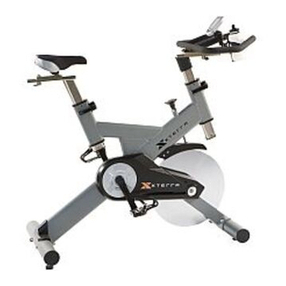
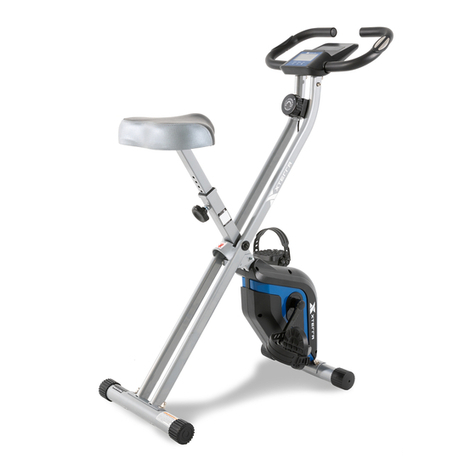
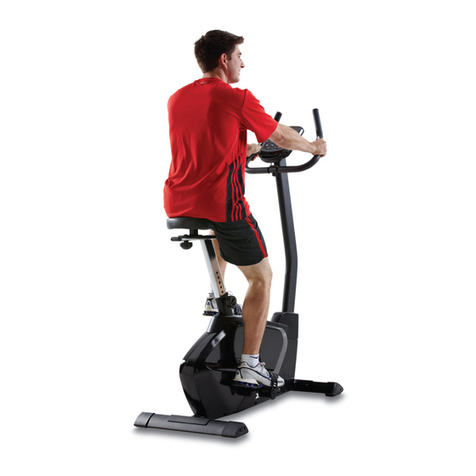
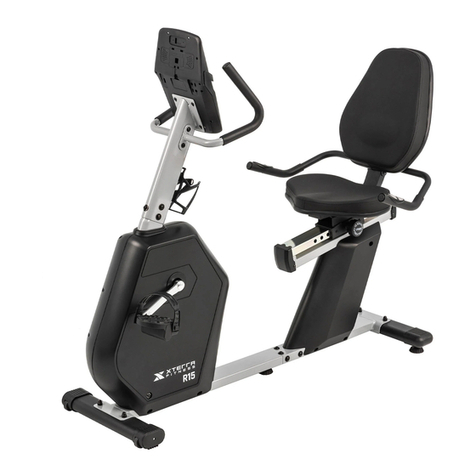
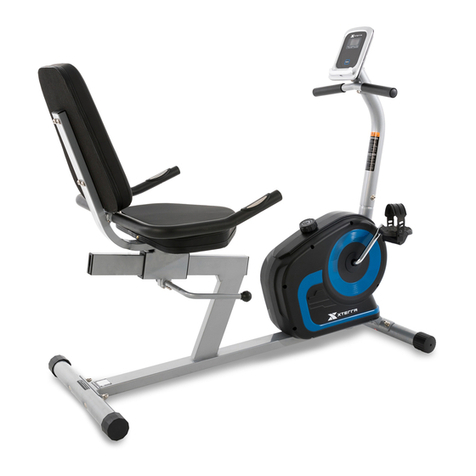
Xterra SB4500 User manual

SB
4500
EXERCISE
BIKE
OWNER’SMANUAL


Table Of Contents
Important Safety Instructions..................................................................2
Important Electrical Instructions..............................................................4
Important Operation Instructions.............................................................5
SB4500 Product Overview......................................................................6
SB4500 Assembly Pack Checklist ..........................................................7
SB4500 Assembly Instructions ...............................................................8
Getting on / off your Exercise Bike........................................................14
Body Positioning...................................................................................15
Seat Adjustment ...................................................................................15
Operation of Your Console.....................................................................16
Programs..............................................................................................22
Bluetooth Capabilities...........................................................................24
Hand Pulse Grips..................................................................................25
Wearing A Chest Strap.........................................................................25
General Maintenance ...........................................................................28
Exploded View Diagram........................................................................29
Parts List ..............................................................................................30
Beginner's Guide To Exercise...............................................................32

Stretching Guide...................................................................................34
Corporate Headquarters.......................................................................36
Warranty Information............................................................................37
ATTENTION
This exercise bike is intended for residential use only and is warranted for this application.
Any other application voids this warranty in its entirety.
Ver.A

1
NOTE:
Article number: SB4500
Use: HOME USE
Max. user’s weight.:120 kg
Product net weight: 39.4kg.
Product size: 148.5 x 65 x 116.5 cm
Safety Standards: ISO 20957 –Class HB
RECYCLING INFORMATION
Used electrical and electronic equipment (WEEE) should not be mixed with general
household waste. For proper treatment, recovery and recycling, please take this
product to designated collection points where it will be accepted free of charge.
Alternatively, in some countries you may be able to return your products to your local
retailer upon purchase of an equivalent new product. Disposing of this product
correctly will help save valuable resources and prevent any potential negative effects
on human health and the environment, which could otherwise arise from inappropriate
waste adding. Please contact your local authority for further details of your nearest
designated collection point.
Penalties may be applicable for incorrect disposal of this waste, in accordance with
your national legislation.
This equipment meets the requirements of European safety directives such as: the
Electromagnetic Compatibility (EMC) Directive and the Low Voltage Directive (LVD).
WARNING
–Injuries to health may result from incorrect or excessive training.
WARNING
–Heart rate monitoring systems may be inaccurate. Over exercising may
result in serious injury or death. If you feel faint stop exercising immediately.
WARNING
–This stationary training equipment is not suitable for high accuracy
purposes.
WARNING
–The equipment shall be installed on a stable base and properly leveled.

2
Important Safety Instructions
WARNING- When using an electrical appliance, basic precautions should
always be followed, including the following: Read all instructions before using this
appliance.
DANGER- To reduce the risk of electric shock:
Always unplug this appliance from the electrical outlet immediately after using and
beforecleaning.
WARNING- Toreduce the risk of burns, fire electric shock, or injury to persons:
1.
An appliance should never be left unattended when plugged in. Unplug from outlet when not
in use, and before putting on or taking off parts.
2.
Do not operate under blanket or pillow. Excessive heating can occur and cause fire, electric
shock, or injury to persons.
3.
This exercise equipment is not intended for use by persons (including children) with reduced
physical, sensory or mental capa- bilities, or lack of experience and knowledge , unless they
have been given supervision or instruction concerning use of the exercise equipment by a
person responsible for their safety.
4.
Use this appliance only for its intended use as described in this manual. Do not use
attachments not recommended by the manufacturer.
5.
Never operate this appliance if it has a damaged cord or plug, if it is not working properly, if it
hasbeen dropped or damaged, or dropped into water. Return the appliance to a service
center for examination and repair.
6.
Do not carry this appliance by supply cord or use cord as a handle.
7.
Keep the cord away from heated surfaces.
8.
Never operate the appliance with the air openings blocked. Keep the air openings free of lint,
hair, and the like.
9.
Never drop or insert any object into any opening.
10.
Do not use outdoors.
11.
Do not operate where aerosol (spray) products are being use or where oxygen is being
administered.
12.
Connect this appliance to a properly grounded outlet only.
13.
The appliance is intended for household use.
14.
Please make sure that power-supply cord and adapter placed in dry area and kept away
from heat.
15.
Keep children and pets away from the equipment. Cleaning and user maintenance shall not
be made by children without supervision.
16.
Before starting any exercise program, you should consult your physician to determine if you
have any medical or physical conditions that could put your health and safety at risk, or prevent
you from using the equipment properly. Your physician’s advice is essential if you are taking
medication that affects your heart rate, blood pressure or cholesterol level.
17.
Be aware of your body’s signals. Incorrect or excessive exercise can damage your health.
Stop exercising if you experience any of the following symptoms: pain, tightness in your
chest, irregular heartbeat, shortness of breath, lightheadedness, dizziness or feelings of
nausea. If you do experience any of these conditions, you should consult your physician
before continuing with your exercise program.
18.
To mount and dismount the equipment safely, one foot-platform should be in the lowest
position.
3
Fitness Equipment Safety Instructions
•Todisconnect, turn all controls to the off position, then remove the plug from the outlet.
•Do not operate equipment on deeply padded, plush or shag carpet. Damage to both carpet and
equipment may result.
•Before beginning this or any exercise program, consult a physician. This is especially important for
persons over the age of 35 or persons with pre-existing health conditions.
•Keep hands away from all moving parts.
•The hand pulse sensors are not medical devices. Their purpose is to provide you with an
approximate measurement in relation to your target heart rate. Use of a chest transmitter strap
(sold separately) is a much more accurate method of heart rate analysis. Various factors,
including the user’s movement, may affect the accuracy of heart rate readings. The pulse sensors
are intended only as exercise aids in determining heart rate trends in general.
•Do not attempt to use your equipment for any purpose other than for the purpose it isintended.
•Wear proper shoes. High heels, dress shoes, sandals or bare feet are not suitable for use onyour
equipment. Quality athletic shoes are recommended to avoid leg fatigue.
Failure to follow all guidelines may compromise the effectiveness of the exercise experience, expose
yourself (and possibly others) to injury, and reduce the longevity of theequipment.
SAVE THESE INSTRUCTIONS - THINK SAFETY!
CAUTION!! Please be careful when unpacking the carton.
WARNING:If any of the adjustment devices are left projecting, they could interfere
with the user’s movement.

4
Important Electrical Instructions
WARNING!
•NEVER remove any cover without first disconnecting AC power supply.
•If A.C. voltage varies by ten percent (10%) or more, the performance of your exercise
bike may be affected. Such conditions are not covered under your warranty. If you
suspectthe voltage is low, contact your local power company or a licensed electrician for
proper testing.
•NEVER expose this exercise bike to rain or moisture. This product is NOT designed for
use outdoors, near a pool or spa, or in any other high humidity environment.Maximum
environmental ratings are 40-120 degrees Fahrenheit, 95% humidity non-condensing(no
water droplets forming on surfaces).
ELECTRICAL REQUIREMENTS
For your safety and to ensure good performance, the ground on this circuit must be non-
looped (isolated). Your treadmill is provided with a power cord with a plug listed below and
requires the listed outlet. Any alterations of this power cord could void all warranties of this
product.
220 V UNITS - treadmill require the use of a 220-250V, 50 Hz and a 20 A “Dedicated Circuit”,
with a non-looped (isolated) neutral/ ground for power. This outlet should be a type G and
have the same configuration as the plug. No adapter should be used with this product.
The plug detail for UK is Type G.

5
Important Operation Instructions
•NEVER operate this exercise bike without reading and completely understanding the
results of any operational change you request from the computer.
•All users should have medical clearance before starting any rigorous exercise program.
This is especially important for persons with a history of heart disease or other high risk
factors.
•The user should adjust the seat to a position that is comfortable during exercise.
•Understand that changes in resistance do not occur immediately. Set your desired level on
the computer console and release the adjustment key. The computer will obey the
command gradually.
•NEVER use your exercise bike during an electrical storm. Surges may occur in
your facility or household power supply that could damage exercise bike
components. Unplug the exercise bike during an electrical storm as a precaution.
•Use caution while participating in other activities while using your exercise bike such
as watching television, reading, etc. These distractions may cause you to lose
balance, resulting in serious injury.
The equipment is speed-independent
The free zone shall more than 0.6m in all directions where the equipment is touched in the training area,
and the free area must also include the area for emergency dismount. Where equipment is positioned
adjacent to each other the value of the free area maybe shared.
Figure 1: Training Area
Figure 2: Free Area

6
SB
4500
Product Overview
Length: 148.5 cm(58.5")
Width: 65 cm(25.6")
Height: 116.5 cm(45.9")
Weight: 39.4 kg
Pedals
Seat
Seat Handle Bar
Mast Handle Bar
Console

7
SB
4500
Assembly
PackChecklist
57#、Carriage Bolt:
M8*50MM(4pcs)
54#、CupWasher:
M8* (1pc)
58#、Flat Washer:
φ8*φ16*1.5t(4pcs)
36#、Phillips HeadScrew:
M8*15MM(27pcs)
39#、Phillips HeadScrew:
M5*12MM(6pcs)
59#、Cap Nut:
M8(4pcs)
55#、Flat Washer:
φ8*φ21*2.0t (10pcs)
52#、Flat Head Socket Screw:
M8*40MM(4pcs)
60#、5MM L Allen Wrench
(1pc)
61#、Philips Head
Screwdriver +13、14、15
Wrench (1pc)

8
#57
M8 x 50mml Carriage Bolt (2 pcs),
#58
φ8 x 16 x 1.5t Flat Washer (2 pcs),
#59 M8 Cap Nut (2 pcs)
#57 M8 x 50mml Carriage Bolt (2 pcs),
#58 φ8 x 16 x 1.5t Flat Washer (2 pcs),
#59 M8 Cap Nut (2 pcs)
57
59
58
11
SB
4500
Assembly Instructions
1
1. Install the Front Stabilizer Tube (No.
11) onto the Main Frame and secure
using 2 Carriage Bolts (No. 57), 2
Flat Washers (No. 58), and 2 Cap
Nuts (No. 59).
2
1. Install the Rear Stabilizer Tube (No.
12) onto the Main Frame and secure
using 2 Carriage Bolts (No. 57), 2
Flat Washers (No. 58), and 2 Cap
Nuts (No. 59).
STEP
Step2 Install the 12#Rear Stabilizer Tube and secure with 57# Carriage Bolt 2pcs 58#Flat Washer 2pcs 59#Cap
Nut 2pcs .
57
59
58
12

9
#55. φ8 x 21 x 2t Flat Washer
(6 pcs)
#36 M8 x 15mm Philips
Head Screw (6 pcs)
#55. φ8 x 21 x 2t Flat Washer (4pcs)
#39 M5 x 12mm Phillips Head Screw (2
pcs)
#54 Cup Washer M8 (1 pc)
#36. M8 x 15mm Philips Head Screw (5
pcs)
55
79
36 55 36
36
80
STEP 4
步骤说明:1, 先将预组装螺丝拆下,然后74#上排线和75#下排线、78#心跳线上段和79#中段对接。2,再将3#立管焊接组、68#水壶架
用36#伞头内六角螺丝(5pcs)、39#大扁头十字螺丝(2pcs)、55#平面华司(4pcs)、54#弧形华司(1pcs)锁紧。
36
54
3
36
36
39
68
55
78
79
74
75
3
1.
Connect the two Handpulse
Wires (No. 79 & 80) together.
Be careful not to pinch the
wires and feed them back into
the connected frame.
2.
Assemble the Front Main
Frame (No.1) to the Rear
Main Frame (No.2) using 6
Flat Washers (No. 55).
Secure on top with 6 Philips
Head Screws (No.36).
4
1.
Run the two Cables (No. 74
& 78) through the Console Mast
(No. 3). Connect the two
Computer Cables (No. 74 & 75)
and two Handpulse Wires (No. 78
& 79) together.
2. Secure the Console Mast (No. 3) to the Main Frame using 5 Phillips HeadScrews
(No.36), 4 Flat Washers (No. 55), and 1 Cup Washer (No. 54).
3. Secure the Drink Bottle Holder (No. 68) to the Console Mast (No.3) using 2Philips
Head Screws (No. 39).

10
#39M5 x 12
Philips Head Screws (4 pcs)
#36M8 x 15
Philips Head Screws (4 pcs)
5
1.
Connect the Computer
Cable (No. 74) with the
Handpulse Wire (No. 78).
Feed the excess wire into
the tube. Be careful not to
pinch the wires
2.
3.
Secure the Console (No.
70) to the Mast using 4
Philips Head Screws (No.
39).
6
1.
Secure the Mast Handle
Bar –L (No.4) and the
Mast Handle Bar –R
(No.5) using 4 Phillips
Head Screws (No.36).

11
#52M8 x 40 Button Head Socket
Screws (4 pcs)
#36M8 x 15
Philips Head Screws (4 pcs)
52
83
83
80
9
36
67
83
7
1.
Secure the Seat Back Bracket
(No. 9) to the Sliding Seat
Plate using 4 Button Head
Socket Screws (No. 52).
Connect the two Handpulse
Wires (No. 83 & 80).
8
1. Secure the Seat Cushion
(No.
67) to the Seat Back Bracket
(No. 9) using 4 Philips Head
Screws (No. 36).

12
#36M8 x 15
Philips Head Screws (4 pcs)
#36M8 x 15
Philips Head Screws (4 pcs)
STEP 9
步骤说明:1、先将预组装螺丝拆下,然后81#心跳线扶手管段和83#心跳线座管段对接。2、将6#左扶手管焊接组和7#右扶手管焊接
组用36#伞头内六角螺丝M8*15(4pcs)锁紧。
36
36
83 81
81 83
6
7
9
1.
Connect the Handpulse
Wires (No. 81 & 83)
2.
Secure the Seat Handle
Bar –L
(No. 6) and the
Seat Handle Bar –R
(No.7) using 4 Phillips
Head Screws (No. 36).
10
1. Secure the Seatback
Cushion (No. 66)
to the Seat Back
Bracket (No. 9) using
4 Philips Head
Screws (No. 36).

13
65
64
11
1.
Secure the Pedal - L (No. 64) and Pedal - R (No. 65) using the
Philips Head Screwdriver & Wrench (No. 61). The Left Pedal (No.
64) should betightened counter-clockwise and the Right Pedal
(No. 65) clockwise.
2.
Secure all screws and adjust the 5 levelers to sit evenly on your
floor.

14
Getting on / off your Exercise Bike
IMPORTANT
The Recumbent Bike comes with a Stationary Handlebar & Seat Handlebar.
Always hold the Stationary Handlebar or Seat Handlebar when getting on and off the Recumbent
Bike.
First time users should familiarize themselves with using the Recumbent Bike by using the
Stationary Handlebar first and then progressing to the Seat Handlebar.
Caution should always be taken when getting on and off any exercise machine.
Please follow the safety steps below.
To get on, Please sit on the seat and grasp the Stationary Handlebar with both hands.
Place your left foot on the left Foot Pedal and get secure.
Lift your right foot over machine and place on right Foot Pedal. Get balanced and begin your
workout.
To get off, come to a complete stop and reverse the procedure.
Always wear rubber-soled shoes, such as tennis shoes.
It is recommended that you keep at least one hand on the Stationary Handlebar at all times,
especially when getting on or off.
All equipment should be set-up and operated on solid, level surfaces.
WARNING
The effect that the safety level of the equipment can be maintained only if it is examined regularly
for damage and wear.
i. Replace defective components immediately and/or keep the equipment out of
use until repair.
ii. The components which are most susceptible to wear: Belt, Shaft, Bearing, Idler,
Pedal.
For proper positioning when riding the BIKE begin by adjusting the seat to approximately hip
height while standing next to the bike. This will get the seat close to a position so that when the
ball of your foot is on the pedal and the pedal is at the bottom of the stroke your knee will have a
slight bend (approximately 5 degrees) when riding the bike. Make sure your knee is not locking
and you are not shifting about on the seat while pedaling. Hold the multi-position handle bars so
that your upper body is stabilized and in a comfortable riding position.

15
Body Positioning
Sit straight on the saddle, grab the handle with both hands, position the feet on pedal through the
pedal strap.
Seat Adjustment Instruction
Firstly, loosen the knob/pull pin anti-clockwise two or three times and then pull out a bit. In the
meantime, adjust the seat to the proper position and release the knob.
Please ensure the pin of the knob is inserted properly in the hole after a “click” sound. Finally,
tighten the knob clockwise to fix the position.

16
Operation of Your Console
Tablet Tray
Touchscreen
Display
USB Port
Table of contents
Other Xterra Exercise Bike manuals

Xterra
Xterra SB440r User manual

Xterra
Xterra UB2.5 User manual

Xterra
Xterra SB2.5 User manual

Xterra
Xterra 16416540 User manual

Xterra
Xterra MB550 User manual

Xterra
Xterra 16467200US User manual

Xterra
Xterra FB360 User manual

Xterra
Xterra FB160 User manual

Xterra
Xterra XB 78 User manual

Xterra
Xterra SB120 User manual

Xterra
Xterra UB1.7 User manual

Xterra
Xterra 16204791500 User manual

Xterra
Xterra 16467450US User manual

Xterra
Xterra SB250 User manual

Xterra
Xterra 16416852 User manual

Xterra
Xterra SB540r User manual

Xterra
Xterra SB150 User manual

Xterra
Xterra UB120 User manual

Xterra
Xterra SB500 User manual

Xterra
Xterra MB8.5 User manual