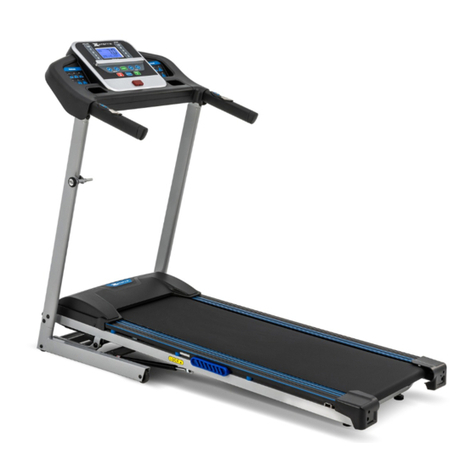
Xterra Wave Deck T9 User manual

Customer Service 1-888-707-1880 0Dyaco Canada Inc. 2020
Email: customerservice@dyaco.ca
Owner’s Manual
Model No.
16004009000
- Assembly
- Operation
- Adjustments
- Parts
- Warranty
CAUTION:
You must read and
understand this
owner’s manual
before operating
unit.
Keep this manual for
future reference.
Serial number
Write the serial
number in the space
above for reference.
Serial number can be
found at the front
bottom section of the
Treadmill.
PLEASE CAREFULLY READ THIS ENTIRE MANUAL BEFORE
OPERATING YOUR NEW TREADMILL!

Customer Service 1-888-707-1880 1Dyaco Canada Inc. 2020
Email: customerservice@dyaco.ca
TABLE OF
CONTENTS
Important Safety Instructions ...........................................................................3
Important Electrical Instructions......................................................................5
Assembly Instructions ....................................................................................8
Folding/Moving Instructions….......................................................................11
Servicing and Maintenance ...........................................................................14
Operation of Your Treadmill ..........................................................................17
Preset Programs...........................................................................................20
Troubleshooting...........................................................................................25
Using the Heart Rate Transmitter .................................................................27
Parts diagram ………….................................................................................30
Parts List ......................................................................................................31
General Maintenance ...................................................................................35
Training Guidelines......................................................................................36
Manufacturer’s Limited Warranty.................................................................40
ATTENTION
THIS TREADMILL IS INTENDED FOR RESIDENTIAL USE ONLY AND IS WARRANTED
FOR THE APPLICATION. ANY OTHER APPLICATION VOIDS THIS WARRANTY IN ITS
ENTIRETY.

Customer Service 1-888-707-1880 2Dyaco Canada Inc. 2020
Email: customerservice@dyaco.ca
BEFORE YOU BEGIN
Thank you for choosing the XTERRA Wave Deck T9 Treadmill. We take great pride in producing this
quality product and hope it will provide many hours of quality exercise to make you feel better, look
better, and enjoy life to its fullest. It is a proven fact that a regular exercise program can improve your
physical and mental health. Too often, our busy lifestyles limit our time and opportunity to exercise. The
XTERRA Wave Deck T9 Treadmill provides a convenient and simple method to begin your assault on
getting your body in shape and achieving a happier and healthier lifestyle. Before reading further,
please review the drawing below and familiarize yourself with the parts that are labeled.
Read this manual carefully before using the XTERRA Wave Deck T9 Treadmill. Although Dyaco
Canada Inc. constructs its products with the finest materials and uses the highest standards of
manufacturing and quality control, there can sometimes be missing parts or incorrectly sized parts. If
you have any questions or problems with the parts included with your XTERRA Wave Deck T9
Treadmill, please do not return the product. Contact us FIRST! If a part is missing or defective call us
toll free at 1-888-707-1880. Our Customer Service Staff are available to assist you from 8:30 A.M. to
5:00 P.M. (Eastern Time) Monday through Friday. Be sure to have the name and model number of the
product available when you contact us.
Console
Safety Key
Incline Adjustment
Switch Speed
Adjustment
Upright Switch
Water bottle
Holder Motor Cover
Running Belt
On/Off Switch
Circuit
Breaker
Power Cord
Wheels
2020
Main Frame “Wave Deck” Rail
Adjusting Bolt
MAX. USER WEIGHT LIMIT 159 KGS (350 LBS)

Customer Service 1-888-707-1880 3Dyaco Canada Inc. 2020
Email: customerservice@dyaco.ca
IMPORTANT SAFETY INSTRUCTIONS
THIS UNIT IS INTENDED FOR HOUSEHOLD USE ONLY
READ ALL INSTRUCTIONS BEFORE USING THIS TREADMILL
CAUTION: Before starting any exercise program, it is recommended that you consult your
physician.
WARNING: Connect this unit to a properly grounded outlet only.
DANGER: To reduce the risk of electric shock, always unplug the treadmill from the electrical
outlet immediately after using and before cleaning.
WARNING
To reduce the risk of burns, fire, electric shock, or injury to persons:
Grounding Instructions
This product must be grounded. If it should malfunction or breakdown, grounding provides a
path of least resistance for electric current to reduce the risk of electric shock. This product is
equipped with a cord having an equipment-grounding conductor and a grounding plug. The
plug must be plugged into an appropriate outlet that is properly installed and grounded in
accordance with all local codes and ordinances. See diagram below for grounding methods.
1. Use 120-volt a.c. household current on a dedicated circuit.
2. It is theresponsibility of the owner to ensure that all users of this treadmill are adequately
informed of allwarnings and precautions.
3. The use of an extension cord with this product is not recommended. If an extension cord
is needed, use a short (less than 10 feet) heavy gauge (14 gauge or better) extension
cord with a three prong (grounded) plug and receptacle.
4. Never leave the treadmill unattended when plugged in. Remove the safety key and unplug
the unit from the outlet when not in use and before removing or replacing parts.
5. Never operate the treadmill if it has a damaged cord or plug, if it is not working properly, if
it has been dropped, damaged, or exposed to water. Never move the treadmill belt while
the power is turned off.
6. Do notpull the treadmill by the power supply cord or use cord as a handle. Keep cord
away from heated surfaces and open flames.
7. Fitness equipment must always be installed and used on a flat surface. Do not use
outdoors or near water. Do not place the unit on a loose rug or uneven surface. It is
recommended to use an equipment mat to prevent the unit from moving while it is being
used, which could possibly scratch or damage the surface of your floor. It is
recommended to have a minimum of 3 metres safe clearance on all sides of the treadmill
while in use.
8. Keep thetreadmill indoors, away from moisture and dust. Do not put the treadmill in a garage,
Covered patio or near water.

Customer Service 1-888-707-1880 4Dyaco Canada Inc. 2020
Email: customerservice@dyaco.ca
9. Do not operate the treadmill where aerosol products are used or where oxygen is being
administered.
10. Read, understand, and test the emergency stop procedure before using the treadmill. Do
not insert any objects into any openings.
11. Inspect and properly tighten all parts of the treadmill regularly.
12. Keep children and pets away from this equipment at all times while exercising.
13. Handicapped individuals should have medical approval and close supervision when using this
treadmill.
14. Do notplace hands or feet under the treadmill. Always keep hands and legs off of the
treadmill when others are using it.
15. Never turn on treadmill while standing on tread-belt. Always hold the handrails while using the
treadmill. Always return the treadmill to the slowest speed to provide for safe dismount and
low speed restart.
16. To disconnect, turn all controls to the off position, then remove plug from outlet.
17. Do not attempt to raise, lower or move the treadmill until it is properly assembled. See
assembly on page 8 and to fold and move the treadmill on page 10. Care must be taken when
lifting or moving the equipment, so as not to injure your back. Always use proper lifting
techniques. You must use any attachments that are not recommended by the manufacturer.
18. Usethe treadmill only for its intended use as described in this manual. Do not use any
attachments that are not recommended by the manufacturer.
19. User weight should not exceed 350lbs (159 kg).
20. Never allow more than one person on the treadmill at once.
21. Warm up 5 to 10 minutes before each workout and cool down 5 to 10 minutes afterward. This
allows your heart rate to gradually increase and decrease and will help prevent straining
muscles.
22. Never hold your breath while exercising. Breathing should remain at a normal rate in
conjunction with the level of exercise being performed. If dizziness, nausea, chest pains, or
any other abnormal symptoms are experienced while using this equipment, STOP the workout
at once. CONSULT A PHYSICIAN IMMEDIATELY.
23. Start your program slowly and very gradually increase your speed and distance.
24. Always wear suitable clothing and footwear while exercising. Do not wear loose fitting clothing
that could become entangled with the moving parts of your treadmill. Do not walk or jog
barefoot, in stocking feet or loose-fitting shoes or slippers.
25. This treadmill is intended for in-home use only. Do not use the treadmill in any commercial,
rental or institutional setting.
26. This exercise equipment is not intended for use by persons with reduced physical, sensory
or mental capabilities, or lack of experience and knowledge.
27. Close supervision is necessary when this machine is used by, on, or near children, invalids,
or disabled persons.
WARNING: Before beginning any exercise program consult your physician. This is especially
important for individuals over the age of 35 or persons with preexisting health problems. Read
all instructions before using any fitness equipment. We assume no responsibility from personal
injury or property damage sustained by or through the use of this product.
SAVE THESE INSTRUCTIONS - THINK SAFETY!
Customer Service 1-888-707-1880 5Dyaco Canada Inc. 2020
Email: customerservice@dyaco.ca
IMPORTANT ELECTRICAL INSTRUCTIONS
WARNING!
●NEVER use a ground fault circuit interrupt (GFCI) wall outlet with this treadmill. Route the
power cord away from any moving part of the treadmill including the elevation mechanism
and transport wheels.
●NEVER remove any cover without first disconnecting AC power.
●If voltage varies by ten percent (10%) or more, the performance of your treadmill may be
affected. Such conditions are not covered under your warranty. If you suspect the voltage
is low, contact your local power company or a licensed electrician for proper testing. See
Diagnosis Guide, page 43.
●NEVER expose this treadmill to rain or moisture. This product is NOT designed for use
outdoors, near a pool or spa, or in any other high humidity environment.
This product must be grounded. If the treadmill should malfunction or breakdown,
grounding provides a path of least resistance for electric current, reducing the risk of electric
shock. This product is equipped with a cord having an equipment-grounding plug. The plug
must be plugged into an appropriate outlet that is properly installed and grounded in
accordance with all local codes and ordinances.
DANGER - Improper connection of the equipment-grounding conductor can result
in a risk of electric shock. Check with a qualified electrician or serviceman if you are in
doubt as to whether the product is properly grounded. Do not modify the plug
provided with the product if it will not fit the outlet; have a proper outlet installed by a
qualified electrician.
●NEVER operate this treadmill without reading and completely understanding the results of
any operational change you request from the computer.
●Understand that changes in speed and incline do not occur immediately. Set your desired
work level on the computer console and release the adjustment key. The computer will obey
the command gradually.
●NEVER use your treadmill during an electrical storm. Surges may occur in your household
power supply that could damage treadmill components.
●Use caution while participating in other activities while walking on your treadmill, such as
watching television, reading, etc. These distractions may cause you to lose balance or stray
from walking in the center of the belt; which may result in serious injury.
●NEVER mount or dismount the treadmill while the belt is moving. Our treadmills start with at
a very low speed and it is unnecessary to straddle the belt during start up. Simply standing on
the belt during slow acceleration is proper after you have learned to operate the unit.
●Always hold on to a handrail or hand bar while making control changes (incline, speed, etc.).
Do not use excessive pressure on console control keys. They are precision set to function
properly with little finger pressure. Pushing harder is not going to make the unit go faster or
slower. If you feel the buttons are not functioning properly with normal pressure, contact your
dealer.

Customer Service 1-888-707-1880 6Dyaco Canada Inc. 2020
Email: customerservice@dyaco.ca
!!ATTENTION: IMPORTANT UNPACKING INSTRUCTIONS.
PLEASE READ BEFORE UNPACKING YOUR FOLDING TREADMILL!!
Serious injury could occur if this folding treadmill is not unpacked properly.
There is a strap installed around the treadmill base that prevents the treadmill from unfolding
accidentally during shipping. If this strap is not removed properly the treadmill could spring
open unexpectedly and cause injury if someone is standing near the treadmill when the strap
is removed.
To ensure your personal safety during removal of the shipping strap please make sure the
treadmill is positioned flat on the ground, in the orientation it would be in if you were using the
treadmill. Do not turn the treadmill up on its side while removing the strap. This could cause
the treadmill’s folding mechanism to spring open. Cut the strapping and pull it out.
Unpack the treadmill and locate the hardware pack. The hardware pack is separated into five
sections; one section containing tools and three sections which contain the hardware needed
for assembly of each step. The assembly steps below are numbered one through three.
Remove only the hardware for the step you are currently assembling to avoid confusion and
mix ups.

Customer Service 1-888-707-1880 7Dyaco Canada Inc. 2020
Email: customerservice@dyaco.ca
HARDWARE PACKING
IV-A - MAIN FRAME
IV-B13 - UPRIGHT POST
COVER (L)
IV-B3 – UPRIGHT
POST COVER
OUTER (L)
IV-B14 - UPRIGHT POST
COVER (R)
IV-B4 –
UPRIGHT
POST COVER
IV-B21 - Water Bottle Holder IV-C14 – Safety Key TOOLS
15
13
14
6
IV-B22 - Bolt (M10 x 50) x 6 IV-B25 - Washer (D10) x 6
IV-B26 - Bolt (ST3.9 x 14) x 2
Silicon Oil Bottle
20ml 20ml

Customer Service 1-888-707-1880 8Dyaco Canada Inc. 2020
Email: customerservice@dyaco.ca
ASSEMBLY INSTRUCTIONS
FIGURE 1. ASSEMBLY FOR LEFT AND RIGHT UPRIGHT POSTS
Hold the left upright post (IV-B1) & (IV-B2) right post. (Note: Be careful not to damage the wire
during the assembly.) Then, place the L & R upright posts and tighten with bolt (IV-B22) and
washer (IV-B25). Tighten all the bolts with the Allen wrench.
IV-B1
IV-B2
IV-B25
IV-B22
IV-B25
IV-B22
Wrench IV-B22
M10 x 50mm x 6 pcs
IV-B25
D10 x 6 pcs

Customer Service 1-888-707-1880 9Dyaco Canada Inc. 2020
Email: customerservice@dyaco.ca
FIGURE 2. ASSEMBLY FOR UPRIGHT OUTER POST COVER
Place the upright post cover outer (L) (IV-B3) & upright post cover outer (R) (IV-B4) on the
bottom frame and tighten with Screw (IV-B26) which are pre-assembled on the frame,
using the Cross Wrench.
IV-B1
IV-B2
IV-B3 IV-B26
IV-B26 IV-B4
IV-B26
Cross Wrench IV-B26
ST3.9 x 14 mm x 8 pcs

Customer Service 1-888-707-1880 10 Dyaco Canada Inc. 2020
Email: customerservice@dyaco.ca
FIGURE 3. ASSEMBLY FOR RIGHT & LEFT UPRIGHT POST COVER
Step 1. Remove the pre-mounted bolt (IV-A41) and spacer (IV-A113) from right & left
upright posts (IV-B1/IV-B2) as well as the upright post covers (IV-B13 & IV-B14).
Step 2. Connect the wire (IV-B33) with (IV-B35) and then tighten left upright post cover (IV-
B13) with left upright post (IV-B1) using bolt (IV-A41) and spacer (IV-A113).
Step 3. Connect the wire (IV-B34) with (IV-B36) and then tighten right upright post cover
(IV-B14) with right upright post (IV-B2) using bolt (IV-A41) and spacer (IV-A113).
Step 4. Attach the water bottle holder (IV-B21) onto side supporting tube using screws (IV-
B28). Step 5. Insert Safety key onto console slot.
IV-C14 IV-C
IV-A41
IV-A113 IV-A41
IV-B35 IV-A113
IV-B13
IV-A41
IV-A113
IV-B21
IV-B36
IV-B28 IV-A41
IV-B33
IV-B1 IV-B34
IV-B14
IV-A113
IV-B2
TOOLS IV-A41
M8 X 16 mm x 6 pcs
IV-A113
D8 x6pcs
IV-B28
M5 X16 mm x2pcs

Customer Service 1-888-707-1880 11 Dyaco Canada Inc. 2020
Email: customerservice@dyaco.ca
FIGURE 4. HOW TO FOLD UP THE TREADMILL
The treadmill is foldable to save space.
WARNING:
Do not try to fold up the treadmill while it is turned on.
Do not connect the power supply while the treadmill is folded.
The incline must be adjusted to the lowest level as EXAMPLE A.
EXAMPLE B is not acceptable for folding the treadmill.
Hold the rear bar at rear part of machine (as shown below) and lift up the rear bar to fold it up
until a “click” sound is heard.
Pull the deck backward slightly to check if the lock mechanism is secured.
OK NO
EXAMPLE A EXAMPLE B
B
A

Customer Service 1-888-707-1880 12 Dyaco Canada Inc. 2020
Email: customerservice@dyaco.ca
FIGURE 5. HOW TO TRANSPORT THE TREADMILL
WARNING:
Do not attempt to move the unit unless it is in the folded and locked position. Be sure the
power cord is secured to avoid possible damage. Use the rear part of the mainframe to
maneuver the unit to the desired position.
Hold the rear part of mainframe (as below picture B) firmly, pull it forward until the
transportation wheels at the bottom touch the ground, and adjust the mainframe to a suitable
angle for moving ( as below picture A), then lower the front part of mainframe back to the
ground slowly and carefully after moving it to the desired position.
.
A
B

Customer Service 1-888-707-1880 13 Dyaco Canada Inc. 2020
Email: customerservice@dyaco.ca
FIGURE 6. HOW TO UNFOLD THE TREADMILL
■TO UNFOLD THE TREADMILL
Step 1: Stand behind the treadmill and hold the rear bar of the machine. Press the lever with
your foot to release the locking system.
Step 2: The hydraulic brake will slowly lower the treadmill deck until it touches to the ground.
B
A

Customer Service 1-888-707-1880 14 Dyaco Canada Inc. 2020
Email: customerservice@dyaco.ca
SERVICING AND MAINTENANCE
FIGURE 7. LUBRICANT OILING USAGE INSTRUCTION
Your treadmill features a walking belt coated with a lubricant. IMPORTANT: Never apply
silicone spray or other substances to the walking belt or walking board. Such substances will
deteriorate the walking belt and cause excessive wear.
The running belt of the treadmill has been lubricated with the appropriate lubricant before
packaging. However, this treadmill will need maintenance by refueling in order to ensure the
normal use and reduce the abrasion of components. Follow the below lubrication process.
Step 1: How to apply the lubricant?
Remove the end cap from the motor cover (as shown) and refill the lubricant down the oil filling
pipe through the hole. To let the lubricant adhere evenly to the running belt, it is suggested to
start the treadmill running at low speed (under 3 KM/H) for 5~10 minutes during the lubrication
process. When finished, replace the end cap.
Attention: 1. After refilling, hold down the STOP key for 5 seconds to delete the
OIL reminder shown on the display.
2. Do not fold up the treadmill for 30 minutes after refilling to avoid the
lubricant flowing out of the treadmill.
Step 2: How often to oil?
When the travelled distance of treadmill reaches to 100KM an “OIL” indicator will display
itself as a reminder. This indicator means you need to add 20ml of lubricant.
When the treadmill is used less than 10KM a day for a period of three months it is
necessary to add with 15ml lubricant.
le of lubricant in the box.

Customer Service 1-888-707-1880 15 Dyaco Canada Inc. 2020
Email: customerservice@dyaco.ca
FIGURE 8. STOP USAGE INSTRUCTION
If you want to stop exercising, press the “stop” key on the console and then the treadmill will
decrease in speed until it gradually stops. If you feel unable to keep up with the running belt
speed and the emergency stop is needed, pull out the safety key (IV-C14) and
then treadmill will stop within 10 seconds.
IV-C14
FIGURE 9. OVER CURRENT PROTECTOR INSTRUCTION
The over current protector can automatically protect the treadmill from apower surge. The
round button will pop out. When the power issue has been solved, press this round button
back in and the treadmill will return to working order.

Customer Service 1-888-707-1880 16 Dyaco Canada Inc. 2020
Email: customerservice@dyaco.ca
FIGURE 10. CONSOLE ADJUSTMENT
The console viewing angle is adjustable.
If you find the console is not tightly secured, loosen the screw (IV-B27) and remove
the rear cover of console (IV-C5), then tighten or unscrew the bolt (IV-C13) as needed.
UNSCREW
IV-C13
TIGHTEN
IV-C5
IV-B27
Cross
wrench
13

Customer Service 1-888-707-1880 17 Dyaco Canada Inc. 2020
Email: customerservice@dyaco.ca
OPERATION OF YOUR TREADMILL
GETTING STARTED:
CAUTION: Before operating the console, read the following precautions:
Do not stand on the walking belt when turning on the treadmill. Always wear the safety key.
Pulling the safety key will stop tread-belt movement. Adjust the speed in small increments to
avoid sudden jumps in speed. To reduce the possibility of electric shock, keep the console dry.
Avoid spilling liquids on the console and place only sealed water bottles in the water bottle
holders. Do not use excessive pressure on console control keys. They are precision set to
function properly with little finger pressure. Pushing harder is not going to make the unit go
faster or slower.
Understand that changes in speed and incline do not occur immediately. Set your desired
speed on the computer console and release the adjustment key. The computer will obey the
command gradually.
HOW TO USE THE SAFETY KEY
1. Place the safety key into position on the treadmill console. Your treadmill will not start or
operate without the safety key attached. Removing the magnetic safety key also secures the
treadmill against unauthorized usage.
2. Fasten the plastic clip on the end of the safety key tether onto your clothing securely. Note:
The safety key is essential to minimizing the consequences of accidental, unexpected stopping.
The clip should be attached securely to make sure it does not come off during the workout.
The treadmill will stop, depending on speed, with a one to two step coast anytime the safety
key is pulled off the console. Use the red Stop / Pause button during normal operation.

Customer Service 1-888-707-1880 18 Dyaco Canada Inc. 2020
Email: customerservice@dyaco.ca
(1) CONSOLE DISPLAYS AND BUTTON FUNCTIONS
1. LCD WINDOWS DISPLAY FUNCTION:
A. Speed :Displays the current speed. Speed range is 1~18Km/H.
B. Distance/Calories/Inclination:Distance range is 0.00-99.9Km, you can manually enter your
desired distance. When you are about to reach your preset distance, the treadmill will
gradually stop by itself. Calories range is 0.0~999. After setting your desired calories, press
the START button and the treadmill will start to run until reaching the preset calories.
Inclination range is 0%~15%, you can manually set your desired incline level.
C. Time/H.R.P.:Time range is 0:00-99:59, it displays your total workout time length. H.R.C
shows your heart rate while placing both hands on the heart rate grips.
Heart rate data is for reference data and cannot be used as medical information.
2. FUNCTION BUTTONS:
START, STOP, PROG, MODE, SPEED (+) OR (-), DECLINE (+) OR (-), QUICK SPEED
BUTTON (3, 6, 9, 12) KM/H,QUICK INCLINATION BUTTON (3, 6, 9, 12) %.
3. FUNCTION BUTTONS INSTRUCTION:
A. PROG:After turning on the treadmill, manually press PROG button to cycle programs and
choose which program to run.
Manual programs (P01-P02-…-P15-U01-U02-U03-HP1-HP2-FAT).
B. MODE:After turning on the treadmill, manually press MODE button to choose between
Manual mode (Normal Mode), Time countdown, Distance countdown or Calories countdown.
C. START:After turning on the treadmill, manually press START button to start the motor.
D. STOP:Press the “STOP” button to stop the motor and the running belt from moving.
E. SPEED (+)or (-):In standby status, press the SPEED (+) or (-) button until the desired
speed shows on the display. While the treadmill is in motion, increase or decrease speed by
pressing the SPEED (+) or (-) button.
F. INCLINE (+) or (-):In standby staus, press the INCLINE (+) or (-) button until the desired
incline degree is shown on the display. While the treadmill is in motion, increase or decrease
incline degree by pressing the INCLINE (+) or (-) button.
G. SPEED Shortcut key:[3, 6, 9, 12 KM/H] while the treadmill is in use, the motor speed will
be directly changed to the chosen speed value -3, 6, 9, or 12 by using these shortcut keys.
H. INCLINE Shortcut:3, 6, 9, 12 degree, while the treadmill is in use, the incline motor will
directly change to the incline degree by pressing the 3, 6, 9or 12 by using these shortcut keys.
I. Lubricating Oiling Reminder System:When the distance of the treadmill reaches 100KM,
the screen will flash "OIL" for 10 seconds during standby mode, at the same time ashort
sound willoccur and repeat every 10 seconds;this reminder will remain even after shut down.
To clear the reminder system, please press and hold the "STOP" button for 3seconds while
the treadmill is in standby mode.
(2) User-setting Programs/Starting Introductions:
1. Programs Introductions:
A. 1 user-setting mode, including Normal Mode, Countdown Timer, Countdown Calories,
Countdown Distance.
B. 20 preprogrammed workouts:P01, P02, …, P20.
C. 3user-setting programs:U01, U02, U03.
D. 2speed control of heart rate programs:HP1, HP2.
E. 1 Body Fat measurement program:FAT
2. Starting Introductions:
A. The safety key is inserted to designated position on the console surface.
B. Press “START” key, monitor will indicate 3-2-1,the motor will start
working after 3“beep” noises.

Customer Service 1-888-707-1880 19 Dyaco Canada Inc. 2020
Email: customerservice@dyaco.ca
(3) Manual Mode
1. How to enter Manual Mode
A. After turning on the treadmill, the system will enter the normal mode of the Manual mode.
B. Pressing the Mode button selects the normal mode of Manual mode, standby mode.
2. The manual mode has three setting functions: Time/Distance/Calorie
A. When manual mode begins, the time widow will display “0:00”
B. Pressing the Mode button in the manual mode, the time will enter the countdown mode. The
time window will display “15:00” and flash. Pressing the SPEED (+-) or Incline (+-) button can
adjust the time length.
C. In thetime countdown mode, pressing the mode button can enter the distance countdown
mode, the distance window display will 1.00 km, pressing the SPEED (+-) or Incline (+-) button
can adjust the distance. The full range of the distance setting is 0.50-99.9km, increase or
decrease as needed starting from 0.1km.
D. In theCalorie countdown mode, pressing the mode button can enter the calorie countdown
mode. The calorie window will display 50.0 kcal. Pressing the SPEED (+-) or Incline (+-) button
can adjust the calorie; the scope of the calorie setting is 10.0-999 kcal and can increase or
decrease starting from 1kcal.
3. Manual mode Operation
A. Pressing the “START” button, the motor will begin operation at the speed of 1.0kmh after a
3second countdown.
B. Pressing the “Speed +-” adjusts the speed
C. Pressing the “incline+-” adjusts the incline.
D. Pressing the speed quick button can quickly adjust to the speed as indicated.
E. Pressing the incline quick button can adjust the incline as indicated.
F. Pressing the “Stop” button, the motor will stop operation.
G. When the settings for time /calorie or distance reach zero, the system will alarm in a
short ”beeping” alarm sound ,the speed will slow down to stop, it will then alarm in along
“beeping” sound and the window will display “END”. The system will return to standby mode
and “beep” once more.
H. The unsetting parameter sum up and reset when exceeding the biggest display scope. The
machine will stop when the total time reaches over 99.59 (100 minute) in manual mode.
(4) Fixed program mode
1. The initial time setting is 10 minutes. In this mode, you can only set the time. The range is
5:00-99:00, pressing the “Speed+-/Incline +-” to adjust.
2. Press the “START” button to start the treadmill motor, the speed will automatically increase
to the first level of speed in Auto mode (See the program form)
3. Press “Speed+-” to adjust the speed.
4. Press “Incline+-”to adjust the incline.
5. Press the speed quick button to quickly adjust to the speed which is indicated.
6. Pressing the incline quick button can adjust the incline which is indicated.
7. Each program has 20 levels; the operating time is preset per level.
8. The system will make a“beep” noise to indicate the change in level.
9. When the setting time reaches to zero, the speed will slow down, the system will make a
short “beep” noise. The system will make long “beep” alarm sound when the machine stops,
the speed window display “END”. After 5seconds the system returns to standby mode and
“beep” once more.
This manual suits for next models
1
Table of contents
Other Xterra Treadmill manuals

Xterra
Xterra ET94 User manual

Xterra
Xterra TRX5500 User manual

Xterra
Xterra TR 7.1 User manual

Xterra
Xterra Trail Racer TR3.0 User manual

Xterra
Xterra TR6.65 User manual

Xterra
Xterra Trail Racer TR3.0 User manual

Xterra
Xterra TR6.5 User manual

Xterra
Xterra Trail Racer TR3.0 User manual

Xterra
Xterra TR300 User manual

Xterra
Xterra TR450 User manual

Xterra
Xterra TR6.6 User manual

Xterra
Xterra TR800 User manual

Xterra
Xterra ET94 User manual

Xterra
Xterra TR250 User manual

Xterra
Xterra TRX5500 User manual

Xterra
Xterra TL200 User manual

Xterra
Xterra TR6.4 User manual

Xterra
Xterra TRX3500 User manual

Xterra
Xterra TR600 User manual

Xterra
Xterra TRX3500 User manual