manuals.online logo
Brands
  1. Home
  2. •
  3. Brands
  4. •
  5. Xylem
  6. •
  7. Water Pump
  8. •
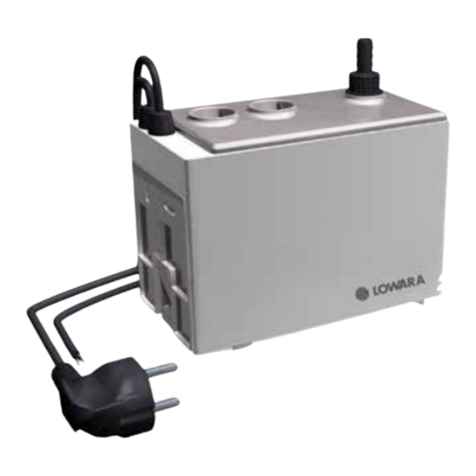
  9. Xylem Lowara Micro PRESFIX User manual

Xylem Lowara Micro PRESFIX User manual

1
Micro PRESFIX
Pressurisation Set
Operating, Installation and Maintenance Instructions
EC Declaration of conformity
Xylem Water solutions UK Ltd declare that the Micro Presfix pressurisation set conforms to the:
Requirements of the Machinery Safety Directive 2006/42/EC.
Electromagnetic compatibility (EMC) Directive 2014/30/EU
Conforming to the UK Health & Safety Requirements 2008 No.1597
Water supply (Water fittings) regulations 1999
Code of practice for heating and chilled water systems BS7074 (parts 1, 2 & 3)
Signed: Position: Engineering manager Date: 13-01-2017
Clive Willmott
Introduction
This leaflet contains information to enable the safe installation and operation of the products mentioned above.
The following instructions must be read and understood by all persons responsible for the installation, operation
and maintenance of this product.
Warning Symbols
Safety instructions where noncompliance would affect safety.
Safety instructions where electrical hazard is involved.
Safety instructions where noncompliance could cause damage to the equipment.
Instruction for safe use
This product has been designed for the pressurisation of sealed heating, chilled water and
closed-condenser water systems to the operating conditions shown.
This product should not be installed until this leaflet has been studied carefully.
Handling, transportation and installation of this equipment should only take place with the proper use
of lifting equipment.
This product must be stored in a frost-free dry environment.
Noise Emissions
This equipment operates at a noise level lower than: 70dBA.
Protection degree: IP54
Ambient temperature: 4-30°C
Maximum system operating pressure: 7 bar
O&M Micro Presfix_Layout 1 29/03/2017 11:15 Page 1
Commissioning
1. Fill the system with water via the quick fill filling loop to the system fill pressure, this filling loop must comply with
local water authority bylaws and contain double check valves. The filling loop must be completely removed after the
system has been filled.
The pressurisation unit must never be used to fill the system.
The maximum running time for pumps fitted to this product must not exceed 4 hours in any 24 hour
period.
It is essential that all air is allowed to escape freely via air vents and radiator vents etc.
All air must be evacuated from the system for this product to operate correctly.
2. Turn on the water supply feeding the product break tank.
Water treatment crystals/chemicals must never be introduced to the system via the break tank.
3. The pumps will self-prime once they have started and the system isolation valve is in the open position.
Note: This product does not contain an internal vessel so the unit will need to be connected and open to the
main system vessel before the unit can be operated.
The base frame must be earth bonded directly to the building earth system.
All wiring should be arranged such that it enters the control section through the appropriate cable
glands.
Water supply and system connection
Connect the Micro Presfix set ½”BSP ball valve (under side of cabinet) to a suitable water supply,
incorporating an approved stop cock.
Extend the 22mm plastic overflow pipe from the Micro Presfix break tank to a position where an over-
flow will be
noticed and rectified. Ensure the overflow pipe is able to handle the incoming water volume, if this is
not the case then a reducing valve should be fitted to the incoming water supply.
Connect the Discharge pressurisation port ½” BSP (Under side of cabinet) to the expansion vessel
pipeline which in turn should be connected to the suction side of the system circulating pump. Quick fill and isolating
valves must also be fitted to this line (see connection sketch Fig 1)
The Break tank is constructed to have a weir slot as required by the water bylaws to prevent back flow contamination,
if the inlet ball valve or NRV suffered a catastrophic failure the overflow may not be able to keep up with the inflow in
which case excess water will be ejected through the weir slot in the side of the case and onto the plant room floor, if
this is not acceptable then consideration should be given to fitting the pressurisation set onto a try with overflow to drain.
2
Installation
The Micro Presfix unit is despatched mounted on a wooden pallet and covered in a protective film, it is recommended
that the unit be retained in the protective packaging until the product is to be installed. The unit will arrive pre-packaged
and wired ready for installation.
This product has been fully run tested at our works under simulated site conditions. The unit should be
thoroughly checked for physical damage that may have been caused during transit.
If the unit is found to have damage it must be reported immediately and should not be installed.
The unit must be sited in a dry clean well-ventilated area with good all round access. The unit is designed
to be wall mounted utilising the 3 mounting holes in the rear of the unit. See installation drawing for position.
Electrical connections
The cable used for the incoming supply must be of adequate size to carry the motor full load current. This is shown on
the duty plate. All non power caballing should be limited to 2.5mm².
All connections must be made using the appropriate wiring drawings for the equipment being installed,
with particular attention being paid to the supply voltages.
The supply voltage is shown on the set duty plate.
Access to electrical connections are located in the top section of the cabinet, remove cabinet lid and
then remove lid from plastic control box. Ensure the plastic lid is replaced before operating this product.
Never operate this product with the control panel lid in the open position.
It is essential that this equipment is earthed to the building earth system.
Pumps operate at 230v 50Hz
O&M Micro Presfix_Layout 1 29/03/2017 11:15 Page 2
3
System set points
Menu button
System set points are entered via the front panel interface.
To stop unauthorised adjustment of set points a lock switch is positioned on the back of the display PCB this will
need to be switched to the unlocked position to enable set points to be changed.
Press the mode button and the duty cut in pressure will be shown, if it is flashing it can be changed,
Press up button to increase set point and down button to decrease set point.
Press menu again and Low pressure set point will be displayed, adjust as above.
Press menu again and high pressure set point will be displayed, adjust as above.
Press menu again and start delay will be shown, adjust as above.
Press menu again and Run Limit will be shown, adjust as above.
Press menu again and Exercise will be shown, set number days Max 28 between exercise runs.
Press menu again and pump 1 run hours will be shown, To reset the hours run to zero press both up and down but-
tons simultaneously for 8 seconds and the run time will be reset to zero.
Press menu again and pump 2 run hours will be shown, Reset as above.
Whilst in menu function the display will revert to operation mode if no action is taken for 5 seconds.
Mode button
This button scrolls between Auto, Hand 1, Hand 2 where fitted and off.
The normal position is Auto, select the options required and press the select button, and the option will then be locked
into the display.
In the off position no pumps are allowed to run but low and high pressures are still monitored.
In hand pump 1 or 2 press the select button and the selected pump will run for 10 seconds and then switch to off. Auto
will need to be selected after this operation.
To lock the selected data put the switch on the back of the display to the locked position.
Set point description
Delay start
This set point is adjustable between 0-10 seconds and is used to delay starting the pressurisation pump for the set
period. This can be useful especially on chilled water systems where it can be very difficult to remove all air.
Low pressure set point
This set point is typically set approximately 0.4 bar below the fill point.
High pressure set point
This set point is typically set approximately 0.2 bar above the final working pressure.
Duty pump cut in
This should be set to the static height of the building + 0.35 bar. The standby set points are automatically set from the
duty pump set points. System set point can be between 0.7 bar and 4.0 bar
Run Limit
The run limit is normally set to 20minutes but can be set up to 1 hour, after the time has elapsed all pumps will be
stopped until the problem has been rectified
Auto
This is the normal operating position for the set and will display system pressure.
Parallel operation
On two pump sets parallel operation can be selected which will enable a larger flow of water when called for which
will help unit run for shorter periods. To set to parallel operation jumper two on the back side of the display will need
setting to the parallel position.
O&M Micro Presfix_Layout 1 29/03/2017 11:15 Page 3
Operation
Ensure the power switch on the front panel is in the on position.
The digital display will now go through the starting check sequence, after about 8 seconds the display will show
system pressure. Press the mode button until Auto shows then press select and Auto mode will be set.
If the system pressure is lower than the fill pressure then a pump will run and start to raise the system
pressure. Once the system pressure is restored the pump will stop.
If the pressure in the system falls to the duty pump cut in point the duty pump will start, once the system pressure
has been restored the duty pump will stop. Each time the pressure falls the alternate pump (on two pump units) will
start and restore system pressure. If the duty pump after running for 2 seconds has not succeeded in
raising the pressure and it continues to fall by 0.2 bar it will be deemed that the duty pump has failed.
4
Off
The off position performs two functions, if the main pump has failed and the duty standby pump has been activated,
the duty pump will be locked out until the system is reset by switching the mode button to the off position and then
press select button to select off then switch mode button back to Auto select and the unit will revert to auto opera-
tion. If the mode button is left in the off position no pumps will be able to run but the system will still be monitored for
all other conditions I.E. low/high pressure.
P1/P2 hand positions
If either pump one or pump two is selected for hand operation, that pump will run for 10 seconds regardless of
system pressure. And then switch off.
This function is primarily intended to check that the pump is operational.
Note: After hand operation has been selected the mode will revert to off so the Auto mode will need re-selecting.
Exercise
This set point is adjustable between 0-28 days and is used to run the pumps for a short period after the set time has
elapsed, running the pumps at regular intervals helps prevent pumps from seizing due to inactivity.
V/Free contacts
See appropriate drawing for Volt free contact availability. Rating 1A 50v maximum.
Features
Hours Run
With the mode switch scroll through until P1 hours run is shown or P2 and the run hours will be displayed.
If the display is flashing the hours run can be set back to zero by pressing and holding both the up and down buttons
for 8 second.
Run limit exceeded
If a pump is called to operate for periods in excess of the time set in Run Limit menu or a combination of frequent
starts both pumps will be locked out and prevented from further operation. To reset the timer circuit the mode button
can be pressed and OFF can be selected, press mode button again and select Auto and the system will be reset
and the unit will operate normally.
Transducer failure
If the transducer fails the display will read Sensor error and prevent pump operation, the high low pressure contacts
will simultaneously operate to indicate that a failure has occurred and switch off the boiler circuit.
Break tank low water level
The break tank contains low level probes which will stop all pumps from operating whilst the water level is low. Once
the water level rises to the reset position the pumps will be released to operate after a 20 second delay.
Boiler/chiller interlock
A volt free normally closed circuit is provided as a boiler/chiller interlock. The circuit has 1 high pressure contact and
1 low pressure contact either of which, when operating, will open the boiler/chiller circuit. If the high pressure contact
is not required with chiller applications it can be omitted. See product wiring drawing.
This circuit is failsafe so if the power supply is turned off the circuit will open and the low and high volt free
contacts will operate simultaneously to indicate that the power has failed.
O&M Micro Presfix_Layout 1 29/03/2017 11:15 Page 4
5
The failed pump will then be locked out and the standby pump will run and take the place of the duty pump.
If a pump trips for any reason it will be locked out and the standby pump will operate in its place.
Once the reason for pump failure has been ascertained and rectified the mode button can be pressed and
OFF can be selected, press mode button again and select Auto and the failed pump will be reset and the unit will
operate normally.
Alternatively the mains switch can be switched off and back on again which will reset the circuit but this will also
open the boiler interlock contacts which may not be desirable.
When parallel operation is selected then when the pressure fails to the set points both pumps will be started and
when pressure rises both pumps will stop, if one pump fails it will be locked out and the remaining pump will operate
on its own.
Maintenance
Routine check (3 monthly intervals)
1. Check that the pump seal is not leaking.
2. Check the pump is not seized and develops the correct pressure.
3. Check that the pump operates without undue noise or vibration.
Routine check (6 monthly intervals)
1. Check the break tank is clean and that the correct water level has been maintained.
2. Check that all screws are tight on electrical components.
3. Check that the earth connections are tight and making good contact.
4. Check that the gas pre charge in the system vessel is at the correct pressure, this should be done by
isolating the vessel from the pressurised line and removing the pressure on the wet side of the vessel.
Once the vessel pressure has been discharged, a tyre gauge can be connected to the pre-charge valve to display
the vessel pre-charge pressure. Recharge as necessary with Nitrogen or dry air.
Typical MTHW sealed system max. 120°C.
Intermediate vessel only required on systems withy return temperatures higher than 70°C
Figure 1.
O&M Micro Presfix_Layout 1 29/03/2017 11:15 Page 5
Fault Possible Cause
Remedy
Pump fails to start.
Power supply failure.
Control panel fuse blown.
Low water level.
Reinstate incoming power supply.
Replace power supply fuse.
Reinstate water supply.
Pump fails to stop.
Set point set too high.
Air in system.
System pressure low due to
large leak.
Lower set point.
Bleed pumps.
Switch unit off until leak is repaired.
Pump switches on and off
quickly.
Air in system.
Unit isolated from system
vessel or pre-charge incorrect.
Purge air from pumps and pipework.
Check vessel and system isolating valves are in the
open position and check vessel pre-charge.
Charge as necessary with Nitrogen or dry air.
Pump runs but will not
make pressure.
Pump air locked.
Large leak in system
Passing too much water.
Open bleed screw in system and vent.
Check system for leaks.
Check pump Non return valve.
Pump overheating. Pump partially seized.
Remove pump and check for sediment build up or
foreign objects
Pump set frequently
starting. (pressure falls
to cut in point).
Newly installed system with large
amount of air in pipe work.
Leaks in system pipe work.
Vessel pre-charge incorrect.
Bleed system to remove air.
Repair leaks.
Isolate vessel and pre-charge with
Nitrogen as appropriate.
Break tank overflowing. Non-return valve letting by.
Replace pump or non-return valve in pump.
Pump stops and
pressure drops
immediately.
Non-return valve letting by.
Vessel pre-charge incorrect.
Replace pump or non-return valve in pump.
Check vessel pre-charge and Charge as
necessary with Nitrogen or dry air.
Fault finding guide
Xylem Water Solutions UK Limited
Millwey Rise Industrial Estate, Axminster, Devon EX13 5HU - UK
Tel: 01297 630230 Fax: 01297 630270
e-mail: lowarauk[email protected]
www.lowara.co.uk www.xyleminc.com
Lowara is a trademark of Xylem Inc. or one of its subsidiaries.
© 2017 Xylem, Inc.
Lowara reserve the right to make modifications without prior notice.
Code UKLIT0167 P03/17
O&M Micro Presfix_Layout 1 29/03/2017 11:15 Page 6

Other Xylem Water Pump manuals

Xylem Bell & Gossett 80-PF Series User manual

Xylem

Xylem Bell & Gossett 80-PF Series User manual

Xylem Goulds GB Series Manual

Xylem

Xylem Goulds GB Series Manual

Xylem Lowara LS Series Manual

Xylem

Xylem Lowara LS Series Manual

Xylem GOULDS AC8743 User manual

Xylem

Xylem GOULDS AC8743 User manual

Xylem IM127R07 Manual

Xylem

Xylem IM127R07 Manual

Xylem LOWARA Micro 10 Instruction Manual

Xylem

Xylem LOWARA Micro 10 Instruction Manual

Xylem JABSCO 777 Series User manual

Xylem

Xylem JABSCO 777 Series User manual

Xylem Flygt 2008 Ready 8 Installation and operating instructions

Xylem

Xylem Flygt 2008 Ready 8 Installation and operating instructions

Xylem GOULDS GB User manual

Xylem

Xylem GOULDS GB User manual

Xylem FLYGT 3045 Maintenance manual

Xylem

Xylem FLYGT 3045 Maintenance manual

Xylem LOWARA DOMO User manual

Xylem

Xylem LOWARA DOMO User manual

Xylem JABSCO 18670 Series User manual

Xylem

Xylem JABSCO 18670 Series User manual

Xylem rule Tournament 401C Manual

Xylem

Xylem rule Tournament 401C Manual

Xylem Goulds MPE Series Setup guide

Xylem

Xylem Goulds MPE Series Setup guide

Xylem Flygt 3201 Owner's manual

Xylem

Xylem Flygt 3201 Owner's manual

Xylem GOULDS 2GFK2412H User manual

Xylem

Xylem GOULDS 2GFK2412H User manual

Xylem LOWARA e-LNEEE Troubleshooting guide

Xylem

Xylem LOWARA e-LNEEE Troubleshooting guide

Xylem Lowara Sekamatik 200 Series General instructions

Xylem

Xylem Lowara Sekamatik 200 Series General instructions

Xylem Bell & Gossett ecocirc XL Troubleshooting guide

Xylem

Xylem Bell & Gossett ecocirc XL Troubleshooting guide

Xylem FLOJET 3526 Series User manual

Xylem

Xylem FLOJET 3526 Series User manual

Xylem LOWARA e-SVE Manual

Xylem

Xylem LOWARA e-SVE Manual

Xylem JO5X User manual

Xylem

Xylem JO5X User manual

Xylem Goulds AquaBoost Advanced User manual

Xylem

Xylem Goulds AquaBoost Advanced User manual

Xylem GOULDS RGS2012 User manual

Xylem

Xylem GOULDS RGS2012 User manual

Popular Water Pump manuals by other brands

KSB CalioTherm Pro 25 Installation & operating manual

KSB

KSB CalioTherm Pro 25 Installation & operating manual

Wilo Stratos-D Series Installation and operating instructions

Wilo

Wilo Stratos-D Series Installation and operating instructions

All-Flo A050 Series Operation & maintenance manual

All-Flo

All-Flo A050 Series Operation & maintenance manual

Crane Barnes DGV Series installation manual

Crane

Crane Barnes DGV Series installation manual

Crane BARNES ESB33 Series installation manual

Crane

Crane BARNES ESB33 Series installation manual

salmson SIR 900 Installation and starting instructions

salmson

salmson SIR 900 Installation and starting instructions

SKF LINCOLN FlowMaster II A Series Operation, assembly, disassembly and troubleshooting guide

SKF

SKF LINCOLN FlowMaster II A Series Operation, assembly, disassembly and troubleshooting guide

CAT Pumps 2560 Service manual

CAT Pumps

CAT Pumps 2560 Service manual

Parker Series V14 Service manual

Parker

Parker Series V14 Service manual

Fluke Calibration 700HPPK instructions

Fluke Calibration

Fluke Calibration 700HPPK instructions

KISANKRAFT FarmBoy FB-WPK-20 Operation manual

KISANKRAFT

KISANKRAFT FarmBoy FB-WPK-20 Operation manual

GORMAN-RUPP PUMPS PA Series Installation, operation and maintenance manual

GORMAN-RUPP PUMPS

GORMAN-RUPP PUMPS PA Series Installation, operation and maintenance manual

Pentair Challenger Installation and user guide

Pentair

Pentair Challenger Installation and user guide

ATD Tools ATD-5007 manual

ATD Tools

ATD Tools ATD-5007 manual

GORMAN-RUPP PUMPS SFV4D Installation, operation and maintenance manual

GORMAN-RUPP PUMPS

GORMAN-RUPP PUMPS SFV4D Installation, operation and maintenance manual

Pentair Sta-Rite S20P4JP10221 Installation and operating manual

Pentair

Pentair Sta-Rite S20P4JP10221 Installation and operating manual

Alarko ALD Series operating manual

Alarko

Alarko ALD Series operating manual

YAMADA NDP-P50 Maintenance manual

YAMADA

YAMADA NDP-P50 Maintenance manual

manuals.online logo
manuals.online logoBrands
  • About & Mission
  • Contact us
  • Privacy Policy
  • Terms and Conditions

Copyright 2025 Manuals.Online. All Rights Reserved.