FT-891 Technical Supplement
Alignment
ALIGNMENT-1
Introduction and Precautions
The following procedures cover adjustments that
are not normally required once the transceiver
has left the factory. However, if a problem occurs
during normal operation due to component failure;
realignment may be required after the faulty com-
ponents have been replaced.
We recommend that authorized Yaesu Techni-
cians, who are experienced with the circuitry and
fully equipped to repair and align our products,
perform repairs. If a fault is suspected, contact the
selling dealer for instructions regarding repair.
Authorized Yaesu Technicians have the latest infor-
mation to align all circuits and make complete per-
formance checks to ensure compliance with factory
specications after repairs.
Those who do undertake any of the following
alignments are cautioned to proceed at their own
risk. Problems caused by unauthorized aempts at
realignment are not covered by the warranty poli-
cy.
Yaesu must reserve the right to change circuits and
alignment procedures in the interest of improved
performance, without notifying owners.
Under no circumstances should any alignment be
aempted unless the normal functions and opera-
tion of the transceiver are clearly understood, the
cause of the malfunction has been clearly identied
and all faulty components replaced. The need for
realignment should be determined to be absolutely
necessary.
The following test equipment (and a thorough fa-
miliarity with its correct use) is necessary for cor-
rect realignment. Most steps do not require all of
the equipment listed. The interactions of some ad-
justments may require that more complex adjust-
ments be performed in a sequence. Do not aempt
to perform only a single step unless it is clearly iso-
lated electrically from all other steps. Have all test
equipment ready before beginning, and follow all
of the steps in a section in the order they are pre-
sented.
Required Test Equipment
RF Signal Generator
AF Signal Generator
Spectrum Analyzer good to at least 1 GHz.
Frequency Counter
SINAD Meter
RF Millivoltmeter
Electronic Load
Digital DC Voltmeter (high-Z, 1 M-Ohm/V)
DC Voltmeter
DC Ammeter (23 A)
Ohmmeter
16-Ohm Dummy Load (100/200 was)
50-Ohm Dummy Load (100/200 was)
150-Ohm Dummy Load (100/200 was)
In-Line Wameter (150/300 was, 50-Ohm)
Linear Detector
RF Coupler
4-Ohm AF Dummy Load (3 was)
3.5 mm 3-contact Plug
Alignment Preparation & Precautions
A 50-ohm RF Dummy load and in-line wameter
must be connected to the ANT jack in all proce-
dures that call for transmission, except where spec-
ified otherwise. Correct alignment is not possible
with an antenna.
After completing one step, read the following step
to determine whether the same test equipment
will be required. If not, remove the unneeded test
equipment before proceeding. (except the dummy
load and wameter).
Correct alignment requires that the ambient tem-
perature be maintained constant between 68 °F ~ 86
°F (20 °C ~ 30 °C). When the transceiver is brought
into the shop from a hot or cold environment, it
should be allowed time to come to room tempera-
ture before alignment. Also, the test equipment
must be thoroughly warmed up before beginning.
Whenever possible, alignments should be made
with oscillator shields and circuit boards rmly af-
xed in place.
Note: Signal levels in dB referred to in this proce-
dure are based on 0 dBμ = 0.5 μV (closed cir-
cuit).
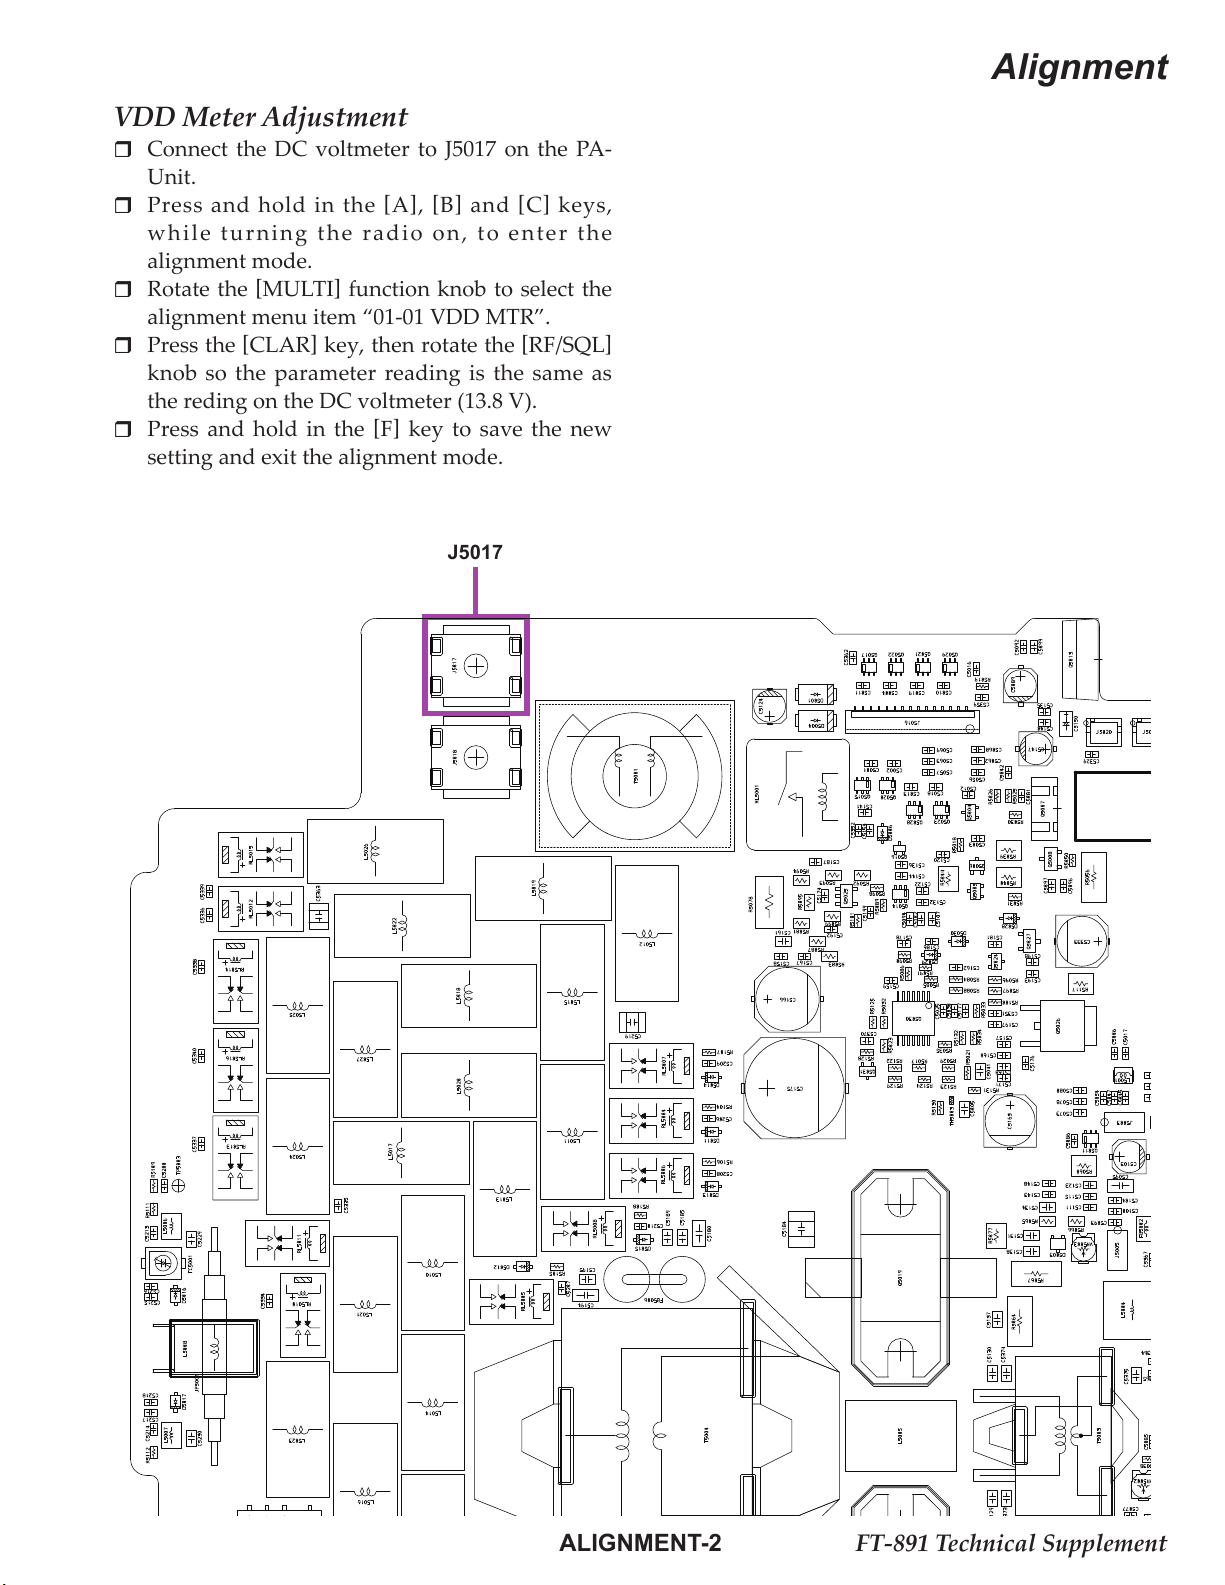
Important Notice
Do not adjust the alignment menus that are
not mentioned in this manual.