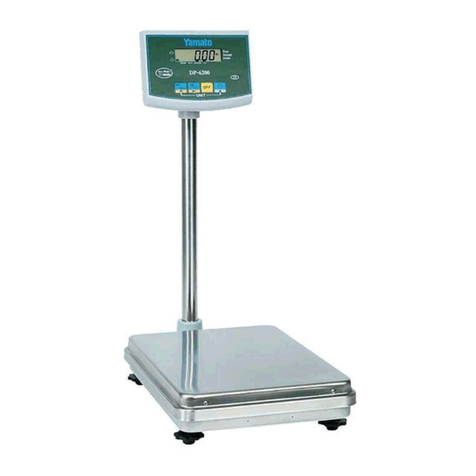
Yamato DP-5602 User manual

OPERATION MANUAL
Digital Platform Scale: DP-5602
Digital Indicator: EDI-562
Read this manual and keep it handy.
Yamato Scale Co., Ltd. EXPORT-1302


Contents
Page
●Safety precautions······················································································1~2
●Storage and disposition··················································································· 2
●Daily checkup at start time··············································································· 2
●Here are some of the functions········································································· 3
●Preparation before use ················································································4~5
How to install the wall mount bracket
●Display and operation-key sections ································································6~9
Operation key section
Display section
1. Main display: Fluorescent display tube
2. Auxiliary display: Full-dot LCD module
●How to carry out measurement······································································· 10
●How to power OFF······················································································· 10
●How to Re-zero··························································································· 10
●How to carry out tare subtraction······································································11
1. One-touch tare
2. Preset tare
●How to clear tare subtraction·········································································· 12
●How to enter a code number ·········································································· 12
●How to add and total ··············································································· 13~14
1. How to carry out manual addition
2-1. How to carry out automatic addition
2-2 .How to return to manual addition
●How to cancel addition·················································································· 15
1. How to cancel last addition
2. How to subtract weight
●How to use the TOTAL key ············································································ 16
●How to count the number of samples ······························································· 17
1. Setting by sample weighing
2. Setting by a unit weight entry with numerical keys

●How to set the over/under judgment function ················································ 18~19
Over/under judgment function
How to set the high and low limits
How to clear the over/under judgment settings
LCD display during the over/under judgment
●Shortage guidance display function ···························································· 20~22
Shortage guidance display function
How to make the settings
How to set the weight per work unit (individual weight)
1. Setting by sample weighing
2. Setting by a unit weight entry with numerical keys
How to set the work unit
How to clear the shortage guidance display settings
LCD display with the shortage guidance display function enabled
●How to set the grading function ································································· 23~24
Grading function
How to set the rank
How to clear the rank settings
●Advanced ranking function ············································································ 25
Subtractive ranking function
How to enable the function
●How to enter an item name············································································ 26
●How to register the entries········································································ 27~29
1. How to register the entries in block
2. How to register the entries individually
The difference between collective registration and individual registration
●How to call registered data ············································································ 29
●How to clear registered data ·········································································· 30
●How to adjust the brightness and contrast of LCD··············································· 30
●Optional functions························································································ 30
●How to set date and time··············································································· 31
●How to set user parameters ··········································································· 32
●User parameter list ················································································· 33~34
●Error code····························································································· 35~37
●Specifications ························································································ 38~39
●Outline view drawing ···················································································· 40

1
Safety Precautions
Read carefully SAFETY PRECAUTIONS before use, and follow all the instructions.
SAFETY PRECAUTIONS are designed for protecting users, other peoples and assets from
physical and financial damages by your safety practices.
This OPERATION MANUAL should be kept for the entire service life of the product.
The hazardous levels and descriptions are defined as follows:
Danger : Denotes where mishandling without compliance with this sign has a
potential risk of suffering death or serious injury.
Warning : Denotes where mishandling without compliance with this sign has a
potential risk of suffering injury or damage on the property.
Caution : Denotes a potential risk that may result in injury or damage on the
equipment if operated without compliance with this sign.
Inhibition : Denotes what is inhibited.
Compulsion : Denotes what must be followed.
NOTE: Prior to use, read carefully the following descriptions of Danger, Warning and Caution to
understand and comply with them.
Danger
: To avoid electrical shock:
1. Ground the instrument.
2. Do not step on a power cable under the feet or a cart.
3. Do not disassemble the indicator.
4. Connect or disconnect a power plug by holding the plug securely.
: To avoid explosion and fire:
Avoid use in the flammable atmosphere, because this equipment is not explosion-proof
type.
: To avoid fire and electrical shock:
If a smoke or smell is found, disconnect the power cable immediately.
Ask the service representative to check the instrument.

2
Warning
: To avoid injury and damage:
1.Place an item on a platform securely.
2.Unplug a power cable after use.
3.Do not adjust the inside of the instrument after removing the platform cover.
4.Do not carry a scale by the indicator. Hold the platform base.
Caution
: To avoid damage:
1.Do not scratch the display panel and keys.
2.Maintain the operating voltage and working condition.
3.Do not attempt to measure items heavier than the limit.
4.Do not give a shock to the platform.
: To maintain the scale performance:
1.Avoid vibration.
2.Avoid direct sunbeam and wind from the air conditioner.
3.Place the scale on the secured base.
4.Use the instrument at temperature between -10C and 40C.
5.Work on the level place. If not level, adjust the leveling legs.
Storage and Disposition
STORING PLACE
1. Do not store the equipment in the place with high temperature/humidity or receiving
direct sunlight for a long period of time. It should also be noted that substantial changes
in the ambient temperature may cause condensation inside the equipment, resulting in
a failure of the operation.
2. This is electronic precision equipment. Do not store it in the place where vibration
and/or shock can be expected.
DISPOSAL
This equipment should be dumped as an industrial waste. Follow the municipal
regulations when dumping it.
Daily Checkup at Start Time
Prior to operation, conduct a daily checkup and weight test to secure the correct
measurement that is required by the Weights and Measures Law.

3
Here are some of the functions
The DP-5602 allows the user to easily carry out effective weighing and counting operations. Make use of
this instrument according to your needs.
This instrument has the following functions as standard.
Function/Purpose Method Remarks Page
Tare subtraction
Use this function when you
wish to set the weight of
any objects to be weighed
or the weight of a container
of such objects to “0” before
weighing.
This function can be carried out by
simply touching the key.
11
The setting can be made using
the Numeric keys and the key.
The weight of the
container must be
measured in advance.
11
A registered tare value can be set
using the key.
The weight of the
container must be
measured and
registered in advance.
29
Counting
Use this function when you
wish to perform counting
operation such as
confirmation of the quantity,
shortage check, etc.
Use the key to set the
number of objects currently
weighted, so that the individual
weight can be set.
17
The key allows the user to
edit the registered individual
weight.
The individual weight
must be set and
registered in advance.
29
Check-weighing
(Over/Under)
Use this function when you
wish to perform weighing or
counting of objects along
with insufficient/excessive
judgment.
These limits can be set using the
and keys. 18
The key allows the user to
edit the registered high and low
limits.
The high and low
limits must be set and
registered in advance.
29
Shortage guidance
display
Use this function when you
wish to produce fixed weight
packages
These limits can be set using the
and keys. 20 to 21
The key allows the user to
edit the registered high and low
limits.
The high and low
limits must be set and
registered in advance.
29
Rank
Use this function when you
wish to perform grading
operation.
Rank can be set using the
and keys.
The high and low
limits must be set and
registered in advance.
23 to 24
The key allows the user to
edit the registered rank value.
The rank value must
be set and registered
in advance.
29
Addition and total
Use this function when you
wish to know the number of
times measurement values
are added as well as the
total weight
Addition and total display can be
performed using the and
keys.
13 to 14
Automatic addition can be
performed using the and
keys. The total can be displayed
using the key.
Registration
Use this function when you
wish to register a tare value
or a code number in the
internal memory.
Registration can be done using the
key.
27 to 28

4
Preparation before use
☆Note the following points to properly use the instrument.
・ Place the instrument on a solid floor.
・ If the installed place is not flat, adjust the levelness with the leveling leg to make it stable.
・ Keep the instrument away from any equipment that generates vibrations.
・ The rated operating temperature of this instrument ranges from -10°C to +40°C. Do not use the
instrument outside of this temperature range.
・ Unplug the power cable when the instrument is not in use or during inspection.
・ When you weigh products which are easy to charge, it is recommended that a ground earth should
be added (from a screw portion on the platform bottom cover).
Do not place the instrument in a
location exposed to direct sunlight,
or exposed to direct air-blow from
air-conditioning equipment, etc.
Do not push the
display section or the
operation-key section
with a pointed object.
The instrument must
be leveled correctly.
Adjust its levelness
with the leveling leg
so that the air bubble
in the spirit level is
located inside the
red circle at the
center of the level.
Firmly plug the power cable
into a receptacle of 100 V,
50/60 Hz power supply.
For safety, make sure to establish a
ground connection using the ground
wire attached to the power cable.
Power cable (about 4 m
long) with a 100 VAC
plug
Ground wire (about 1 m long)
S
p
irit level
Leveling leg
Display section

5
How to install the wall mount bracket
Installation procedure
1. First, remove the 4 set screws on the back of
the indicator. Then install the supplied 2 wall
mount brackets by firmly tightening the 4
screws (make sure to insert the 4 washers
between the indicator and the 2 wall mount
brackets ).
2. Install the 2 wooden tapping screws to a wall
or post, as shown in the following figure.
105 mm (installation pitch)
3. Using the upper holes of the 2 wall mount
brackets set in the above step 1, hook the
brackets onto the 2 wooden tapping screws
set in the above step 2. The installation is now
complete.
<Caution>
Since the 4 set screws have been tightened to a
fixed torque at the factory, the enclosure is
water-proof and dust-proof (i.e. IP66 protection
rating), easy to wash, and hygienically sound
(HACCP compliance). However, for the wall-mount
type indicators, the user must remove the set screws
and then install the wall mount brackets .
Therefore, the “IP66” and “HACCP compliance”
cannot be assured if the set screws are not firmly
tightened or if the wall mount brackets are
externally installed.
Wall or post

6
Display and operation-key sections

7
Operation key section
Turns on display or resets to zero.
Turns the power OFF.
Calls registered data, or registers data.
Performs the quick tare subtraction.
Manual addition or printout at addition.
Subtraction or printout at subtraction.
Totalizing or total printout.
To set code number.
To set upper limit.
To set lower limit.
To set sample number.
Determines the setting value entered.
to Enters a numerical value.
Clear data entry or tare.
Change of function on keys to .
Feed the print paper (with key) for Printer
JPS-508.
Changeover between automatic and manual (with
key).
To set date (with key).
To set time (with key).
To set item name (with key).
Changeover between weighing and counting mode
(with key).
To set item rank (with key).

8
Display section
1. Main display: Fluorescent display tube
Comes on in WT (weighing) mode Comes on in PCS (counting) mode.
Comes on during tare subtraction Displays weight or
quantity
Comes on during reset to zero
Comes on when weighing is stable.
Comes on in automatic mode. Comes on when the key is pressed.
Under/over judgment lamp
With the high limit and the low limit being set,
if a measured value is less than the low limit, the
red lamp comes on,
if a measured value is between the lower and high
limits, the blue lamp comes on, or
if a measured value is more than the high limit, the
yellow lamp comes on.
2. Auxiliary display: Full-dot LCD module
The auxiliary display can display up to eight items.
Enter setting values such as the high limit or the low limit through the auxiliary display (except for the
user parameter settings described on page 31).
Example of the indication

9
Items that can be displayed and their position
The display screen is divided into eight sections as shown in Fig. 1.
For the sections to in the first two lines, items will be assigned automatically according to the
mode.
For the remaining sections to in the third and fourth lines, the user can assign setting items of
their choice.
To assign these settings, refer to “How to set user parameters” on page 28 and change the setting
values of the parameters No. 070 to 073.
①
③
②
④
⑤⑥
⑦⑧
Fig. 1: Divided sections on the screen
: Low limit (in WT or PCS mode), or Limit 1 (with the rank function enabled)
: High limit (in WY or PS mode), or Limit 2 (with the rank function enabled)
: Tare weight
: Gross weight
and : Net weight, code number, item name*1, date, clock time, number of times added, total
(the number of times added and the total weight or the total quantity*1), and individual
weight value
and : Net weight, code number, item name*1, date, clock time, number of times added, and
total (the number of times added and the total weight or the total quantity*1)
*1 Each of the item name and the total uses two sections. Therefore, always set them in
the section or .
If the item name and the total are specified in the section or , the items that have
been assigned in the sections and will not be displayed; if they are specified in the
section or , they will not be displayed.

10
How to carry out measurement
Operating procedure Panel display Remarks
[Turning ON the display]
Press the key.
*Note:
The indications of both WT
and PCS modes are shown in
this step. However, in the
upcoming steps and
procedures, the descriptions
for PCS mode are omitted
unless there is a significant
difference between those
modes.
All lamps come on and “0.00”
appears. The signs above “0,”
and “STABLE” come on.
e.g.) Capacity: 30kg, Division: 0.01kg
or
All lamps continuously come on
until the instrument becomes
stable.
If the error code
or
appears after all lamps
come on, refer to page 34.
If the optional printer
JPS-508 is connected and
the error code
appears during use, press
the key and then
key. If the same code
appears, consult with
Yamato Scale’s dealer.
[Start measurement]
Place an object to be weighed
on the platform of the
instrument.
The weight of the object appears.
(The following indication shows that
the object weighs 10.00 kg.)
If the error code
appears after an object is
placed on the instrument,
the weight of the object
exceeds the measurable
range of the instrument.
Remove the object from the
instrument, and use the
instrument within its rated
operating range.
How to power OFF
Operating procedure Panel display Remarks
[Turning OFF the display]
Press the key.
This instrument consumes
standby power even with
the display turned OFF. If
the instrument is to be
unused for a long time,
unplug the power cable.
How to re-zero
Operating procedure Panel display Remarks
Press the key.
*This resets to zero and
displays “0.00.”
The effective range of
zero reset is within
1.9% of the weighing
capacity.

11
How to carry out tare subtraction
1. One-touch tare············ Simplified tare subtraction method using the key only
Operating procedure Panel display Remarks
Place a container on the platform
of the instrument.
The weight of the container
appears. (The following indication
shows that the container weighs
1.00 kg.)
When the displayed value is
stable, press the key.
“0.00” appears and the
NET lamp comes on.
[Weighing start]
Place an object to be weighed in
the container.
The net weight of the
object appears.
2. Preset tare (when tare weight is already known) ······· Use the numeric keys and key.
<Example> To set the tare weight to 1.50 kg:
Operating procedure Panel display Remarks
①[Entering the tare weight]
Enter , and in that
order.
A setting value can be
entered through the
auxiliary display.
The setting value blinks.
②Press the key.
The auxiliary display
returns to normal
indication. On the main
display, the entered
value is shown as minus
for tare subtraction and
the NET lamp comes on.
③[Weighing start]
Place an object to be weighed on
the instrument.
The net weight of the
object appears.

12
How to clear tare subtraction
Operating procedure Panel display Remarks
Remove the container from the
platform.
The panel shows the tare
weight with a minus sign.
Press the key.
“0.00” appears and the
NET lamp goes out.
How to enter a code number
<<Example>> To enter “123456” as the code number:
Operating procedure Panel display Remarks
Press the key.
(The blinking field is used for
setting a value.)
A setting value can be
entered through the
auxiliary display.
The setting value blinks.
[Entering the code number]
Enter , , , ,
and in that order.
Up to 6 digits can be
entered.
If you enter the wrong
number, press the
key and then enter the
correct number.
Press the key. The display returns to
normal indication. (The
left figure shows the
panel when the
parameter number 072 is
set to “4.”)

13
How to add and total
Use this function when you wish to add each measured value to the internal memory of the instrument
and confirm the total cycle or the total weight.
1. How to carry out manual addition
When a printer or other devices are connected to the system, refer to the respective instruction
manuals.
Operating procedure Panel display Remarks
Place an object to be weighed on
the platform of the instrument.
The weight of the object
appears.
[Addition]
Press the key with the
object placed.
*To cancel the addition, press the
key.
There is no change in the
indication.
If the parameter number 035 is set
to any numbers other than “0,”
“SEnd” appears for the preset
seconds.
If the total value has
exceeded the storage
capacity of the internal
memory after addition,
the following error codes
appear.
- The number of
measurement times has
exceeded.
- The total weight has
exceeded.
Remove the object from the
instrument.
The display returns to
“0.00.”
- One cycle of addition is now complete.
- By repeating Steps to , each measurement value is added to the internal memory.

14
2-1 How to carry out automatic addition
Operating procedure Panel display Remarks
Press the key and then
press the key.
The sign appears
above “AUTO” after the
sign lights above
“SHIFT”.
[Addition]
Place an object to be weighed on
the platform of the instrument.
When the reading becomes
stable, automatic addition is
carried out and a short beep
sounds.
*To cancel addition, press the
key.
If the parameter number 035 is set
to any numbers other than “0,”
“SEnd” appears for the preset
seconds.
If the total value has
exceeded the storage
capacity of the internal
memory after addition,
the following error codes
appear.
- The number of
measurement times has
exceeded.
- The total weight has
exceeded.
Remove the object from the
platform.
The display returns to
“0.00.”
- One cycle of automatic addition is now complete.
- By repeating Steps to , each measurement value is added to the internal memory.
The timing of automatic addition can be set at parameter #69.
2-2 How to return to manual addition
Operating procedure Panel display Remarks
Press the key and then the
key.
The sign appears
above and then the
sign above the “AUTO”
goes out.

15
How to cancel addition
The DP-5601 has a function to cancel the added data in the scale memory.
There are two ways to cancel added data and the way can be chosen by parameter setting
#086. The default setting is “”086 = 0”.
Setting value Name Function Remarks
0 Cancel last addition Cancel last minute addition data Only once available.
1 Subtraction of
weight
Subtract the weight on platform from
the scale memory.
Multiple subtractions
available.
1. How to cancel last addition
Operating procedure Panel display Remarks
Press the key after
addition.
If the parameter number 035 is set to
any numbers other than “0,” “SEnd”
appears for the preset seconds.
The last addition
weight is canceled,
regardless of the
displayed weight.
2. How to subtract weight
Operating procedure Panel display Remarks
Place weighing items you desire
to subtract on platform after
addition.
The display shows
the weight of items.
Press the key. The display remains the same.
If the parameter number 035 is set to
any numbers other than “0,” “SEnd”
appears for the preset seconds.
Remove the items from the
platform.
The display returns
to “0.00.”
- One cycle of subtraction of weight is now complete.
- By repeating Steps to , the continuous subtractions of weight from the internal memory are
available.

16
How to use the TOTAL key
Added measurement results (the total weight and the total number of measurement times) can be
confirmed.
Operating procedure Panel display Remarks
Press the key.
Up to 4 digits of integer value
can be used for the total number
of measurement times.
Up to 9 digits of integer value
can be used for the total weight.
The total values
appear on the auxiliary
display.
Press the key. The display returns to
normal indication.
Continue to carry out the cycle of addition.
To end the addition and clear the total values
To clear the memory of the total values, press the
key while the total weight or the total number
of measurement times is shown.
The command clears all of the total weight and the
total number of measurement times, and the
addition can start from the beginning at the next
operation.
To continue the
addition
This manual suits for next models
1
Table of contents
Other Yamato Scale manuals

Yamato
Yamato DSR-200 User manual

Yamato
Yamato DP-6900 User manual

Yamato
Yamato DP-6100GP User manual

Yamato
Yamato DKS-3002 User manual

Yamato
Yamato DP-6700 User manual

Yamato
Yamato UDS-1V-WP User manual

Yamato
Yamato AW-300P User manual

Yamato
Yamato AW-WLG Series User manual

Yamato
Yamato PB-200 User manual

Yamato
Yamato BC-10 User manual

Yamato
Yamato DP-6900 User manual

Yamato
Yamato BC-10 User manual

Yamato
Yamato Clock MINI DF301 User manual

Yamato
Yamato CPS series User manual

Yamato
Yamato PPC-200 User manual

Yamato
Yamato Accu-weigh PPC-200 User manual

Yamato
Yamato DSR-400 User manual

Yamato
Yamato DSR-200 User manual

Yamato
Yamato PPC-200W User manual

Yamato
Yamato Delicell User manual