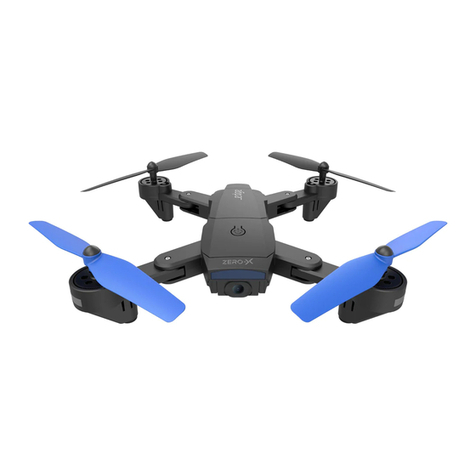
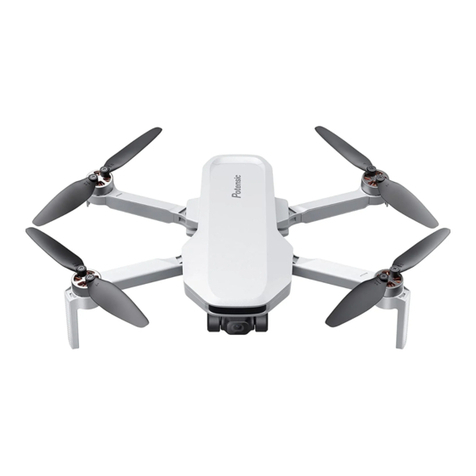
ZERO-X Hydra ZX-HRA User manual

ZX-HRA v2
Capture the skies.™
Full HD Camera Drone with WIFI, GPS & FPV
DRONE USER MANUAL
hydra

CONTENTS
1.0 WELCOME ............................................................................................ 04
1.1 BEFORE YOU GET UP IN THE AIR ....................................................... 04
1.2 GENERAL SAFETY ................................................................................. 04
1.3 BATTERY SAFETY................................................................................... 05
2.0 PACKAGE CONTENTS .......................................................................... 06
2.1 PRODUCT OVERVIEW .......................................................................... 06
2.2 CONTROLLER OVERVIEW ................................................................... 07
3.0 SETTING UP YOUR ZERO-X HYDRA...................................................... 08
3.1 CHARGING THE BATTERY.................................................................... 08
3.2 REMOVING AND INSTALLING THE BATTERY.................................... 09
3.3 INSTALLING A MICRO SD CARD ......................................................... 10
3.4 REMOVING A MICRO SD CARD .......................................................... 10
3.5 REMOTE CONTROL .............................................................................. 11
3.6 FOLDING DESIGN................................................................................. 11
3.7 FLIGHT SAFETY...................................................................................... 12
3.8 WIFI CONNECTION AND APP SET UP ............................................... 12
3.9 USING THE REMOTE CONTROL SMART PHONE HOLDER............. 13
4.0 FLYING YOUR HYDRA........................................................................... 13
4.1 BASIC FLIGHT ........................................................................................ 16
4.2 TROUBLE SHOOTING........................................................................... 16
4.3 ONE BUTTON TAKE OFF/LANDING................................................... 17
4.4 ALTITUDE HOLD .................................................................................... 17
4.5 SPEED MODES....................................................................................... 18

4.6 OUT OF RANGE ALARM....................................................................... 18
4.7 MOTOR LOCK DOWN .......................................................................... 18
4.8 TRIMMING.............................................................................................. 19
4.9 RETURN TO HOME................................................................................ 19
4.10 POINT OF INTEREST............................................................................. 19
5.0 APP NAVIGATION ................................................................................. 21
5.1 APP CONTROL SCREEN ....................................................................... 21
6.0 MAINTENANCE.......................................................................... 24
6.1 REPLACING ROTOR BLADES............................................................... 24
6.2 REPLACEMENT PARTS.......................................................................... 25
7.0 WARRANTY TERMS & CONDITIONS .................................................... 26
NOTES ............................................................................................................ 27

04.
1.0 WELCOME
Thanks for purchasing a Zero-X Hydra, get ready to have the time of
your life! We’re sure your Zero-X Hydra will bring you a world of great
experiences in the air.
Please take the time to read the following safety warnings and operating
instructions carefully.
1.1 BEFORE YOU GET UP IN THE AIR
Connect the Hydra battery to the included USB charging cable and
insert the USB charging cable into the supplied USB wall charger. While
the battery is charging the LED on the charging cable will glow red.
Once charging is complete the light will glow green. While the battery
is charging please take the time to read the instructions and familiarise
yourself with the controls of your Zero-X Hydra.
1.2 GENERAL SAFETY
Please familiarise yourself with your local legislation regarding drone
usage before you begin using your Zero-X Hydra. Included in the package
contents of your Zero-X Hydra are the Australian CASA guidelines,
please read carefully and understand this information as operating a
drone outside of these guidelines may result in legal issues. Zero-X takes
no responsibility for operation of this product outside of what is legally
permissible in your local area.
• Do not fly your Hydra any closer than 30 metres from people, animals or
buildings. Check to make sure you are no closer than 5.5 kilometres from
any airfields or airports.
For more information on CASA’s Australian legislation visit:
http://www.casa.gov.au/ For information outside Australia please visit
the website of your local aviation authority.
• Do not attempt to modify the Hydra or any of its components in any
way, doing so will void your warranty and may affect the operation of the
drone.
• Do not use the Hydra in any conditions that could affect, damage or
impair your view of the Hydra including rain, wind, snow, fog or low
light. Avoid getting your Hydra wet, dusty or sandy. These elements will
damage the components of your Hydra.
• Please do not attempt to touch the Hydra when the Remote Control is
powered on, or if the rotor blades are turning.
• When flying your Hydra, please keep in mind the privacy of others.

05.
IMPORTANT INFORMATION - PLEASE READ BEFORE USE
1.3 BATTERY SAFETY
When handled incorrectly, Lithium polymer batteries can be dangerous
and can potentially harm and do damage to persons or property. Zero-X
does not accept any liability for damage to persons or property if the
battery is not correctly charged, stored or protected.
• Always unwind all cables before charging.
• Do not over charge the battery. Once the charging process is
completed, remove the battery from the charger as soon as possible.
• Only use the included or replacement Zero-X Hydra chargers and
batteries.
• You must charge the Lithium polymer battery in a safe area away from
flammable materials.
• The battery is only to be charged under adult supervision, do not leave
charging batteries unattended. You should always remain in constant
observation to monitor the charging process and react immediately to
any potential problems that may occur.
• Do not charge the battery in temperatures hotter than 40°C or colder
than 0°C.
• Do not cover the batteries when charging. Do not leave batteries in
direct sunlight.
• After each flight & or crash, please check battery for any damage or
swelling.
• If the battery is damaged, leaking, making noise, punctured or
malformed in any way DO NOT attempt to use it. Please dispose of the
battery immediately and safely in the correct manner.
• Do not bend, puncture, crush or scratch the drone’s battery. Do not store
batteries in your pockets, on your person or in extreme temperatures.
• After flying/discharging the battery you must allow it to cool to ambient/
room temperature before recharging.
• If at any time during the charge or discharge process the battery begins
to balloon or swell, discontinue charging or discharging immediately.
Quickly and safely disconnect the battery, then place it in a safe, open
area away from flammable materials to observe it for at least 15 minutes.
Continuing to charge or discharge a battery that has begun to balloon
or swell can result in a fire. A battery that has ballooned or swollen even
a small amount must be removed from service completely.
• Never plug in a battery and leave it to charge unattended overnight.
• Non-compliance with the above warnings may result in the failure of the
battery.

06.
2.0 PACKAGE CONTENTS
2.1 PRODUCT OVERVIEW
1. Hydra Drone
2. Remote Control
3. Charger
4. AC Wall Charger
5. Battery
6. Rotor Blades
7. User Guide
1. Front Left Foot
2. Camera
3. Front Right Foot
4. Battery
5. Battery Release
6. Rear Left Foot
7. Power Button
8. Rear Right Foot
9. Front Right Rotor Blade
10. Front Left Rotor Blade
11. Rear Right Rotor Blade
12. Rear Left Rotor Blade
9
11 12
10
2
7
6
3
8
1
5
4

07.
2.2 CONTROLLER OVERVIEW
1. Phone Holder
2. Video Button
3. Left Thumbstick
4. Return To Home
5. Power Switch
6. Photo Button
7. Right Thumbstick
8. One Button Take Off /
Landing / Emergency Stop
Button
6
1
7
8
5
2
3
4

08.
3.0 SETTING UP YOUR ZERO-X HYDRA
3.1 CHARGING THE BATTERY
PLEASE NOTE: YOUR ZERO-X DRONE COMES WITH A CERTIFIED
ZERO-X USB AC CHARGING ADAPTER FOR 240v CHARGING OF
YOUR DRONE BATTERY. USE OF A NON ZERO-X CERTIFIED USB
AC CHARGING ADAPTER WILL VOID YOUR WARRANTY AND MAY
DAMAGE BOTH YOUR BATTERY AND DRONE.
Fully unwind the included USB charging cable and plug the USB end into
the included Zero-X Certified USB AC charging adapter. When connected
to a charging source the LED light in the charger will flash red. Connect
the drone battery to the charging cable and the light will shine green
indicating charging is in process. The LED on the USB charging cable will
begin to flash red again once charging is complete.
To keep the battery life as long as possible avoid removing the battery
from the charging cable before charging is complete. If you have just
finished flying your Hydra drone, please allow the battery to cool down for
at least 30 minutes before recharging.
• When the Hydra battery has finished charging it is advised that the
battery is removed from the charger as soon as possible. Overcharging
will damage the battery and effect the flight time.
• The Hydra battery can take up to 90 minutes to fully charge. If the
battery has been on charge for any longer than 2 hours and the indicator
on the charging cable is not showing that the battery is charged, please
remove the battery from the charger.
• When connecting the USB cable with the battery, make sure to follow
the guides on the battery connector as these are designed to only
be inserted in one direction. Forcing the connection in the incorrect
direction, may cause damage to the battery and charging cable.
• When flying the Hydra, low battery will be indicated when the remote
control starts beeping and the lights on the Hydra start flashing.

09.
3.2 REMOVING AND INSTALLING THE BATTERY
To remove the hydra’s battery please follow the instructions below.
1. Slide and hold the Battery Release latch on the underside of the
drone back towards the power button.
2. While holding the Battery Release latch in the release position lift the
battery out of the battery slot.
TO INSTALL THE HYDRA’S BATTERY.
1. Slot the battery into the slot aligning the batteries connection slot
with the drones copper pins
2. With the batteries contact side locked into position, firmly press
down the battery at the locking end until the Battery Release latch
clicks into position

10.
3.3 INSTALLING A MICRO SD CARD
If you want to record your flights using the Hydra’s built in camera
it is required that you install a Micro SD Card (not included). It is
recommended that you use a class 10 Micro SD Card, up to 32 GB.
To install a Micro SD Card, please follow the instructions below.
1. Remove the Hydra’s battery following the instructions laid out in the
section of this manual named REMOVING AND INSTALLING THE
BATTERY.
2. With the Hydra positioned upside down and the battery removed,
insert your Micro SD Card into the slot near the copper contacts
ensuring that the text facing upward
3. Press the Micro SD card in until a click is heard and the Micro SD Card
locks in position.
3.4 REMOVING A MICRO SD CARD
To remove your Micro SD Card, follow the instructions below.
1. Remove the Hydra’s battery following the instructions laid out in the
section of this manual named REMOVING AND INSTALLING THE
BATTERY.
2. Press the Micro SD Card in until a click is heard and the card releases.
3. The card will now release and the Micro SD Card will now be
removable.

11.
3.5 REMOTE CONTROL
1. Ensure that the Remote Control power switch is in the OFF (down)
position.
2. Remove the battery cover on the rear of the Remote Control by
sliding it downward.
3. Insert 4 x AA batteries (AA Batteries not included) making sure that
they are in the orientation specified.
4. Do not mix new and old batteries or different types of batteries.
3.6 FOLDING DESIGN
The Hydra can fold down for easy storage and transport.
To fold the Hydra’s arms down it requires that the arms are folded down
and unfolded in a specific order.
When folding and unfolding the arms press the arms in towards the body
of the drone, they will click once when unlocking from their extended
position and then click again when they are locked into their folded
position.
To fold down the Hydra’s arms first fold in both front arms, and then both
rear arms.
4xAA Battery
Cover
Battery Cover

12.
To unfold the Hydra’s arms, first unfold the rear arms and then unfold the
front arms.
PLEASE NOTE: Do not power up the Hydra while the arms are folded
down.
Do not attempt to fold down or extend the arms while the Hydra is
powered up.
3.7 FLIGHT SAFETY
Before flying your Hydra make sure that you are in a safe setting. CASA
restrictions regarding flying drones require the drone be no closer than
5.5kms from any airport or airfield whilst flying. Drones should also not
be flown over populated areas or any closer than 30 metres from vehicles
people or animals.
It is also required that you check your surroundings before taking off
making sure there are no obstacles or dangers in the area, including
overhead power lines and bodies of water. If there are hazards present in
your intended area of flight, please consider an alternative location.
3.8 WIFI CONNECTION AND APP SET UP
To use your Apple or Android smart-phone as a FPV screen you will need
to wirelessly connect your smart phone to your Hydra over WiFi. This is
done during the set up and launching of the Hydra and requires you to
have the Zero-X Hydra App installed.
1. To find the Zero-X Hydra App search ‘Zero-X Hydra’ on the Apple
App store if you are using an iPhone, or on the Google Play store if
you are using an Android phone.
2. Download the Zero-X Hydra App.
3. Once the App is downloaded and installed on your Smart phone,
switch on your Hydra by holding the power button for two seconds
and move your Smart-phone to be within two metres of the drone.

13.
4. When the Hydra is switched on (without the remote controller
switched on) The lights on the arms of the Hydra will flash. While
these lights are flashing the WiFi signal will start up be available for
connection.
5. In your Smart-phone’s WiFi settings find the and select the Zero-X
Hydra WiFi connection.
6. Open the Zero-X Hydra App.
7. Press the App Control button on screen to access FPV mode.
3.9 USING THE REMOTE CONTROL SMART PHONE
HOLDER
1. Extend the Phone cradle from the top of the drone.
2. Flip down the bottom grip of the phone cradle.
3. Lift the top grip and place your smart phone horizontally between the
two grips.
4. Release the top grip making sure that your smart phone is securely in
position.
4.0 FLYING YOUR HYDRA
GETTING STARTED, POWERING UP, PAIRING, CALIBRATING AND
UNLOCKING THE MOTORS
1. Now that you have installed fully charged battery into your Hydra
Drone and 4 x AA batteries (AA batteries not included) into
your remote control, please conduct a complete check of your
surroundings to ensure that your location is safe to take off from.
2. On your Android or Apple Smart-phone, open your WiFi settings and
connect to the Zero-X Hydra WiFi connection. Once connection is
made, open the Zero-X Hydra app on your Smart-phone.
3. Position your phone in the remotes smart phone holder.
1 2 3 4

14.
4. Switch the Remote Controls power switch to the up ON position. The
Remote Control should beep once and the light commence flashing
to indicate power up has been successful.
5. Next push the LEFT Thumb stick (Acceleration/Yaw) on the Remote
Control to the maximum lowest (down) position, the Remote Control
light should now change to a slow flash. The Remote Control is now
ready to be paired with the Hydra drone.
6. To activate the connection between the Remote Control and the
Hydra, move the Left Thumb stick (Acceleration/Yaw) on the Remote
Control to the lowest (down) position hold for one second and then
return the Left Thumb stick to the middle position.
7. On your Hydra Drone, press and hold the power on/off button at the
back of the drone for 2 seconds. The drone should turn on with all
lights active and shining brightly. Once the drone lights start flashing
and rotating, the drone is now in GPS pairing mode ready to connect
to the Remote Control and activate GPS functionality for take off. DO
NOT OPERATE THE DRONE BEFORE GPS HAS BEEN CONNECTED.
8. While the Hydra is in GPS paring mode, it can take up to a minute
for the Hydra to orientate itself. Once the Hydra has gained a GPS
connection the left side of the controller’s light bar will glow blue.
9. Once the GPS connection has been established move the left thumb
stick to the top left position while moving the right thumb stick to the
top right position and hold for 2 seconds. The Hydra is now entering
Compass calibration mode.

15.
10. Level Correction: When the indicator lights on the left side of the
Hydra Drone are flashing, please place the Hydra on a flat level
horizontal surface, then lifting it slightly off the ground (around
10cms) rotate the drone 4 times in 180 degree increments in a
clockwise direction until the remote control makes a long “beep”
sound, the left indicator will turn solid and the right indicator will start
flashing. Once completed, level correction has been successfully
calibrated.
11. Vertical correction: Rotate the drone vertically on the ground, until
the remote control makes another long “beep”. When the four
indicator start flashing in a clockwise sequence, it indicates that the
drone has been successfully calibrated.
12. Once the remote is paired and the Hydra is calibrated, the motors will
need to be unlocked before you fly. To unlock the motors, move the
left thumb stick to the right and downward position while also moving
the right thumb stick to the left and downward position as shown in
the diagram below.
When done correctly the rotor blades will spin waiting for take off.
13. Press the Auto Take Off button and the Hydra will jump up to
shoulder height.

16.
4.1 BASIC FLIGHT
4.2 TROUBLE SHOOTING
Do not approach the drone again until the remote has been powered
off. If for any reason the Hydra does not work after following the
launching steps, please check the following.
A. The Hydra battery is fully charged, correctly connected and not
damaged.
B. The batteries in the Remote Control are of the same brand, have
an equal amount of charge and have enough charge to power the
remote control correctly (Using an assortment of batteries will affect
the performance of the Remote Control).
C. The connection between the Remote Control and the Hydra may
not have been completed correctly. Ensure that when activating the
connection, the Left Thumb stick (Acceleration/Yaw) is moved all
the way to the bottom and then returned to the middle. If this is not
completed the connection will not activate. Once these points have
Push the left stick
up to gain altitude Push the right stick
up to y forward
Push the left stick
back to descend
Left Stick Right Stick
Push the right stick
back to y backward
Push the left stick
left to pivot left Move the right stick
to the left to y to left
Push the left stick
right to pivot right
Move the right stick to the
right to y right

17.
been checked turn both the Hydra and the Remote Control off and
start the launching process again.
4.3 ONE BUTTON TAKE OFF/LANDING
The one button take off and landing button allows you to easily get your
drone off the ground and land once the Hydra is paired and the motors
are unlocked.
TO TAKE OFF
Follow the powering up and pairing instructions in this manual. Once the
drone is paired to the controller press and the motors are unlocked the
one button take off/ land button, and the drone will take off and hover at
shoulder height.
TO LAND
While flying to bring the drone down, press the one button take off/land
button. The drone will then descend and land.
EMERGENCY LANDING
If you need to bring the drone down in an emergency, while flying, hold
the one button take off/land button. The motors will stop completely and
the Hydra will fall to the ground.
PLEASE NOTE: When using any land function, make sure that there are
no obstacles, people or animals under the drone.
Do not use the emergency stop function unless it is an emergency
situation as this will cause the motors to lock, and the drone to free fall.
4.4 ALTITUDE HOLD
Altitude hold works while you are flying the Hydra to help the drone hover
and maintain a constant height making aerial photography easy.
To see altitude hold working, allow the left thumb stick to fall back to its
default middle position while flying, and the Hydra will balance itself to
hold its altitude.

18.
4.5 SPEED MODES
The Hydra drone has three speed modes.
To cycle through the speed modes, use the speed button on the rear of
the controller. Each mode will be identifiable by a series of beeps.
Low Speed Mode: One beep
Medium Speed Mode: Two beep
High Speed Mode: Three Beeps
4.6 CONTROLLER ALERTS
When the Remote Control battery is low the Remote Control will issue a
slow series of beeps, signalling that the batteries need to be replaced.
When the Hydra battery is running low, the remote will issue a fast series
of beeps, signalling that the battery needs to be recharged.
The remote will quickly beep twice when the Hydra is flying out of range. If
the controller begins to sound the out of range alarm, please fly the Hydra
back towards you.
PLEASE NOTE: Do not ignore low power warnings as this may result in
unplanned landings.
4.7 MOTOR LOCK DOWN
When the rotor-blades are stopped by an obstacle the motors will go into
protective lock down.
To unlock the motors make sure the rotor-blades are clear from debris and
put the Hydra back on the ground. Once you are ready to fly again pull the
left thumb stick back and the motors will release.

19.
4.8 TRIMMING
Trimming is used to balance out your drone if it is drifting when flying.
To adjust the trimming please follow the steps below.
1. Make sure that the Remote Control and Hydra are switched on and
correctly paired.
2. Hold the Trimmer button on the rear of the Remote Control.
3. While still holding the Trimmer button use the right thumb stick to
counter the direction that your Hydra is drifting.
4. As you are adjusting the trimming the beep tone will go lower the
more that you trim in any directing.
PLEASE NOTE: If Trimming is not fixing the drones drifting, you may need
to re calibrate your drone by turning off the drone and the controller and
restarting the instructions in the Getting Started section of this manual.
4.9 RETURN TO HOME
Return to home brings the Hydra back to the location it was launched
from.
To activate Return to Home press the Return to Home button on the front
of the remote control.
PLEASE NOTE: It is important that the GPS is correctly connected before
launch before activating return to home. Failing to do so may result in the
drone flying away when return to home is attempted.
4.10 POINT OF INTEREST
When activated, point of interest will make the Hydra circle around the
desired point of interest.
To activate Point of interest aim the Hydra at the desired point of interest
and then press the right thumb stick in like a button and the controller will
beep.
While in Point of Interest mode the left thumb stick is used only to
control the Hydra’s height and the right thumb stick is used to control the
direction and speed that the Hydra circles the target and how close the
Hydra is to the target.

20.
Press Down
Moving the right thumb stick right will make the Hydra circle the
target clockwise while focusing on the target.
Moving the left thumb stick left will make Hydra circle the target
counter clockwise while focusing on the target.
Moving the thumb stick down will move the Hydra away from the
target making the circle bigger.
Moving the left thumb stick up will move the Hydra closer to the
target making the circle smaller.
Table of contents
Other ZERO-X Drone manuals

ZERO-X
ZERO-X ZX-BTZ User manual

ZERO-X
ZERO-X Titan User manual

ZERO-X
ZERO-X Edge User manual

ZERO-X
ZERO-X Atlas ZX-ATL User manual

ZERO-X
ZERO-X nova ZX-NVA User manual

ZERO-X
ZERO-X Rapture ZXRAP User manual

ZERO-X
ZERO-X Spectre ZXSPT User manual

ZERO-X
ZERO-X RAPTURE HD ZX-RHD User manual

ZERO-X
ZERO-X Force User manual

ZERO-X
ZERO-X stratus+ User manual