Zoom 4410B User manual

Wireless-G
USB Adapter
USER GUIDE

Wireless-G USB Adapter
2

Contents 3
Contents
Overview .................................................................. 4
1. Installation Instructions ...................................... 5
Installing and Connecting the Adapter.................... 6
The Adapter LED.................................................... 9
2. Setting Security ................................................. 10
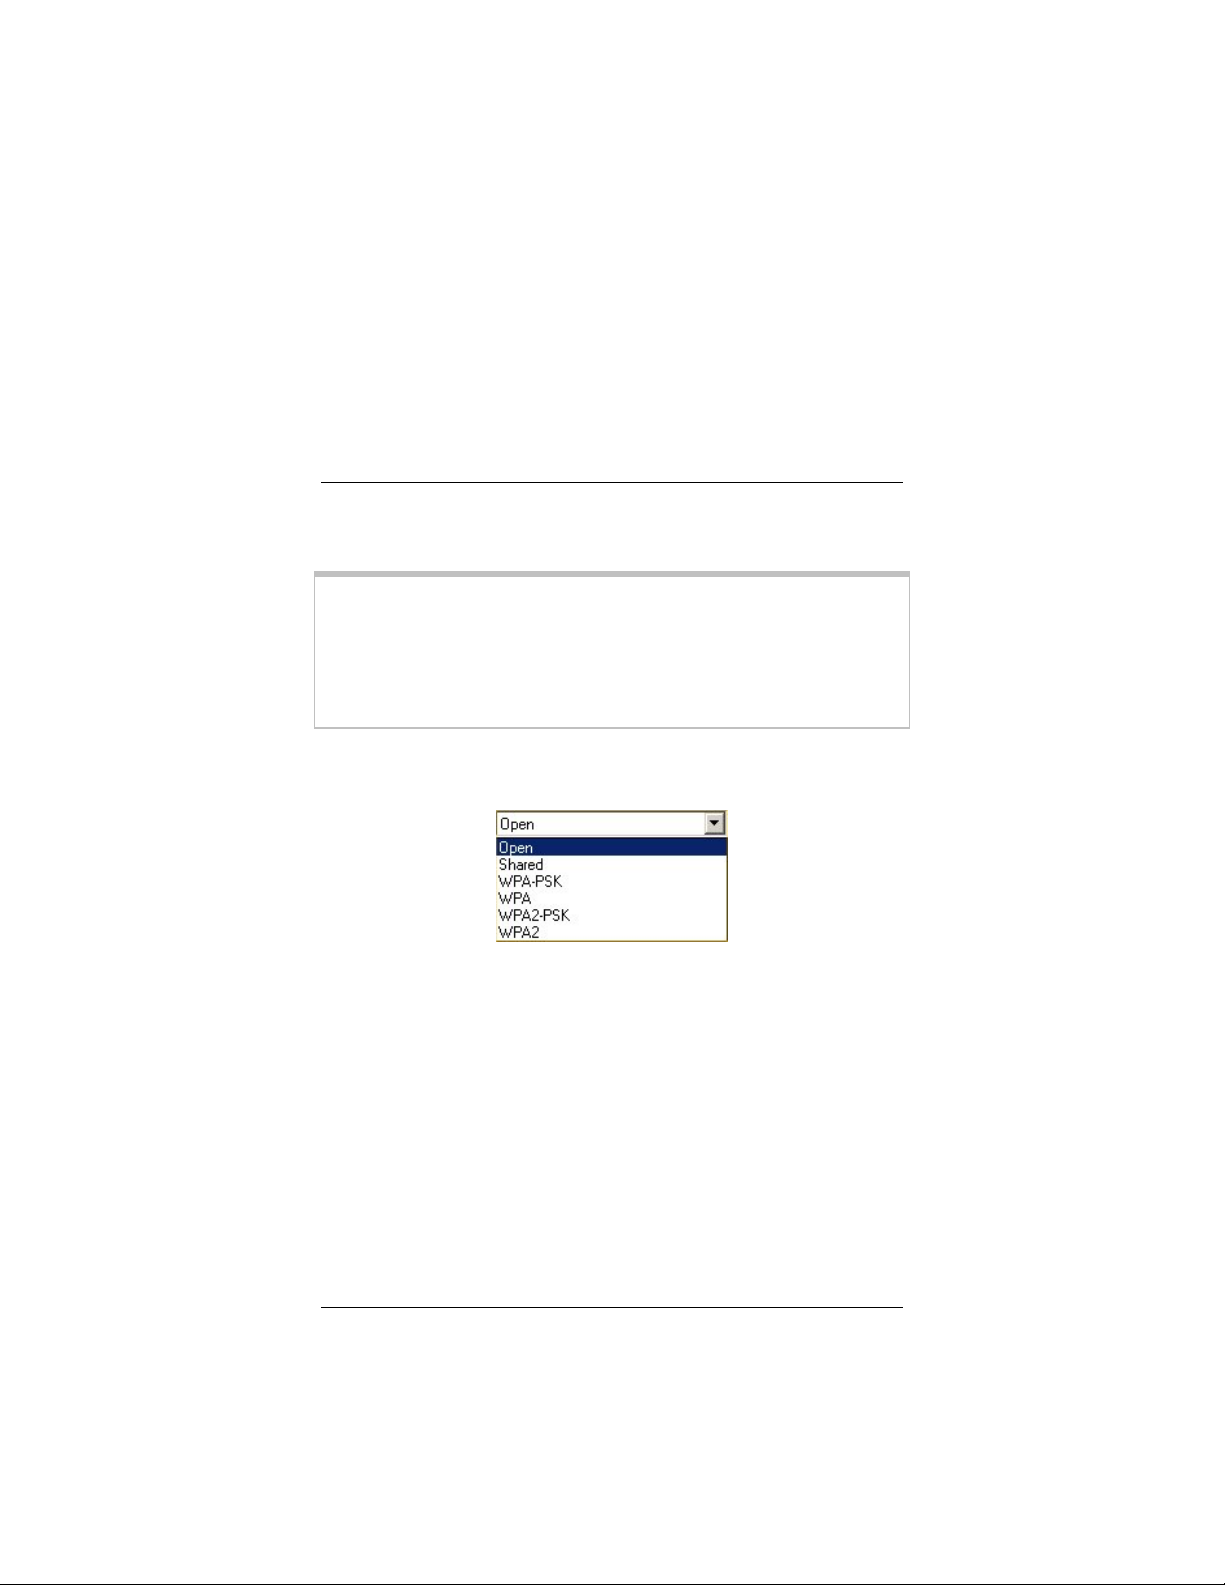
Accessing the Security Screen............................. 11
WPA2-PSK (Pre-Shared Key) .............................. 14
WPA-PSK (Pre-Shared Key) ................................ 15
WEP (Wired Equivalent Privacy) .......................... 16
WPA2 ................................................................... 18
WPA ..................................................................... 20
Certificate (WPA2 and WPA)................................ 23
WiFi™ Protected Setup (WPS) ............................ 24
Changing your Security Setting ............................ 26
3. Advanced Options............................................. 27
Creating Profiles................................................... 27
Monitoring Link Status.......................................... 30
Using Site Survey and Rescan............................. 31
Advanced Configuration ....................................... 33
Appendix A. TCP/IP Settings................................ 34
Appendix B. Troubleshooting .............................. 41
Appendix C. Technical Support ........................... 43
Appendix D. Regulatory Information ................... 47

Wireless-G USB Adapter
4
Overview
The chapters in this User Guide describe how to:
•Install the Zoom Wireless-G USB adapter on a Windows®
PC
•Connect to a wireless network
•Enable security on the Wireless-G USB adapter
•Use the advanced features of the Wireless-G USB
configuration software
Chapters 1 and 2 cover the basics – what you need to get
connected and to enable security.
If you are interested in the more advanced features of the
Wireless-G USB adapter, please see Chapter 3. This chapter
explains how to create profiles so you can switch your
connection from one network to another, monitor the strength of
your network connection, and scan a list of available networks.

Chapter 1: Installation Instructions 5
1
Installation Instructions
This chapter provides simple instructions for installing the
Wireless-G USB adapter on a Windows PC. If you have already
installed the adapter on a computer (using the separate Quick
Start guide), you can skip this chapter and begin with Chapter 2:
Setting Security.
What’s in the Package
The adapter package includes the following:
•Wireless-G USB adapter
•CD containing the
Installation Wizard and
documentation
•USB extension cable
•Quick Start manual
Before You Begin
Before you install the Wireless-G USB adapter, check that your
computer has the following:
•Available USB port
•Windows Vista, XP or
2000
•CD drive
•6 MB of free hard drive
space

Installing and Connecting
the Adapter
Important! Install the software BEFORE you plug the Wireless-
G USB adapter into your computer.
1Insert the Wireless-G USB CD into the CD or DVD drive. The
CD should start automatically.
Windows Vista:
If the AutoPlay dialog box appears, click Run Setup.exe.
If a message appears saying An unidentified program wants
access to your computer, click Allow.
2On the Language Selection screen, select your language.
3On the next screen, select Installation Wizard, and then on
the following screen select USB.
4On the Zoom Wireless-G USB Welcome screen, click Next
to install the adapter.
A Zoom Wireless-G USB Setup screen is displayed for a few
seconds while the installation proceeds.
6
Wireless-G USB Adapter

Windows Vista: If a message tells you that Windows can't
verify the publisher of the driver software, select Install this
driver software anyway.
5At the prompt, click Finish and remove the CD.
If the Zoom installation menu remains on screen, click Exit.
6Shut down the computer.
7Plug in the USB Adapter and turn your computer back on.
To connect to a network
1Double-click the Zoom Wireless-G USB icon on your
desktop to open the Zoom Wireless-G Configuration window.
Note that you also have a Zoom Wireless-G USB icon in your
Windows taskbar:
The color of this icon indicates the status of your network
connection:
Blue indicates an excellent or good link.
Yellow indicates a usable but weak link.
Red indicates no link or a very poor link.
7
Chapter 1: Installation Instructions

2In the Zoom Wireless-G USB window, click the Site Survey
tab to see a list of available wireless networks.
3Highlight the network you want and click Join.
If the network you select has security configured, you
must enable and configure security on your computer before
you can connect. See Chapter 2, Setting Security.
4If you join a wireless network that does not have security, you
should now be connected. To check your connection, open
your Web browser and go to your favorite site.
We highly recommend security. Chapter 2, Setting Security on
page 10 has descriptions of the six security options and setup
instructions.
If you have difficulty accessing the Internet, follow the
suggestions in your browser’s “Page cannot be displayed”
message. You may need to adjust your LAN settings.
As you work online, you can monitor your connection easily
using the Link Status icon described in Step 1 above.
8
Wireless-G USB Adapter

Chapter 1: Installation Instructions 9
The Adapter LED
The states of the LED on the Wireless-G USB adapter are
explained below.
LED Status Meaning
Flashing The Wireless-G USB adapter is attempting to
connect to a wireless network.
Steady The Wireless-G USB adapter is connected to a
wireless network and is transmitting or
receiving data.

2
Setting Security
We strongly recommend security, although you do not need to
use it to get your wireless connection working.
Important! You must first enable security on the the wireless
access point. You then enable security on the adapter using the
same configuration that you used for the access point. For
example, if the wireless access point is configured for WPA2-
PSK, you must select WPA2-PSK security in the Wireless-G
USB configuration software and enter the same encryption key.
Select one of six ways to configure and implement security for
your wireless network:
•WPA2-PSK (WiFi ® Protected Access 2Pre-Shared Key)
This is the option we recommend, if it is supported by the
access point and the devices in your network. WPA2-PSK
protects your communications with AES (Advanced
Encryption Standard). Some access points permit a “mixed
mode” network composed of both WPA and WPA2 wireless
clients.
WPA2-PSK requires you to enter an encryption key shared
by the access point.
•WPA PSK (WiFi ® Protected Access Pre-Shared Key)
If the devices in your network do not all support WPA2-PSK,
select WPA-PSK. WPA-PSK protects your communications
with TKIP (Temporal Key Integrity Protocol).
10
Wireless-G USB Adapter

This option requires you to enter an encryption key shared
by the access point.
•WEP (Wired Equivalent Privacy)
Both the Open and Shared Authentication modes require
WEP security. The most recent assessments of WEP advise
choosing Open rather than Shared.
If the devices in your network do not support WPA2-PSK or
WPA-PSK, select Open with WEP data encryption.
This method requires you to enter an encryption key. The
keys can be 64, 128 or 256 bits in length.
•WPA2
If you are linking to a corporate network that accesses a
RADIUS (Remote Authentication Dial-In User Service)
authentication server, and if the devices in the network
support WPA2, select WPA2. This option provides security
with AES (Advanced Encryption Standard). AES has a key
size of 128, 192, or 256-bits. In order for eavesdroppers to
decipher a message, they would have to try every possible
key.
•WPA is an option for corporate users who access a RADIUS
(Remote Authentication Dial-In User Service) authentication
server that does not support WPA2. WPA provides security
with TKIP (Temporal Key Integrity Protocol), which
dynamically changes keys as the system is used.
Accessing the Security Screen
1On your desktop, double-click the Zoom Wireless-G USB
icon:
11
Chapter 2: Setting Security

2The Zoom Wireless-G USB configuration software opens to
display the configuration parameters:
3Make sure that the desired wireless network is displayed in
the Profile and SSID text boxes (the term <Infra>
designates an Infrastructure network) and that the Network
Type is correct.
There are two types of wireless networks: Infrastructure and
Ad Hoc.
•In an Infrastructure network, wireless devices
communicate with each other via a wireless access
point, router, or ADSL modem with built-in wireless
technology.
•In an Ad Hoc network, a group of wireless devices
communicate directly with other “client” devices that are
using wireless adapters. The network does not include a
wireless access point or wireless router.
12
Wireless-G USB Adapter

Chapter 2: Setting Security 13
•In the unlikely event that you use an Ad Hoc network,
you must set up Static IP addressing. See Appendix A:
TCP/IP Settings.
4Select the Enable Security check box to open the Security
Configuration window. For configuration instructions,
consult this table:
To configure Go to page
WPA2-PSK 14
WPA-PSK 15
WEP 15
WPA2 18
WPA 20

WPA2-PSK (Pre-Shared Key)
1In the Privacy Configuration window, click the
Authentication Mode drop-down arrow and select WPA2-
PSK.
2At Encryption Mode, accept the default: AES (Advanced
Encryption Standard).
3In the Pre-shared key [WPA] area, enter the same network
key that is used on the wireless access point. We advise you
to enter a key with a minimum of 20 random characters.
4Click OK to save your settings and return to the
Configuration tab.
5On the Configuration tab, click Apply.
6Click the Close box to exit the configuration software.
That’s it! You have configured WPA2-PSK security for your
wireless connection, and you’re ready to use the Internet.
14
Wireless-G USB Adapter

WPA-PSK (Pre-Shared Key)
If all of the wireless devices in your network DO NOT support the
recommended WPA2-PSK, select WPA-PSK.
1In the Privacy Configuration window, click the
Authentication Mode drop-down arrow and select WPA-
PSK.
2At Encryption Mode, accept the default: TKIP (Temporal
Key Integrity Protocol).
3In the Pre-shared key [WPA] area, enter the same network
key that is used on the wireless access point. We advise a
key with a minimum of 20 random characters.
4Click OK to save your settings and return to the
Configuration tab.
5On the Configuration tab, click Apply.
6Click the Close box to exit the configuration software.
15
Chapter 2: Setting Security

That’s it! You have configured WPA-PSK security for your
wireless connection, and you’re ready to use the Internet.
WEP (Wired Equivalent
Privacy)
1In the Privacy Configuration window, click the
Authentication Mode drop-down arrow and select Open
(recommended) or Shared:
The USB Adapter automatically selects WEP as the
Encryption Mode.
2In the Preconfigured key [WEP] area,do the following:
aIn the Format for entering key drop-down list, select
•ASCII characters if your network uses all Zoom
wireless products
16
Wireless-G USB Adapter

Chapter 2: Setting Security 17
•Hexadecimal digits if an access point, router, or
some adapters are not Zoom products
b
c
d
In the Key Length drop-down list, select 128 bits, 64
bits, or 256 bits.
Note: 128-bit and 256-bit WEP provide more security
than 64-bit, but the longer keys could diminish network
performance.
In the Key Index drop-down list, if you are using a 64-bit
key, select which of four keys – 1, 2, 3, or 4 – will be
used to encrypt the data. The key you select must be the
same one that is selected on the access point. We
recommend that you use Key 1.
128-bit and 256 bit WEP use just a single key.
In the Network Key text box, enter a key using the table
below as a guide.
The key must be the same for all the devices on your
network.
If you selected key
type…
Enter exactly…
Hexadecimal digits
– 256 bits
58 Hexadecimal characters A–F, a–f
and 0–9.
Hexadecimal digits
– 128 bits
26 characters A–F, a–f and 0–9. For
example,
00112233445566778899AABBCC.
Hexadecimal digits
– 64 bits
10 characters. The characters can
be A-F, a-f, and 0-9. For example,
11AA22BB33.
ASCII – 128-bits 13 characters. The characters can
be any upper- or lower-case letters
and numbers. For example:
MyKey12345678.
ASCII – 64 bits 5 characters. The characters can be
any upper- or lower-case letters and
numbers. For example, MyKey.
3Re-enter the key in the Confirm Network Key text box.
4Click OK to save your settings and return to the
Configuration tab.
5On the Configuration tab, click Apply.

6Click the Close box to exit the configuration software.
That’s it! You have configured WEP security for your wireless
connection, and you’re ready to use the Internet.
WPA2
Select WPA2 if:
•you are linking to a corporate network that uses a RADIUS
(Remote Authentication Dial-In User Service) authentication
server
•all of the devices in the network support WPA2, or your
access point offers both WPA2 and WPA.
18
Wireless-G USB Adapter

1In the Privacy Configuration window, click the
Authentication Mode drop-down arrow and select WPA2.
2At Encryption Mode, accept the default AES (Advanced
Encryption Standard)
3In the IEEE 802.1X Authentication area, note that the check
box marked Enable IEEE 802.1X authentication for this
network is selected. With IEEE 802.1X authentication, each
wireless device (client) sends a signal to the wireless access
point, which in turn sends the signal to the RADIUS server.
The server determines whether or not the client is allowed to
join the network.
4Click the EAP (Extensible Authentication Protocol) Type
drop-down list and select an authentication protocol:
•PEAP (Protected Extensible Authentication Protocol).
This is the default. With PEAP, you can select from two
authentication extensions:
MS-CHAPV2. Microsoft’s version of CHAP
(Challenge-Handshake Authentication Protocol
(default)
GTC
•TLS (Transport Layer Security). There are no
authentication extension options with TLS.
19
Chapter 2: Setting Security

•TTLS (Tunneled Transport Layer Security). With TTLS,
you can select from four authentication extensions:
PAP (Password Authentication Protocol)
CHAP (Challenge Handshake Authentication
Protocol)
MS-CHAP (Microsoft’s version of CHAP).
MS-CHAPV2 (the default).
•SIM (Subscriber Identity Module). A SIM card stores the
key used to identify a subscriber to a wireless service.
5Click the Certification tab and enter the required information
(see page 23).
6Click OK to save your settings and return to the
Configuration tab.
7On the Configuration tab, click Apply.
8Click the Close box to exit the configuration software.
That’s it! You have configured WPA2 security for your wireless
connection, and you’re ready to use the Internet.
WPA
Select WPA if you are linking to a corporate network that uses a
RADIUS (Remote Authentication Dial-In User Service) server
that does not support WPA2.
1In the Privacy Configuration window, click the
Authentication Mode drop-down arrow and select WPA.
20
Wireless-G USB Adapter
Table of contents
Other Zoom Adapter manuals
Popular Adapter manuals by other brands

Tenda
Tenda TWL542U user manual

ActionTec
ActionTec 54 Mbps Wireless Multiport Print Server user manual

AudioCodes
AudioCodes MP-20 Series Release notes

Phoenix Contact
Phoenix Contact COAXTRAB CN-UB-280DC installation instructions

Bebob
Bebob ML-120ALEX user manual

König Electronic
König Electronic P.SUP.NBU90K1 manual

Siemens
Siemens 3VM9182-0SH10 operating instructions

HORNER
HORNER HE693SNP CBL Installation data

Panda Wireless
Panda Wireless PAU09 user manual

Sennheiser
Sennheiser BTD 300i instruction manual

Eaton
Eaton TRIPP LITE U444-06N-DP4K6B installation instructions

NETGEAR
NETGEAR HA501 - 802.11a Wireless 32-Bit Card Bus... reference guide