Zoom 4410A User manual

Quick Start
Zoom Wireless-G
USB Adapter
English ................................. 3
Español .................................. 12
Model 4410A

2

3
ZOOM WIRELESS-G USB
ADAPTER
Quick Start
To complete the installation, you need the following:
•A Windows® Vista, XP, 2000, Me, or 98SE computer with a
USB port and CD drive
•At least 6 MB of free hard drive space
Important: Install the software BEFORE you plug the Wireless-G
USB adapter into your computer.
If you are running Windows XP, 2000, Me or 98SE, please go to
page 7for instructions.
Installing and connecting on Windows Vista
1Insert the Wireless-G USB CD into the CD or DVD drive. The
CD should start automatically.
If the AutoPlay dialog box appears, click Run Setup.exe.
If the User Account Control dialog box appears, click
Continue.
2On the Language Selection screen, select your language.

3On the next screen, select Installation Wizard, and then on the
following screen select USB.
4On the Zoom Wireless-G USB Installation Wizard Welcome
screen, click OK to install the adapter.
If a message tells you that Windows can't verify the publisher of
the driver software, select Install this driver software anyway.
5At the prompt, plug in the USB Adapter and click OK.
A pop-up notification message tells you that your hardware has
been installed successfully.
6On the Zoom installation menu, select Exit.
If a message appears saying that the program might not have
installed correctly, click This program installed correctly.
4

To connect to a network:
1From the Start menu select Connect To.
2In the Connect to a network dialog box, highlight the desired
network and click Connect.
•If your desired network is secured, in the next dialog box
enter the security key or password and click Connect.
•If your desired network is unsecured, in the message box
select Connect Anyway.
Note: We strongly recommend that you choose a secured
network. For brief information on wireless security, see
page 9below.
If you have difficulty connecting, make sure you have entered
the correct password. Then perform a power cycle on your
computer and router/gateway/access point as described in the
Troubleshooting Tips on page 10.
5

6
3In the Successfully connected to [desired network] dialog
box, you have three options. You can:
•Select Save the network and Start this connection
automatically if you always want to connect to the same
network. Then click Close. The next time you start your
computer you will automatically connect to the selected
network.
•Select Save the network and clear the Start this
connection automatically check box if you don't want to
automatically connect to this network every time you start
your computer but you will want to connect in the future.
Click Close to display the Select a location . . . dialog box
where you choose a location. Windows Vista automatically
applies the correct network security settings.
If the User Account Control dialog box appears, click
Continue.
•Click Close to complete the connection procedure. Select
this option if you are connecting to this network only one
time.
To disconnect from the current network:
1From the Start menu, select Connect to.
2In the Disconnect or Connect to another network dialog box,
select the current network and click Disconnect.
In the Are You Sure? message box, click Disconnect again.
3In the next dialog box, you can connect to another network or
click Close to complete the disconnect procedure.

7
Installing and connecting on Windows XP, 2000,
Me and 98SE
1Insert the USB Adapter CD into your CD drive. The CD should
start automatically. (If it does not, on the Windows desktop click
the Start button, click Run, and then type e:\setup.exe where e
is the letter of your CD drive.)
2On the Language Selection screen, select your language.
3On the next screen select Installation Wizard, and then on the
following screen select USB.
Windows Me users: if prompted, restart your computer.
4Follow the prompts to complete the installation.
Windows 2000 users: If the Digital Signature Not Found
message appears, click Yes to continue.
5On the final screen, click Finish.
6On the Zoom installation screen, click Exit, remove the
installation CD, then turn off your computer.
(If the Zoom screen is minimized to a button on the taskbar,
maximize the screen so you can exit the installation.)
7While the computer is off, plug the USB adapter into a USB port
on your computer.
8Turn the computer back on. Windows will find your new
hardware. If you see an Unsigned driver message, click
Continue anyway.

Windows 2000: If the Digital Signature Not Found message
appears, click Yes to continue.
Windows Me and 98: If prompted, restart your computer.
Congratulations! Your installation is complete. Follow the
instructions below to get connected.
To connect to a network:
1Double-click the Zoom Wireless-G USB icon on your desktop
to open the configuration software.
2In the Zoom Wireless-G USB window, click the Site Survey
tab to see a list of available wireless networks.
There are two types of wireless networks: Infrastructure and Ad
Hoc.
•In an Infrastructure network, wireless devices communicate
with each other via a wireless access point, router, or ADSL
modem with built-in wireless technology.
•In an Ad Hoc network, a group of wireless devices
communicate directly with other “client” devices that are
using wireless adapters. The network does not include a
wireless access point or wireless router.
Note: In the unlikely event that you use an Ad Hoc network,
you must set up Static IP addressing. See Appendix A:
TCP/IP Settings in the User’s Guide on the CD.
3Highlight the network you want and click Join.
8

9
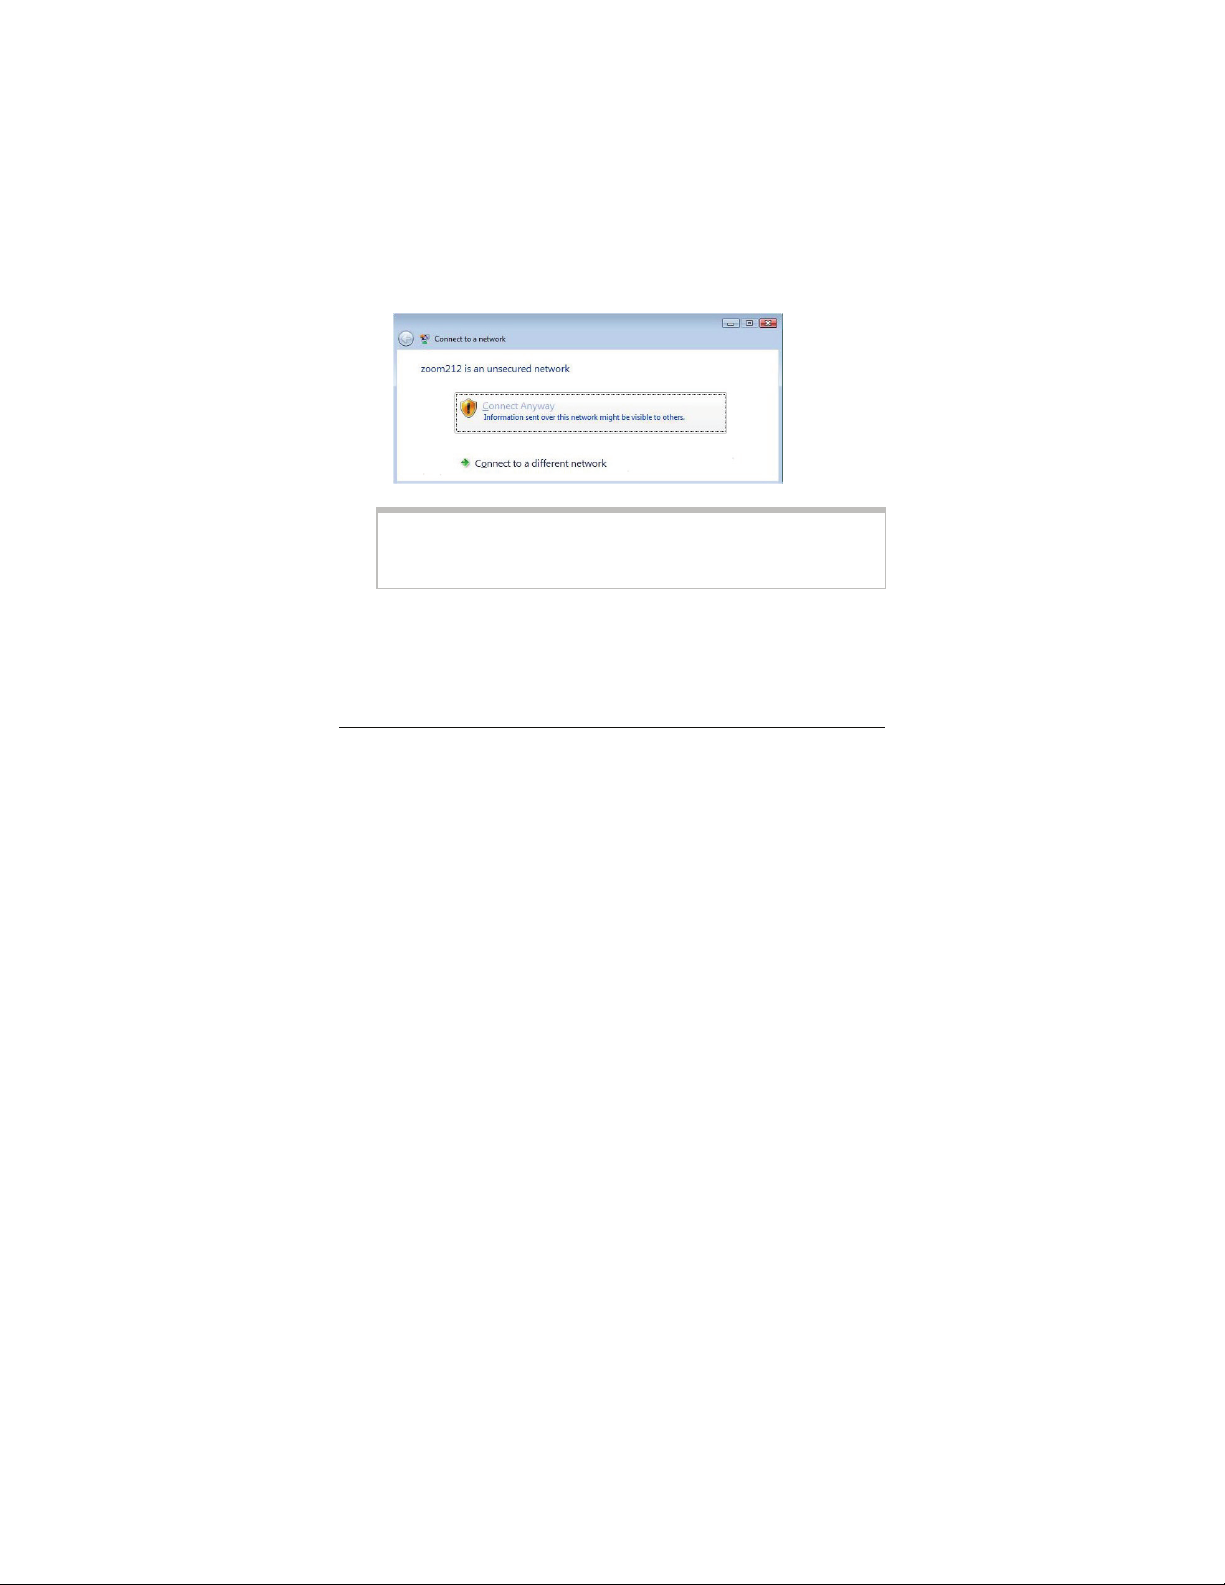
4If you join a wireless network that does not have security, you
should now be connected. To check your connection, open your
Web browser and go to your favorite site.
Setting wireless security
Important: In an infrastructure network, if you want wireless
security you must first enable it on the wireless access point. Then
you enable security on the adapter, using the same type of
security that you used for the access point.
We highly recommend security. There are five security options
with the Wireless-G USB adapter: WPA2-PSK, WPA-PSK, WEP,
WPA2-Enterprise, and WPA.
We recommend that you choose WPA2-PSK if the access point
and the devices in your network support this option. Please see the
User Guide on the CD for descriptions of the five security options
and for setup instructions.
Advanced Features (Windows XP, 2000, Me and 98)
The features described below are all explained fully in the User’s
Guide on the CD.
•Profiles. If you plan to link to more than one network – for
example, an office and a home network – you can set up
profiles so that you can switch easily from one network to
another.
•Link Status (Infrastructure networks only). Use the Status area
on the utility’s Configuration tab to monitor the strength of the
wireless radio signal as well as the transmission speed and

10
quality. If your link deteriorates, you can connect to a network
with a stronger signal, as long as you configure the correct
security.
•Site Survey. Use this window to survey all the wireless
networks available to you, with their signal strength, channel
number, and configured security.
Troubleshooting Tips
If your Zoom Wireless-G USB adapter is not working properly, try
these steps:
•Make sure the adapter is not damaged and that it is securely
connected to the computer, either directly or through its short
USB extender cable.
•Perform a power cycle – take the following steps in the order
given:
1. Turn off the computer.
2. Turn off your wireless router, gateway or access point and
wait a few seconds.
3. Turn the router, gateway or access point back on.
4. Turn on the computer.
Windows Vista users: Try again to connect your wireless
adapter to a network using Windows Networking.
•If you are using the USB extender cable, try changing the
orientation of the adapter.
•Try the adapter in another USB port.

11
•Unplug other USB devices from your computer one at a time
and see if that allows the adapter to work.
•If possible, try installing the adapter on another computer.
Windows XP, 2000, Me and 98 troubleshooting options
If the problem does not seem to be hardware-related, click the
Zoom icon on your desktop to run the Wireless-G USB software.
1Check the Configuration tab to make sure that the SSID and
Network Type settings for the adapter are the same as these
settings for the other devices in your wireless network.
2Then click the Security tab and check the settings to make sure
that the adapter is configured for the same security system as
the other devices in your wireless network. Make sure that your
security key is the same – remember that the keys are case-
sensitive.
3Check your TCP/IP settings as discussed in Appendix A of the
User Guide.
4If the adapter still does not work, uninstall the software and then
re-install it. Unplug the adapter from the USB port, then select
Start – All Programs – Zoom Wireless-G USB – Uninstall
Zoom Wireless-G USB. Then re-install the Wireless-G USB
software.
If none of the above solutions work, go to www.zoom.com and
select Technical Support for help via email or phone.

12
Guía Rápida
Para completar la instalación necesitará lo siguiente:
Un computador con Windows® Vista, XP, 2000, Me, o98SE con
un puerto USB, una unidad para CD, y por lo menos 6 MB de
espacio libre de disco duro
Importante: Instalar el software ANTES de conectar el adaptador
USB Inalámbrica-G en su computador.
Si esta operando Windows XP, 2000, Me o 98SE, por favor vaya
a la página 16 y siga las instrucciones.
Como instalar y conectar a Windows Vista
1Inserte el CD de la USB Inalámbrica-G en la unidad de CD o
DVD. El CD deberá iniciarse automáticamente.
Si aparece la caja de dialogo AutoPlay, haga clic en Run
Setup.exe.
Si la caja de dialogo User Account Control (Control Cuenta de
Usuario) aparece haga clic en Continue (Continuar).
2En la pantalla Language Selection (Selección de Idioma),
seleccione su idioma.

3En la siguiente pantalla, seleccione Installation Wizard
(Administrador de Instalación) y luego en la siguiente pantalla
seleccione USB.
4En la pantalla de bienvenida Zoom Wireless-G USB
Installation Wizard (Administrador de Instalación USB
Inalámbrica-G de Zoom), haga clic en OK para instalar el
adaptador.
Si un mensaje le indica que Windows no puede verificar el
editor del driver de software seleccione Install this driver
software anyway (Instale este driver de software de todos
modos).
5A la indicación, conecte el Adaptador USB y haga clic en OK.
Un mensaje de notificación emergente le dirá que su hardware
ha sido instalado con éxito.
6En el menú de instalación Zoom, seleccione Exit (Salir).
13

Si aparece un mensaje diciendo que puede que el programa no
haya sido instalado correctamente, haga clic en This program
installed correctly (Este programa se instalo correctamente).
Para conectar a una red:
1En el menú Start (Inicio) seleccione Connect to (Conectar a).
2En la caja de dialogo Connect to a network (Conectar a una
Red) resalte la red deseada y haga clic en Connect (Conectar).
•Si asegura la red deseada, en la siguiente caja de dialogo
ingrese la clave de seguridad o contraseña y haga clic en
Connect (Conectar).
•Si su red no esta asegurada, en la caja de mensaje
seleccione Connect Anyway (Conectar de todos modos).
Nota: Recomendamos firmemente que escoja una red
asegurada. Para información breve sobre la seguridad
inalámbrica vaya a la página 19.
14

15
Si tiene dificultad para conectarse asegúrese de que ha
ingresado la contraseña correcta. Luego ejecute un ciclo de
poder en su computador y enrutador/gateway/punto de acceso
según lo descrito en Consejos para la Solución de Problemas
en la página 20.
3En la caja de dialogo Successfully connected to [desired
network] (Conectado con éxito a la [red deseada]), tiene tres
opciones, que son:
•Seleccione Save the network (Guardar la red) e Start this
connection automatically (Iniciar automáticamente esta
conexión) si desea conectarse siempre a la misma red.
Luego haga clic en Close (Cerrar). La próxima vez que inicie
su computador se conectará automáticamente a la red
seleccionada.
•Seleccione Save the network (Guardar la red) y despeje la
caja de verificación Start this connection automatically
(Inicie automáticamente esta conexión) si no desea
conectarse automáticamente a esta red cada vez que inicie
su computador pero desea conectarse en el futuro. Haga clic
en Close (Cerrar) para desplegar la caja de dialogo Select a
location . . . (Seleccione un sitio. . .) donde usted
seleccionará un sitio. Windows Vista aplicara
automáticamente las configuraciones de seguridad correctas
para la red.
Si aparece la caja de dialogo User Account Control
(Control Cuenta de Usuario), haga clic en Continue
(Continuar).

16
•Haga clic en Close (Cerrar) para completar el procedimiento
de conexión. Seleccione esta opción si se esta conectando a
esta red solo por una vez.
Para desconectarse de la red actual:
1En el menú Start (Inicio), seleccione Connect to (Conectar a).
2En la caja de dialogo Disconnect or Connect to another network
(Desconectar o Conectar a otra Red), seleccione la red actual y
haga clic en Disconnect (Desconectar).
En la caja de mensaje Are You Sure? (¿Esta seguro?) haga clic
en Disconnect (Desconectar) nuevamente.
3En la próxima caja de dialogo, se puede conectar a otra red o
hacer clic en Close (Cerrar) para completar el procedimiento de
desconexión.
Como instalar y conectar a Windows XP, 2000,
Me y 98SE
1Inserte el CD del Adaptador USB en la unidad de CD. El CD
deberá iniciarse automáticamente. (Si no lo hace, vaya al
escritorio de Windows y haga clic en el botón Start (Inicio), clic
en Run (Correr) y luego digite e:\setup.exe donde ees la letra
de su unidad CD).
2En la pantalla Language Selection (Selección de Idioma)
seleccione su idioma.

17
3En la siguiente pantalla seleccione Installation Wizard
(Administrador de Instalación) y luego en la siguiente pantalla
seleccione USB.
Usuarios de Windows Me: si así se lo indica reinicie su
computador.
4Siga las indicaciones para completar la instalación.
Usuarios de Windows 2000: Si aparece el mensaje Digital
Signature Not Found (Firma Digital no Encontrada), haga clic
en Yes (Si) para continuar.
5En la última pantalla, hacer clic en Finalizar.
6En la pantalla de instalación Zoom, haga clic en Exit (Salir),
retire el CD de instalación, luego turn off your computer
(apague su computador).
(Si la pantalla Zoom esta minimizada a un botón en la barra de
tareas, maximizar la pantalla de manera que pueda salir de la
instalación).
7Mientras el computador esta apagado, conecte el adaptador
USB en un puerto USB de su computador.
8Vuelva a encender el computador. Windows encontrará su
Nuevo hardware. Si ve el mensaje Driver sin Firmar, haga clic
en Continue anyway (Continuar de todos modos).
Felicitaciones! Su instalación ya esta completa. Siga las
instrucciones a continuación para conectarse.

Para conectar a una red:
1Haga doble clic en el icono Zoom Wireless-G USB (USB
Inalámbrica-G Zoom) en su escritorio para abrir el software de
configuración.
2En la ventana Wireless-G USB Zoom, hacer clic en el tab Site
Survey (Inspección del Sitio) para ver la lista de redes
inalámbricas disponibles.
Hay dos tipos de redes inalámbricas: de Infraestructura y Ad
Hoc.
En una red de Infraestructura, los dispositivos inalámbricos
se comunican entre si por medio de un punto de acceso
inalámbrico, un enrutador o un módem ADSL con tecnología
inalámbrica incorporada.
En una red Ad Hoc, un grupo de dispositivos inalámbricos
se comunican directamente con otros dispositivos “clientes”
que estén usando adaptadores inalámbricos. La red no
incluye ni un punto de acceso inalámbrico ni un enrutador
inalámbrico.
Importante: En el caso poco probable de que use una red
Ad Hoc, se debe configurar un Direccionamiento IP Estático.
Ver Apéndice A: Configuraciones TCP/IP en la Guía del
Usuario del CD.
3Resaltar la red que desea y hacer clic en Unir (Join).
18

19
4Si se une a una red inalámbrica que no tiene seguridad, ahora
deberá estar conectado. Para verificar su conexión, abrir el
navegador Web e ir a su sitio favorito.
Como Configurar la Seguridad Inalámbrica
Importante: Si desea tener seguridad inalámbrica en una red de
infraestructura primero deberá habilitarla en un punto de acceso
inalámbrico. Luego deberá habilitar la seguridad en el adaptador usando el
mismo tipo de seguridad que uso para el punto de acceso.
Recomendamos en grado sumo la seguridad. Existen cinco
opciones de seguridad para el adaptador Inalámbrico- G USB:
WPA2-PSK, WPA-PSK, WEP, WPA2-Enterprise y WPA.
Le recomendamos que escoja el WPA2-PSK si el punto de
acceso y los dispositivos de su red soportan esta opción. Para ver
las descripciones de las cinco opciones de seguridad y las
instrucciones de configuración ver la Guía del Usuario del CD.
Características Avanzadas (Windows XP, 2000, Me y 98)
Las características que se describen a continuación están todas
explicadas en detalle en la Guía del Usuario del CD.
•Perfiles (Profiles). Si planea enlazarse a más de una red – por
ejemplo, a una red de oficina y a una de casa – usted puede
configurar perfiles de manera que pueda cambiarse fácilmente
de una red a la otra.
•Estatus del Enlace (Solo para redes de Infraestructura). Usar el
área de Status en el tab de Configuración tanto para
monitorear la fortaleza de la señal inalámbrica de radio como
también la velocidad de transmisión y la calidad. Si su enlace se

20
deteriora, usted se puede conectar a una red con una señal más
fuerte, siempre que configure la seguridad adecuada.
•Inspección del Sitio. Use esta ventana para inspeccionar todas
las redes inalámbricas disponibles al usuario, la fortaleza de su
señal, el número de canal y la seguridad configurada.
Consejos para la Solución de Problemas
Si su adaptador Inalámbrico-G USB Zoom no esta funcionando
adecuadamente, intente estos pasos:
•Asegurarse de que el adaptador no este dañado y de que este
conectado correctamente al computador ya sea directamente o
mediante su cable USB.
•Perform a power cycle – take the following steps in the order
given:
1. Apague el computador.
2. Apague su enrutador inalámbrico, gateway o punto de
acceso y espere unos pocos segundos.
3. Encienda el enrutador, gateway o punto de acceso.
4. Encienda el computador.
Usuarios de Windows Vista: Intente nuevamente conectar su
adaptador inalámbrico a una red usando Windows
Networking.
•Si esta usando el cable USB, trate de cambiar la orientación del
adaptador.
•Pruebe el adaptador en otro puerto USB.
•Desconecte otros dispositivos USB de su computador, uno por
uno y observe si esto permite que el adaptador funcione.
Table of contents
Languages:
Other Zoom Adapter manuals

Zoom
Zoom Game Point! 4420 User manual

Zoom
Zoom 4410B/TF User manual

Zoom
Zoom 1077 Series User manual

Zoom
Zoom Wireless-N Router User manual

Zoom
Zoom ISDN TA/V.34 User manual

Zoom
Zoom 5900 User manual

Zoom
Zoom BT4163 Quick start guide

Zoom
Zoom 5821F User manual

Zoom
Zoom 4320A User manual

Zoom
Zoom ISDN TA User manual