Zoom GFX-1 User manual

Introduction
Operation Manual
Thank you for selecting the
ZOOM GFX-1
(hereafter
simply called the "GFX-1").
Please take the time to read this manual carefully so as
to get the most out of the unit and to ensure optimum
performance and reliability.
Retain this manual, the warranty card and all other
documentation for future reference.
Contents
SAFETY PRECAUTIONS . . . . . . . . . . . . . . . . . . . . . . . . 2
Features . . . . . . . . . . . . . . . . . . . . . . . . . . . . . . . . . . . . 3
Basic Terms . . . . . . . . . . . . . . . . . . . . . . . . . . . . . . . . . 4
Operating the Unit on Battery Power . . . . . . . . . . . . . 5
Controls and Functions / Connections . . . . . . . . . . . . 6
Selecting Patches for Play . . . . . . . . . . . . . . . . . . . . . 10
Using the Tuner Function . . . . . . . . . . . . . . . . . . . . . 12
Making/Changing DRIVE Module Settings . . . . . . . . 14
Editing a Patch . . . . . . . . . . . . . . . . . . . . . . . . . . . . . . 16
Storing/Copying Patches . . . . . . . . . . . . . . . . . . . . . . 18
Using a Separately Available Expression Pedal . . . 20
Restoring the Factory Defaults . . . . . . . . . . . . . . . . . 21
Effect Sequence . . . . . . . . . . . . . . . . . . . . . . . . . . . . . 22
Effect Parameters . . . . . . . . . . . . . . . . . . . . . . . . . . . 23
Specifications / Troubleshooting . . . . . . . . . . . . . . . 37
Usage Precautions . . . . . . . . . . . . . . . . . . . . . . . . . . . 38
Patch List . . . . . . . . . . . . . . . . . . . . . . . . . . . . . . . . . . 39
© ZOOM Corporation
Reproduction of this manual, in whole or in part, by any means, is prohibited.
GFX1(E).fm 1 ページ 2004年9月9日 木曜日 午後5時18分

2
ZOOM GFX-1
In this manual, symbols are used to highlight
warnings and cautions for you to read so that
accidents can be prevented. The meanings of these
symbols are as follows:
This symbol indicates explanations
about extremely dangerous
matters. If users ignore this symbol
and handle the device the wrong
way, serious injury or death could
result.
This symbol indicates explanations
about dangerous matters. If users
ignore this symbol and handle the
device the wrong way, bodily injury
and damage to the equipment
could result.
Please observe the following safety tips and
precautions to ensure hazard-free use of the GFX-1.
Power requirements
Since power consumption of this unit is
fairly high, we recommend the use of an
AC adapter whenever possible. When
powering the unit from batteries, use only
alkaline types.
[AC adapter operation]
•Be sure to use only an AC adapter which
supplies 9 V DC, 300 mA and is
equipped with a "center minus" plug
(Zoom AD-0006). The use of an adapter
other than the specified type may
damage the unit and pose a safety
hazard.
• Connect the AC adapter only to an AC
outlet that supplies the rated voltage
required by the adapter.
• When disconnecting the AC adapter
from the AC outlet, always grasp the
adapter itself and do not pull at the
cable.
• During lightning or when not using the
unit for an extended period, disconnect
the AC adapter from the AC outlet.
[Battery operation]
•Use four conventional IEC R6 (size AA)
batteries (alkaline).
• The GFX-1 cannot be used for
recharging.
•Pay close attention to the labelling of the
battery to make sure you choose the
correct type.
•When not using the unit for an extended
period, remove the batteries from the
unit.
•If battery leakage has occurred, wipe the
battery compartment and the battery
terminals carefully to remove all
remnants of battery fluid.
• While using the unit, the battery
compartment cover should be closed.
Environment
To prevent the risk of fire, electric shock
or malfunction, avoid using your GFX-1
in environments where it will be exposed
to:
• Extreme temperatures
•Heat sources such as radiators or stoves
• High humidity or moisture
• Excessive dust or sand
• Excessive vibration or shock
Handling
•Never place objects filled with liquids,
such as vases, on the GFX-1 since this
can cause electric shock.
• Do not place naked flame sources, such
as lighted candles, on the GFX-1 since
this can cause fire.
• The GFX-1 is a precision instrument.
Do not exert undue pressure on the keys
and other controls. Also take care not to
drop the unit, and do not subject it to
shock or excessive pressure.
•Take care that no foreign objects (coins
or pins etc.) or liquids can enter the unit.
Connecting cables and input and
output jacks
You should always turn off the power to
the GFX-1 and all other equipment before
connecting or disconnecting any cables.
Also make sure to disconnect all
connection cables and the power cord
before moving the GFX-1.
Alterations
Never open the case of the GFX-1 or
attempt to modify the product in any way
since this can result in damage to the unit.
Volume
Do not use the GFX-1 at a loud volume
for a long time since this can cause
hearing impairment.
W
arning
Caution
W
arning
W
arning
W
arning
Caution
W
arning
Caution
SAFETY PRECAUTIONS
Caution
GFX1(E).fm 2 ページ 2004年9月9日 木曜日 午後5時18分
3
ZOOM GFX-1
The GFX-1 is a sophisticated multi-effect processor for guitar with the
following great features.
●
Superior performance
The GFX-1 provides a palette of 34 built-in high-quality effects,
including a wide variation of distortion settings and flexible
modulation effects. Up to nine effects can be used simultaneously. In
performance and features, the GFX-1 far surpasses anything in its
class.
●
Sturdy case and smooth operation feel
The metal body and large foot switches of the GFX-1 are designed to
withstand the rigors of use on stage. The intuitive operation of the unit
is derived from the highly popular ZOOM 606. Dedicated selectors for
the most important distortion effects make the unit a snap to use.
Controlling distortion type and intensity during a performance is
smooth and easy.
●
Built-in auto-chromatic tuner
The integrated auto-chromatic tuning function is tailored for the needs
of the guitarist and can be used on stage.
●
Compatible with expression pedal
Connecting an optional expression pedal makes it easy to adjust effect
depth or volume with your foot during play. Whether you choose pedal
wah or gutsy pitch bend, the range of available sounds is on a par with
top-range units.
●
Dual power supply principle allows use anywhere
Besides the AC adapter, the unit can also be powered from four IEC
R6 (size AA) batteries. Continuous operating time on batteries is
approximately 7 hours with manganese batteries and 24 hours with
alkaline batteries.
Features
GFX1(E).fm 3 ページ 2004年9月9日 木曜日 午後5時18分

4
ZOOM GFX-1
This section explains some important terms that you will find in this manual.
●
Effect module
As shown in the illustration below, the effect sound of the GFX-1 is
created by routing the signal through a series of different effects. Each
of these effects is called an effect module.
In addition to effect modules such as DRIVE (distortion), MOD/
PITCH (modulation), or DLY/REV (delay and reverb), you can also
use the ZNR (Zoom Noise Reduction) and amp simulator
simultaneously. Parameters such as effect intensity can be adjusted for
each module, and modules can be switched on and off as needed.
●
Effect type
Each effect module of the GFX-1 contains a variety of effects in the
same general family. These are called effect types, and you can select
one of these at a time. For example, the MOD/PITCH module
comprises the effect types chorus, flanger, pitch shifter, etc.
●
Effect parameter
Each effect module has various parameters that control how the effect
operates. By adjusting the parameters for each module, you have a
considerable amount of control over the final sound.
●
Patch
In the GFX-1, effects are stored and called up in patches. A patch
contains information about module on/off settings, selected effect
types, and effect parameter settings. The GFX-1 can store 40 patches
in its internal memory.
●
Bank
A combination of 4 patches is called a bank. The GFX-1 has a total of
10 banks which are labelled A through J. The patches in each bank are
numbered 1 through 4. To select a patch, you specify the bank and the
patch number. A1 selects patch 1 in bank A, and F4 selects patch 4 in
bank F.
Basic Terms
COMP WAH AMPZNREQDRIVE
MOD/PITCH DLY/REV
IN OUT
GFX1(E).fm 4 ページ 2004年9月9日 木曜日 午後5時18分

5
ZOOM GFX-1
●
Play mode/edit mode
These terms refer to the operation state of the GFX-1. The mode is
selected with the PLAY/EDIT selector. In play mode, you select the
effects for playing, and in edit mode, you can change the effect
settings.
BANK J
PATCH 1
PATCH 2
PATCH 3
PATCH 4
BANK i
PATCH 1
PATCH 2
PATCH 3
PATCH 4
BANK H
PATCH 1
PATCH 2
PATCH 3
PATCH 4
BANK G
PATCH 1
PATCH 2
PATCH 3
PATCH 4
BANK F
PATCH 1
PATCH 2
PATCH 3
PATCH 4
BANK E
PATCH 1
PATCH 2
PATCH 3
PATCH 4
BANK d
PATCH 1
PATCH 2
PATCH 3
PATCH 4
BANK C
PATCH 1
PATCH 2
PATCH 3
PATCH 4
BANK b
PATCH 1
PATCH 2
PATCH 3
PATCH 4
BANK A
PATCH 1
PATCH 2
PATCH 3
PATCH 4
Operating the Unit on Battery
NOTE
When a dot (.) flashes on the display, the batteries are almost exhausted.
Replace them as soon as possible.
Four IEC R6
(size AA) batteries
Battery
compartment cover
Battery polarity alternates
for each slot.
OPEN
Battery
compartment
cover
GFX-1 bottom
Latch
1.
Turn the unit over, push the latch
of the battery compartment
cover, and lift the cover up.
3.
Close the battery compartment cover.
Make sure that the latch snaps shut.
2.
Insert four fresh IEC R6 (size AA)
batteries into the battery
compartment.
GFX1(E).fm 5 ページ 2004年9月9日 木曜日 午後5時18分

6
ZOOM GFX-1
Controls and Functions / Connections
Display
Top Panel
Shows various information necessary
for operation of the GFX-1, such as
patch number, parameter settings, etc.
DRIVE LED
Indicates the on/off
status of the DRIVE
module.
DRIVE selector
Selects the distortion (effect type)
used in the DRIVE module.
GAIN [+] / [-] keys
Adjust the DRIVE
module distortion
intensity and gain.
Foot switches [1] – [4]
Serve for effect patch switching and for
operation of the tuner function.
STORE key
Serves for storing an
edited patch or copying
an existing patch to
another location.
GFX1(E).fm 6 ページ 2004年9月9日 木曜日 午後5時18分

7
ZOOM GFX-1
Controls and Functions / Connections
PLAY/EDIT selector
Switches between play mode and edit mode and also
serves to select the module for editing.
BANK [W] / [Q] keys
Serve for switching effect patch banks.
VALUE [+] / [-] keys
Serve for adjusting setting values for various items.
GFX1(E).fm 7 ページ 2004年9月9日 木曜日 午後5時18分

8
ZOOM GFX-1
Controls and Functions / Connections
Rear Panel
Connections
[INPUT] jack
Connect the guitar to this jack.
To use the GFX-1 in a mono
configuration, connect the
[OUTPUT/PHONES] jack to the amplifier
using a cable with mono phone plugs.
By using a Y cable and connecting the
output to two amplifiers, you can get a
wider sound spread from the effects. It is
also possible to connect a pair of
headphones to this jack.
[OUTPUT / PHONES] jack
This jack is used for conection to a guitar amplifier or a pair of stereo
headphones. A Y-splitter cable can also be used in this jack to conect
the GFX-1 to two amplifiers.
GFX1(E).fm 8 ページ 2004年9月9日 木曜日 午後5時18分

9
ZOOM GFX-1
Controls and Functions / Connections
[DC IN] (AC adapter) jack
The dedicated AC adapter AD-0006 (9 V DC, 300 mA,
center minus) can be connected here.
[POWER ON/OFF] switch
Serves to turn the GFX-1 on and off.
[CONTROL IN] jack
An optional expression pedal (FP01/FP02) can be connected here.
[CONTROL IN]
By connecting an optional
expression pedal (FP01/FP02) here,
you can adjust the effect intensity.
To guard against inadvertently disconnecting the AC
adapter cable, wind the cable around the hook, as
shown in the illustration.
GFX1(E).fm 9 ページ 2004年9月9日 木曜日 午後5時18分

10
ZOOM GFX-1
Selecting Patches for Play
To try out the GFX-1, we recommend that you simply play your
instrument while switching patches.
HINT
Power-on
Set GFX-1 to
play mode
Immediately after turning on
power to the GFX-1, the unit will
be in play mode even if the
[PLAY/EDIT] selector is set to a
different position.
Switch patches
Connect your instrument and guitar amp to the GFX-1,
and then set the [POWER ON/OFF] switch on the rear
panel to ON.
Turn on the guitar amplifier and adjust the volume to a
suitable position.
When the [PLAY/EDIT]
selector is set to a
different position, set it
to "PLAY".
The currently selected bank
and patch number are shown
on the display
To switch patches in play
mode, use the foot
switches [1] - [4].
Bank Patch number
GFX1(E).fm 10 ページ 2004年9月9日 木曜日 午後5時18分

11
ZOOM GFX-1
Selecting Patches for Play
HINT
HINT
Switch banks
To adjust the master volume
To select among the banks A - J, use the BANK
[W]/[Q] keys.
Press one of the VALUE [+]/[-] keys
to change the value.
The setting range is 0 - 50. When the unit is turned off
and on again, the setting will be reset to 40.
When using headphones, the master volume setting
can be used to adjust the listening volume.
By pressing foot switches [1] and [2] together, you can
switch to the previous bank, and by pressing foot switches
[3] and [4] together, you can switch to the next bank.
GFX1(E).fm 11 ページ 2004年9月9日 木曜日 午後5時18分

12
ZOOM GFX-1
The GFX-1 incorporates an auto-chromatic tuner for guitars. To use the
tuner function, the built-in effects must be bypassed (temporarily turned
off) or muted (original sound and effect sound turned off).
NOTE
The tuner function is not available if the PLAY/EDIT selector is set to a position
other than PLAY.
Using the Tuner Function
b
P
M
t
A
8
A
8
Switch to bypass or mute
Tune the
guitar
Press the foot switch [1] - [4] that corresponds to the currently
selected patch.
Play the open
string you want to
tune, and watch
the display.
Bypass Mute
The left side of the display shows the
note which is closest to the current pitch.
Pressing and immediately
releasing the switches sets
the unit to the bypass
condition. Pressing and
holding the switches for at
least 1 second sets the unit
to the mute condition.
GFX1(E).fm 12 ページ 2004年9月9日 木曜日 午後5時18分

13
ZOOM GFX-1
Using the Tuner Function
b
P
M
t
A
8
A
8
HINT
Adjusting the reference pitch of
the tuner
Return to play
mode
Tune the other strings in
the same way.
Press one of the foot
switches [1] - [4].
Press one of the VALUE [+] / [-] keys.
When power to the unit is turned off
and on again, the setting reverts to the
default of "40" (center A = 440 Hz).
The right side of the display
shows a symbol that indicates by
how much the tuning is off.
The current reference pitch is shown for about 2
seconds. The default setting is "40" (center A = 440 Hz).
The patch of that switch is
called up.
Use the VALUE [+] / [-] keys to adjust the setting.
The setting range is 35 - 45 (center A = 435 to 445 Hz).
The default reference pitch of the tuner (the setting which is
established when the unit is turned on) is center A = 440 Hz.
You can fine-adjust this reference pitch if desired.
Pitch is high Pitch is correct Pitch is low
Indication turns faster the more the pitch is off.
GFX1(E).fm 13 ページ 2004年9月9日 木曜日 午後5時18分

14
ZOOM GFX-1
The DRIVE module comprises various distortion types and gain settings,
which can be adjusted with the dedicated selector and keys at any time.
HINT
The following operation can be carried out in play mode or edit mode.
Making/Changing DRIVE Module Settings
F
d
2
6
HINT
NOTE
Select the DRIVE module distortion
type
When the DRIVE LED is out, the DRIVE module is off. If you
switch to a different effect type in this condition, the module is
automatically turned on.
Use the DRIVE selector to select the desired distortion
type (effect type).
By setting the PLAY/EDIT
selector to the DRIVE
position, you can check
the current effect type.
The selected effect type
name is shown for
about 2 seconds on the
display. For a detailed
list of effect types, see
the section "Effect
Parameters" at the end
of this manual.
GFX1(E).fm 14 ページ 2004年9月9日 木曜日 午後5時18分

15
ZOOM GFX-1
Making/Changing DRIVE Module Settings
F
d
2
6
Adjust the DRIVE module gain
Press one of the GAIN [+] / [-] keys.
Depending on which effect type is currently
selected, distortion depth or signal gain changes.
The GAIN parameter value is shown for about 2
seconds on the display.
HINT
To switch the
DRIVE module
on or off
Press the GAIN [+] / [-]
keys together.
The change made in this way is
only temporary. When you
select a different patch, the
setting will revert to the original
condition. If you want to keep
the change, store the patch, as
described on page 18.
When the DRIVE module is
switched off, the DRIVE
LED goes out.
GFX1(E).fm 15 ページ 2004年9月9日 木曜日 午後5時18分

16
ZOOM GFX-1
Editing means changing the various effect parameter settings of a patch.
Use an existing patch as a starting point and adjust the parameters to
create your own and original sound.
Editing a Patch
3
0
Lit
Parameter value
HINT
Select the effect parameter
The DRIVE
module can also
be directly edited
by using the
DRIVE selector
and GAIN [+] / [-]
keys (→p. 14).
Terminate the edit mode
Use the PLAY/EDIT selector to select the module and
parameter you want to edit.
Set the PLAY/EDIT selector to "PLAY".
The unit reverts to the play mode.
For information
on effect modules
and parameters,
see the section
"Effect
Parameters" at
the end of this
manual.
The GFX-1 switches to the edit mode and the value of the currently
selected effect parameter appears on the display. When the GFX-1 is in
edit mode, a dot is shown in the bottom right corner of the display.
GFX1(E).fm 16 ページ 2004年9月9日 木曜日 午後5時18分
17
ZOOM GFX-1
Editing a Patch
3
0
NOTE
NOTE
Changing the
module on/off
setting
Press one of the foot switchs
[1] – [4].
This switches the effect module
selected with the PLAY/EDIT selector
on or off.
When the [PLAY/EDIT] selector is set to
"PATCH LEVEL" the module cannot be
turned off.
The editing changes made in this way are only temporary. When you
return to the play mode and select a different patch, the settings will
revert to the original condition. If you want to keep the change, store the
settings before switching the patch (→p.18 ).
Adjust the parameter setting
value
Use the VALUE [+] / [-] keys.
The keys operate as follows.
•Keeping one key depressed: Va lue changes continuously.
•Hold down one key while pressing the other key:
Value increases/ decreases rapidly.
•Pressing both keys simultaneously:
Switch to next effect type in same module.
GFX1(E).fm 17 ページ 2004年9月9日 木曜日 午後5時18分

18
ZOOM GFX-1
An edited patch can be stored at any desired location in the internal
memory of the unit. It is also possible to copy an existing patch and store
it at another location.
Storing/Copying Patches
b
4
A
1
b
4
Press the STORE key in play
mode or edit mode
Specify the store/copy target location
The bank and patch number on the display are flashing.
Use the BANK [W]/[Q] keys and the
foot switches [1] - [4] to specify the
patch to be used as a store/copy
target.
GFX1(E).fm 18 ページ 2004年9月9日 木曜日 午後5時18分
19
ZOOM GFX-1
Storing/Copying Patches
b
4
A
1
b
4
NOTE
NOTE
When the store/copy process is executed, the
previous content of the store target is overwritten
and cannot be restored if it was a user-created
patch. You should therefore take care when
selecting a target patch. However, the factory
default settings of an individual patch or all patches
can be restored, as described on page 21.
The store process is also canceled when the
[PLAY/EDIT] selector or the [DRIVE] selector
is operated.
Press the STORE key once more
When the store/copy process is completed, the
unit reverts to the original mode, with the target
patch being selected.
The store process is aborted and the unit
reverts to the previous mode.
To cancel the store/copy
process
Press the VALUE [+]/[-] keys or GAIN
[+]/[-] keys instead of the STORE key.
GFX1(E).fm 19 ページ 2004年9月9日 木曜日 午後5時18分
20
ZOOM GFX-1
The GFX-1 is equipped with a [CONTROL IN] jack that accepts an
optional expression pedal. Connect and use the pedal as follows.
■
Using the expression pedal (FP01/FP02)
If you connect an optional expression pedal to the [CONTROL IN] jack,
the pedal can be used to adjust the volume or as a real-time controller for
an effect parameter.
For information on parameters that can be controlled with the FP01/
FP02, see pages 25 - 36.
1. Insert the plug of the FP01/FP02 into the [CONTROL IN]
jack and turn the GFX-1 on.
2. Select the patch in play mode and move the expression
pedal up or down.
Depending on what is programmed for that patch, the pedal will
change the volume or an effect parameter.
HINT
The pedal can also be used in edit mode.
NOTE
If you connect the expression pedal while the GFX-1 is on, malfunction may
occur. Be sure to connect the pedal first, and then turn the GFX-1 on.
Using a Separately Available Expression Pedal
GFX1(E).fm 20 ページ 2004年9月9日 木曜日 午後5時18分
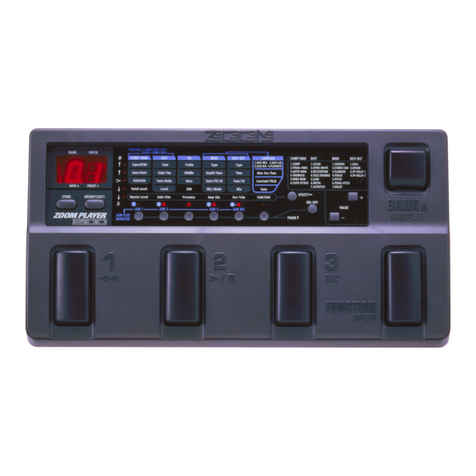
Table of contents
Other Zoom Computer Hardware manuals

Zoom
Zoom Gateway/Router V3 User manual

Zoom
Zoom STUDIO 1201 User manual

Zoom
Zoom 606 Guitar User manual

Zoom
Zoom SIB-01 User manual

Zoom
Zoom Zoom player 3000 User manual

Zoom
Zoom 9120 User manual

Zoom
Zoom 607 Bass User manual

Zoom
Zoom 708II Bass User manual

Zoom
Zoom Player 3000B User manual

Zoom
Zoom B2FOUR User manual
Popular Computer Hardware manuals by other brands

Velleman
Velleman K8042 Illustrated assembly manual

Resolution Products
Resolution Products RE926S-03-00 OWNER'S OPERATION AND INSTALLATION MANUAL

IEI Technology
IEI Technology PCIE-H610 user manual

Matrox
Matrox RT.X2 user guide

Pilz
Pilz PNOZ mc5p operating instructions

Panasonic
Panasonic MICROCOMPUTER MN103S user manual