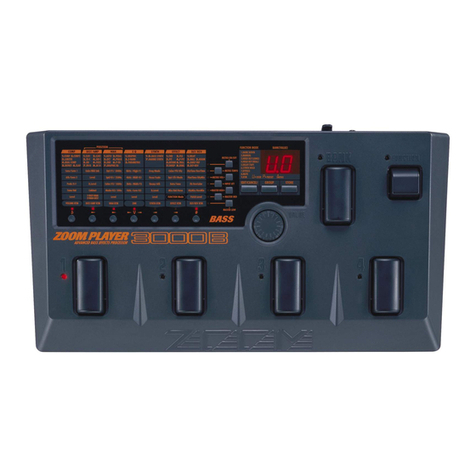
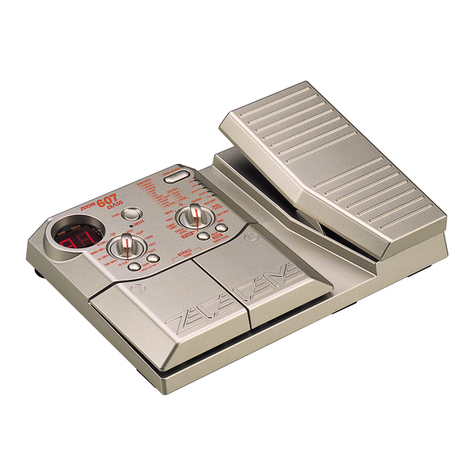
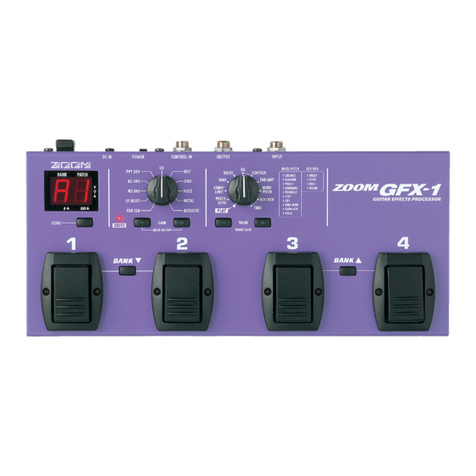
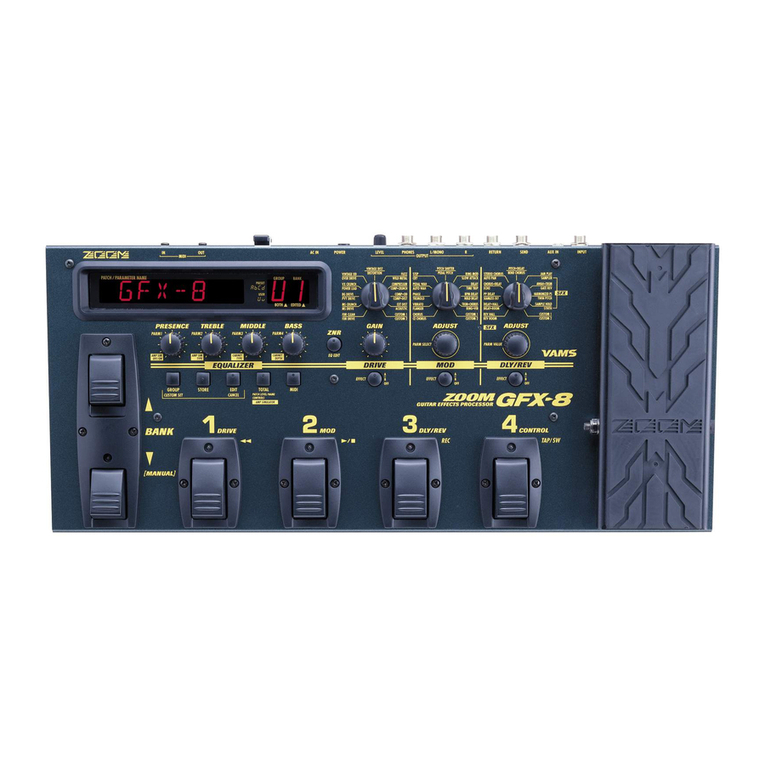
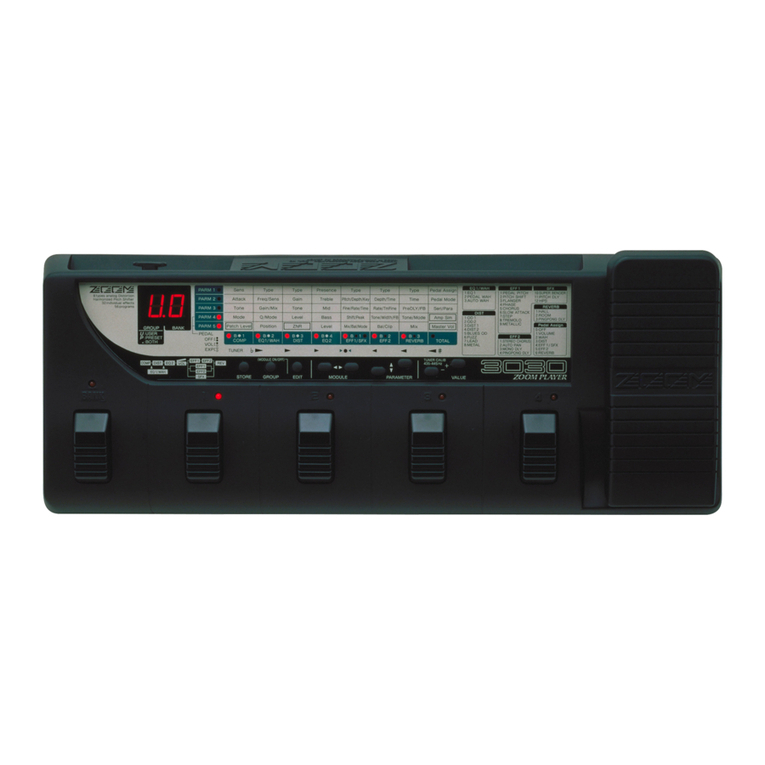
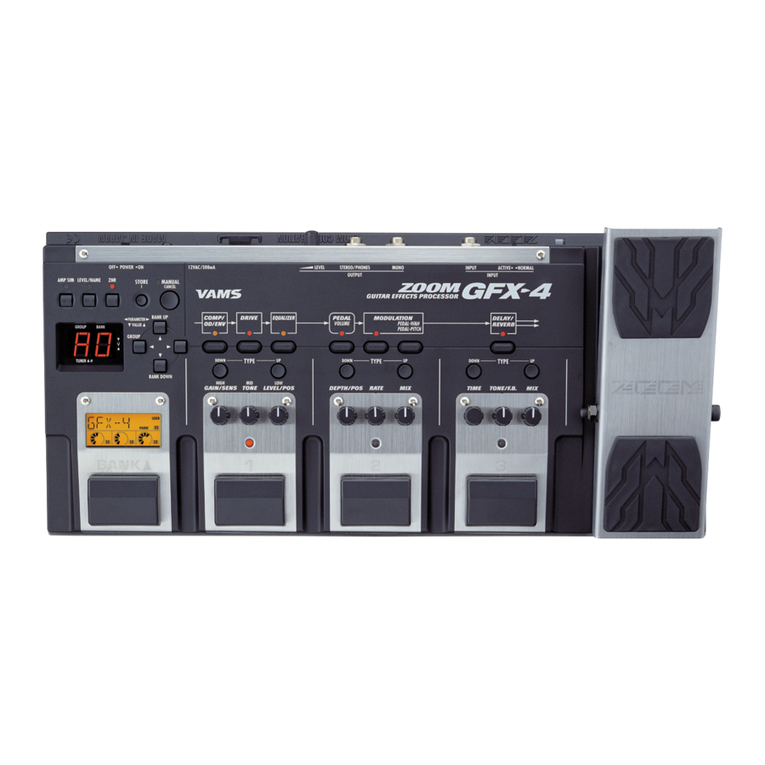
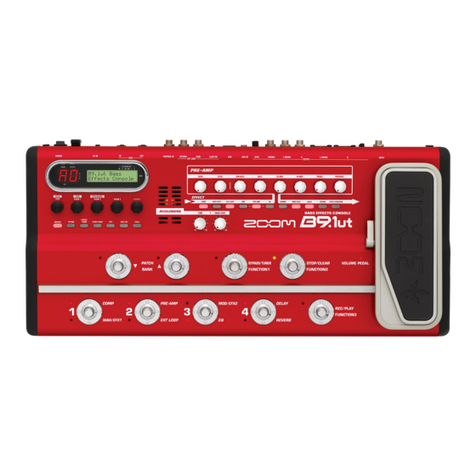
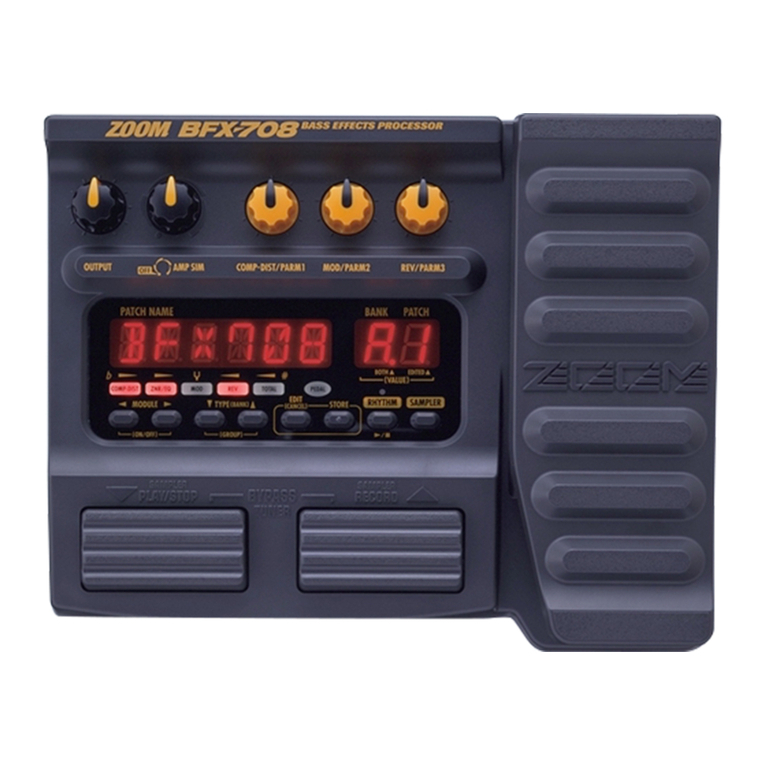
Zoom Zoom player 3000 User manual

BANK
FUNCTION
VALUE
ADVANCED GUITAR EFFECTS PROCESSOR
RIVE
NG BOX
s/Gain
king Gain)
tack/Tone
alking Mode)
Level
(MIC Level)
VOLUME RTM
PRE DRIVE RTM
Gain/Top
Tone/Body
Level
ZNR
POSITION
MAIN DRIVE RTM
High/Depth
Midf/Rate/Sens
MidG/Reso
Low/Stage/Inv
Level
EQ RTM
Pitch/Key
Tone/Scale/Time
Shift/Mode/Dly
Bal/Mix
Amp Sim Mode
EFFECT1 RTM
Pitch/Key/Depth
Fine/Scale/Rate
Shift/Mode
Bal/Mix/Peak
SERI/PARA
EFFECT2 RTM
Time(x100mS)
Time(x1mS)
Feedback
Mix
SEAMLESS
DELAY RTM
Time
Tone/FB
Mix
Patch Level
FUNCTION Mode
REVERB RTM
1.OD
3.DIST
5.GRU
7.
METAL
1.3-BAND EQ
2.PHASE
3.PEDAL-WAH
4.AUTO-WAH
1.PITCH
3.DETUNE
4.PEDAL-PITCH
5.STRING
2.HPS 1.HALL1
3.ROOM 1
4.ROOM 2
5.PP-DELAY
2.HALL21.PITCH
3.CHO
5.TREM/PAN
6.RING MOD
1.NORMAL
2.ANALOG
3.HOLD
2.HPS
4.FLG
2.B-OD
4.FUZZ
6.LEAD
8.ACO
MAIN DRIVE EQ EFFECT 1 EFFECT 2 DELAY REVERB
NG BOX POSITION SERI/PARA SEAMLESS
FUNCTION MODE BANK(VALUE)
EDIT(CANCEL)GROUP STORE
1.MANUAL
2.BANK DOWN
3.DELAY(
TAP&HOLD
)
4.BYPASS
5.MUTE
6.RTM
7.VOLUME
PRESETUSER
(BOTH) SEAMLESS
. .
UP
A 1
ADVANCED GUITAR EFFECTS PROCESSOR
OPERATION MANUAL

Introduction ••••••••••••••••••••••••••••••••••••• 1
Names of Parts••••••••••••••••••••••••••••••••• 2
Top Panel View •••••••••••••••••••••••••••••••• 2
Rear Panel View•••••••••••••••••••••••••••••••• 2
Getting Connected •••••••••••••••••••••••••••• 3
Before Playing•••••••••••••••••••••••••••••••••• 3
Introducing the 3000•••••••••••••••••••••••••• 4
Outline •••••••••••••••••••••••••••••••••••••••••• 4
Patches and Parameters •••••••••••••••••••••• 5
Global Parameters ••••••••••••••••••••••••••••• 5
Operation Modes••••••••••••••••••••••••••••••• 5
Let's Try Out Some Patches
(Play Mode Operation) ••••••••••••••••••••••6
Display for Play Mode Panel •••••••••••••••••• 6
Selecting a Patch •••••••••••••••••••••••••••••• 7
Adjusting the Master Volume•••••••••••••••••••8
Temporarily Switching Effects Off
(Bypass Function) ••••••••••••••••••••••••••• 9
Temporarily Turning the Sound Off
(Mute Function) •••••••••••••••••••••••••••••••10
Tuning Your Guitar (Autotuner Function)•••••11
Adjusting the Standard Pitch of the Tuner
(Calibration)•••••••••••••••••••••••••••••••••• 12
Changing the Patch Sound
(Edit Mode Operation)•••••••••••••••••••••13
Switching between Edit
and Play Modes ••••••••••••••••••••••••••••• 13
Panel Display in Edit Mode •••••••••••••••••• 14
Switching Effect Modules On/Off ••••••••••• 15
Changing Parameter Settings of Effects•••• 16
Storing Patches••••••••••••••••••••••••••••••• 17
Using the FUNCTION switch••••••••••••• 18
Assigning a Function to
the FUNCTION Switch•••••••••••••••••••••• 18
Manual Mode ••••••••••••••••••••••••••••••••• 20
Delay Time Tap Input••••••••••••••••••••••••• 21
Using Hold Delay ••••••••••••••••••••••••••••• 22
Adjusting Effect Parameters
in Real Time (RTM) •••••••••••••••••••••••••••23
Controlling the Volume in Real Time
(VOLUME RTM)•••••••••••••••••••••••••••••••26
Other Functions••••••••••••••••••••••••••••••••28
Using the Amp Simulator••••••••••••••••••••••28
Returning the 3000 to the Factory Default
Settings (All Initialize/Factory Recall) •••••••••29
Using the Talking Box Effect ••••••••••••••30
Connecting the Microphone ••••••••••••••••••30
Using the Microphone to Control
the Talking Box Effect•••••••••••••••••••••••••30
Using the Remote Pedal ••••••••••••••••••••32
RP01 Names of Parts / Connections ••••••••32
Using the RP01 for Controlling the RTM
Target Parameter (RTM Mode) •••••••••••••••33
Using the RP01 for Delay Tap Input or
Hold Delay Operation (DELAY Mode)••••••••35
Effect Types and Parameters•••••••••••• 36
PRE DRIVE •••••••••••••••••••••••••••••••••••••36
MAIN DRIVE••••••••••••••••••••••••••••••••••••37
EQ•••••••••••••••••••••••••••••••••••••••••••••••39
EFFECT1••••••••••••••••••••••••••••••••••••••••40
EFFECT2••••••••••••••••••••••••••••••••••••••••42
DELAY ••••••••••••••••••••••••••••••••••••••••••43
REVERB ••••••••••••••••••••••••••••••••••••••••45
Troubleshooting ••••••••••••••••••••••••••••• 46
SPECIFICATIONS •••••••••••••••••••••••••••• 48
USAGE AND SAFETY
PRECAUTIONS •••••••••••••••••••••••••••••••••49
USAGE AND SAFETY PRECAUTIONS•••••••49
Usage Precautions ••••••••••••••••••••••••••••49
CONTENTS
CONTENTS
ADVANCED GUITAR EFFECTS PROCESSOR

Thank you for selecting the ZOOM PLAYER 3000 (hereafter simply called the
"3000").
The 3000 is a multi-effect device with the following features:
• Furnishes 37 types of diverse single effects; also contains an amp
simulator and noise reduction function (ZNR). A maximum of nine effects
can be combined freely.
• The effects can be used by switching among a maximum of 40 user and
40 preset types of patches (for a total of 80 patches).
• Two types of distortion effects can be used simultaneously. This allows
creating a wide variety of distortion and overdrive sounds not possible
with a conventional multi-effect device.
• Built-in harmonized pitch shifter (HPS) performs intelligent pitch shift
matching the scale being played.
• Unique TALKING BOX effect allows use of a connected microphone to
create a talking simulator sound.
• Seamless patch change function assures smooth transitions by allowing
the delay of the previous patch to continue after the patch has been
switched.
• User-definable function switch can be adapted for bypass or muting, and
can also serve as a controller for changing effect parameters or level
settings in real time. Even without additional equipment, the 3000 allows
a wide variety of expression styles.
• Optional remote pedal RP01 can be used to control effect parameters
and volume from any convenient spot. Use as a pedal wah or pedal pitch
shifter is also possible.
• Tap input lets you match the delay time to the tempo of the current song,
using the function switch or remote pedal. These also are handy for the
hold delay function which automatically repeats phrases played on the
instrument.
• Three types of amp simulators generate a guitar amp sound for audio
speakers and headphone monitors.
• Incorporates an auto-chromatic tuner for guitar, enabling easy tuning on
stage.
Please take the time to read this manual carefully so as to get the most out of
your 3000 and to ensure optimum performance and reliability.
1●
ADVANCED GUITAR EFFECTS PROCESSOR
Introduction
Introduction

● 2
Names of Parts
Names of Parts
Top Panel View
Rear Panel View
ADVANCED GUITAR EFFECTS PROCESSOR
BANK
FUNCTION
VALUE
ADVANCED GUITAR EFFECTS PROCESSOR
1.COMP
2.BOOSTER
3.OVERDRIVE
4.TALKING BOX
Sens/Gain
(Talking Gain)
Attack/Tone
(Talking Mode)
Level
(MIC Level)
VOLUME RTM
PRE DRIVE RTM
Gain/Top
Tone/Body
Level
ZNR
POSITION
MAIN DRIVE RTM
High/Depth
Midf/Rate/Sens
MidG/Reso
Low/Stage/Inv
Level
EQ RTM
Pitch/Key
Tone/Scale/Time
Shift/Mode/Dly
Bal/Mix
Amp Sim Mode
EFFECT1 RTM
Pitch/Key/Depth
Fine/Scale/Rate
Shift/Mode
Bal/Mix/Peak
SERI/PARA
EFFECT2 RTM
Time(x100mS)
Time(x1mS)
Feedback
Mix
SEAMLESS
DELAY RTM
Time
Tone/FB
Mix
Patch Level
FUNCTION Mode
REVERB RTM
1.OD
3.DIST
5.GRU
7.
METAL
1.3-BAND EQ
2.PHASE
3.PEDAL-WAH
4.AUTO-WAH
1.PITCH
3.DETUNE
4.PEDAL-PITCH
5.STRING
2.HPS 1.HALL1
3.ROOM 1
4.ROOM 2
5.PP-DELAY
2.HALL21.PITCH
3.CHO
5.TREM/PAN
6.RING MOD
1.NORMAL
2.ANALOG
3.HOLD
2.HPS
4.FLG
2.B-OD
4.FUZZ
6.LEAD
8.ACO
PRE DRIVE MAIN DRIVE EQ EFFECT 1 EFFECT 2 DELAY REVERB
TALKING BOX POSITION SERI/PARA SEAMLESS
FUNCTION MODE BANK(VALUE)
EDIT(CANCEL)GROUP STORE
1.MANUAL
2.BANK DOWN
3.DELAY(TAP&HOLD)
4.BYPASS
5.MUTE
6.RTM
7.VOLUME PRESETUSER
(BOTH) SEAMLESS
UP
U O
FUNCTION switch
BANK switch
Foot switches 1– 4
Display
EDIT (CANCEL) key
GROUP key
STORE key
Parameter Select keys
Parameter LEDs
VALUE knob
Module LEDs
Module Select keys
300mA
DC9V OUTPUT
(PHONES)
MIC IN INPUT
REMOTE IN
SERIAL NO.
OUTPUT (PHONES) jack
GUITAR INPUT jackMIC INPUT jack
DC INPUT (AC adapter) jack
REMOTE jack

3●
Connect the accessory AC adapter to the DC INPUT jack. The power to
the 3000 is ON when the AC adapter is plugged into a power outlet.
Adjust the volume of the musical instrument and the amplifier while
playing the instrument.
300mA
DC9V OUTPUT
(PHONES)
MIC IN INPUT
REMOTE IN
SERIAL NO.
PHONES OUT
MIC IN INPUT
REMOTE IN
OUTPUT
DC INPUT
Guitaramplifier
Headphones
AC adapter
Guitar
HM01
RP01
When using the optional
remote pedal RP01, use the
remote cable supplied with
the RP01 to connect the
REMOTE OUT jack of the
RP01 to the REMOTE IN
jack of the 3000. Power for
the remote pedal will be
supplied by the 3000.
Other remote cables
available as options (RC05,
RC10) cannot be used.
When using a
microphone for the
TALKING BOX
effect, connect it to
the MIC IN jack. The
optional headset
microphone HM01 or
another dynamic
microphone can be
used.
A pair of stereo headphones can be
connected to the OUTPUT
(PHONES) jack. If the volume level
from the headphones is low, use
phones with low impedance.
When using the 3000 with one guitar
amplifier, make the connection with a
mono cable. When using two guitar
amplifiers, a stereo Y cable is required. The
use of two amplifiers will result in
impressive wide sound for stereo effects.
PEDAL
SW
MODE
SELECT
MONITOR
STATUS
MODE DELECT
PEDAL-WAH ON/OFF(PEDALSW)
DELAYMODE
(PEDALSW TRIGGER)
RTMMODE
VOLUME ASSIGN
PEDAL-PITCH ON/OFF(PEDAL SW)
Getting Connected
Before Playing
STEP
1
Cut the power to the amplifier, turn the volume down to its minimum level, and
connect the 3000 correctly to the musical instrument and amplifier
STEP
2
Power up the 3000.
STEP
3
Switch ON the power to the amplifier.
ADVANCED GUITAR EFFECTS PROCESSOR
Names of Parts
After completing connection, the volume has to be adjusted according to the following procedure.

The 3000 is a multi-effect processor featuring seven effect modules (effect blocks). Each effect module works
as a single effect, equivalent to a compact effect device. In other words, the 3000 can be thought of as
functioning in the same way as seven compact effect devices linked together.A compact effect device comes
with knobs for adjusting the type of effect and depth. Similarly, the effect modules have parameters that
determine the type of effect and depth. Take a look at the top panel of the 3000. At
the top left, you will see the effect modules
(PRE DRIVE - REVERB) arranged in a
horizontal row. The various parameters (1 -
7) which together form the effect module are
listed vertically under the module name.
(Some parameters are independent of effect
modules, and some are general parameters
which work on the entire 3000.)
The 3000 effect modules are of the following types:
• PRE DRIVE This effect module provides light distortion and also includes settings for the talking box
effect for use with a microphone (4 effect types).
• MAIN DRIVE This effect module provides hard distortion and high-gain sound effects. Settings for the
acoustic guitar simulator are also part of this module (8 effect types).
• EQ The built-in three-band equalizer allows separate boost or cut in the low, mid, and high
frequency range. Phaser and wah settings also belong to this module (4 effect types).
• EFFECT1 This is the pitch shifter effect module (5 effect types).
• EFFECT2 This is the modulation effect module (6 effect types).
• DELAY This is the delay effect module (3 effect types).
• REVERB This is the reverb effect module (5 effect types).
All effect modules have several effect types, that is variations which result in different sound. These are called
"effect type". One effect type can be selected for each effect module.
The following diagram shows the signal flow in the 3000, and the effect types that can be selected for
each effect module.
● 4
Introducing the 3000
Outline
ADVANCED GUITAR EFFECTS PROCESSOR
1.COMP
2.BOOSTER
3.OVERDRIVE
4.TALKING BOX
Sens/Gain
(Talking Gain)
Attack/Tone
(Talking Mode)
Level
(MIC Level)
VOLUME RTM
PRE DRIVE RTM
Gain/Top
Tone/Body
Level
ZNR
POSITION
MAIN DRIVE RTM
High/Depth
Midf/Rate/Sens
MidG/Reso
Low/Stage/Inv
Level
EQ RTM
Pitch/Key
Tone/Scale/Time
Shift/Mode/Dly
Bal/Mix
Amp Sim Mode
EFFECT1 RTM
Pitch/Key/Depth
Fine/Scale/Rate
Shift/Mode
Bal/Mix/Peak
SERI/PARA
EFFECT2 RTM
Time(x100mS)
Time(x1mS)
Feedback
Mix
SEAMLESS
DELAY RTM
Time
Tone/FB
Mix
Patch Level
FUNCTION Mode
REVERB RTM
1.OD
3.DIST
5.GRU
7.
METAL
1.3-BAND EQ
2.PHASE
3.PEDAL-WAH
4.AUTO-WAH
1.PITCH
3.DETUNE
4.PEDAL-PITCH
5.STRING
2.HPS 1.HALL1
3.ROOM 1
4.ROOM 2
5.PP-DELAY
2.HALL21.PITCH
3.CHO
5.TREM/PAN
6.RING MOD
1.NORMAL
2.ANALOG
3.HOLD
2.HPS
4.FLG
2.B-OD
4.FUZZ
6.LEAD
8.ACO
PRE DRIVE MAIN DRIVE EQ EFFECT 1 EFFECT 2 DELAY REVERB
TALKING BOX POSITION SERI/PARA SEAMLESS
Parameters
Effect modules
PRE DRIVE EQ
EQ
MAIN DRIVE
TALKING BOX Amp Sim
VOLUME
EFFECT1 EFFECT2
EFFECT1
EFFECT2
DELAY REVERB
P1– P9
SERI/PARA
*1 *1
*3 *2
Sr
*1 The MAIN DRIVE module and EQ effect module
can be connected in three different ways:
parallel connection, serial connection in the order
MAIN DRIVE ➝ EQ, or serial connection in the
order EQ ➝ MAIN DRIVE.
*2 The EFFECT1 module and EFFECT2 module can
be connected in two different ways: parallel or
serial.
*3 When the TALKING BOX effect has been selected
for the PRE DRIVE module, the MAIN DRIVE
module cannot be used, and the signal is sent
directly to the EQ module.
ZNR

Internal settings for the 3000 can be stored in memory and retrieved from memory in units called
"patches".
A patch is a combination of up to seven effect modules. The patch comprises the parameter settings for
the effect modules, as well as information about ZNR settings, signal routing, etc. The section enclosed
by a dotted line in the above illustration is a patch.
The storage for patches in the 3000 accommodates two types of groups, the USER group that can be
freely created, altered and stored by the user, and the read-only PRESET group that is factory-defined.
Each group supports 40 types of patches, for a storage total of 80. When using the 3000, you can call up
these patches instantly by pressing the foot switch on the panel.
Also, the parameters comprising the patches can be adjusted, and stored in the USER group. In the 3000,
patches are invoked in sets of four, and patches can be changed by using the Foot Switches. These sets of
four patches are called "banks". The USER group and the PRESET group each have banks numbered
from 0 through 9. To select a patch, first switch to the appropriate bank number and then select the
desired patch.
Besides the parameters for individual effect modules, the 3000 also has global parameters which work on
all patches.
When a global parameter is adjusted, its effect will remain even when the patch is switched. However, if
the unit is turned off without storing a patch, the global parameter setting will revert to the previous
value. When wishing to keep the new global parameter setting, choose any patch from the USER group
and store it, as described on page 17.
The workings of the 3000 can be divided into major function categories according to their purpose. These
functions are called "modes". The 3000 has the following four modes:
• Play mode For performance In this mode, you perform by selecting a patch and using an effect.
You can turn the effect sound off temporarily, and use the tuning function in this
mode.
• Manual mode In this mode, effect modules can be switched on and off individually, using the
BANK switch and Foot Switches 1 - 4 on the top panel. This is suitable for use
during a performance.
• Edit mode In this mode, the effect parameters of the currently selected patch can be edited
(changed) by the user. Global parameters are also set in this mode.
• Special mode This mode serves for initializing the 3000. USER group settings and patches can be
selectively returned to the factory default.
5●
1.COMP
2.BOOSTER
3.OVERDRIVE
4.TALKING BOX
ZNR
POSITION Amp Sim Mode
SERI/PARA Patch Level
FUNCTION Mode
1.OD
2.B-OD
3.DIST
4.FUZZ
5.GRU
6.LEAD
7.
METAL
8.ACO
1.3-BAND EQ
2.PHASE
3.PEDAL-WAH
4.AUTO-WAH
1.PITCH
2.HPS
3.DETUNE
4.PEDAL-PITCH
5.STRING
1.HALL1
2.HALL2
3.ROOM 1
4.ROOM 2
5.PP-DELAY
1.PITCH
2.HPS
3.CHO
4.FLG
5.TREM/PAN
6.RING MOD
1.NORMAL
2.ANALOG
3.HOLD
PRE DRIVE MAIN DRIVE EQ EFFECT 1 EFFECT 2 DELAY REVERB
VOLUME RTM
Patch Parameter
Global Parameters
Patch
Patches and Parameters
Global Parameters
Operation Modes
ADVANCED GUITAR EFFECTS PROCESSOR
Introducing the 3000

The Play mode is for selecting a patch and playing. When you power up the 3000, it automatically
activates in Play mode, and the USER group's Bank 0, Patch Number 1 is selected.
In Play mode, the display LEDs on the panel show the following information:
(1) Group
The type of group currently selected is indicated in the left side of the display.
(2) Bank Number
The currently selected bank number is indicated in the right side of the display.
(3) Patch Number
The LED of the Foot Switch 1 - 4 corresponding to the currently selected patch number lights up.
(4) Effect Module ON/OFF
The panel module LEDs light for the effect modules are that is on in the currently selected patch.
● 6
Let's Try Out Some Patches (Play Mode Operation)
Let's Try Out Some Patches
(Play Mode Operation)
Display for Play Mode Panel
ADVANCED GUITAR EFFECTS PROCESSOR
VALUE
ADVANCED GUITAR EFFECTS PROCESSOR
1.COMP
2.BOOSTER
3.OVERDRIVE
4.TALKING BOX
Sens/Gain
(Talking Gain)
Attack/Tone
(Talking Mode)
Level
(MIC Level)
VOLUME RTM
PRE DRIVE RTM
Gain/Top
Tone/Body
Level
ZNR
POSITION
MAIN DRIVE RTM
High/Depth
Midf/Rate/Sens
MidG/Reso
Low/Stage/Inv
Level
EQ RTM
Pitch/Key
Tone/Scale/Time
Shift/Mode/Dly
Bal/Mix
Amp Sim Mode
EFFECT1 RTM
Pitch/Key/Depth
Fine/Scale/Rate
Shift/Mode
Bal/Mix/Peak
SERI/PARA
EFFECT2 RTM
Time(x100mS)
Time(x1mS)
Feedback
Mix
SEAMLESS
DELAY RTM
Time
Tone/FB
Mix
Patch Level
FUNCTION Mode
REVERB RTM
1.OD
3.DIST
5.GRU
7.
METAL
1.3-BAND EQ
2.PHASE
3.PEDAL-WAH
4.AUTO-WAH
1.PITCH
3.DETUNE
4.PEDAL-PITCH
5.STRING
2.HPS 1.HALL1
3.ROOM 1
4.ROOM 2
5.PP-DELAY
2.HALL21.PITCH
3.CHO
5.TREM/PAN
6.RING MOD
1.NORMAL
2.ANALOG
3.HOLD
2.HPS
4.FLG
2.B-OD
4.FUZZ
6.LEAD
8.ACO
PRE DRIVE MAIN DRIVE EQ EFFECT 1 EFFECT 2 DELAY REVERB
TALKING BOX POSITION SERI/PARA SEAMLESS
FUNCTION MODE BANK(VALUE)
EDIT(CANCEL)GROUP STORE
1.MANUAL
2.BANK DOWN
3.DELAY(TAP&HOLD)
4.BYPASS
5.MUTE
6.RTM
7.VOLUME PRESETUSER
(BOTH) SEAMLESS
UP
U O
(1) (2)
(4)
(3)

In the Play mode, you can play by choosing one of the patches from among the 80 types (40 USER group
patches plus 40 PRESET patches) in memory.
7●
When choosing a patch, first decide which group of patches you want
to use. With each push of the GROUP key, the left side of the display
changes in the following sequence.
• U (USER) Only USER group patches can be used.
• P (PRESET) Only PRESET group patches can be used.
• U. or P. (BOTH) Patches of both USER and PRESET
groups can be used.
Each time you step, you change to the next higher bank number. (The
bank number flashes.)
In this status, the patch will not yet be changed
The LEDs lights for the Foot Switch you stepped on, telling you that a
patch has been selected. Also, the indicated bank number changes
from flashing to constantly lit display.
Here, try switching the patches while you are actually playing
your instrument, and find out what types of patches are stored in
the 3000.
HINTHINT
HINTHINT
BANK
FUNCTION
VALUE
ADVANCED GUITAR EFFECTS PROCESSOR
1.COMP
2.BOOSTER
3.OVERDRIVE
4.TALKING BOX
Sens/Gain
(Talking Gain)
Attack/Tone
(Talking Mode)
Level
(MIC Level)
VOLUME RTM
PRE DRIVE RTM
Gain/Top
Tone/Body
Level
ZNR
POSITION
MAIN DRIVE RTM
High/Depth
Midf/Rate/Sens
MidG/Reso
Low/Stage/Inv
Level
EQ RTM
Pitch/Key
Tone/Scale/Time
Shift/Mode/Dly
Bal/Mix
Amp Sim Mode
EFFECT1 RTM
Pitch/Key/Depth
Fine/Scale/Rate
Shift/Mode
Bal/Mix/Peak
SERI/PARA
EFFECT2 RTM
Time(x100mS)
Time(x1mS)
Feedback
Mix
SEAMLESS
DELAY RTM
Time
Tone/FB
Mix
Patch Level
FUNCTION Mode
REVERB RTM
1.OD
3.DIST
5.GRU
7.
METAL
1.3-BAND EQ
2.PHASE
3.PEDAL-WAH
4.AUTO-WAH
1.PITCH
3.DETUNE
4.PEDAL-PITCH
5.STRING
2.HPS 1.HALL1
3.ROOM 1
4.ROOM 2
5.PP-DELAY
2.HALL21.PITCH
3.CHO
5.TREM/PAN
6.RING MOD
1.NORMAL
2.ANALOG
3.HOLD
2.HPS
4.FLG
2.B-OD
4.FUZZ
6.LEAD
8.ACO
PRE DRIVE MAIN DRIVE EQ EFFECT 1 EFFECT 2 DELAY REVERB
TALKING BOX POSITION SERI/PARA SEAMLESS
FUNCTION MODE BANK(VALUE)
EDIT(CANCEL)GROUP STORE
1.MANUAL
2.BANK DOWN
3.DELAY(TAP&HOLD)
4.BYPASS
5.MUTE
6.RTM
7.VOLUME PRESETUSER
(BOTH) SEAMLESS
UP
U O
1
2
3
GROUP
BANK
GROUP=PRESET
GROUP=BOTH
GROUP=USER
USER PRESET BOTH
GROUP GROUP
Selecting a Patch
STEP
1
Press the GROUP key to select the group.
STEP
2
Select a bank by stepping on the BANK switch.
STEP
3
Step on a Foot Switch (1 – 4) to select a patch.
ADVANCED GUITAR EFFECTS PROCESSOR
(Play Mode Operation)
Let's Try Out Some Patches

● 8
ADVANCED GUITAR EFFECTS PROCESSOR
In Play mode, regardless of the selectable patches, the final volume output by the 3000 can be controlled
by the Master Volume.
The display will indicate the current value (1 - 50) of the Master Volume
for one second (default setting: 40).
• The Master Volume setting works in common for all patches. It
cannot be stored for separate patches.
• If you want to change the volume for specific patches, adjust the
patch level in Edit mode. For details, see page 45.
The master level setting cannot be stored. It needs to be adjusted
every time the unit is turned on.
NOTE
HINTHINT
BANK
FUNCTION
VALUE
ADVANCED GUITAR EFFECTS PROCESSOR
1.COMP
2.BOOSTER
3.OVERDRIVE
4.TALKING BOX
Sens/Gain
(Talking Gain)
Attack/Tone
(Talking Mode)
Level
(MIC Level)
VOLUME RTM
PRE DRIVE RTM
Gain/Top
Tone/Body
Level
ZNR
POSITION
MAIN DRIVE RTM
High/Depth
Midf/Rate/Sens
MidG/Reso
Low/Stage/Inv
Level
EQ RTM
Pitch/Key
Tone/Scale/Time
Shift/Mode/Dly
Bal/Mix
Amp Sim Mode
EFFECT1 RTM
Pitch/Key/Depth
Fine/Scale/Rate
Shift/Mode
Bal/Mix/Peak
SERI/PARA
EFFECT2 RTM
Time(x100mS)
Time(x1mS)
Feedback
Mix
SEAMLESS
DELAY RTM
Time
Tone/FB
Mix
Patch Level
FUNCTION Mode
REVERB RTM
1.OD
3.DIST
5.GRU
7.
METAL
1.3-BAND EQ
2.PHASE
3.PEDAL-WAH
4.AUTO-WAH
1.PITCH
3.DETUNE
4.PEDAL-PITCH
5.STRING
2.HPS 1.HALL1
3.ROOM 1
4.ROOM 2
5.PP-DELAY
2.HALL21.PITCH
3.CHO
5.TREM/PAN
6.RING MOD
1.NORMAL
2.ANALOG
3.HOLD
2.HPS
4.FLG
2.B-OD
4.FUZZ
6.LEAD
8.ACO
PRE DRIVE MAIN DRIVE EQ EFFECT 1 EFFECT 2 DELAY REVERB
TALKING BOX POSITION SERI/PARA SEAMLESS
FUNCTION MODE BANK(VALUE)
EDIT(CANCEL)GROUP STORE
1.MANUAL
2.BANK DOWN
3.DELAY(TAP&HOLD)
4.BYPASS
5.MUTE
6.RTM
7.VOLUME PRESETUSER
(BOTH) SEAMLESS
UP
U O
1, 2
VALUE
VALUE
Adjusting the Master Volume
STEP
1
Operate the VALUE knob.
STEP
2
While the value is displayed, use the VALUE knob to adjust the volume to the
desired level.
Let's Try Out Some Patches
(Play Mode Operation)

You can switch the 3000 Effect mode OFF temporarily (this is called "bypass"), and monitor the
instrument's direct sound. This is a handy function for checking how the effects are working.
9●
If you lightly step on the Foot Switch and then release your foot within a
second, the 3000 will enter the Bypass status. The LED for the currently
selected patch will flash, and the module LED will light. Also, the
display will indicate the Bypass status with " ", and then change to
" ".
The 3000 will return to the usual Play mode.
The FUNCTION switch can also be used to activate the Bypass
function. For details, please refer to page 19.
When the FUNCTION switch mode is set to bypass or mute, step 1
is invalid. When not wishing to use the Foot Switches 1 - 4 for
on/off switching of the bypass or mute condition, set the
FUNCTION switch mode to BYPASS or MUTE.
NOTE
HINTHINT
BANK
FUNCTION
VALUE
ADVANCED GUITAR EFFECTS PROCESSOR
1.COMP
2.BOOSTER
3.OVERDRIVE
4.TALKING BOX
Sens/Gain
(Talking Gain)
Attack/Tone
(Talking Mode)
Level
(MIC Level)
VOLUME RTM
PRE DRIVE RTM
Gain/Top
Tone/Body
Level
ZNR
POSITION
MAIN DRIVE RTM
High/Depth
Midf/Rate/Sens
MidG/Reso
Low/Stage/Inv
Level
EQ RTM
Pitch/Key
Tone/Scale/Time
Shift/Mode/Dly
Bal/Mix
Amp Sim Mode
EFFECT1 RTM
Pitch/Key/Depth
Fine/Scale/Rate
Shift/Mode
Bal/Mix/Peak
SERI/PARA
EFFECT2 RTM
Time(x100mS)
Time(x1mS)
Feedback
Mix
SEAMLESS
DELAY RTM
Time
Tone/FB
Mix
Patch Level
FUNCTION Mode
REVERB RTM
1.OD
3.DIST
5.GRU
7.
METAL
1.3-BAND EQ
2.PHASE
3.PEDAL-WAH
4.AUTO-WAH
1.PITCH
3.DETUNE
4.PEDAL-PITCH
5.STRING
2.HPS 1.HALL1
3.ROOM 1
4.ROOM 2
5.PP-DELAY
2.HALL21.PITCH
3.CHO
5.TREM/PAN
6.RING MOD
1.NORMAL
2.ANALOG
3.HOLD
2.HPS
4.FLG
2.B-OD
4.FUZZ
6.LEAD
8.ACO
PRE DRIVE MAIN DRIVE EQ EFFECT 1 EFFECT 2 DELAY REVERB
TALKING BOX POSITION SERI/PARA SEAMLESS
FUNCTION MODE BANK(VALUE)
EDIT(CANCEL)GROUP STORE
1.MANUAL
2.BANK DOWN
3.DELAY(TAP&HOLD)
4.BYPASS
5.MUTE
6.RTM
7.VOLUME PRESETUSER
(BOTH) SEAMLESS
UP
U O
1, 2
Release your foot
straight away
Temporarily Switching Effects Off (Bypass Function)
STEP
1
Step on the Foot Switch for the currently selected patch number (the Foot Switch
whose LED is lit) and release your foot straight away.
STEP
2
To release this status, lightly step on and release your foot from the Foot Switch
again, or select another patch.
ADVANCED GUITAR EFFECTS PROCESSOR
(Play Mode Operation)
Let's Try Out Some Patches

● 10
ADVANCED GUITAR EFFECTS PROCESSOR
The mute function temporarily turns the output OFF.
If you have stepped for more than a second on the Foot Switch whose
LED is lit, both effect sound and direct sound will be silenced (muted).
The LED for the currently selected patch will flash, and the module LED
will light. Also, the display will indicate the Mute status with "", and
then change to " ".
The 3000 will return to the usual Play mode.
The FUNCTION switch can also be used to activate the Mute
function. For details, please refer to page 19.
When the FUNCTION switch mode is set to bypass or mute, step 1
is invalid. When not wishing to use the Foot Switches 1 - 4 for
on/off switching of the bypass or mute condition, set the
FUNCTION switch mode to BYPASS or MUTE.
NOTE
HINTHINT
BANK
FUNCTION
VALUE
ADVANCED GUITAR EFFECTS PROCESSOR
1.COMP
2.BOOSTER
3.OVERDRIVE
4.TALKING BOX
Sens/Gain
(Talking Gain)
Attack/Tone
(Talking Mode)
Level
(MIC Level)
VOLUME RTM
PRE DRIVE RTM
Gain/Top
Tone/Body
Level
ZNR
POSITION
MAIN DRIVE RTM
High/Depth
Midf/Rate/Sens
MidG/Reso
Low/Stage/Inv
Level
EQ RTM
Pitch/Key
Tone/Scale/Time
Shift/Mode/Dly
Bal/Mix
Amp Sim Mode
EFFECT1 RTM
Pitch/Key/Depth
Fine/Scale/Rate
Shift/Mode
Bal/Mix/Peak
SERI/PARA
EFFECT2 RTM
Time(x100mS)
Time(x1mS)
Feedback
Mix
SEAMLESS
DELAY RTM
Time
Tone/FB
Mix
Patch Level
FUNCTION Mode
REVERB RTM
1.OD
3.DIST
5.GRU
7.
METAL
1.3-BAND EQ
2.PHASE
3.PEDAL-WAH
4.AUTO-WAH
1.PITCH
3.DETUNE
4.PEDAL-PITCH
5.STRING
2.HPS 1.HALL1
3.ROOM 1
4.ROOM 2
5.PP-DELAY
2.HALL21.PITCH
3.CHO
5.TREM/PAN
6.RING MOD
1.NORMAL
2.ANALOG
3.HOLD
2.HPS
4.FLG
2.B-OD
4.FUZZ
6.LEAD
8.ACO
PRE DRIVE MAIN DRIVE EQ EFFECT 1 EFFECT 2 DELAY REVERB
TALKING BOX POSITION SERI/PARA SEAMLESS
FUNCTION MODE BANK(VALUE)
EDIT(CANCEL)GROUP STORE
1.MANUAL
2.BANK DOWN
3.DELAY(TAP&HOLD)
4.BYPASS
5.MUTE
6.RTM
7.VOLUME PRESETUSER
(BOTH) SEAMLESS
UP
U O
1, 2
Keep your foot more than
one second
Temporarily Turning the Sound Off (Mute Function)
STEP
1
Step on the Foot Switch whose LED is currently lit, keep your foot pressed on the
switch for a moment, and then release it.
STEP
2
To release this status, step on the Foot Switch again, or select another patch.
Let's Try Out Some Patches (Play
Mode Operation)

The 3000 will enter the Bypass status, and you can use the autotuner
function. The display will indicate "", and the module LEDs will
light.
The autotuner function can be used when the 3000 is in Mute
status. This is handy for tuning on stage when you do not want to
produce the sound externally.
The display shows the tone closest to the current pitch. Tune the guitar
until it matches the desired tone.
For tuning an electric bass, use 12F harmonics and tune with the
sound an octave higher.
When the tuner function is ON, the module LED works as a meter,
measuring the accuracy of the tuning. If the pitch matches accurately,
the middle LED (the EFF1 module LED) lights.
The 3000 returns to the Play mode.
HINTHINT
HINTHINT
The 3000 supports a chromatic autotuner function. This function can be used automatically in Bypass or
Mute status.
11 ●
BANK
FUNCTION
VALUE
ADVANCED GUITAR EFFECTS PROCESSOR
1.COMP
2.BOOSTER
3.OVERDRIVE
4.TALKING BOX
Sens/Gain
(Talking Gain)
Attack/Tone
(Talking Mode)
Level
(MIC Level)
VOLUME RTM
PRE DRIVE RTM
Gain/Top
Tone/Body
Level
ZNR
POSITION
MAIN DRIVE RTM
High/Depth
Midf/Rate/Sens
MidG/Reso
Low/Stage/Inv
Level
EQ RTM
Pitch/Key
Tone/Scale/Time
Shift/Mode/Dly
Bal/Mix
Amp Sim Mode
EFFECT1 RTM
Pitch/Key/Depth
Fine/Scale/Rate
Shift/Mode
Bal/Mix/Peak
SERI/PARA
EFFECT2 RTM
Time(x100mS)
Time(x1mS)
Feedback
Mix
SEAMLESS
DELAY RTM
Time
Tone/FB
Mix
Patch Level
FUNCTION Mode
REVERB RTM
1.OD
3.DIST
5.GRU
7.
METAL
1.3-BAND EQ
2.PHASE
3.PEDAL-WAH
4.AUTO-WAH
1.PITCH
3.DETUNE
4.PEDAL-PITCH
5.STRING
2.HPS 1.HALL1
3.ROOM 1
4.ROOM 2
5.PP-DELAY
2.HALL21.PITCH
3.CHO
5.TREM/PAN
6.RING MOD
1.NORMAL
2.ANALOG
3.HOLD
2.HPS
4.FLG
2.B-OD
4.FUZZ
6.LEAD
8.ACO
PRE DRIVE MAIN DRIVE EQ EFFECT 1 EFFECT 2 DELAY REVERB
TALKING BOX POSITION SERI/PARA SEAMLESS
FUNCTION MODE BANK(VALUE)
EDIT(CANCEL)GROUP STORE
1.MANUAL
2.BANK DOWN
3.DELAY(TAP&HOLD)
4.BYPASS
5.MUTE
6.RTM
7.VOLUME PRESETUSER
(BOTH) SEAMLESS
UP
U O
1, 4
C=
C#=
D=
D#=
E=
F=
F#=
G=
G#=
A=
A#=
B=
Release your foot
straight away
pitch matches accurately
pitch is sharp
pitch is flat
Tuning Your Guitar (Autotuner Function)
STEP
1
Lightly step on the Foot Switch whose LED is currently lit in the display for Foot
Switches 1 - 4, and release your foot straight away.
STEP
2
Pick a released string.
STEP
3
When the display shows the desired tone, perform fine tuning until the EFFECT1
module LED lights up.
STEP
4
Press the Foot Switch again, or select another patch.
ADVANCED GUITAR EFFECTS PROCESSOR
(Play Mode Operation)
Let's Try Out Some Patches

● 12
ADVANCED GUITAR EFFECTS PROCESSOR
Set the internal standard pitch (calibration).
The display will indicate "
bP
", and the module LEDs will light.
The display will indicate the current calibration value for one second.
Calibration is within the range of "35" (A = 435 Hz) and "45" (A = 445
Hz).
Every time the unit is turned on, the calibration value is reset to
A = 440 Hz.
.
NOTE
BANK
FUNCTION
VALUE
ADVANCED GUITAR EFFECTS PROCESSOR
1.COMP
2.BOOSTER
3.OVERDRIVE
4.TALKING BOX
Sens/Gain
(Talking Gain)
Attack/Tone
(Talking Mode)
Level
(MIC Level)
VOLUME RTM
PRE DRIVE RTM
Gain/Top
Tone/Body
Level
ZNR
POSITION
MAIN DRIVE RTM
High/Depth
Midf/Rate/Sens
MidG/Reso
Low/Stage/Inv
Level
EQ RTM
Pitch/Key
Tone/Scale/Time
Shift/Mode/Dly
Bal/Mix
Amp Sim Mode
EFFECT1 RTM
Pitch/Key/Depth
Fine/Scale/Rate
Shift/Mode
Bal/Mix/Peak
SERI/PARA
EFFECT2 RTM
Time(x100mS)
Time(x1mS)
Feedback
Mix
SEAMLESS
DELAY RTM
Time
Tone/FB
Mix
Patch Level
FUNCTION Mode
REVERB RTM
1.OD
3.DIST
5.GRU
7.
METAL
1.3-BAND EQ
2.PHASE
3.PEDAL-WAH
4.AUTO-WAH
1.PITCH
3.DETUNE
4.PEDAL-PITCH
5.STRING
2.HPS 1.HALL1
3.ROOM 1
4.ROOM 2
5.PP-DELAY
2.HALL21.PITCH
3.CHO
5.TREM/PAN
6.RING MOD
1.NORMAL
2.ANALOG
3.HOLD
2.HPS
4.FLG
2.B-OD
4.FUZZ
6.LEAD
8.ACO
PRE DRIVE MAIN DRIVE EQ EFFECT 1 EFFECT 2 DELAY REVERB
TALKING BOX POSITION SERI/PARA SEAMLESS
FUNCTION MODE BANK(VALUE)
EDIT(CANCEL)GROUP STORE
1.MANUAL
2.BANK DOWN
3.DELAY(TAP&HOLD)
4.BYPASS
5.MUTE
6.RTM
7.VOLUME PRESETUSER
(BOTH) SEAMLESS
UP
U O
2, 3
1
VALUE
VALUE
435Hz :
440Hz :
445Hz :
Release your foot
straight away
Adjusting the Standard Pitch of the Tuner (Calibration)
STEP
1
Invoke the Bypass status by lightly stepping on and releasing your foot from the
Foot Switch whose LED is currently lit in the display for Foot Switches 1 - 4.
STEP
2
Operate the VALUE knob.
STEP
3
While the value is displayed, use the VALUE knob to set the desired value.
Let's Try Out Some Patches (Play
Mode Operation)

This section describes the basic operation of the Edit mode. The patches of the 3000 are made up from a
variety of parameters that determine the sound as well as parameters that are independent of patches,
such as ZNR sensitivity settings, module connection routing, etc. In the Edit mode, parameters can be
changed to fit your personal preferences. Most global parameters are also set in this mode.
13 ●
The 3000 enters Edit mode, so that you can edit parameters.
The editing methods are explained in detail on the following pages.
The 3000 returns to the Play mode.
BANK
FUNCTION
VALUE
ADVANCED GUITAR EFFECTS PROCESSOR
1.COMP
2.BOOSTER
3.OVERDRIVE
4.TALKING BOX
Sens/Gain
(Talking Gain)
Attack/Tone
(Talking Mode)
Level
(MIC Level)
VOLUME RTM
PRE DRIVE RTM
Gain/Top
Tone/Body
Level
ZNR
POSITION
MAIN DRIVE RTM
High/Depth
Midf/Rate/Sens
MidG/Reso
Low/Stage/Inv
Level
EQ RTM
Pitch/Key
Tone/Scale/Time
Shift/Mode/Dly
Bal/Mix
Amp Sim Mode
EFFECT1 RTM
Pitch/Key/Depth
Fine/Scale/Rate
Shift/Mode
Bal/Mix/Peak
SERI/PARA
EFFECT2 RTM
Time(x100mS)
Time(x1mS)
Feedback
Mix
SEAMLESS
DELAY RTM
Time
Tone/FB
Mix
Patch Level
FUNCTION Mode
REVERB RTM
1.OD
3.DIST
5.GRU
7.
METAL
1.3-BAND EQ
2.PHASE
3.PEDAL-WAH
4.AUTO-WAH
1.PITCH
3.DETUNE
4.PEDAL-PITCH
5.STRING
2.HPS 1.HALL1
3.ROOM 1
4.ROOM 2
5.PP-DELAY
2.HALL21.PITCH
3.CHO
5.TREM/PAN
6.RING MOD
1.NORMAL
2.ANALOG
3.HOLD
2.HPS
4.FLG
2.B-OD
4.FUZZ
6.LEAD
8.ACO
PRE DRIVE MAIN DRIVE EQ EFFECT 1 EFFECT 2 DELAY REVERB
TALKING BOX POSITION SERI/PARA SEAMLESS
FUNCTION MODE BANK(VALUE)
EDIT(CANCEL)GROUP STORE
1.MANUAL
2.BANK DOWN
3.DELAY(TAP&HOLD)
4.BYPASS
5.MUTE
6.RTM
7.VOLUME PRESETUSER
(BOTH) SEAMLESS
. .
UP
A 1
2, 4
1
EDIT(CANCEL)
EDIT(CANCEL)
Switching between Edit and Play Modes
STEP
1
In the Play mode, choose the patch you want to edit. (This can be from the USER
or PRESET group.)
STEP
2
Press the EDIT key.
STEP
3
Perform editing.
STEP
4
When you have finished editing, press the EDIT key again.
ADVANCED GUITAR EFFECTS PROCESSOR
(Edit Mode Operation)
Changing the Patch Sound
Changing the Patch Sound (Edit Mode Operation)

In Edit mode, the panel displays the following information:
(1) Effect module ON/OFF
When the effect modules are ON in a patch, their corresponding module LEDs light.
(2) Parameter type
On the top panel of the 3000, effect modules are arranged horizontally and effect parameters for the
various modules are listed vertically (including patch parameters and global parameters).
(3) Currently selected parameter
The parameter at the point where the lines marked by the flashing module LED and flashing
parameter LED cross is the parameter that is currently selected for editing. When an effect module is
selected that is currently off, the flashing interval of the module LED changes (the off time becomes
longer).
(4) Parameter value
The value of the parameter currently selected for editing is displayed. When the selected effect
module is off, only "--" is displayed.
Depending on the type selected for the effect module, some parameters may have no setting item. When
such a parameter is selected, the display shows "-.-.". For information on effect types and parameters,
please refer to page 36.
● 14
Changing the Patch Sound
(Edit Mode Operation)
Panel Display in Edit Mode
ADVANCED GUITAR EFFECTS PROCESSOR
1.COMP
2.BOOSTER
3.OVERDRIVE
4.TALKING BOX
Sens/Gain
(Talking Gain)
Attack/Tone
(Talking Mode)
Level
(MIC Level)
VOLUME RTM
PRE DRIVE RTM
Gain/Top
Tone/Body
Level
ZNR
POSITION
MAIN DRIVE RTM
High/Depth
Midf/Rate/Sens
MidG/Reso
Low/Stage/Inv
Level
EQ RTM
Pitch/Key
Tone/Scale/Time
Shift/Mode/Dly
Bal/Mix
Amp Sim Mode
EFFECT1 RTM
Pitch/Key/Depth
Fine/Scale/Rate
Shift/Mode
Bal/Mix/Peak
SERI/PARA
EFFECT2 RTM
Time(x100mS)
Time(x1mS)
Feedback
Mix
SEAMLESS
DELAY RTM
Time
Tone/FB
Mix
Patch Level
FUNCTION Mode
REVERB RTM
1.OD
3.DIST
5.GRU
7.
METAL
1.3-BAND EQ
2.PHASE
3.PEDAL-WAH
4.AUTO-WAH
1.PITCH
3.DETUNE
4.PEDAL-PITCH
5.STRING
2.HPS 1.HALL1
3.ROOM 1
4.ROOM 2
5.PP-DELAY
2.HALL21.PITCH
3.CHO
5.TREM/PAN
6.RING MOD
1.NORMAL
2.ANALOG
3.HOLD
2.HPS
4.FLG
2.B-OD
4.FUZZ
6.LEAD
8.ACO
PRE DRIVE MAIN DRIVE EQ EFFECT 1 EFFECT 2 DELAY REVERB
TALKING BOX POSITION SERI/PARA SEAMLESS
FUNCTION MODE BANK(VALUE)
EDIT(CANCEL)GROUP STORE
1.MANUAL
2.BANK DOWN
3.DELAY(TAP&HOLD)
4.BYPASS
5.MUTE
6.RTM
7.VOLUME PRESETUSER
(BOTH) SEAMLESS
UP
1 0
(4)
(3)
(1)
Time(x1mS)
Time(x1mS)
(2)
Bal/Mix/Peak
SERI/PARA
EFFECT2 RTM
Mix
SEAMLESS
DELAY RTM
Peath
Level
FUNCTION Mode
REVERB RTM
Bal/Mix/Peak
SERI/PARA
EFFECT2 RTM
Mix
SEAMLESS
DELAY RTM
Peath
Level
FUNCTION Mode
REVERB RTM Effect module off (LED out)
Effect module on (LED lit)
Pitch/Key/Depth
Fine/Scale/Rate
Shift/Mode
Bal/Mix/Peak
SERI/PARA
EFFECT2 RTM
Time(x100mS)
Time(x1mS)
Feedback
Mix
SEAMLESS
DELAY RTM
Time
Tone/FB
Mix
Patch Level
FUNCTION Mode
REVERB RTM Flashes at
same rate
Selected
parameter
When selected effect module is on
Pitch/Key/Depth
Fine/Scale/Rate
Shift/Mode
Bal/Mix/Peak
SERI/PARA
EFFECT2 RTM
Time(x100mS)
Time(x1mS)
Feedback
Mix
SEAMLESS
DELAY RTM
Time
Tone/FB
Mix
Patch Level
FUNCTION Mode
REVERB RTM
Flashes
Selected
parameter
When selected effect module is off
OFF interval is
longer
- 2
Effect module on
Parameter value
- -
Effect module off

In Edit mode, the effect modules can be switched on or off freely.
15 ●
In Edit mode, the module LEDs light for effect modules that are
currently on. The LED for the module that is selected for editing flashes.
By pressing the MODULE Select key directly under the module LED,
this LED starts to flash.
The MODULE key can be used to toggle the module on or off. When
off, the module LED goes out.
• The module on/off state can be stored as part of a patch, by
performing the store operation as described on page 17.
• In Manual mode, the BANK switch and Foot Switches 1 - 4 can
be used to switch modules on and off. For details, please refer to
page 20.
• In Play mode, modules can be switched on and off by pressing
the Module Select keys.
BANK
FUNCTION
VALUE
ADVANCED GUITAR EFFECTS PROCESSOR
1.COMP
2.BOOSTER
3.OVERDRIVE
4.TALKING BOX
Sens/Gain
(Talking Gain)
Attack/Tone
(Talking Mode)
Level
(MIC Level)
VOLUME RTM
PRE DRIVE RTM
Gain/Top
Tone/Body
Level
ZNR
POSITION
MAIN DRIVE RTM
High/Depth
Midf/Rate/Sens
MidG/Reso
Low/Stage/Inv
Level
EQ RTM
Pitch/Key
Tone/Scale/Time
Shift/Mode/Dly
Bal/Mix
Amp Sim Mode
EFFECT1 RTM
Pitch/Key/Depth
Fine/Scale/Rate
Shift/Mode
Bal/Mix/Peak
SERI/PARA
EFFECT2 RTM
Time(x100mS)
Time(x1mS)
Feedback
Mix
SEAMLESS
DELAY RTM
Time
Tone/FB
Mix
Patch Level
FUNCTION Mode
REVERB RTM
1.OD
3.DIST
5.GRU
7.
METAL
1.3-BAND EQ
2.PHASE
3.PEDAL-WAH
4.AUTO-WAH
1.PITCH
3.DETUNE
4.PEDAL-PITCH
5.STRING
2.HPS 1.HALL1
3.ROOM 1
4.ROOM 2
5.PP-DELAY
2.HALL21.PITCH
3.CHO
5.TREM/PAN
6.RING MOD
1.NORMAL
2.ANALOG
3.HOLD
2.HPS
4.FLG
2.B-OD
4.FUZZ
6.LEAD
8.ACO
PRE DRIVE MAIN DRIVE EQ EFFECT 1 EFFECT 2 DELAY REVERB
TALKING BOX POSITION SERI/PARA SEAMLESS
FUNCTION MODE BANK(VALUE)
EDIT(CANCEL)GROUP STORE
1.MANUAL
2.BANK DOWN
3.DELAY(TAP&HOLD)
4.BYPASS
5.MUTE
6.RTM
7.VOLUME PRESETUSER
(BOTH) SEAMLESS
UP
U O
1, 2
Switching Effect Modules On/Off
STEP
1
Use the Module Select keys to select the desired effect module.
STEP
2
Pressing the MODULE Select key once more turns the effect module on or off.
ADVANCED GUITAR EFFECTS PROCESSOR
(Edit Mode Operation)
Changing the Patch Sound
HINTHINT

● 16
ADVANCED GUITAR EFFECTS PROCESSOR
You can choose any parameter of an effect module and change the setting and value as desired.
The flashing module moves to the LED for the selected module.
The flashing parameter LED moves to the LED for the selected
parameter.
• When you have switched a module or parameter, the display
changes accordingly.
• The settings of patch parameters and global parameters can
also be changed in the same way.
• The topmost parameter controls the effect type. When the effect
type is changed, the values of other parameters for that module
also change. For the distortion effect types of the PREDRIVE
and MAIN DRIVE modules and for the DELAY module, the
content of the effect parameters does not change.
The current parameter value changes.
For details about the types and functions of parameters of the
effect modules, see page 36 -45 , "Effect Types and Parameters".
The parameter changes made in this way are temporary. If you do
not store the new settings, they will return to the original values
when you return to Play mode and select another patch. (Global
parameters revert to the original setting when the unit is turned off.)
For information on storing patches, please refer to page 17.
NOTE
HINTHINT
BANK
FUNCTION
VALUE
ADVANCED GUITAR EFFECTS PROCESSOR
1.COMP
2.BOOSTER
3.OVERDRIVE
4.TALKING BOX
Sens/Gain
(Talking Gain)
Attack/Tone
(Talking Mode)
Level
(MIC Level)
VOLUME RTM
PRE DRIVE RTM
Gain/Top
Tone/Body
Level
ZNR
POSITION
MAIN DRIVE RTM
High/Depth
Midf/Rate/Sens
MidG/Reso
Low/Stage/Inv
Level
EQ RTM
Pitch/Key
Tone/Scale/Time
Shift/Mode/Dly
Bal/Mix
Amp Sim Mode
EFFECT1 RTM
Pitch/Key/Depth
Fine/Scale/Rate
Shift/Mode
Bal/Mix/Peak
SERI/PARA
EFFECT2 RTM
Time(x100mS)
Time(x1mS)
Feedback
Mix
SEAMLESS
DELAY RTM
Time
Tone/FB
Mix
Patch Level
FUNCTION Mode
REVERB RTM
1.OD
3.DIST
5.GRU
7.
METAL
1.3-BAND EQ
2.PHASE
3.PEDAL-WAH
4.AUTO-WAH
1.PITCH
3.DETUNE
4.PEDAL-PITCH
5.STRING
2.HPS 1.HALL1
3.ROOM 1
4.ROOM 2
5.PP-DELAY
2.HALL21.PITCH
3.CHO
5.TREM/PAN
6.RING MOD
1.NORMAL
2.ANALOG
3.HOLD
2.HPS
4.FLG
2.B-OD
4.FUZZ
6.LEAD
8.ACO
PRE DRIVE MAIN DRIVE EQ EFFECT 1 EFFECT 2 DELAY REVERB
TALKING BOX POSITION SERI/PARA SEAMLESS
FUNCTION MODE BANK(VALUE)
EDIT(CANCEL)GROUP STORE
1.MANUAL
2.BANK DOWN
3.DELAY(TAP&HOLD)
4.BYPASS
5.MUTE
6.RTM
7.VOLUME PRESETUSER
(BOTH) SEAMLESS
UP
U O
2
3
1
VALUE
Changing Parameter Settings of Effects
STEP
1
Use the Module Select keys to select an effect module.
STEP
2
Use the Parameter Select keys to select the parameter.
STEP
3
Operate the VALUE knob.
STEP
4
Change other parameters in the same way.
Changing the Patch Sound
(Edit Mode Operation)
HINTHINT

As long as you do not store in memory any patches edited in Edit mode, the original status will be
returned when you select another patch. The following paragraphs describe how to store patches.
17 ●
This will invoke the store standby status, and the module LEDs, and
parameter LEDs, will flash. In this status, you can specify the bank
number and patch number of the storage destination.
Even though you can change the parameters of the patches of the
PRESET group, you cannot write over them. Instead, when you
have changed a patch of the PRESET group, the storage destination
can only be "U" (USER group).
You can store in either Play mode or Edit mode.
If you do not make any particular specification, the destination will be
the original patch of the USER group. When store has not been
specified by the PRESET group, the patch is stored in Patch 1, Bank 0
of the USER group.
When you store parameters, the patch data already in the storage
destination will be erased. Check to make sure you do not need the
patch in the storage destination.
If the STORE key was not pressed for the second time, pressing the
EDIT key will abandon the store procedure and return to the
previous condition (before step 1).
NOTE
NOTE
HINTHINT
NOTE
BANK
FUNCTION
VALUE
ADVANCED GUITAR EFFECTS PROCESSOR
1.COMP
2.BOOSTER
3.OVERDRIVE
4.TALKING BOX
Sens/Gain
(Talking Gain)
Attack/Tone
(Talking Mode)
Level
(MIC Level)
VOLUME RTM
PRE DRIVE RTM
Gain/Top
Tone/Body
Level
ZNR
POSITION
MAIN DRIVE RTM
High/Depth
Midf/Rate/Sens
MidG/Reso
Low/Stage/Inv
Level
EQ RTM
Pitch/Key
Tone/Scale/Time
Shift/Mode/Dly
Bal/Mix
Amp Sim Mode
EFFECT1 RTM
Pitch/Key/Depth
Fine/Scale/Rate
Shift/Mode
Bal/Mix/Peak
SERI/PARA
EFFECT2 RTM
Time(x100mS)
Time(x1mS)
Feedback
Mix
SEAMLESS
DELAY RTM
Time
Tone/FB
Mix
Patch Level
FUNCTION Mode
REVERB RTM
1.OD
3.DIST
5.GRU
7.
METAL
1.3-BAND EQ
2.PHASE
3.PEDAL-WAH
4.AUTO-WAH
1.PITCH
3.DETUNE
4.PEDAL-PITCH
5.STRING
2.HPS 1.HALL1
3.ROOM 1
4.ROOM 2
5.PP-DELAY
2.HALL21.PITCH
3.CHO
5.TREM/PAN
6.RING MOD
1.NORMAL
2.ANALOG
3.HOLD
2.HPS
4.FLG
2.B-OD
4.FUZZ
6.LEAD
8.ACO
PRE DRIVE MAIN DRIVE EQ EFFECT 1 EFFECT 2 DELAY REVERB
TALKING BOX POSITION SERI/PARA SEAMLESS
FUNCTION MODE BANK(VALUE)
EDIT(CANCEL)GROUP STORE
1.MANUAL
2.BANK DOWN
3.DELAY(TAP&HOLD)
4.BYPASS
5.MUTE
6.RTM
7.VOLUME PRESETUSER
(BOTH) SEAMLESS
UP
U O
1, 3
2
STORE
STORE
BANK
Storing Patches
STEP
1
Press the STORE key.
STEP
2
Using the BANK switch and Foot Switches 1 – 4, specify the patch storage
destination.
STEP
3
Press the STORE key again. This completes the storage operation, and returns the
3000 to the Play mode.
ADVANCED GUITAR EFFECTS PROCESSOR
(Edit Mode Operation)
Changing the Patch Sound

● 18
ADVANCED GUITAR EFFECTS PROCESSOR
The FUNCTION switch can be used to quickly activate muting or bypass, or to adjust the volume or
effect parameters in real time.
There are seven modes for the FUNCTION switch which can be selected by the user. To assign a
function, perform the following steps.
The module LED of the REVERB module starts to flash.
FUNCTION Mode is a global parameter which serves to control the
FUNCTION switch. The setting is not affected by the on/off status of
the REVERB module.
Seven modes are available for the FUNCTION switch, as described
below.
1: MANUAL
Toggle between Manual mode and Play mode. For information on
Manual mode, please refer to page 20.
2: BANK DOWN
Switch the bank to the next lower number (opposite direction from
BANK
FUNCTION
VALUE
ADVANCED GUITAR EFFECTS PROCESSOR
1.COMP
2.BOOSTER
3.OVERDRIVE
4.TALKING BOX
Sens/Gain
(Talking Gain)
Attack/Tone
(Talking Mode)
Level
(MIC Level)
VOLUME RTM
PRE DRIVE RTM
Gain/Top
Tone/Body
Level
ZNR
POSITION
MAIN DRIVE RTM
High/Depth
Midf/Rate/Sens
MidG/Reso
Low/Stage/Inv
Level
EQ RTM
Pitch/Key
Tone/Scale/Time
Shift/Mode/Dly
Bal/Mix
Amp Sim Mode
EFFECT1 RTM
Pitch/Key/Depth
Fine/Scale/Rate
Shift/Mode
Bal/Mix/Peak
SERI/PARA
EFFECT2 RTM
Time(x100mS)
Time(x1mS)
Feedback
Mix
SEAMLESS
DELAY RTM
Time
Tone/FB
Mix
Patch Level
FUNCTION Mode
REVERB RTM
1.OD
3.DIST
5.GRU
7.
METAL
1.3-BAND EQ
2.PHASE
3.PEDAL-WAH
4.AUTO-WAH
1.PITCH
3.DETUNE
4.PEDAL-PITCH
5.STRING
2.HPS 1.HALL1
3.ROOM 1
4.ROOM 2
5.PP-DELAY
2.HALL21.PITCH
3.CHO
5.TREM/PAN
6.RING MOD
1.NORMAL
2.ANALOG
3.HOLD
2.HPS
4.FLG
2.B-OD
4.FUZZ
6.LEAD
8.ACO
PRE DRIVE MAIN DRIVE EQ EFFECT 1 EFFECT 2 DELAY REVERB
TALKING BOX POSITION SERI/PARA SEAMLESS
FUNCTION MODE BANK(VALUE)
EDIT(CANCEL)GROUP STORE
1.MANUAL
2.BANK DOWN
3.DELAY(TAP&HOLD)
4.BYPASS
5.MUTE
6.RTM
7.VOLUME PRESETUSER
(BOTH) SEAMLESS
UP
U O
1, 5
4
2
3
FUNCTION Mode
REVERB RTM
EDIT(CANCEL)
Patch Level
FUNCTION Mode
REVERB RTM
VALUE
Assigning a Function to the FUNCTION Switch
STEP
1
Press the EDIT key to activate the Edit mode.
STEP
2
Use the Module Select keys to select the REVERB module.
STEP
3
Use the Parameter Select keys to select parameter 6 (FUNCTION Mode).
STEP
4
Use the VALUE knob to select one of the modes 1 - 7 listed below.
Using the FUNCTION switch
Table of contents
Other Zoom Computer Hardware manuals
Popular Computer Hardware manuals by other brands

Advantech
Advantech UbiQ-SM30 user manual

HighPoint
HighPoint R1000 Series Quick installation guide

GlacialTech
GlacialTech UFO V51 operating instructions

Thermaltake
Thermaltake Bigwater 780e CL-W0169 user guide

Agilent Technologies
Agilent Technologies VXI 75000 Series User and service manual

Kamstrup
Kamstrup wM-Bus Dongle SW Tool user manual