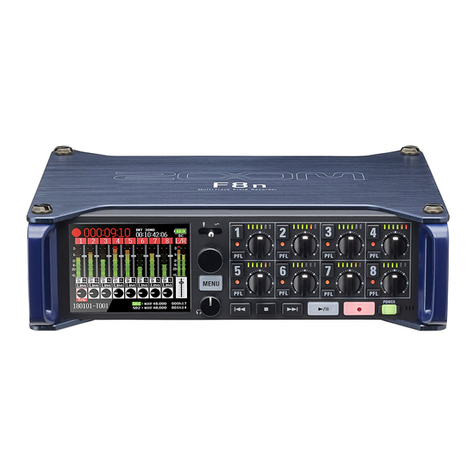
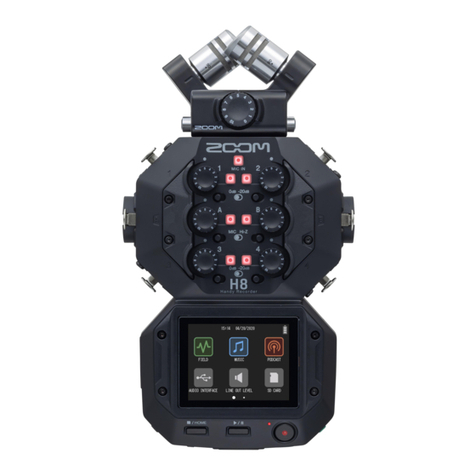
Zoom F8n Pro User manual

You must read the Usage and Safety Precautions before use.
Quick Tour
The Operation Manual can be downloaded from the ZOOM website (www.zoom.jp/docs/f8n_pro).
This page has les in PDF and HTML formats.
The PDF le format is suitable for printing on paper and reading on a computer.
The HTML le format is suitable for smartphones and tablets and can be read with web browsers.
© 2021 ZOOM CORPORATION
Copying or reprinting this manual in part or in whole without permission is prohibited.
You might need this manual in the future. Always keep it in a place where you can access it easily.
The contents of this manual and the specifications of the product could be changed without notice.

2
Inserting SD cards
• Supported recording media:
SDHC, SDXC cards
• To remove an SD card, push it further into the
slot and then pull it out.
• Always turn the power off before inserting or
removing an SD card.
Preparing power sources
■Using AA batteries
• Use only one type of battery (alkaline, NiMH
or lithium) at a time.
• Set the type of battery used correctly so that
the amount of remaining battery charge can
be shown accurately.
MENU>SYSTEM>Power Source
Battery Type
After loading the batteries, close the
battery cover and tighten the screw.

3
■Using external DC power supply equipment
When connecting an external DC power supply,
be sure to make the power supply settings.
MENU>SYSTEM>Power Source
Shutdown Voltage
Nominal Voltage
9–18V direct current
Hirose 4 pin connector
■Using an AC adapter
Dedicated AC adapter (ZOOM AD-19)
Turning the power on
Press and hold to turn the power on.
The power will automatically turn off if the F8n Pro is unused for 10 hours.
If you want to keep the power on always, turn off the automatic power saving (Auto Power Off)
function.

4
Setting the date and time
Turn to select setting items,
and press to conrm them.
If power is not supplied by an AC adapter or
batteries for a long time, date and time settings
will be reset. If the date and time setting screen
appears during startup, set them again.
■Home Screen
Status icon
Track numbers
Red: Input enabled
Green: Playback track enabled
Gray: Input disabled Stereo-linked inputs
Stopped
L/R track
Limiter indicator
Yellow: Limiter operating
Recording
Paused
Playing back
Counter ( playback/elapsed
recording time)
Clipping indicator
Faders
Frame rate
INT: Internal timecode enabled
EXT: External input timecode enabled
Level meters
Phantom power status
Lit: Phantom power enabled
Unlit: Phantom power disabled
Input source
Trim
Power type and
remaining amount
DC: AC adapter
EXT: External DC power
supply
AA: Batteries
Playback card
Green: Selected for playback
Gray: No card
Recording/playback le
format, and sample rate
(shown for each card)
Recording/playback take name
When recording: Remaining recordable time
When playing: Remaining playback time
(shown for each card)
Full
Empty
When stopped, press and hold
to show the name that will be given
to the next recorded take.
Limiter status
Gray: Limiter disabled
Red: Limiter enabled
Yellow: Limiter operating
Recording/playback timecode
5
Formatting SD cards
After purchasing a new SD card, always format it to maximize performance.
All data previously saved on an
SD card will be deleted when it is
formatted.
Select “SD1” after inserting an SD card.
The Home Screen can be reopened
by pressing and holding .

6
Connecting
Wireless mic
Shotgun
mic
When disconnecting a mic, pull the
XLR plug while pushing the connector
lock release button.
Wireless
mic
Shotgun
mic
Headphones
Use to adjust the
headphone volume.
Enabling tracks for recording
The status indicators will
light red.

7
Enabling phantom power
Do not use this function with devices that
are not compatible with phantom power.
Doing so could damage the device.
Select “Input 1” after connecting
a condenser mic to it.
The Home Screen can be reopened
by pressing and holding .
Adjusting input levels (trim)
• Input volume (trim) settings do not affect the
recording data.
• When recording in 32-bit oat WAV format, if
monitored audio sounds distorted, lowering
the volume of the recording le can restore the
waveform to a state without clipping.
• When recording in 16/24-bit WAV format, adjust
so that the level meters are around –12 dB at
maximum volume.

8
Using the faders to balance the mix
Adjust the balance to make moni-
toring easy. Fader settings have no
effect on recorded data.
Setting recording le scene names
The F8n Pro names and manages recording les with the following format.
Scene names, scene numbers and take numbers are also written in the recording le
metadata.
Take number (increases by 1 every recording from 001–999)
Scene number (can be advanced from 1–9999)
Scene name (naming format can be set)

9
Scene Name Mode
None The scene name and number are not used. When recording les are created, they are
named only with take numbers, such as “T001”, “T002”, “T003” and so on.
T001.wav T002.wav T003.wav
Recording order
Files can also be created inside folders you have made.
Current Folder
The name of the currently selected folder is used as the scene name.
When recording is paused, on the Home Screen can be pressed to advance
the scene number by one.
If no folder exists for the scene that was advanced by one, a new folder will be created.
-T001.wav
SCENE001
SCENE001 SCENE001 SCENE001
-T002.wav -T003.wav -T001.wav
SCENE002
SCENE002 SCENE002
-T002.wav
Create and select
this yourself
Recording order
Created automatically
when the scene number
is advanced
Date
The current date is used as the scene name.
If recording occurs after the date changes, a scene folder with the new date will be
created.
T001.wav
211004
211004- 211004- 211004-
T002.wav T003.wav T001.wav
211005
211005- 211005-
T002.wav
Created automatically
Recording order
Created automatically
when the date changes
User Name
A scene name input by the user is used.
No folder will be created automatically.
When recording is paused, on the Home Screen can be pressed to advance
the scene number by one.
T001.wav T002.wav T001.wav
MYSCENE001- MYSCENE001- MYSCENE002-
Recording order
When scene number advances
Files can also be created inside folders you have made.

10
Receiving timecode
The F8n Pro supports SMPTE timecode (LTC).
The timecode of the recording start time is added to the metadata of the recording le.
Synchronize the timecode with cameras and other devices before beginning lming to make
synchronization of recorded materials easy when editing later.
This section explains procedures for receiving timecode once before lming (synchronizing
with timecode from a camera, for example), and then recording with the F8n Pro separate
from the camera or other device.
■Setting the frame rate
can be pressed to return to the
previous screen.
■Connecting
Timecode
■Synchronizing the timecode (jamming)
Disconnect the camera.
11
Recording
Press to stop recording.
Shortcut operations (when recording paused)
Press and hold Show the name that will be given to the next take recorded.
Example: Scene001-T002
Advance the scene number by 1 (when the Home Screen is open).
Press and hold Move the previously recorded take to the FALSE TAKE folder
(when the Home Screen is open).
Playing recordings

12
Functions of parts
■Front
①Display (LCD)
This shows the recorder status and
MENU Screen.
②Selection encoder
Use this to select and to conrm in
various menus.
③Slate switch
Use this to record slate tones and with
the slate mic.
④
Track button/status indicator
Press the track button, lighting the
status indicator red, to enable that
track for recording.
⑤LED level meter
This lights according to the track input
level.
⑥Track knob
This controls the track fader.
Depending on the setting, this can also
adjust trim or pan.
⑦PFL button
Press this to open the PFL Screen. The
status indicator of the selected track will
light orange.
⑧MENU button
Press this to open the MENU Screen or
return to the previous screen.
⑨Headphone volume knob
This adjusts the headphone volume.
⑩REW button
Use this to search backward and to skip
to the previous track.
⑪STOP button
This stops recording and playback.
⑫FF button
Use this to search forward and to skip to
the next track.
⑬PLAY/PAUSE button
This starts and pauses track playback.
⑭REC button
This starts recording.
⑮Power button
This turns the power on/off.
⑯Slate mic
Use this for slate mic recording.

13
XLR
12
3
1 : GND
2 : HOT
3 : COLD
■Back
■Left side ■Right side
①12 V DC IN
Connect the dedicated AC adapter
(ZOOM AD-19) here.
②TIMECODE IN/OUT connectors
Use cables with BNC connectors to input
and output timecode.
③Battery cover
Open this when installing or removing
AA batteries.
④MIC IN connector
Mic capsules (sold separately) can be
attached.
⑤EXT DC IN connector
External DC power supplies that
support Hirose 4-pin connectors can
be connected here.
⑥USB (Mini-B) port
Connect this to a computer, smartphone
or tablet to use the F8n Pro as an SD
card reader or audio interface.
USB bus power operation is not
supported.
⑦SD card slots
Up to 2 SD cards can be loaded.
⑧Lock release buttons
To disconnect a mic, pull the XLR plug
while pressing this.
⑨Inputs 1–4
Connect mics and instruments to these.
These can be used with XLR and TRS
connectors.
⑩SUB OUT jack
This stereo mini jack (unbalanced) can
be used to output sound.
⑪Headphone jack
This can output sound to headphones.
⑫MAIN OUT jacks
Use cables with TA3 connectors to
output sound to speakers.
⑬Inputs 5–8
Connect mics and instruments to these.
These can be used with XLR and TRS
connectors.

14
Menu items
FINDER
View content lists of SD cards, takes and folders and to create folders. Set
and delete recording/playback folders and to view their information, for
example.
META DATA
(for Next Take) Various relevant data (metadata) can be written to les during recording.
INPUT Make input settings.
OUTPUT Make output settings, including for headphones.
REC Make recording settings, including sample and bit rates.
PLAY Make playback settings, including for playing all recordings and repeat
playback.
TIMECODE Make timecode input and output settings.
SLATE Adjust the level of the slate mic/tone.
SYSTEM Make F8n Pro system settings.
SD CARD Check SD card data and format SD cards.
USB Enable USB use, including as an SD card reader or audio interface.

15
Input settings list
Input Source Set this according to the connected device to “Mic”, “Line”, “USB 1”, “USB 2”,
“USB 3” or “USB 4”.
Ambisonic Mode By connecting mics that can output Ambisonic A-format signals to Inputs
1–4, audio can be converted to Ambisonic B-format and recorded.
HPF The high pass lter can cut low frequencies to reduce the sound of wind,
vocal pops and other noise.
Input Limiter The limiter can prevent distortion by reducing signals that have excessively
high levels.
Phase Invert The phase of input signals can be inverted. This is useful when sounds cancel
each other out due to mic settings.
Phantom Phantom power settings can be made.
Plugin Power Make this setting when a mic that is compatible with plug-in power is
connected to the MIC/LINE input connector of a mic capsule.
Input Delay If there are differences in the timing of input sounds, use this function to
correct them when recording.
Stereo Link Mode
Mid-side mic signals can be set to be monitored as an ordinary stereo signal.
Trim Link The input levels of multiple tracks can be linked and adjusted at the same
time.
PFL Mode On the PFL Screen, the monitoring sound can be set to be either pre-fader (PFL)
or post-fader (SOLO).
Auto Mix When recording multiple sounds, mic inputs can be adjusted automatically.

Z2I-4471-01
ZOOM CORPORATION
4-4-3 Kanda-surugadai, Chiyoda-ku, Tokyo 101-0062 Japan
zoomcorp.com
Product names, registered trademarks and company names in this document are the property of their respective companies.
Windows®is a trademark or registered trademark of Microsoft®Corporation.
All trademarks and registered trademarks in this document are for identification purposes only and are not intended to infringe
on the copyrights of their respective owners.
Troubleshooting
There is no sound or output is very quiet
→Check the headphone connection.
→Conrm that the headphone volume of the F8n
Pro is not lowered.
Sound from a mic or connected equipment
cannot be heard or is very quiet
→Check the orientation of the mic or the volume
settings of the connected equipment.
→Check the F8n Pro input level (trim) settings.
→Check the F8n Pro fader settings.
→Check the F8n Pro headphone volume.
→Check the F8n Pro phantom power settings.
Recording is not possible
→Conrm that the status indicator is lit red.
→Conrm that the SD card has open space.
→Conrm that an SD card is loaded properly in a
card slot.
→If “Card Protected!” appears on the display, the
SD card write-protection is enabled. Slide the lock
switch on the SD card to disable write-protection.
Not recognized by computer when
connected
→Conrm that the USB cable being used is not
designed only to provide power.
→The operation mode must be set on the F8n Pro
to allow the computer to recognize it.
→A driver is necessary for use as an audio interface
with Windows. Download the driver from the
ZOOM website (zoomcorp.com).
Other manuals for F8n Pro
3
Table of contents
Other Zoom Voice Recorder manuals

Zoom
Zoom H5 User manual

Zoom
Zoom H4next User manual

Zoom
Zoom F8n User manual

Zoom
Zoom H4N User manual

Zoom
Zoom H6 Handy Recorder User manual

Zoom
Zoom H4N User manual

Zoom
Zoom Handy recorder H2 User manual

Zoom
Zoom Handy REcorder H1 User manual

Zoom
Zoom H4n Pro User manual

Zoom
Zoom Handy REcorder H1 User manual