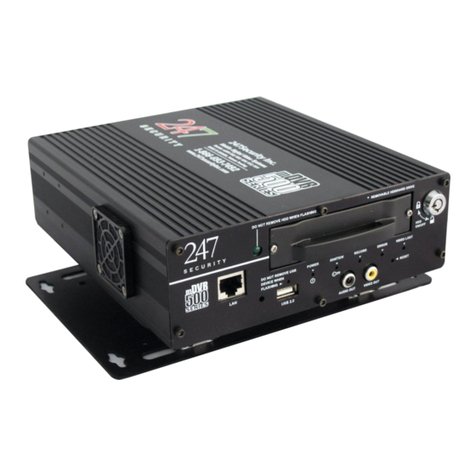
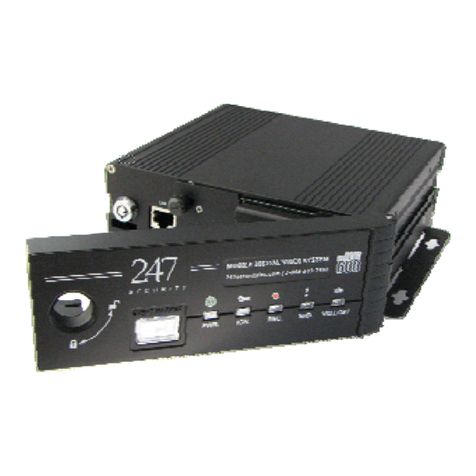
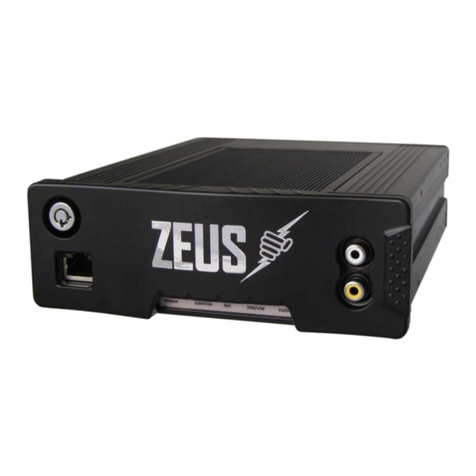
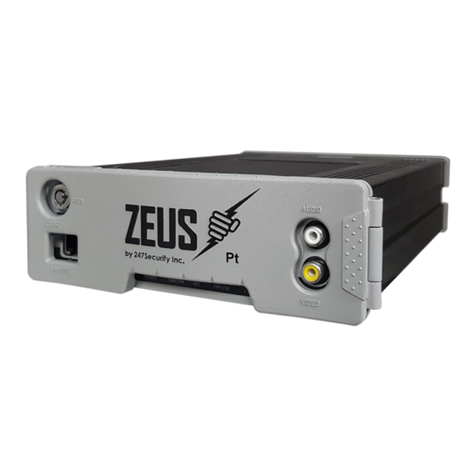
247Security Zeus Series User manual

Copyright © 2014, 247Security Inc. | 4400 North Point Parkway, Suite # 158, Alpharetta, GA 30022, USA | 1-866-693-7492 | www.247securityinc.com
ZEUS mDVR Installation
QUICKQUICK
GUIDE

247Security Inc. | 4400 North Point Parkway, Suite # 158, Alpharetta, GA 30022, USA | 1-866-693-7492 | www.247securityinc.com
ZEUS mDVR
USERS MANUAL
1
Zeus Series - Four Channel DVR
Quick Guide - INSTALLATION
Thank you for purchasing a Zeus Series DVR from 247Security Inc. For any
questions regarding the installation procedure, please contact 247Security Inc.
Technical Support at 1-866-693-7492.
Your order will contain the following components (per system):
1. Zeus system (L – no WIFI or W – w/WIFI)
2. One to four cameras, depending on your order
3. One Camera cable per camera
4. Power cable & screws
5. Digital I/O cable
6. Set of keys
7. Event marker & cable
8. WIFI antenna kit (w/ Zeus-W model)
9. Storage media choices
a. SD card (32 or 64GB) w/empty HDD case
b. 320GB Hybrid Drive (10 year warranty)
c. 320GB Hard Disk
Optional Equipment:
1. GPS module & cable
2. G-Force module & cable
3. External WIFI bridge (802.11n)
Additional Equipment Per Order:
1. USB A-to-MiniB cable (Qty 2 w/hybrid drive purchase)
2. CD containing all the software and manuals (part of 247Security INC. GoGreen initiative to reduce paper)
3. Ethernet Network Cable

247Security Inc. | 4400 North Point Parkway, Suite # 158, Alpharetta, GA 30022, USA | 1-866-693-7492 | www.247securityinc.com
ZEUS mDVR
USERS MANUAL
2
The installation of your digital video recorder and components is comprised of the
following five steps:
1. DVR and Camera Placement
2. Cables
3. Connections and On-site Preparations
4. Equipment Test
5. DVRViewer Application and Camera Aiming
1. DVR AND CAMERA PLACEMENT
DVR
The first step is to determine the most appropriate location for the DVR and cameras. Mounting locations will vary
depending on the bus style, body manufacturer and bus year. Mounting orientation can be horizontal, vertical, or at
angles for spatial consideration. Mount the DVR through the affixed mounting base and ensure there is sufficient
space in front and around the DVR for ventilation, free movement on the mounting plate and for easy removal of the
hard drive—approximately 7 inches so the door can open freely. Recommended installation locations include: inside
the front bulkhead, behind the driver’s mirror or other locations where moisture and possible tampering will be at a
minimum.
CAMERAS
Cameras are available in many different lens sizes and most are mounted on an X-Y-Z axis so you adjust the image
to look horizontal even if the camera is mounted on the curve of the ceiling, as is convenient to avoid being a
headroom hazard to occupants. A minimum 1.5 inch hole is recommended for camera mounting and safe cable
pass through. Avoid installing cameras to sections of the ceiling that are exposed to, or are leaking, water.
2. CABLES
All cables for the installation and maintenance of your DVR system are included and consist of the following:
Cables for Installation
Camera Cable
(One per Camera)
Event Marker
Power Cable
Digital I/O Cable
GPS Receiver
Module (Optional)

247Security Inc. | 4400 North Point Parkway, Suite # 158, Alpharetta, GA 30022, USA | 1-866-693-7492 | www.247securityinc.com
ZEUS mDVR
USERS MANUAL
3
CAMERA CABLES
Camera Cables (available in lengths of 15, 35 or 50 feet)use the STP (shielded twisted pair) cable standard. The
camera cables are connected using molded 2x3 Molex interfaces that are keyed to prevent improper mating. Each
connector uses a clip to snap securely to each camera and to the inputs on your DVR. Typical configurations are
such that the passenger cameras connect to inputs 1 and 2; and, if available, door, exterior, or driver cameras
connect to inputs 3 and 4. After the installation, all Camera Cables should be concealed and holes filled with
grommets to protect the equipment from vandalism.
EVENT MARKER
The Event Marker is used for the driver to indicate a critical event during recording, which the DVR will interpret as a
priority video for later review. When the driver presses the event marker button, the DVR will mark all video feeds
from 150 seconds prior to and after the button press. These priority event videos can be retrieved by the technician,
using our USB memory stick, to be viewed on a computer with the DVRViewer application installed, removing the
storage media and bringing inside for review or in conjunction with our Touchdown WIFI system for automatic
upload of the video event. The Event Marker module has one button, to signal an event, and 3 color lights to indicate
three DVR states: green for POWER; amber for RECORDING; and red for VIDEO LOST when a camera signal has
been lost.
POWER CABLE
A three-wire, 12-feet-long Power Cable is used for connecting the DVR directly to the battery power in the vehicle’s
electrical box. The cable uses a large molded 2x2 Molex connector that is keyed, thereby connecting to the DVR in
only one orientation. The cable’s three wires are described in the following table:
POWER CABLE
BUS ELECTRICAL PANEL
DC IN (Red)
Constant LIVE Power Source
(battery side of solenoid, direct current)
GND (Black)
Ground
in bus electrical panel
IGN. ON/OFF (White)
Ignition-switched Power
(live only if ignition is turned to ON/ ACC)
Two screws (#4 thread, 3/8“ long) are included to securely fasten the Power Cable to the DVR. Securing the Power
Cable to the DVR prevents occupants from deactivating the system by disconnecting the Power Cable. NOTE:
MAKE SURE TO FUSE BOTH THE RED AND WHITE POWER LINES WITH A 7.5A FUSE (NOT
INCLUDED)
SENSOR & ALARM CABLE (DIGITAL I/O)
The Digital I/O Cable is used for connecting the DVR to the vehicle’s pertinent electrical functions, such as the turn
signals, brake lights, and the stop-arm. The cable is 15 feet long and connects to the DVR using a molded 2x5 Molex
connector, and to the vehicle’s equipment using 4 twisted pairs of wires. Using the Digital I/O Cable is an optional
function at your discretion.
Digital Input #
Wire Color
Function
DI 1
Brown
TEXT OVERLAY – AMBER
DI 2
Green+White
TEXT OVERLAY – STOP-ARM
DI 3
Green
TEXT OVERLAY – BRAKES
DI 4
Orange+White
TEXT OVERLAY – LEFT SIGNAL
DI 5
Orange
TEXT OVERLAY – RIGHT SIGNAL

247Security Inc. | 4400 North Point Parkway, Suite # 158, Alpharetta, GA 30022, USA | 1-866-693-7492 | www.247securityinc.com
ZEUS mDVR
USERS MANUAL
4
GPS MODULE (OPTIONAL)
The GPS Module is an external GPS receiver and is optional equipment. The module’s cable measures 15 feet long
and uses a 2X3 Molex plug to connect to the DVR. The module has a magnetic base; however, it is recommended
that the module be secured to a surface through its screw holes. To ensure maximum functionality, the GPS Module
must be mounted in direct, unobstructed line-of-sight with the sky, such as the base of the windshield or even on the
roof of the bus. If mounted internally just make sure the device doesn’t have something covering it (ex. Book) as the
device will not be able to connect to the GPS Satellite for a signal.
G-FORCE MODULE (OPTIONAL)
The G-Force Module also known as “Drive-Safe” is an external accelerometer and is optional equipment. The
module’s cable measures 15 feet long and uses a 2X3 Molex plug to connect to the DVR. To work properly the
device must be secured to a solid surface and mounted perfectly vertical and horizontal. The orientation for the X –
Y – Z axis can be adjusted in the system set-up page of the DVR.
When working properly the green power light will be on solid
The red A/D light will be flashing and the amber light will
Illuminate if the G-Force thresholds are exceeded. The device
works in conjunction with the GPS module
EXTERNAL WIFI (OPTIONAL)
The external WIFI bridge can be added to the Zeus system to update a Zeus non WIFI system or update an existing
internal 802.11g system to an external 802.11n system for increased data throughput speed. The bridge is
powered through a 10pin network cable and obtains POE (power over Ethernet) from the LAN connection on the
front of the Zeus DVR. An internal setting on the set-up page of the DVR will need to be checked to then provide
power to the bridge.

247Security Inc. | 4400 North Point Parkway, Suite # 158, Alpharetta, GA 30022, USA | 1-866-693-7492 | www.247securityinc.com
ZEUS mDVR
USERS MANUAL
5
3. CONNECTIONS AND ON-SITE PREPARATIONS
Rear view of a Zeus 4 Channel DVR
Port
Function
WIFI
RP-SMA Jack for connecting WIFI antenna (NOTE: AVAILABLE ON W MODEL ONLY FOR INTERNAL)
GPS
2x3 Molex to connect GPS external module and antenna
GP I/O2
Support digital inputs (6-8) GPIO cable is NOT included
CAN BUS
For future use
C.D.C.
For future use
CELL
MODEM
For future use
POWER
INPUT
10V-
32VDC
Power input for 10V to 32V DC. Includes two #4-threaded screw holes for securing the power
cable. Make sure to install 7.5A in-line fuses on the constant hot (red) and ignition (white) wires.
TAB 101
Connection for optional external Drive-Safe™ G-Force module
EMR
Connection for event marker cable
GP I/O 1
Digital I/O interface is used for connecting the vehicle’s electrical functions to the DVR.
CAM 1 -4
Camera connections

247Security Inc. | 4400 North Point Parkway, Suite # 158, Alpharetta, GA 30022, USA | 1-866-693-7492 | www.247securityinc.com
ZEUS mDVR
USERS MANUAL
6
SETTING UP YOUR LAPTOP FOR CONNECTING TO THE DVR
At any point in the installation after power connections are established, the DVR can be connected to a laptop to
provide the installer a live view of the cameras for aiming purposes. Using the included cross-over cable, attach one
end to the LAN 1 port on the DVR, and the other end to the Ethernet LAN port on the laptop. To verify that the
correct type of Ethernet cable is being used, inspect one of the connector ends for the embossed letters “XOVER”.
For Windows XP users, consider the following steps:
1. Right-click on My Network Places and click Properties.
2. Right-click Local Area Connection and click Properties.
3. From the list of protocols, select Internet Protocol (TCP/IP) and click the Properties button.
4. For your convenience, make a record of any values in the number fields on this page. They may be required
to be restored in order to return the laptop to your institute’s private network after the installation.
5. Change the IP Address field to 192.168.1.55
6. Change the Subnet Mask field to 255.255.255.0
7. All remaining fields on this page should be left empty.
8. Click OK on the remaining windows to apply the changes until all of the windows have been closed.
For Windows Vista users, consider the following steps:
1. Right click on the mouse on the Network icon on the desktop
2. Go to properties and left click on the mouse
3. Find Manage network connections under Tasks on the left side and left mouse click
4. Right click mouse on Local Area Connection
5. Go to properties and left click mouse (Screen will go blank for a few seconds)
6. At this point a window appears asking for your permission to continue, left click on the mouse to continue
7. Left click mouse on Internet Protocol Version 4(TCP/IPv4)
8. Then left click mouse on Properties
9. Record ANY numbers on this screen for your record if needed
10. Left click mouse on Use the following IP Address button
11. In the IP address window type 192.168.1.55
12. Left click mouse on Subnet mask window, the window should display 255.255.255.0
13. There should be NO other numbers in ANY other window in the Internet Protocol (TCP/IP) Properties
14. Left click on the mouse on OK
15. Left click on the mouse on OK or Close
For WINDOWS 7 users:
1. Click on the Start button in the lower left corner
2. Select control panel
3. Select and open Network and Sharing Center
4. Select Change adapter settings
5. Right click on Local Area Connection
6. Go to properties and left click
7. Left click on Internet Protocol Version 4 (TCP/IPv4)
8. Left click on Properties
9. Record ANY numbers on this screen for your records if needed
10. Left click on Use the following IP Address button
11. In the IP address window type 192.168.1.50
12. Left click on Subnet mask and you should have 255.255.255.0
13. There should be no other numbers in the TCP/IP properties
14. Left click on OK
15. Left click on Close
Note: If the steps in setting up your PC do not work, contact you IT department concerning your PC, this is a one
time setup.
247Security Inc. | 4400 North Point Parkway, Suite # 158, Alpharetta, GA 30022, USA | 1-866-693-7492 | www.247securityinc.com
ZEUS mDVR
USERS MANUAL
7
4. EQUIPMENT TEST
When all of the cameras, cables, and add-on modules have been installed and when the DVR is connected to your
on-site laptop, the completed setup needs to be tested. To begin the test, ensure the DVR’s storage media is
inserted in the DVR and the lock is turned to the locked position and then turn the vehicle’s ignition to ACC, ON or
RUN position. Starting the vehicle’s engine—and, by extension, the alternator to charge the battery—during the test is
not essential. Ensure that you have direct line-of-sight to the front of the DVR to see the LED indicators.
Note: At the first sign of a hazard/malfunction (electrical fire, smoke) immediately turn the vehicle’s ignition OFF.
The Zeus Series DVR normal boot sequence is as follows:
Sequence
Time Elapsed
[minutes : seconds]
Activity
1
0:05
The IGN (ignition) indicator will turn on. The DVR is idling in Stand-By
mode. It is not online or recording.
2
0:15
The PWR (power) indicator will turn on while the IGN (ignition) indicator
will flash, repeatedly. The DVR is now undergoing its boot sequence.
3
0:20
The green POWER indicator on the Event Marker will turn on.
4
0:45
The IGN (ignition) and PWR (power) indicators will turn on solid. The DVR
has completed its boot sequence.
5
0:50
The record light on the front of the DVR will come on.
6
1:00
The amber RECORD light on the Event Marker will turn on solid, also
indicating that the DVR is recording data. The DVR is now ready to record,
or to be serviced through the Ethernet Cable from your laptop.
NOTE: ON
THE ZEUS SERIES DVR’S WHEN THE X-CROSS CABLE IS CONNECTED TO
THE DVR FOR CONFIGURING THE BUS AND AIMING CAMERAS, THE UNIT
WILL NOT RECORD, AS SOON AS YOU DISCONNECT THE X-CROSS CABLE
FROM THE DVR WITH-IN 10 SECONDS THE DVR WILL AGAIN BEGIN
RECORDING. THIS CAN BE CHANGED IN THE SET-UP OF THE DVR IN THE
SYSTEM TAB.

247Security Inc. | 4400 North Point Parkway, Suite # 158, Alpharetta, GA 30022, USA | 1-866-693-7492 | www.247securityinc.com
ZEUS mDVR
USERS MANUAL
8
5. DVRViewer APPLICATION AND CAMERA AIMING
GETTING STARTED
Insert the 247Security Inc. CD-ROM into your on-site laptop and install the DVRViewer application. Please ensure
that any older version of theDVR Viewer application is successfully uninstalled from the computer before proceeding
to install the new DVRViewer.
DVRViewer is fully backwards-compatible with all 247Security DVR systems.
After the installation is completed, turn on your DVR and connect it to your laptop using the bundled Crossover
Cable. When your DVR has completed its boot-up sequence, start your newly-installed DVRViewer application on
your laptop.
TO LOG INTO DVRViewer
You will be presented with the user login screen for DVRViewer.
For the first time the application is started, it will use the
proceeding de facto credentials:
Username: admin
Password: 247SECURITYINC
Note:The User Name and Password fields are case-sensitive. If
you lose or forget your password, please contact 247Security
Inc. Technical Support at 1-866-693-7492 for assistance.

247Security Inc. | 4400 North Point Parkway, Suite # 158, Alpharetta, GA 30022, USA | 1-866-693-7492 | www.247securityinc.com
ZEUS mDVR
USERS MANUAL
9
DVRViewer MAIN WINDOW
To connect to your DVR, click on Play to open the action menu and select Live View. DVRViewer will scan your
computer’s network port for the connected DVR.
When your DVR is detected, it will appear on the device list along with the IP address of which one of its two LAN
ports you inserted the Crossover Cable. Select the DVR on the list and click Connect.
LIVE FEED FOR AIMING YOUR CAMERAS
When connected, DVRViewer will display a live video feed
from the DVR, allowing for the technician to adjust the
cameras as necessary. The number of simultaneous live
camera feeds will depend on how many camera channels
were enabled in that DVR’s configuration. Absent cameras
from an enabled camera channel will display “VIDEO LOST”
in its respective channel window, in DVRViewer. The live feed
will also carry live audio from all connected cameras for
immediate on-site testing of the built-in microphones. If you
hear audio but see no picture the issue is likely the video
codec in the laptop doesn’t support HD video and you will
need to use a newer laptop. (Microphone available for interior
cameras, only)

247Security Inc. | 4400 North Point Parkway, Suite # 158, Alpharetta, GA 30022, USA | 1-866-693-7492 | www.247securityinc.com
ZEUS mDVR
USERS MANUAL
10
CUSTOMIZING YOUR DVR’S FUNCTIONALITY IN SETUP
Prior to shipment the DVR will be completely configured to the following parameters:
•Date and time adjusted to your local time zone
•One recording channel activated per camera ordered
•Recording parameters, including frame rate, quality, and resolution, configured to recommended settings
•Event Marker recording durations, measured in seconds, of how long before and after the button is pressed
are the camera recordings marked is adjusted to the default of 150 seconds
•The DVR’s shut down delay, after the vehicle’s ignition has been turned off, adjusted to the default delay of
300 seconds (5 minutes).
The above parameters, as well as additional options, can be modified at your discretion by entering your DVR’s
Setup. To make adjustments to you DVR’s configuration, click Setup from the DVRViewer main window.
A login screen will appear, with the HTTP authentication standard. The default credentials are as follows:
User name:admin
Password: admin
A successful login will open the DVR configuration window, which operates similarly to a Web page. DVR
preferences are divided into sections pertinent to specific functions.
Zeus Series DVRs can use custom names of your choice to identify each vehicle in your fleet from one another. The
system’s name can be changed on the System page of DVR Setup after any changes, make sure and select the
APPLY button at the bottom of the screen and the CONTINUE button to accept the requested changes.

247Security Inc. | 4400 North Point Parkway, Suite # 158, Alpharetta, GA 30022, USA | 1-866-693-7492 | www.247securityinc.com
ZEUS mDVR
USERS MANUAL
11
Each individual camera channel can also be given a unique name to help identify cameras and their locations when
multiple cameras are installed. The names can be changed in their respective Camera pages of Setup.
Note: The custom names of your DVR and camera channels must be alphanumeric (letters A through Z; numbers 0
through 9). The names cannot contain spaces, special characters, or punctuation.

247Security Inc. | 4400 North Point Parkway, Suite # 158, Alpharetta, GA 30022, USA | 1-866-693-7492 | www.247securityinc.com
ZEUS mDVR
USERS MANUAL
12
STORAGE MEDIA INFORMATION
64GB SD Card
320GB Hard Disk
16/320GB DHD
(Hybrid Drive)
Shock Mount Plate
(Springs)
REQUIRED
System Page Setup
NOTES
DVR will ship with an
empty HDD case to cover
the space the HDD or DHD
would fit
HDD’s can still be used to
interchange with any
247Security DVR using the
same physical size HDD
DHD Hybrid drives ONLY
work in Zeus Series DVR’s
configured correctly as
listed above.
Thank you for choosing 247Security Inc. For any questions regarding the
installation procedure, please contact 247Security Inc.
Technical Support at 1-866-693-7492.
This manual suits for next models
2
Table of contents
Other 247Security DVR manuals

247Security
247Security ZEUS PRO Series User manual

247Security
247Security mDVR 600 Series User manual

247Security
247Security mDVR 500 Series Service manual

247Security
247Security mDVR600 Series User manual

247Security
247Security ZEUS TITAN User manual

247Security
247Security mDVR304 User manual

247Security
247Security mDVR303 User manual

247Security
247Security mDVR400 Series User manual

247Security
247Security mDVR514M User manual

247Security
247Security ZEUS Pt User manual