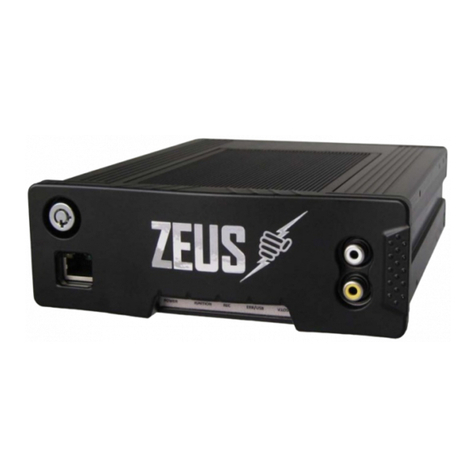
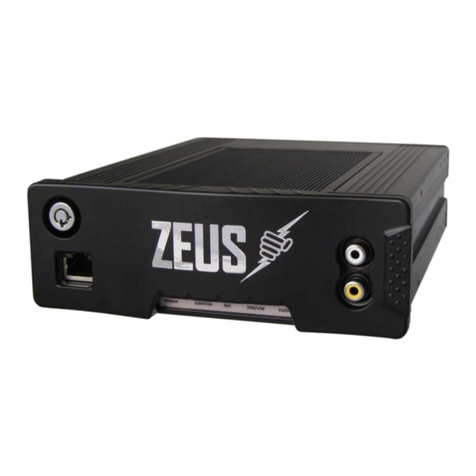
247Security ZEUS TITAN User manual

USER MANUAL
Zeus Titan | Desktop App
247securityinc.com
1.866.693.7492

247securityinc.com
1.866.693.7492
INTRODUCTION
The Zeus Titan DVR captures your vehicle’s video from multiple cameras and organizes the
les allowing end-users to retrieve video with a few mouse clicks. Zeus Titan also makes it
easy for you to access cameras and saved video in real-time.
247securityinc.com | 1.866.693.7492 | 1455 Alderman Drive, Alpharetta GA 30005, USA Pg. 2 of 47
Introduction
Not just state-of-the-art, Zeus TITAN and the DVRViewer Pro software DEFINE the mobile
video surveillance industry.
Zeus TITAN feature:
A dynamic bit rate
Congurable frame rate up to 30 fps per camera
Image quality control
Real-time previewing on all channels
Alarm triggers
Sensor conguration
Easy retrieval and transfer of video les over Modem/WiFi/LAN
GPS tracking
In addition, ZEUS allows end-users to independently manipulate these parameters for each
camera if desired. Note that some parameters should only be adjusted if the user has specific
knowledge or under the direction of 247 Security Inc tech support.

247securityinc.com
1.866.693.7492
1
TABLE OF CONTENTS
247securityinc.com | 1.866.693.7492 | 1455 Alderman Drive, Alpharetta GA 30005, USA Pg. 3 of 47
Table of Contents
Introduction ...............................................................................................
Overview ...................................................................................................
Operation ...................................................................................................
Conguration Zeus Titan .............................................................................
Conguration Menus ...................................................................................
• System Conguration Menu ..................................................................
• Camera Conguration Menu ..................................................................
• Sensor Conguration Menu ...................................................................
• Network Menu ......................................................................................
• Status Menu .........................................................................................
• Tools Menu ...........................................................................................
Reference Appendix ....................................................................................
Connections ................................................................................................
Specications .............................................................................................
Page 2
Pages 4 - 5
Pages 6 - 7
Pages 8 - 11
Pages 12 - 36
Pages 13 - 19
Pages 20 - 26
Page 27
Page 28
Page 29
Pages 30 - 36
Page 37 - 41
Pages 42 - 44
Pages 45 - 47

247securityinc.com
1.866.693.7492
Back
RETROFIT NOTES
247securityinc.com | 1.866.693.7492 | 1455 Alderman Drive, Alpharetta GA 30005, USA Pg. 5 of 47
Retrofit Notes
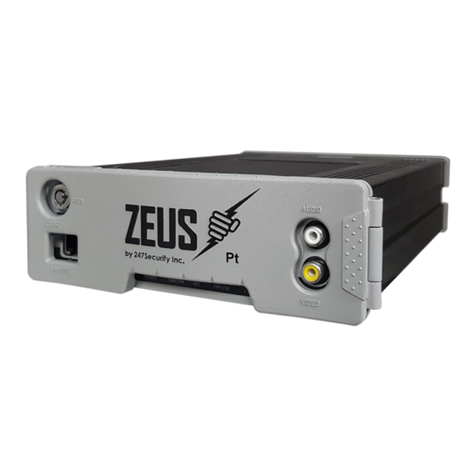
If replacing a ZEUS PT with a ZEUS TITAN, there are a few important changes:
TITAN uses a dierent power cable than PT
SD Cards are not recommended as a storage media; use a DHD2

247securityinc.com
1.866.693.7492
VIEWING VIDEOS
REMOVING THE MEDIA STORAGE TRAY
247securityinc.com | 1.866.693.7492 | 1455 Alderman Drive, Alpharetta GA 30005, USA Pg. 6 of 47
OPERATION
Operation
Once your Zeus TITAN has been installed, it’s ready to start recording.
To view videos, retrieve the DHD media storage tray from the DVR, connect it to your computer,
and open DVRViewer Pro. Refer to the DVRViewer Pro User Guide for details.
Go to pro.247securityinc.com for more information.
If you have TouchDown, you can upload and view videos from your browser, you don’t need to
retrieve the media storage tray from the vehicle.
The media storage tray (DHD – see below) can be removed and inserted without turning the
vehicle ignition o, but the POWER and REC LEDs must be o. This process is necessary so
that the ZEUS can properly close all video/audio les and safely turn the HDD (hard disc drive)
power o. This process will take roughly 15 to 30 seconds to complete. The feature is helpful
when access to video is needed but vehicle is required to remain running.
For a full explanation of the Titan lights, refer to Status Indicators on page 38
Turn the key to the “Open” position.
Open the door and wait until all lights
are o.
Note: The ignition light will remain
illuminated if the vehicle ignition is on.

247securityinc.com
1.866.693.7492
WIRELESS VIDEO RETRIEVAL
247securityinc.com | 1.866.693.7492 | 1455 Alderman Drive, Alpharetta GA 30005, USA
Gently pull media storage straight out from
the bay until it is free from the rails.
If swapping the drive, insert new media storage,
and close the door.
Turn the key to the “Lock” position.
The ZEUS will now turn the HDD power on,
detect the new media and start recording again.
If viewing videos, connect the media tray to the
computer with the supplied cable.
Refer to the DVRViewer Pro User Manual
for more information.
You can retrieve video from the DVR wirelessly through a wireless network access point.
Refer to the TouchDown manual for more information or talk to your 247 Security Inc representative.
Pg. 7 of 47
OPERATION

247securityinc.com
1.866.693.7492
1. CONNECT TITAN TO PC/LAPTOP
247securityinc.com | 1.866.693.7492 | 1455 Alderman Drive, Alpharetta GA 30005, USA
Your 247 Security installer will congure your TITAN DVR as part of the installation process.
Changes to the initial conguration can be made by following these steps.
1. Connect TITAN to your PC or laptop, with the supplied Ethernet Crossover Cable
2. Set up your computer’s Ethernet port (temporarily) with a static IP
3. Use DVRViewer Pro or a browser to access conguration settings (You can also use DVRViewer)
4. After disconnecting from TITAN, return your laptop/PC to dynamic IP settings as necessary
An Ethernet Crossover Cable is included with the unit. This is how the installer views the cameras
for aiming purposes. A crossover Ethernet cable is slightly dierent than a normal Ethernet cable:
the connection is not between a PC and a network device per se, such as a router/switch/modem,
but between two terminal devices on a LAN.
Use the grey cross-over cable that
shipped with the DVR. Attach one
end to the LAN port on the laptop
or PC,
...and the other end to the DVR port labeled LAN.
Verify that one end of the cable has a “XOVER” label.
A standard Ethernet network cable will not work.
CONFIGURING ZEUS TITAN
Pg. 8 of 47
Configuring Zeus Titan

247securityinc.com
1.866.693.7492
2. STATIC IP SETUP
SETTING UP YOUR PC - WINDOWS 7
SETTING UP YOUR PC - WINDOWS 8
1
247securityinc.com | 1.866.693.7492 | 1455 Alderman Drive, Alpharetta GA 30005, USA
Both your PC/Laptop and the TITAN need to be set up with “static” IP addresses to connect to each
other. TITAN’s default IP address is 192.168.1.100
1. Click on the Start button in the lower left corner
2. Select Control Panel
3. Select and open Network and Sharing Center
4. Select “Change adapter settings”
5. Right click on Local Area Connection
6. Left click on Properties
7. Left click on “Internet Protocol Version 4 (TCP/IPv4)”
8. Left click on Properties
9. Record ANY numbers on this screen; you may need to return to these numbers when nished
conguring TITAN
10. Left click on the Use the following IP Address button
11. In the IP address window type 192.168.1.55
12. Left click on Subnet mask and 255.255.255.0 should display
13. There should be no other numbers in the TCP/IP properties window
14. Left click on OK
15. Left click on Close
1. Drag the mouse pointer to the top right or bottom right “hot corner” until the ve Charms appear
along the right edge of the screen. Drag the mouse pointer and click on Search
(you can also access the Search charm through the keyboard shortcut Windows logo + Q), the
search pane will open; type “Control Panel” and select it from the results to the left
2. Select and open Network and Internet
3. Select and open Network and Sharing Center
4. Select Change adapter settings
5. Right click on Ethernet
6. Select Properties
7. Left click on Internet Protocol Version 4 (TCP/IPv4)
8. Left click on Properties
9. Record ANY numbers on this screen; you may need to return to these numbers when nished
conguring TITAN
10. Left click on Use the following IP Address button
11. In the IP address window type “192.168.1.55”
12. Left click on Subnet mask “255.255.255.0” should populate automatically
13. There should be no other numbers in the TCP/IP properties window
14. Left click on OK
15. Left click on Close
Pg. 9 of 47
CONFIGURING ZEUS TITAN

247securityinc.com
1.866.693.7492
Pg.10 of 47
247securityinc.com | 1.866.693.7492 | 1455 Alderman Drive, Alpharetta GA 30005, USA
SETTING UP YOUR PC - WINDOWS 10
1. Right click on the Start button in the lower left corner
2. Select Network Connections
3. Select and open Network and Sharing Center
4. Select Change adapter settings
5. Right click on Local Area Connection
6. Select Properties
7. Left click on Internet Protocol Version 4 (TCP/IPv4)
8. Left click on Properties
9. Record ANY numbers on this screen; you may need to return to these numbers when nished
conguring TITAN
10. Left click on Use the following IP Address button
11. In the IP address window type “192.168.1.50”
12. Left click on Subnet mask and “255.255.255.0” should populate automatically
13. There should be no other numbers in the TCP/IP properties window
14. Left click on OK
15. Left click on Close
SETTING UP YOUR PC - WINDOWS 11
1. Click the Start button in the lower left corner
2. Type “network connections”, click on View Network Connections
3. Right click Local Area Connection and click Properties
4. Left click on Internet Protocol Version 4 (TCP/IPv4)
5. Click the Properties button
6. Make sure that “Use the following IP address:” is selected
7. In the IP address window type “192.168.1.50”
8. Left click on Subnet mask and “255.255.255.0” should populate automatically
9. Click the OK button
10. Click Close or OK
Note: If the steps in setting up your PC do not work, contact you IT department concerning your PC,
this is a one-time setup to congure the Zeus Titan DVR.
You may need to return your computer to dynamic settings by selecting “Obtain an IP address
automatically”. See Step 4 below.
CONFIGURING ZEUS TITAN

247securityinc.com
1.866.693.7492
3. RUN DVRVIEWER PRO
247securityinc.com | 1.866.693.7492 | 1455 Alderman Drive, Alpharetta GA 30005, USA
CONFIGURING ZEUS TITAN
Pg.11 of 47
Refer to the DVRViewer Pro User Manual for details on downloading, installing, and launching the
program on your PC or laptop.
Verify that the DVR is powered up – the
Power and Ignition LEDs should be on
and solid. The bus can be idling or on
“Accessory” without the engine running.
Open DVRViewer Pro and login. The user “admin” has the password “247SECURITYINC”
Click View/Playback and select Congure.
Configure TITAN as needed.
Note: Some settings should not be changed
unless the user has specic knowledge, or is
under the direction of 247SecurityInc tech
support.
If unsure, make no changes without
contacting tech support.
4. RETURN THE IP SETTING TO DYNAMIC
You may not have to switch your Local Area Connection back to “Obtain an IP address automatically”
if your setting was already set to “Use the following IP address” but it was blank. We recommend that
you follow the previous instructions and delete the IP address.

247securityinc.com
1.866.693.7492
247securityinc.com | 1.866.693.7492 | 1455 Alderman Drive, Alpharetta GA 30005, USA
CONFIGURATION MENUS
Pg.12 of 47
Configuration Menus
Verify that the DVR is powered up – the Power and Ignition LEDs should be on and solid.
The bus can be idling or in “Accessory” mode.
The DVR setup is divided into six
major sections: System, Camera,
Sensor, Network, Status and Tools.
The TITAN DVR will already have been congured at the factory for your specic system
requirements, but of course can be updated as needed.
Note that some settings can impact the proper functioning of the DVR and require specic
knowledge before changing. If not certain, contact tech support rst.

247securityinc.com
1.866.693.7492
The System menu is where you
congure general parameters such
as the name of the DVR, time zone,
shutdown delay, etc.
Also, the G-Force set-up parameters
are here if the Drive-Safe module is
attached to the DVR.
SYSTEM CONFIGURATION MENU
247securityinc.com | 1.866.693.7492 | 1455 Alderman Drive, Alpharetta GA 30005, USA Pg.13 of 47
CONFIGURATION MENUS

247securityinc.com
1.866.693.7492
DVR Server Name allows the end-user to individually assign each ZEUS TITAN in their network a
unique name. This practice makes it possible to dierentiate and communicate with each individual
DVR system. DVRViewer Pro can communicate and congure multiple ZEUS TITAN systems by
scanning all ZEUS servers on the network, should they be connected via wireless network access
points.
DVR SERVER NAME
ADMIN PASSWORD
This is the “admin” password and can be changed to avoid unauthorized access.
Note that 247Security cannot recover access to the DVR should you change the password from the
default and misplace it. The default username is “admin” and cannot change.
DVR TIME ZONE
Select the time zone where the vehicle is operating from the drop-down menu.
A best practice is to include the bus number as part
of the DVR Server Name. The eld accepts letters &
numbers with a maximum of 16 characters.
Note: DO NOT USE spaces or symbols.
When you open Live Look-in under the View/Playback
menu in DVRViewer Pro, a list of all connected ZEUS
TITAN DVRs will display. Click on any DVR server name,
you gain access to the specic TITAN system.
COMPANY ID
The Company ID appears on all uploaded events and Event Reports. Company ID is assigned by
247SECURITY and shouldn’t be changed. The eld is used for identifying the DVR to TouchDown
Cloud and for cellular modem services, including Live Look-In and GPS data.
247securityinc.com | 1.866.693.7492 | 1455 Alderman Drive, Alpharetta GA 30005, USA Pg.14 of 47
CONFIGURATION MENUS

247securityinc.com
1.866.693.7492
247securityinc.com | 1.866.693.7492 | 1455 Alderman Drive, Alpharetta GA 30005, USA Pg.15 of 47
CONFIGURATION MENUS
SHUTDOWN DELAY (S)
This setting controls how long the TITAN will continue to operate and the cameras will continue
to record after the ignition key is switched to the OFF position. For example, in situations where
the bus is parked in a “No idle zone” but you want to continue to record video. The default value
of 300 seconds (5 minutes) is pre-set in the DVR, with the range of values from 10s to 14400
(4 hours).
STANDBY TIME (S)
This eld determines how long after the Shutdown Delay that TITAN will be in “Standby Mode”
before completely turning o. In Standby Mode the DVR enters a low-power consumption state
so that after the vehicle’s ignition has been turned o, DVR can still be accessed via a Wi-Fi
connection for DVR conguration, Live View and play back of video. Video recording stops and
SmartServer upload occurs. The recommended setting is 2400 seconds, or 4 hours.
MAXIMUM FILE SIZE (MB) & MAXIMUM FILE TIME (S)
These parameters determine the maximum size of the video les that are recorded and saved on
the removable hard drive(s). In the eld “Maximum File Size (MB)”, you can enter values ranging
from 10 MB to 500 MB . In the eld “Maximum File Time (s)”, you can enter values ranging from
60 seconds to 7200 seconds (2 hours).
Recommended settings are shown here. Should the video recording reach either of these maximums,
a new video le is automatically started to continue the recording process.
There are pros and cons associated with larger or smaller settings; it can either slow down or speed
up recording, searching, playback, and uploading video.
NUMBER OF DISKS
This eld tells TITAN the number of SD cards being used to store video. If the number of SDs
detected doesn’t match this setting, the ERR/USB LED will light. We strongly discourage the
use of SD cards. This should be set to “2” to match the number of SD card slots.

247securityinc.com
1.866.693.7492
CONFIGURATION MENUS
247securityinc.com | 1.866.693.7492 | 1455 Alderman Drive, Alpharetta GA 30005, USA Pg.16 of 47
EVENT MARKER
This drop-down list selects the sensor to use for the event marker.
The Event Marker (Sensor 1) is the default sensor to be used with
the included event marker cable unless there is a required custom
solution to use a dierent sensor.
EVENT MARKER
This eld tells TITAN what type of button conguration that is being
used for the installed Event Marker. There are 2 types of Event
Markers, each has a separate wiring conguration.
PRE-LOCK TIME (S) & POST-LOCK TIME (S)
“Pre-Lock Time” and “Post-Lock Time” (in seconds) defines how many seconds are included in the
event before and after the button push (or triggered event).
For instance, with settings of “60” in both elds, if the Event Marker Button was pressed at 8:30am,
the video event le is marked from 8:29am until 8:31am. It is recommended that both elds be set to
30 (seconds).
STOP RECORDING WHEN PLAY BACK / LIVE VIEW
This option disables recording when the TITAN is accessed by DVRViewer Pro either to Play Back
videos or for a Live View of cameras. Checking these boxes improves simultaneous multiple video
channel viewing, however video content may be lost if it stops recording.

247securityinc.com
1.866.693.7492
247securityinc.com | 1.866.693.7492 | 1455 Alderman Drive, Alpharetta GA 30005, USA Pg.17 of 47
CONFIGURATION MENUS
ENABLE FILE ENCRYPTION & FILE ENCRYPTION PASSWORD
This is a global setting that, when enabled, password-protects saved video clips. When these
encrypted les are opened, the password will be required. This is an additional security feature
to keep unauthorized users from viewing the video.
Note: If the password is lost, the video CANNOT be retrieved! If you forget your password, you will
NOT be able to play back your recorded video / audio les.
ENABLE GPS
If this option is enabled and the GPS antenna is installed, GPS information is integrated and
synchronized with video recordings. DVRViewer Pro will assist you in navigating videos.
ENABLE EXTERNAL GPS
This enables an external third-party GPS system to input its information to TITAN, for inclusion with
the video. In another scenario, TITAN may be replacing an older DVR that used an external GPS.
ENABLE Tab101 / SHOW TAB101 PEAK ON OSD
If this option is enabled and Tab101 is installed, TITAN will collect G-Force information for
integration with video. DVRViewer Pro can navigate videos based on Tab101 information.
Parameters for the Drive-Safe G-Force sensors are listed below. If the Tab101 is installed and
enabled, and if the second box is checked, g-force values will be shown on the OSD.
ENABLE SSD RECORDING
This option must be CHECKED if you are using SD cards as storage. SD cards are not recommended.
Note: Enable DHD Recording should be UNCHECKED if this is checked.
ENABLE EXTERNAL WiFi
This option is only enabled for a DVR that does not have the internal WiFi connection. This allows
for the connection of an external third-party WiFi Bridge to work with an otherwise “non-WiFi”
DVR for use on the WiFi TouchDown system.

247securityinc.com
1.866.693.7492
247securityinc.com | 1.866.693.7492 | 1455 Alderman Drive, Alpharetta GA 30005, USA Pg.18 of 47
CONFIGURATION MENUS
MAXIMUM OF RECORDING HOURS PER DAY
It’s safe to keep this set to 10 hours. Should the full day’s recording exceed 10 hours, ZEUS
TITAN will delete the oldest les from SSD disk
ENABLE DHD RECORDING
Check this box for DHD removable drives. The default setting is checked. If this is not checked,
secondary media must be used, such as SD cards, which is not recommended.
WAKE UP OPTION FOR FILE COPY
This setting denes when TITAN will copy les from the SSD to the HDD (both are inside the
DHD and DHD2 devices). “Right Away After Shutdown” occurs at the end of the Shut Down
period as set in the Shut Down Delay eld above, and before the TITAN enters Stand-by mode.
If there is a TouchDown system, set this to “By Wake Up Time”. It allows TouchDown processes
to begin and nish before the SSD copies video to the HDD. Titan will turn on at the set time set
in the next eld, and copy SSD les to the HDD. If there’s no TouchDown system, set this to
“Right Away After Shut Down”.
WAKE UP TIME SETTING
If By Wake Up Time is selected above, this eld sets the Wake Up Time when TITAN will turn on
and start moving video from the SSD to the HDD. This is a 24-hour clock format.
ENABLE DELETING ALL FILES WHEN DVR SERVER NAME CHANGES
This option, when ticked, deletes all the recordings and les on the DHD media when the
“DVR Server Name” changes, or if a DHD from a dierent DVR is inserted. “DVR Server Name”
is the name of the TITAN DVR; each DVR within a eet should have a unique name.
For example, if a number of drives are taken from several buses, and are returned to dierent
DVRs, all data will be erased if this is checked. If this is a concern, make sure that this box remains
unchecked. Default is unchecked. This is a security feature to prevent unauthorized access to video.
10

247securityinc.com
1.866.693.7492
247securityinc.com | 1.866.693.7492 | 1455 Alderman Drive, Alpharetta GA 30005, USA Pg.19 of 47
CONFIGURATION MENUS
DRIVE-SAFE G-FORCE SET-UP
If the TAB101 option is checked as listed above, the G-Force parameters will then appear on the
system set-up page after a system re-boot.
The TAB101 detailed settings are not to be reset except by a qualied technician or installer.
Table of contents
Other 247Security DVR manuals

247Security
247Security mDVR400 Series User manual

247Security
247Security mDVR600 Series User manual

247Security
247Security ZEUS User manual

247Security
247Security mDVR 600 Series User manual

247Security
247Security mDVR500 Series User manual

247Security
247Security mDVR 500 Series Service manual

247Security
247Security mDVR300 Series User manual

247Security
247Security ZEUS PRO Series User manual

247Security
247Security Zeus Series User manual

247Security
247Security ZEUS Pt User manual