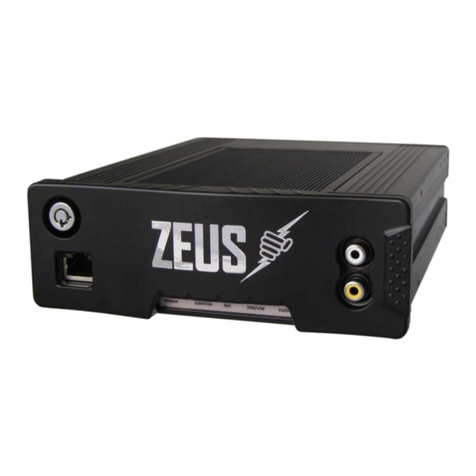
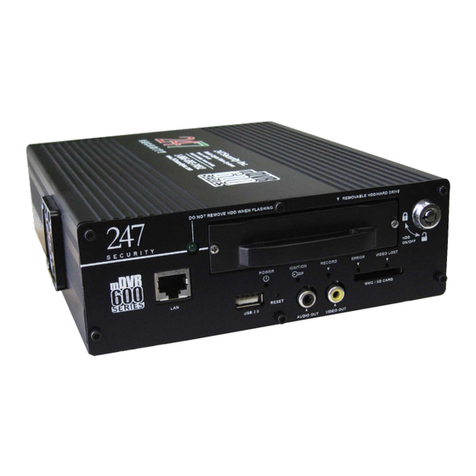
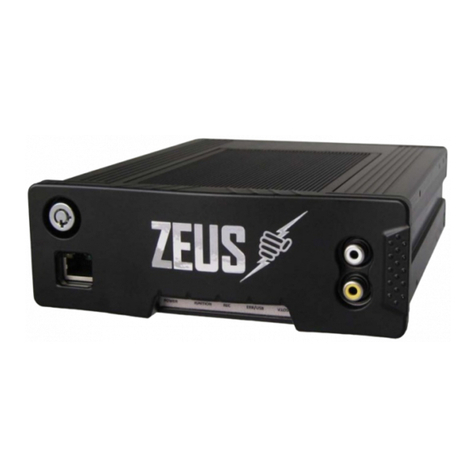
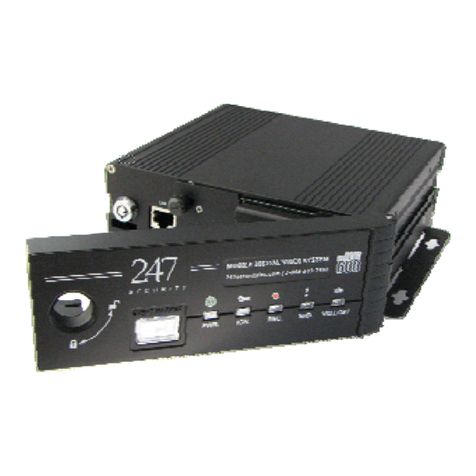
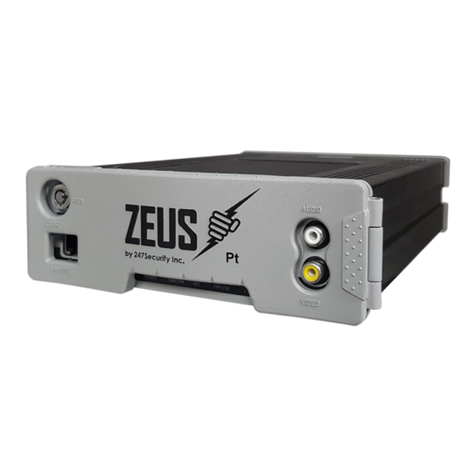
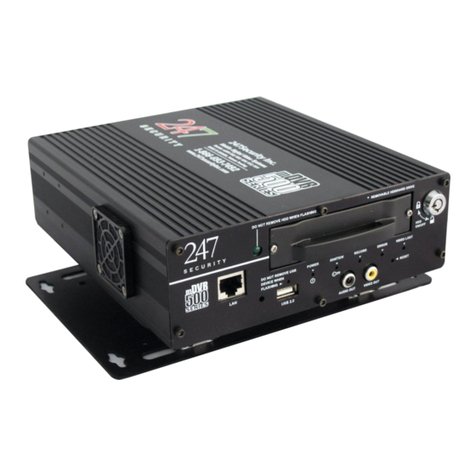
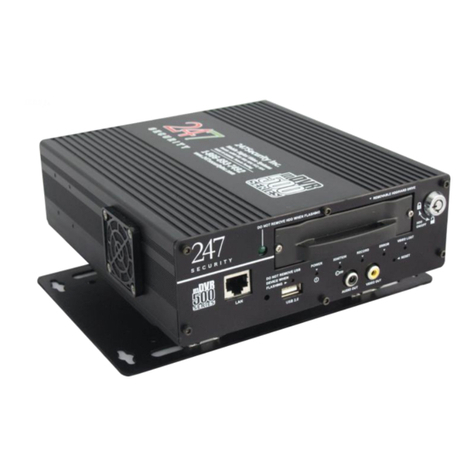
247Security ZEUS User manual

Copyright ©2013, 247Security Inc. | 4400 North Point Parkway, Suite # 158, Alpharetta, GA 30022, USA | 1-866-693-7492 | www.247securityinc.com
ZEUS PRO mDVR System
USERS MANUAL

247Security Inc. | 4400 North Point Parkway, Suite # 158, Alpharetta, GA 30022, USA | 1-866-693-7492 | www.247securityinc.com
ZEUS mDVR
USERS MANUAL
1
ZEUS
Rugged Mobile Digital Video Recorder
For In-Vehicle Applications
4 Video/4 Audio Channels
V1.1

247Security Inc. | 4400 North Point Parkway, Suite # 158, Alpharetta, GA 30022, USA | 1-866-693-7492 | www.247securityinc.com
ZEUS mDVR
USERS MANUAL
2
TABLE OF CONTENTS
USER MANUAL............................................................................. ERROR! BOOKMARK NOT DEFINED.
TABLE OF CONTENTS....................................................................................................................... 2
1GENERAL INFORMATION AND SPECIFICATIONS......................................................................... 5
1.1 INTRODUCTION .............................................................................................................................................. 5
1.2 SPECIFICATIONS.............................................................................................................................................. 5
1.3 CONNECTORS & LED LOCATIONS .................................................................................................................... 7
1.3.1 FRONT PANEL ................................................................................................................................................ 7
With Door Closed .............................................................................................................................................................. 7
1.3.2 BACK PANEL ................................................................................................................................................... 9
2PREPARATION FOR USE ...........................................................................................................10
2.1 FRONT CONNECTORS.................................................................................................................................... 10
2.1.1 10/100BASE-T LAN CONNECTOR and POE Connector................................................................................. 10
2.1.2 USB 2.0 CONNECTOR ................................................................................................................................... 10
2.1.3 AUDIO/VIDEO OUT CONNECTORS ............................................................................................................... 10
2.2 BACK CONNECTORS ...................................................................................................................................... 11
2.2.1 POWER INPUT CONNECTOR ........................................................................................................................ 11
2.2.2 CAMERA 1 - 4 CONNECTORS........................................................................................................................ 11
2.2.3 GENERAL PURPOSE INPUT / OUTPUT CONNECTOR #1 ............................................................................... 11
2.2.4 GENERAL PURPOSE INPUT / OUTPUT CONNECTOR #2 ............................................................................... 12
2.2.5 EVENT MARKER CONNECTOR ...................................................................................................................... 12
2.2.6 GPS CONNECTOR ......................................................................................................................................... 13
2.3 CABLE REQUIREMENTS ................................................................................................................................. 13
2.3.1 POWER CABLE.............................................................................................................................................. 13
2.3.2 EVENT MARKER CABLE ................................................................................................................................ 13
2.3.3 SENSOR / ALARM CABLE.............................................................................................................................. 14
2.3.4 CAMERA CABLE............................................................................................................................................ 14
2.3.5 GPS MODULE & CABLE ................................................................................................................................ 14
2.3.6 NETWORK CROSS-OVER CABLE ................................................................................................................... 15
2.3.7 POE Cable .................................................................................................................................................... 15
2.3.8 MINI USB CABLE........................................................................................................................................... 15
2.4 CAMERA LENSES, WHAT VIEW, WHAT LENS ................................................................................................. 15
3OPERATION .............................................................................................................................16
3.1 STATUS INDICATORS..................................................................................................................................... 16
3.1.1 IGNITION LED............................................................................................................................................... 16
3.1.2 POWER LED.................................................................................................................................................. 16
3.1.3 ERROR LED ................................................................................................................................................... 16
3.1.4 VIDEO LOST INDICATOR LED........................................................................................................................ 16
3.1.5 RECORD LED................................................................................................................................................. 16
3.1.6 HDD ON/OFF LOCK ...................................................................................................................................... 16
3.1.7 MEDIA STORAGE REMOVAL......................................................................................................................... 16
3.2 WIRELESS VIDEO RETRIEVAL ......................................................................................................................... 17
3.3 EVENT MARKING AND RETRIEVAL ................................................................................................................ 17
3.4 SD (Storage Flash) OPERATION DISK............................................................................................................. 17
3.4.1 OPERATION.................................................................................................................................................. 17
3.4.2 PERFORMANCE AND RESTRICTION.............................................................................................................. 18

247Security Inc. | 4400 North Point Parkway, Suite # 158, Alpharetta, GA 30022, USA | 1-866-693-7492 | www.247securityinc.com
ZEUS mDVR
USERS MANUAL
3
3.5 HBD (Hybrid Disk) OPERATION DISK ............................................................................................................. 18
4CONNECTING TO DVR ..............................................................................................................19
4.1 IP CONFIGURATION ...................................................................................................................................... 19
4.2 CONNECT CROSS-OVER CABLE...................................................................................................................... 20
4.3 SETTING UP YOUR PC ................................................................................................................................... 20
4.3.1 USING WINDOWS XP ................................................................................................................................... 20
4.3.2 USING WINDOWS VISTA .............................................................................................................................. 20
4.3.3 USING WINDOWS 7 ..................................................................................................................................... 20
5DVR SETUP ..............................................................................................................................22
5.1 STARTING DVRVIEWER ................................................................................................................................. 22
5.2 DVRVIEWER LOGIN....................................................................................................................................... 22
5.3 CONNECTING TO DVR ................................................................................................................................... 22
5.4 SETUP LOGIN ................................................................................................................................................ 23
5.5 SYSTEM CONFIGURATION MENU.................................................................................................................. 24
5.5.1 DVR SERVER NAME ...................................................................................................................................... 25
5.5.2 ADMIN PASSWORD...................................................................................................................................... 25
5.5.3 DVR TIMEZONE ............................................................................................................................................ 25
5.5.4 SHUTDOWN DELAY (S)................................................................................................................................. 26
5.5.5 STANDBY TIME (S)........................................................................................................................................ 26
5.5.6 MAXIMUM FILE SIZE (MB) & MAXIMUM FILE TIME (S) ............................................................................... 26
5.5.7 EVENT MARKER ........................................................................................................................................... 26
5.5.8 PRE-LOCK TIME (S) & POST-LOCK TIME (S) .................................................................................................. 27
5.5.9 STOP RECORDING WHEN PLAY BACK .......................................................................................................... 27
5.5.10 STOP RECORDING WHEN LIVE VIEW........................................................................................................... 27
5.5.11 ENABLE FILE ENCRYPTION........................................................................................................................... 27
5.5.12 FILE ENCRYPTION PASSWORD .................................................................................................................... 27
5.5.13 ENABLE GPS ................................................................................................................................................ 28
5.5.14 ENABLE Tab101........................................................................................................................................... 28
5.5.15 ENABLE Show Tab101 Peak on OSD............................................................................................................ 28
5.5.16 ENABLE SMART UPLOAD............................................................................................................................. 28
5.5.17 ENABLE BUZZER .......................................................................................................................................... 28
5.5.18 ENABLE EXTERNAL WIFI.............................................................................................................................. 28
5.5.19 ENABLE HBD RECORDING ........................................................................................................................... 28
5.5.20 SCREEN NUMBER ........................................................................................................................................ 29
5.5.21 DRIVE-SAFE (G-FORCE SET-UP) ................................................................................................................... 29
5.6 CAMERA CONFIGURATION MENUS .............................................................................................................. 30
5.6.1 ENABLE CAMERA ......................................................................................................................................... 31
5.6.2 CAMERA NAME............................................................................................................................................ 31
5.6.3 RECORDING MODE ...................................................................................................................................... 31
5.6.3.1 CONTINUE........................................................................................................................................................ 31
5.6.3.2 TRIGGER BY SENSOR ........................................................................................................................................ 31
5.6.3.3 NO RECORDING ............................................................................................................................................... 31
5.6.4 RESOLUTION ................................................................................................................................................ 31
5.6.5 FRAME RATE ................................................................................................................................................ 32
5.6.6 BIT RATE MODE ........................................................................................................................................... 32
5.6.7 BIT RATE....................................................................................................................................................... 32
5.6.8 PICTURE QUALITY ........................................................................................................................................ 33
5.6.9 BRIGHTNESS, CONTRAST, HUE AND SATURATION ...................................................................................... 33
247Security Inc. | 4400 North Point Parkway, Suite # 158, Alpharetta, GA 30022, USA | 1-866-693-7492 | www.247securityinc.com
ZEUS mDVR
USERS MANUAL
4
5.6.10 TRIGGERS .................................................................................................................................................... 33
5.6.11 PRE-RECORDING & POST-RECORDING TIME............................................................................................... 34
5.6.12 SHOW GPS SPEED ON OSD ......................................................................................................................... 34
5.6.13 SHOW GPS COORDINATE ON OSD .............................................................................................................. 34
5.6.14 RECORDING NOTIFICATION ........................................................................................................................ 35
5.7 SENSOR CONFIGURATION MENU ................................................................................................................. 36
5.8 NETWORK MENU.......................................................................................................................................... 37
5.9 STATUS MENU .............................................................................................................................................. 38
5.10 TOOLS MENU................................................................................................................................................ 39
5.10.1 DOWNLOAD CONFIGURATION ................................................................................................................... 39
5.10.2 UPLOAD CONFIGURATION .......................................................................................................................... 40
5.10.3 UPDATE FIRMWARE & MCU FIRMWARE .................................................................................................... 42
6DVRVIEWER.............................................................................................................................45
6.1 INTRODUCTION ............................................................................................................................................ 45
6.2 SOFTWARE CLIENT FEATURES....................................................................................................................... 45
6.3 SYSTEM REQUIREMENTS .............................................................................................................................. 45
6.4 INSTALLATION .............................................................................................................................................. 46
6.5 STARTING DVRVIEWER ................................................................................................................................. 46
6.6 LIVE VIEW ..................................................................................................................................................... 48
6.6.1 SELECTING SCREEN LAYOUT ........................................................................................................................ 49
6.6.2 CAMERA SELECTION .................................................................................................................................... 49
6.6.3 CAMERA MENU ........................................................................................................................................... 49
6.6.4 SNAPSHOT ................................................................................................................................................... 49
6.6.5 SETUP........................................................................................................................................................... 49
6.6.6 DISCONNECT................................................................................................................................................ 49
6.7 PLAY ARCHIVE .............................................................................................................................................. 49
6.8 SEARCH VIDEO BY CALENDAR AND TIMELINE BAR ....................................................................................... 50
6.9 SEARCH VIDEO BY EVENT.............................................................................................................................. 51
6.9.1 PLAY BACK CONTROL ................................................................................................................................... 52
6.9.2 EXPORT VIDEO ............................................................................................................................................. 52
6.10 PLAY FILE ...................................................................................................................................................... 53
6.11 SNAPSHOT.................................................................................................................................................... 54
6.12 USERS ........................................................................................................................................................... 54
6.12.1 USER MANAGEMENT .................................................................................................................................. 54
6.12.2 ADD/DELETE USER ...................................................................................................................................... 55
6.12.3 CHANGE USER PASSWORD ......................................................................................................................... 55
7SUPPORT INFORMATION .........................................................................................................56
8LIMITED WARRANTY................................................................................................................56

247Security Inc. | 4400 North Point Parkway, Suite # 158, Alpharetta, GA 30022, USA | 1-866-693-7492 | www.247securityinc.com
ZEUS mDVR
USERS MANUAL
5
1GENERAL INFORMATION AND SPECIFICATIONS
1.1 INTRODUCTION
DVR stands for Digital Video Recorder with one common goal, allowing end-users to record / retrieve real
time video files with a few mouse clicks. Within the last decade, video encrypt/decrypt algorithms achieved
noticeable improvement along with the availability of large capacity digital storage devices that draw attention
to designing DVR systems. With this in mind, 247Security Inc. has designed and built the ZEUS Series equipment
to make this transition smooth for the in-vehicle applications, specifically the transportation industry.
The ZEUS employs high performance video compression modified h.266 standard to optimize video/audio
data stream so that it can be sent over a network or stored directly on a local disk. The compression algorithm
mainly runs on a DSP Engine, therefore freeing up valuable resources within the system to do other jobs. The
ZEUS has features such as dynamic bit rate, controllable frame rate (max 120fps total), image quality control,
real-time previewing on all channels, alarm triggers, sensor configuration, easy retrieval and transfer of video
files over WIFI/LAN, GPS tracking and much more. In addition, ZEUS allows end-users to independently
manipulate these parameters for each camera if desired.
1.2 SPECIFICATIONS
Video Recording Resolution
•Each channel can be set independently using D1 (720x480), CIF (360x240), DCIF (528x352)
configurations
Video Compression
•Modified h.266 compression, high quality video images and low bandwidth usage on the market
today. Four different levels of video quality configurations.
Video Recording Frame Rate
•Channels can be independently set to record from 1fps to 30 fps
•All channels can record simultaneously at 30fps with D1 (720x480) resolution.
Video recording channels
•Up to 4 channels, 30fps/channel
Audio Recording Channels
•Up to 4 audio channels; Camera has built-in noise-reduction microphone
•One audio recording channel synchronized to each video recording channel
Camera connection
•Video, Audio, Power and Encryption all in one cable, with locking mechanism
Internal video storage
•Removable drive (HDD, HBD, SSD. Read item 3.4 and 3.5 for more detail about SD and HBD
operation)
•Up to 500 GB HDD or 64GB SSD
•Rugged
•USB. 2.0

247Security Inc. | 4400 North Point Parkway, Suite # 158, Alpharetta, GA 30022, USA | 1-866-693-7492 | www.247securityinc.com
ZEUS mDVR
USERS MANUAL
6
•Integrated heater
Wireless Network
•WLAN 802.11g, can support external WiFi 802.11gn or 802.11bg
GPS
•GPS module can be connected to DVR using one cable, up to 40’ in length
Ethernet
•10/100 Base-T Ethernet port
•IEEE 802.3u 100BASE-T Fast Ethernet compatible
•POE (Power Over Ethernet)
Sensors
•Up to 9 sensors can be connected
Alarms
•Up to 4 alarms can be connected
Indicators
•Power LED (green)
•Ignition LED (green)
•Record LED (amber)
•Error LED (red)
•Video Lost LED (red)
PHYSICAL/POWER
Housing
Ionized Aluminum for rugged applications
Form Factor
Depth: 184 mm (7.25 inches)
Width: 159 mm (6.25 inches)
Height: 51 mm (2 inches)
(Not including shock and vibration isolator)
Weight
Typically approximately 1.3 kg (2.8 lb)
(Not including shock and vibration isolator)
Power Supply
Vehicle power supply switcher
ESD protected
Battery
Lithium Coin Cell CR2032 (20.0 x 3.2 mm)
3 V / 235 mAh
Input Power Range
+8 VDC ~ +24 VDC normal operating voltage

247Security Inc. | 4400 North Point Parkway, Suite # 158, Alpharetta, GA 30022, USA | 1-866-693-7492 | www.247securityinc.com
ZEUS mDVR
USERS MANUAL
7
+6 VDC ~ +28 VDC abnormal operating voltage up to 10 seconds
Over and under voltage protection
Ignition Signal / Power Down Timer
Software configurable delay power off signal from 1- 14400 seconds (4 hours)
50mA current draw in sleep mode after power down
Power Consumption
Typical 10W (5°C ~ 55°C)
DVR draws less than 24ma when off
ENVIRONMENT
Temperature Range
-30°C to +55°C (-22°F to +131°F) operating temperature
Relative Humidity
10% to 90% non-condensing
1.3 CONNECTORS & LED LOCATIONS
1.3.1 FRONT PANEL
With Door Closed
320 Gigabytes
Removable HDD
Key lock,
Secure HDD
Protection
Door
Video/Audio
output
Connect to
monitor
Video Lost LED
Error LED
Recording LED
Ignition LED
Power On LED
Mounting
Place
10/100Base-T
Network / Protocol
Over Ethernet.
(Works as POE when
Protection Door
closed)
10/100Base-T
Network / Power
over Ethernet.
(Works as POE when
Protection Door
closed)

247Security Inc. | 4400 North Point Parkway, Suite # 158, Alpharetta, GA 30022, USA | 1-866-693-7492 | www.247securityinc.com
ZEUS mDVR
USERS MANUAL
8
Front View w/Door Open & HDD Removed
SD Flash Memory
Socket
USB Port for
Data Retrieval
Main Power
Reset Switch

247Security Inc. | 4400 North Point Parkway, Suite # 158, Alpharetta, GA 30022, USA | 1-866-693-7492 | www.247securityinc.com
ZEUS mDVR
USERS MANUAL
9
1.3.2 BACK PANEL
Wifi
GPS
General
Purpose
I/O 2
Power
+8V~+24V
DC IN
G-Force
Event
Marker
General
Purpose
I/O 1
Cameras (1-> 4)

247Security Inc. | 4400 North Point Parkway, Suite # 158, Alpharetta, GA 30022, USA | 1-866-693-7492 | www.247securityinc.com
ZEUS mDVR
USERS MANUAL
10
2PREPARATION FOR USE
2.1 FRONT CONNECTORS
2.1.1 10/100BASE-T LAN CONNECTOR and POE Connector
Depending on the hardware, the DVR will come either an 8-pin RJ45 or 10-pin RJ50 port. Only ZEUSL
hardware will have the RJ50 port, this port is labeled as POE and has a default static IP address of
192.168.1.100 and used for POE.All other ZEUS hardware will have an RJ45 front port labeled as LAN and does
not suppose POE. Pins on diagram below marked with * are only on ZEUSL systems.
Pin Number
Signal
Description
Pin out
1
TX+
Transmit Data +
2 TX- Transmit Data -
3
RX+
Receive Data +
4 COM Common
5 N/C Not connected
6
RX-
Receive Data -
7 COM Common
8
COM
Common
9*
GND
POE Ground
10*
VCC
POE 12VDC
2.1.2 USB 2.0 CONNECTOR
Connector type: 4-pin friction-lock header
2.1.3 AUDIO/VIDEO OUT CONNECTORS
Connector type: RCA Jack
Pin Number
Signal
Description
Pin out
Inside Audio Audio Signal
Outside GND Ground
Inside Video Video Signal
Outside GND Ground
Pin Number Signal Description Pin out
1
VCC
Cable Power +5 V
2
-Data
Balanced Data Line -
3 +Data Balanced Data Line +
4 GND Cable Ground

247Security Inc. | 4400 North Point Parkway, Suite # 158, Alpharetta, GA 30022, USA | 1-866-693-7492 | www.247securityinc.com
ZEUS mDVR
USERS MANUAL
11
BACK CONNECTORS
2.1.4 POWER INPUT CONNECTOR
The ZEUS has a built-in Intelligent power switcher that can operate from +8V ~ +24V DC-IN. The
ON/OFF signal connects to the vehicle’s ignition signal. The ZEUS uses this signal to trigger the power shut-off
delay and the timing circuitry. The ZEUS will remain ON until the shut-off delay time has been reached. The
system will then go through its normal shutdown procedures before completely powering down. The GND
(Common DC ground) signal should be connected to the vehicle common ground.
Pin Number
Signal
Description
Pin out
1 ON/OFF
On/Off Switch
On when 6V ~ VIN
Off when 0V ~ 0.5V
2
GND
Ground
3 VIN Input voltage (+8V~+24VDC)
4 GND Ground
2.1.5 CAMERA 1 - 4 CONNECTORS
The ZEUS supports a maximum of 4 cameras. These Micro-fit connectors are used to connect the
camera inputs to the ZEUS system (video and audio) using a gang plug adapter for the cameras. Also included in
each camera connection is DV12V Out to power the camera. You can refer to the cover of the DVR for the PIN
assignments of each connector. If any of these cameras are not connected properly (for instance loose cables,
unplugged etc…) than the ZEUS intelligently notifies the end-users with “black screen and OSD info” on the
preview screen. Camera inputs are labeled CAMERA 1, CAMERA 2, CAMERA 3 and CAMERA 4
Pin Number Signal Description Pin out
1
MIC-IN
Microphone In
2
GND
Ground
3
Video+
Video In (+)
4
Video-
Video In (-)
5
+12VDC
+12VDC OUT
6
GND
Ground
2.1.6 GENERAL PURPOSE INPUT / OUTPUT CONNECTOR #1
This connector provides 5 digital inputs and 1 digital output. The digital inputs are labeled as DI_1,
DI_2, DI_3, DI_4, DI_5. The digital output is labeled as DO_3. End-users can assign any sensors to one of these
digital input signals. Up to 5 sensors can be wired to this connector. Alternatively, one alarm (LED, Siren, etc.) is
available on the digital output.

247Security Inc. | 4400 North Point Parkway, Suite # 158, Alpharetta, GA 30022, USA | 1-866-693-7492 | www.247securityinc.com
ZEUS mDVR
USERS MANUAL
12
Pin Number Signal Description Pin out
1
Input DI_1
2
Input DI_2
3
Input DI_3
4
Input DI_4
5
Input DI_5
6
Output DO_3
7
GND
8 GND
9 +10V Standby
10 +10V Standby
2.1.7 GENERAL PURPOSE INPUT / OUTPUT CONNECTOR #2
This connector provides 3 digital inputs. The digital inputs are labeled as DI_6, DI_7, DI_8. End-users
can assign any sensors to one of these digital input signals, up to 3 sensors can be wired to this connector. This
connector also provides +12VDC OUT on pin 4 with a built-in 0.75A fuse.
Pin Number
Signal Description
Pin out
1
Input DI_6
2
Input DI_7
3
Input DI_8
4 +12VDC OUT
5
Not connected
6
GND
2.1.8 EVENT MARKER CONNECTOR
This connector is used to plug in the included event marker cable.
Pin Number
Signal Description
Pin out
1 DI_0
2
GND
3 +12V OUT
4
Output DO_0
5 Output DO_1
6
Output DO_2

247Security Inc. | 4400 North Point Parkway, Suite # 158, Alpharetta, GA 30022, USA | 1-866-693-7492 | www.247securityinc.com
ZEUS mDVR
USERS MANUAL
13
2.1.9 GPS CONNECTOR
This connector on the back of the DVR is used to plug in the included GPS cable and allow the ZEUS DVR
to collect GPS data with the inside dash mount GPS antenna.
Pin Number Signal Description Pin out
1
N/A
2 RxD
3
TxD
4 N/A
5
GND
6 +12V OUT
2.2 CABLE REQUIREMENTS
2.2.1 POWER CABLE
The 15ft three wire power cable is included for connection between the DVR and your vehicle power
and ignition signals. It is highly recommended that in-line fast blow fuses (7.5 amps) be installed on the two
power input connections for safety pre-cautions.
Wire Color
Signal
Description
Picture
Red VIN Input voltage (8~24VDC)
Black
GND
Ground
White ON/OFF
Ignition switched power (only hot
when ignition is in RUN/ACC
2.2.2 EVENT MARKER CABLE
A 15 ft cable is already connected to the Event Marker and pre-wired to a 2X3 Molex connector; the
Molex connector will then connect to the event marker port on the back of the DVR. The event marker uses 3
digital outputs for Video Lost, Recording & Power LED’s and 1 digital input for the push button. The push
button is used for pre/post trigger recording which when pressed, marks the video files at that specific
moment. Pre-event and Post-event time locking can be configured in the DVR setup.
Connector
Description
Picture
6-Pin
Molex
Connects to Event Marker connector
on DVR

247Security Inc. | 4400 North Point Parkway, Suite # 158, Alpharetta, GA 30022, USA | 1-866-693-7492 | www.247securityinc.com
ZEUS mDVR
USERS MANUAL
14
2.2.3 SENSOR / ALARM CABLE
A 15ft sensor / alarm cable is provided to connect the 4 digital inputs, 1 digital output and motion
sensor signals to the GP I/O port of the DVR.
Wire Color
Signal
Description
Picture
Brown Input DI_1 Connects to Digital Input 1 of GP
I/O connector (Pin 1)
White/
Green Input DI_2 Connects to Digital Input 2 of GP
I/O connector (Pin 2)
Green Input DI_3
Connects to Digital Input 3 of GP
I/O connector (Pin 3)
White/
Orange Input DI_4
Connects to Digital Input 4 of GP
I/O connector (Pin 4)
Orange Motion
Sensor
Connects to Motion Sensor of GP
I/O connector (Pin 5)
White/
Brown
Output DO_3
Connects to Digital Output 3 of GP
I/O connector (Pin 6)
Blue GND Connects to GND of GP I/O
connector (Pin 7)
White/
Blue GND Connects to GND of GP I/O
connector (Pin 8)
2.2.4 CAMERA CABLE
STP (shielded twisted pair) cable is the standard and will use 2x3 Molex plugs for connections making
the installation simple and straight forward. The cable connectors are keyed so they cannot be connected
incorrectly. Connect one end of the cable to one of the available camera inputs on the DVR and the other end
into the camera.
Connector
Signal
Description
Picture
6-Pin
Molex Connects to DVR
6-Pin
Molex Connects to camera
2.2.5 GPS MODULE & CABLE
An internally mounted GPS module attaches to a 15ft cable to the back of the DVR using a 2x3 Molex
camera cable. This is an RS-232 connection.
Connector Signal Description Picture
6-Pin
Molex connector on DVR
6-Pin
Molex Connects to GPS

247Security Inc. | 4400 North Point Parkway, Suite # 158, Alpharetta, GA 30022, USA | 1-866-693-7492 | www.247securityinc.com
ZEUS mDVR
USERS MANUAL
15
2.2.6 NETWORK CROSS-OVER CABLE
This cable connects a computer / laptop to the 10/100BASE-T LAN connector using the network
standard RJ45 connector so that user can setup the DVR parameters as well as preview the video and audio
from the video channels.
Connector Signal Description Picture
RJ45 Ethernet Connects to 10/100BASE-T LAN
connector
2.2.7 POE Cable
The POE cable is only used for DVRs that use a M2 Client for wireless uploading and has a RJ50
connector on one end and a RJ45 connector on the other. The RJ50 connects to the DVR 10/100BASE-T front
port and the RJ45 connects to the M2 Client. Only used for ZEUSL hardware.
RJ50 pins
Signal
RJ45 pins
Picture
1 TX+ 1
2 TX- 2
3 RX+ 3
6 RX- 6
9 POE-GND 7,8
10 POE-12V 4,5
2.2.8 MINI USB CABLE
This cable connects the mDVR removable storage media to your computer or laptop for video / audio
playback. This is a standard USB 2.0 Type A to 5 Pin mini-B Cable which should be no longer than 12 to 16
inches. See section 6 for instructions on how to use the DVRViewer application to connect to the storage media
and play back your recorded video and audio.
Connector Signal Description Picture
USB 2.0
Type A Connects to your computer
USB 2.0
5 Pin mini-
B
Connects to the mDVR storage
media
2.3 CAMERA LENSES, WHAT VIEW, WHAT LENS
The chart below can be used as a guide when ordering and installing cameras in your vehicle.
Lens
Angle of View
Best focus distance
Viewable distance
2.9mm
120°
4 ft
10 ft
3.6mm
92°
5 ft
12 ft
6.0mm
54°
8 ft
20 ft

247Security Inc. | 4400 North Point Parkway, Suite # 158, Alpharetta, GA 30022, USA | 1-866-693-7492 | www.247securityinc.com
ZEUS mDVR
USERS MANUAL
16
8.0mm
39°
10 ft
28 ft
12mm
26°
13 ft
35 ft
16mm
19°
20 ft
56 ft
Viewable distance means maximum range of the optimum standard
3OPERATION
3.1 STATUS INDICATORS
3.1.1 IGNITION LED
This LED is to notify the operator that the vehicle’s ignition has been turned on which will then turn on
the DVR. This LED will be blinking when ignition is turned on and until DVR powers on. This LED will also blink
very quickly when ignition is turned off and until DVR powers off completely.
3.1.2 POWER LED
This LED is to notify operator that system power is on.
3.1.3 ERROR LED
This LED is to notify operator that the system has encountered a problem and cannot continue normal
operation when lit solid. Please call tech support for troubleshooting procedures.
Error LED indication for USB retrieval. When using USB retrieval to retrieval the GPS data or Lock video
files, the Err Led will flash at the speed of 500ms on and 500ms off. If the Err led flash, the USB stick is not ready
to remove
3.1.4 VIDEO LOST INDICATOR LED
This LED is to notify operator when any of the enabled cameras loses video signal meaning the cable is
cut, not connected or the camera is having a problem.
3.1.5 RECORD LED
This LED indicates if the DVR is recording.
3.1.6 HDD ON/OFF LOCK
The HDD On/Off lock mechanism is employed to prevent unauthorized operators from removing the
media storage and tampering with video data. Turn the key to position “Close” to lock media storage or “Open”
to unlock. The ZEUS will NOT record video if the lock mechanism is in the “Open” position
3.1.7 MEDIA STORAGE REMOVAL
The media storage is hot swappable and can be removed and inserted without turning the ignition of
the vehicle off. This process will take roughly 10 to 20 seconds to complete. The feature is helpful when access
to video is needed but vehicle is still running its’ route. User can remove the media storage and insert a new
one so that the needed video can be retrieved right away.
1. Turn key to the “Open” position:

247Security Inc. | 4400 North Point Parkway, Suite # 158, Alpharetta, GA 30022, USA | 1-866-693-7492 | www.247securityinc.com
ZEUS mDVR
USERS MANUAL
17
This process is necessary so that the ZEUS can properly close all video/audio files and safely
turn the HDD power off. Open the door and wait until only the ignition light is still light before
removing the media.
2. Gently pull media storage out from the bay
3. Insert new media storage – Wait for at least 30 seconds (Power LED is OFF) then insert
new/original storage media, close the door.
4. Turn key to the “Close” or locked position:
The ZEUS will now turn the HDD power on, detect the new media and start recording again.
3.2 WIRELESS VIDEO RETRIEVAL
(Refer to Touch Down manual) the DVR can still be made WIFI ready with the use of an external WIFI
bridge available for purchase separately, or Internal WIFI.
3.3 EVENT MARKING AND RETRIEVAL
(Refer to Event Marking/USB Retrieval guide)
3.4 SD (Storage Flash) OPERATION DISK
3.4.1 OPERATION
1. Use a SD flash card 32G ADATA class 10 for ZEUS
2. Format of SD:
•Format of SD is FAT32(can use Windows7 to perform).
•Refer to the links: http://www.ehow.com/how_1000631_hard-drive-
linux.html#ixzz23PSoZHpv
3. Plugging the SD to ZEUS:
i. HDD key lock OFF, wait for all LEDs OFF excluding Ignition LED, then insert the SD in SD slot
in front panel.
(Use the same step if user wants to plug out the SD)
ii. HDD key lock ON, wait for the ZEUS boots up
4. At Boot up stage:
The Ignition LED is flashing about 30 seconds to 60 and stay
5. At the running stage:
i. The Power LED and Ignition LED (Green) are ON when system boots up completely.
ii. The Recording LED (Amber) will be ON (or flashing)
6. At Shutdown delay stage:

247Security Inc. | 4400 North Point Parkway, Suite # 158, Alpharetta, GA 30022, USA | 1-866-693-7492 | www.247securityinc.com
ZEUS mDVR
USERS MANUAL
18
ZEUS goes to Shutdown delay stage after Ignition is switched OFF, the ZEUS still records till
Shutdown delay times out.
7. At Stand by stage:
The ZEUS stops recording onto the SD.
The ZEUS will upload TD the gpslogs, dvrlog and the marked videos from the SD if the Enable
Smart Upload option is enabled.
ZEUS shutdowns when Uploading completes and Stand by times out.
3.4.2 PERFORMANCE AND RESTRICTION
Suggestion this configure for 4 interior cameras:
Resolution: 528x320
Frame rate: 15
Bit rate mode: VBR (variable bit rate)
Bit Rate: 1Mbs
The 32GBs SD can store 2 days of recorded continuous videos then Ring delete happens.
The SD Disk is a small and light media storage for a ZEUS, the limitation is the small
capacity compares to a HDD (250GB or 320GB)
3.5 HBD (Hybrid Disk) OPERATION DISK
a) Format HBD Disk:
1. HBD includes two disks: HD and SD
2. The format of SD is FAT32
3. The format of HD is EXT3
b) Recording
1. Recording is only on SD, and during recording, HD is turned off.
2. For HBD recording, the user needs to enable the HBD recording on system setup page
c) At the boot up stage
•When the system boots up, and if the HBD recording is enabled, if the SD is corrupted, then the
DVR will recover the SD for up to 4 minutes. If the SD can’t be recovered, it will be formatted to
FAT32
•When the HBD inserted, if the HBD recording is enabled, the SD will be selected as recording
disk and the HD will be turned off if the HD shows up.

247Security Inc. | 4400 North Point Parkway, Suite # 158, Alpharetta, GA 30022, USA | 1-866-693-7492 | www.247securityinc.com
ZEUS mDVR
USERS MANUAL
19
d) At the Standby stage
•After the shutdown delay, the files on SD will copy to HD. If the file copy is completely, the SD
will be formatted to FAT32.
•After ignition is off, after shutdown delay, the Tab101 downloading will start first. After the
TAB101 downloading, if HBD recording is enabled, then the WIFI is not turned on, the GPS is
powered off and the cameras are powered off. After that, the HD will be turned on and the
files in SD will be copied to HD. If the file copy is completely, the SD will be formatted to FAT32.
Then WIFI is turned on. The system goes to standby mode.
•If the files from SD are not completely copied to HD, the SD will not be formatted
•During the file copy from SD to HD, if the live view or play archived happens, the file copy from
SD to HD is paused. After the live view or play archived is done, the file copy from SD to HD
resumes.
•System starts uploading data if this feature is enabled at setup page. The smart uploading only
uploads data from HD.
e) The process of disk copy from Flash to Hard disk
1. Create the file list on Flash
2. Check whether the file to be copied exists on Hard disk
3. If the file doesn’t exist, check whether the file is lock file or not. If it is lock file . Check whether
it was copied before or not, if it was, then change the lock file to no lock file
4. If the file exists, then check the size of file, if the size of file on hard disk is equal to the size of
file to be copied, check next file and go to step2.
5. Copy the file from SD to Hard disk
6. Check next file and go Step2 until all files have been checked
f) The procedure of disk key lock off
1. Flash the Hard disk LED
2. DVR stops recording and release all the resource
3. Un-mount all the disks
4. Send MCU command to turn off the power
4CONNECTING TO DVR
Please make sure you already read Item “1.3 Warning POE feature” before reading setup.
4.1 IP CONFIGURATION
The DVR default IP address is 192.168.1.100. The DVR is set up with a STATIC IP address to allow for a direct
connection with a cross-over cable. During installation the DVR can be connected to a laptop allowing the
installer to preview the cameras for aiming purposes.
This manual suits for next models
1
Table of contents
Other 247Security DVR manuals

247Security
247Security Zeus Series User manual

247Security
247Security ZEUS Pt User manual

247Security
247Security ZEUS PRO Series User manual

247Security
247Security mDVR500 Series User manual

247Security
247Security mDVR 500 Series Service manual

247Security
247Security mDVR 600 Series User manual

247Security
247Security mDVR514M User manual

247Security
247Security mDVR400 Series User manual

247Security
247Security mDVR304 User manual

247Security
247Security mDVR300 Series User manual