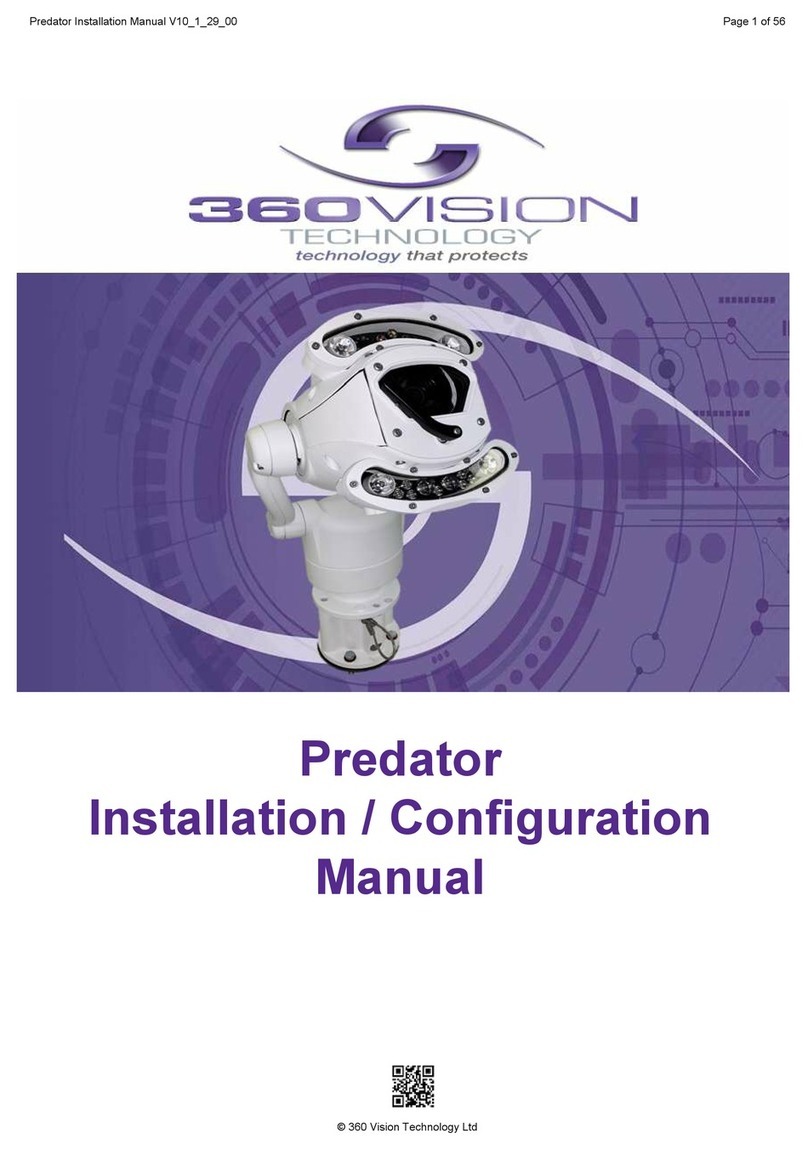
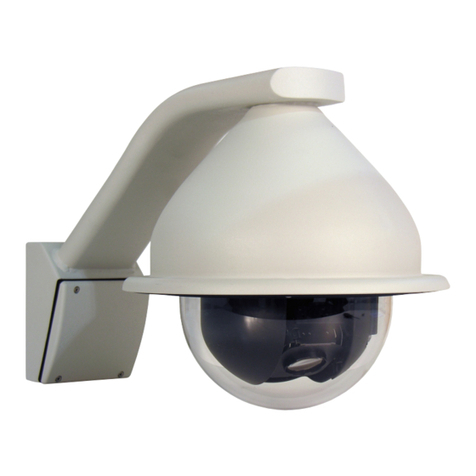
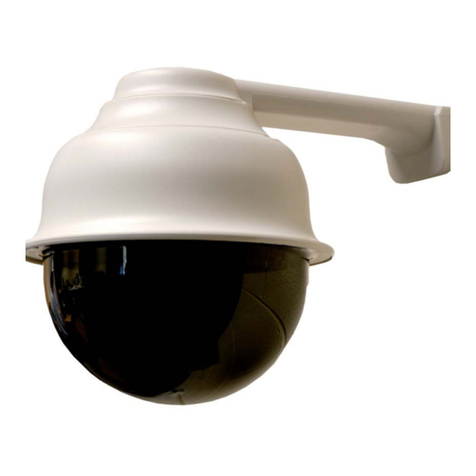
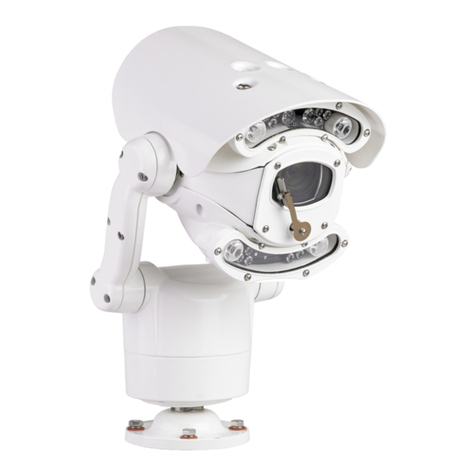
360 Vision Visiondome-VR Instruction sheet

Page 1
© 360 Vision Technology Ltd.
Visiondome VR Installation Manual Ver 2.7
Visiondome-VR
Installation/Conguration Manual

Page 2
© 360 Vision Technology Ltd.
Visiondome VR Installation Manual Ver 2.7
Table of Contents
1 Safety and Precautions .............................................................................................................................. 2
2 Housing Dimensional Drawing ................................................................................................................... 3
3 Mounting Options ....................................................................................................................................... 4
4 Connections ............................................................................................................................................... 5
4.1 Standalone Alarmcard Setup ............................................................................................................. 7
5 Basic Twisted Pair/RS485 Data Wiring ...................................................................................................... 9
6 Visiondome VR Protocol/Address setup. ................................................................................................. 10
7 Visiondome VR OSD ................................................................................................................................11
7.1 PIN Number ......................................................................................................................................11
8 OSD Operation/Navigation....................................................................................................................... 12
9 Special Presets ........................................................................................................................................ 14
10 Important - Care of Painted Surfaces..................................................................................................... 14
11 Storage and Handling............................................................................................................................. 15
12 Warranty................................................................................................................................................. 15
1 Safety and Precautions
1. Please read these notes before attempting to operate the 360 Vision VisionDome VR, and keep for future
reference.
2. All servicing and repairs must be handled by 360 Vision Technology.
3. Avoid pointing the camera directly towards a bright light source (sunlight), or expose the camera to intensive
light situations as this may damage the camera pick-up device.
4. Installation should be carried out by suitably qualied personnel, in accordance with local codes of practice
and regulations.
5. 360 Vision Technology Limited accept no liability for any damage caused by incorrect or improper installation.

Page 3
© 360 Vision Technology Ltd.
Visiondome VR Installation Manual Ver 2.7
2 Housing Dimensional Drawing
Sot Mount
Weight 4kg
MUST NOT BE REPRODUCED OR SHOWN TO
DO NOT SCALE
ALL DIMENSIONS IN MM
REMOVE ALL SHARP EDGES
SHEET:
D
C
B
A
D
C
B
A
4
3
2
1
4
3
2
1
A3
DESCRIPTION SCALE:
PERMISSION OF THE AUTHOR.
ANY THIRD PARTY WITHOUT THE DIRECT WRITTEN
C COPYRIGHT PROTECTED AND
THIS DRAWING AND ALL COPIES ARE
PART NUMBER:
0.167 1 OF 2
TOLERANCES:-
X = 0.5
X.X = 0.1
X.XX = 0.05
A3
3rd ANGLE PROJECTION
360 Vision Technology Ltd.
Unit 7, Seymour Court,
Manor Park, Runcorn, Cheshire,
WA7 1SY. United Kingdom.
www.360visiontechnology.com
125
12
238
188
263
9.5 (x4) ON
101.6 (4" PCD)
10
11
6
20
M12x1.5P (x3)
CABLE GLAND
332
326
NAME:
M5725-A
VANDAL INSTALL
CAST WALL BRACKET
ISS DATE REFERENCE
A 060617 FIRST ISSUE
060617
DATE :
K.CRAIK
RELEASED:
APPROVED:
ENGINEER:
--
MATERIAL: FINISH:
SCALE 0.3
SCALE 0.3
Wall Mount
MUST NOT BE REPRODUCED OR SHOWN TO
DO NOT SCALE
ALL DIMENSIONS IN MM
REMOVE ALL SHARP EDGES
SHEET:
D
C
B
A
D
C
B
A
4
3
2
1
4
3
2
1
A3
DESCRIPTION SCALE:
PERMISSION OF THE AUTHOR.
ANY THIRD PARTY WITHOUT THE DIRECT WRITTEN
C COPYRIGHT PROTECTED AND
THIS DRAWING AND ALL COPIES ARE
PART NUMBER:
0.167 1 OF 2
TOLERANCES:-
X = 0.5
X.X = 0.1
X.XX = 0.05
A3
3rd ANGLE PROJECTION
360 Vision Technology Ltd.
Unit 7, Seymour Court,
Manor Park, Runcorn, Cheshire,
WA7 1SY. United Kingdom.
www.360visiontechnology.com
188
50 (2") GLAND
CLEARANCE
210.0
9 (x4) ON
190.5 (7.5") PCD
203.0
5.0
121.5
5
10
9
9(22)
NAME:
M5727-A
VANDAL INSTALL
SOFFIT MOUNT (CEILING)
ISS DATE REFERENCE
A 220118 FIRST ISSUE
210118
DATE :
K.CRAIK
RELEASED:
APPROVED:
ENGINEER:
- -
MATERIAL: FINISH:
SCALE 0.4
SCALE 0.4
SCALE 0.4
M12x1.5P (x3)
CABLE GLAND CONNECTION
(SEALING PLUG SUPPLIED
ON UNUSED CONNECTION)
Weight 3.5kg

Page 4
© 360 Vision Technology Ltd.
Visiondome VR Installation Manual Ver 2.7
Weight 5.5kg
MUST NOT BE REPRODUCED OR SHOWN TO
DO NOT SCALE
ALL DIMENSIONS IN MM
REMOVE ALL SHARP EDGES
SHEET:
D
C
B
A
D
C
B
A
4
3
2
1
4
3
2
1
A3
DESCRIPTION SCALE:
PERMISSION OF THE AUTHOR.
ANY THIRD PARTY WITHOUT THE DIRECT WRITTEN
C COPYRIGHT PROTECTED AND
THIS DRAWING AND ALL COPIES ARE
PART NUMBER:
0.167 1 OF 2
TOLERANCES:-
X = 0.5
X.X = 0.1
X.XX = 0.05
A3
3rd ANGLE PROJECTION
360 Vision Technology Ltd.
Unit 7, Seymour Court,
Manor Park, Runcorn, Cheshire,
WA7 1SY. United Kingdom.
www.360visiontechnology.com
200
357
575
6
125
9.0 (x4) ON
101.6 (4") PCD
9
9
6
10
188
M12x1.5P (x3)
CABLE GLAND
50 GLAND
CLEARANCE
NAME:
M5726-A
VANDAL INSTALL
SWN-NECK BRACKET
ISS DATE REFERENCE
A 060617 FIRST ISSUE
060617
DATE :
K.CRAIK
RELEASED:
APPROVED:
ENGINEER:
--
MATERIAL: FINISH:
SCALE 0.3
SCALE 0.3
Swan Neck Mount
3 Mounting Options
Weight 2.2kg
Corner Bracket

Page 5
© 360 Vision Technology Ltd.
Visiondome VR Installation Manual Ver 2.7
4 Connections
Cable Size
VisionDome VR
Maximum Distances
(Using VRVD-PSU)
0.75mm² 30 metres
1.00mm² 40 metres
1.25mm² 50 metres
1.50mm² 60 metres
2.00mm² 100 metres
To ensure optimum Visiondome VR performance these parameters must be adhered to. Failure to do so will
invalidate the warranty.
Coax Video Connection board
Power Connections
Connect 24Vac/30vdc to CON2.
Data Connections
Connect RS485 (D+/D-) to Dome connection board using CON3.
Video Connections
Connect Video Coax cable (Video/Gnd) to Dome connection board
using CON4.
Wall and Swan Neck mount options are supplied with 7m power, RS485 data and coax cables. These are tted
using cables glands.
Please note that the External Vandal Dome is water sealed to its bracket. The Dome is supplied with
connection cables which can be cut down to any required length.
Please note that if the customer seperates the Dome from its bracket this will damage the waterproof
seals and will therefor invalidate the 3 year warranty.
RS485 Data
Data + Blue
Data - Yellow
Power
V + (AC) Brown
V - (AC) Blue
Video
Video Signal Centre Core
Video Ground Coax Shield

Page 6
© 360 Vision Technology Ltd.
Visiondome VR Installation Manual Ver 2.7
MAINS input
230Vac
L
E
N
MAINS FUSE
VRVD-PSU
MAINS FUSE = 1.0AF
OUTPUT FUSE
VRVD-PSU
FUSE 1 = 2.5AT
FUSE 2 = 200mAT
VRVD-PSU
180 x 180 x 100mm
Enclosure Dimensions
VRVD-PSU_301117
MAINS input
230Vac
L
E
N
MAINS FUSE
VRVD-XALARM-PSU
MAINS FUSE = 1.0AF
OUTPUT FUSE
VRVD-XALARM-PSU
FUSE 1 = 2.5AT
FUSE 2 = 200mAT
VRVD-XALARM-PSU
180 x 180 x 100mm
Enclosure Dimensions
VRVD-XALARM-PSU_301117

Page 7
© 360 Vision Technology Ltd.
Visiondome VR Installation Manual Ver 2.7
The VRVD-XALARM-PSU has eight normally open/normally closed (Dilswitch S1, switch 8 on) alarm inputs
on connector CON1 on the alarm PCB. When using normally closed contacts, all un-used alarm inputs must
be connected to alarm in common CON1. Connect switches or volts free relay outputs from PIRs or other
equipment to CON1 connector so that the terminal labelled COM is connected to the appropriate alarm input
(A1 to A8) when the alarm contact is activated. There is also an alarm relay which can be used to activate
alarms on other equipment (DVRs etc.). The alarm relay contacts (Common – ‘C’, Normally Open – ‘NO’ and
Normally Closed – ‘NC’) use connector CON3 on the alarm PCB.
When an alarm is activated, the ALARM PCB will activate the alarm relay output and will send commands to set
the Visiondome VR to activate ‘alarm mode’. The Visiondome VR will save the current status (pan, tilt, lens, tour
and mimic) then it will seek the preset which corresponds with the active alarm number.
The alarm will remain active while the alarm input is active. After the alarm input becomes inactive, a 10 second
alarm timer will start. The timer extends the alarm activity until the alarm timer expires. If the alarm input
becomes active again before the timer has expired, the timer resets and will restart again when the alarm input
becomes inactive and a further preset seek command is sent to the Visiondome VR.
If an alarm is active and a further alarm becomes active, the latest alarm will interrupt the previous alarm. (i.e.
the latest alarm has highest priority) The Visiondome VR will seek the preset that corresponds with the new
alarm. When the contacts become inactive, the Visiondome VR will seek the preset that corresponds with the
previous highest priority alarm that is still active. When all alarms inputs are inactive the alarm timer starts. After
the timer expires, the Alarm PCB sends a command to the Visiondome VR to end the ‘alarm mode’ and the
Visiondome VR will return to the status position and action that had been saved when rst alarm became active.
(Fit a link on the alarm card CON4 position 7 to disable the automatic return to the pre-alarm status when all
alarms and the alarm time have expired).
When an alarm is active and the Visiondome VR has automatically selected the appropriate preset, it is possible
to send further commands (i.e. manual control) to the Visiondome VR which will override the preset which had
previously been automatically selected. Each time an automatic preset seek occurs as described in the previous
paragraph; the manual control will be interrupted.
4.1 Standalone Alarmcard Setup
Alarm Number Preset Number
1 1
2 2
3 3
4 4
Alarm Number Preset Number
5 5
6 6
7 7
8 8
Address (1-7) (Range 1 to 128)
Use Dilswitch to set address same as camera.
(See page 8).
Alarm Input setting
Use Dilswitch pole 8 to set if alarms are N/O or N/C. All
unused N/C contacts to be connected to alarm common.
RS485 In Connections/LK3 termination
Connect RS485 from controller to CON6.
Power Connections
Connect 24Vac/30Vdc to CON7.
RS485 Out Connections/LK1 termination
Connect RS485 to camera to CON5.
Relay Output (0.5A 125Vac max, 1A 24Vdc max)
Use CON3 for relay output.
Alarm Inputs
Use CON1 for volt free alarm inputs.
Protocol/Alarm settings
Use CON4 to set protocol and camera
alarm behaviour. (See page 9).
Page 8
© 360 Vision Technology Ltd.
Visiondome VR Installation Manual Ver 2.7
Dil Switch Settings 1-7
Address 1 to 128 range See below
Dil Switch Settings 8
Normally Open Contacts O
Normally Closed Contacts (un-used inputs must be connected to common) On
RS485 Address Settings
1 2 3 4 5 6 7 8
ON
1 2 3 4 5 6 7 8
ON
1 2 3 4 5 6 7 8
ON
1 2 3 4 5 6 7 8
ON
1 2 3 4 5 6 7 8
ON
1 2 3 4 5 6 7 8
ON
01
02
03
04
05
06
07
08
09
10
11
12
13
14
15
16
1 2 3 4 5 6 7 8
ON
1 2 3 4 5 6 7 8
ON
1 2 3 4 5 6 7 8
ON
1 2 3 4 5 6 7 8
ON
1 2 3 4 5 6 7 8
ON
1 2 3 4 5 6 7 8
ON
1 2 3 4 5 6 7 8
ON
1 2 3 4 5 6 7 8
ON
1 2 3 4 5 6 7 8
ON
1 2 3 4 5 6 7 8
ON
1 2 3 4 5 6 7 8
ON
1 2 3 4 5 6 7 8
ON
17
18
19
20
21
22
23
24
25
26
27
28
29
30
31
32
1 2 3 4 5 6 7 8
ON
1 2 3 4 5 6 7 8
ON
1 2 3 4 5 6 7 8
ON
1 2 3 4 5 6 7 8
ON
1 2 3 4 5 6 7 8
ON
1 2 3 4 5 6 7 8
ON
1 2 3 4 5 6 7 8
ON
1 2 3 4 5 6 7 8
ON
1 2 3 4 5 6 7 8
ON
1 2 3 4 5 6 7 8
ON
1 2 3 4 5 6 7 8
ON
1 2 3 4 5 6 7 8
ON
1 2 3 4 5 6 7 8
ON
1 2 3 4 5 6 7 8
ON
33
34
35
36
37
38
39
40
41
42
43
44
45
46
47
48
1 2 3 4 5 6 7 8
ON
1 2 3 4 5 6 7 8
ON
1 2 3 4 5 6 7 8
ON
1 2 3 4 5 6 7 8
ON
1 2 3 4 5 6 7 8
ON
1 2 3 4 5 6 7 8
ON
1 2 3 4 5 6 7 8
ON
1 2 3 4 5 6 7 8
ON
1 2 3 4 5 6 7 8
ON
1 2 3 4 5 6 7 8
ON
1 2 3 4 5 6 7 8
ON
1 2 3 4 5 6 7 8
ON
1 2 3 4 5 6 7 8
ON
1 2 3 4 5 6 7 8
ON
1 2 3 4 5 6 7 8
ON
1 2 3 4 5 6 7 8
ON
49
50
51
52
53
54
55
56
57
58
59
60
61
62
63
64
1 2 3 4 5 6 7 8
ON
1 2 3 4 5 6 7 8
ON
1 2 3 4 5 6 7 8
ON
1 2 3 4 5 6 7 8
ON
1 2 3 4 5 6 7 8
ON
1 2 3 4 5 6 7 8
ON
1 2 3 4 5 6 7 8
ON
1 2 3 4 5 6 7 8
ON
1 2 3 4 5 6 7 8
ON
1 2 3 4 5 6 7 8
ON
1 2 3 4 5 6 7 8
ON
1 2 3 4 5 6 7 8
ON
1 2 3 4 5 6 7 8
ON
1 2 3 4 5 6 7 8
ON
1 2 3 4 5 6 7 8
ON
1 2 3 4 5 6 7 8
ON
1 2 3 4 5 6 7 8
ON
Example shows switch
settings for camera address 3
Switch is shown as
white.

Page 9
© 360 Vision Technology Ltd.
Visiondome VR Installation Manual Ver 2.7
CON4 Settings
1 2 3 4 5 6 7 8
CON4
Protocol Settings 3 4 5 6
360 Vision O O O O
Pelco D 9600 baud On O O O
Pelco D 4800 baud O On O O
Pelco D 2400 baud On On O O
Pelco P 9600 baud O O On O
Pelco P 4800 baud On O On O
Pelco P 2400 baud O On On O
5 Basic Twisted Pair/RS485 Data Wiring
The Visiondome VR is capable of being controlled by either Coax Telemetry or Twisted Pair Telemetry
(RS485). Below are wiring congurations for two wiring formats used for Twisted Pair Telemetry (RS485). The
Visiondome VR camera is not RS485 end of line terminated, a 120Ω resistor across D+ and D- must be used if
the camera is tted at the end of the RS485.
Daisy Chain
RS485 twisted pair cable is wired to each camera in a “chain”. Only
the last camera is to have the RS485 (end of line) termination on, all
other cameras in the chain must have the RS485 termination o.
Star Wired
RS485 twisted pair cable is wired to each camera in a “star” from
one point. A suitable RS485 star driver/data distribution product
must be used. All cameras in this wiring conguration must have the
RS485 (end of line) termination on.

Page 10
© 360 Vision Technology Ltd.
Visiondome VR Installation Manual Ver 2.7
6 Visiondome VR Protocol/Address setup.
All Visiondome VR cameras are supplied set to 360 Vision protocol, camera twisted pair address 1. When
the Visiondome VR is switched on, an OSD (On Screen Display) is shown on the image from the camera for
approx 20 seconds.
PRO: Protocol being used for telemetry (e.g. 360 Vision Technology Ltd)
CAM: Camera RS485 ID (e.g. Cam 1)
S or L: Short or Long cable run. Use the utility to set whether the coax used to send video is under or over
300m.
Second Line: Shows the Visiondome VR Software Version loaded into the camera.
To change the above settings in the camera, 360 Predator utility software, a USB/RS485 cable (PRED-
USB-485) and a laptop are required.
The Predator utility and PRED-USB-485 cable drivers can be found on the CD (shipped with the camera) or on
the 360 Vision Technology web site (www.360visiontechnology.com/downloads).
Install the software (Predator-issued-120521-1-installer.exe) on the laptop being used. Connect the RS485 end
of the cable tted with a 3 way connector to the Visiondome VR RS485. Run the utility on the laptop and then
connect the USB end of the cable into the laptop. The utility will then look for new comms ports and then will
look for the camera across all baud rates used.
Settings that can be altered from this software are:
• Protocol: 360 (Coax/RS485), Pelco P 2400/4800/9600, Pelco
D 2400/4800/9600, Pelco Coaxitron (Extended version), VCL
(Coax/RS485), Ultrak (RS485), Forward Vision (RS485)*,
BBV/DENNARD C (FSK Coax), MARK MERCER (FSK Coax),
Molynx (Coax/RS485)*/**
• Coax Cable length: Longer than 300m or shorter than 300m.
• RS485 Address: Used on RS485 systems only.
*Molynx & Forward Vision are not available in the Visiondome VR
camera.
** Choose Molynx to set the camera to Mark Mercer (RS485)
(units supplied Dec 2017)
PRO:360VTL CAM:0001 S
Visiondome VR Software Version

Page 11
© 360 Vision Technology Ltd.
Visiondome VR Installation Manual Ver 2.7
7 Visiondome VR OSD
OSD (On Screen Display) is accessed by dening/programming preset 6 or 95.
• Use the joystick up, down, left and right to navigate the menu.
• Use the joystick zoom in to highlight/select an option.
• Use joystick left and right to increment/decrement numbers.
Tour 001 item ...
PreDelSpd
Old.................
New................
0 1 2 3 4 5 6 7 8 9
Accept Item
Accept Final Item
Clear item
Return
Exit
DEFINE MIMIC
Mimic Number 001
Start Recording
Return
Exit
DEFINE PRESET
Preset Number ...
0 1 2 3 4 5 6 7 8 9
Accept Entry
Clear Entry
Return
Exit
DEFINE HOME FUNCTION
Action Tour
Number 001
Delay Minutes 010
Delay Seconds 000
Accept Changes
Return
PRIVACY ZONE MENU
Dene Privacy Zone
Seek Privacy Zone
Remove Privacy Zone
Return
Exit
SERVICING
Power Reset Dome
Factory Reset Dome
Visiondome VR Software
Version
Return
Exit
Dene Tour
Dene Mimic
Dene Preset
Dene Home Function
Return
Dene Tour
Dene Mimic
Dene Preset
Dene Home Function
Settings Menu
Text Field Menu
Servicing
Privacy Zone Menu
Return
SEEK PRESET
Preset Number ...
0 1 2 3 4 5 6 7 8 9
Accept Entry
Clear Entry
Return
Exit
START TOUR
Tour Number 001
Start Tour
Return
Exit
START MIMIC
Mimic Number 001
Start Mimic
Return
Exit
DOME SETTINGS MENU
Pin Number ...
0 1 2 3 4 5 6 7 8 9
Accept Entry
Clear Entry
Return
Exit
DOME MENU
Seek Preset
Start Tour
Start Mimic
Settings Menu
Exit
7.1 PIN Number
Operators PIN: 360 or 426 or 180
Controllers PIN: 1379 or 9731
Engineers PIN: 5498
TEXT FIELD EDIT
---------------------------------------
0123456789 :ABCDEFG
HIJKLMNOPQRSTUVWXYZ
X Position: 000
Y Position: 000
TEXT Display: OFF
Accept Entry
Clear Entry
Return
General1 Settings
General2 Settings
Night Settings
Shutter Settings
Return
WARNING
All Stored Data Will Be
Permanently Erased
Continue
Return
Exit
DEFINE PRIVACY ZONE
Privacy Zone ...
0 1 2 3 4 5 6 7 8 9
Accept Entry
Clear Entry
Return
Exit
SEEK PRIVACY ZONE
Privacy Zone ...
0 1 2 3 4 5 6 7 8 9
Accept Entry
Clear Entry
Return
Exit
REMOVE PRIVACY ZONE
Privacy Zone ...
0 1 2 3 4 5 6 7 8 9
Accept Entry
Clear Entry
Return
Exit
FINISH MIMIC BY
DEFINING ANY PRESET
Digital Zoom ON
White Balance OUTDOOR
Line Lock ON
Line Phase +056
Video Gain 002
Video Lift 000
Wide Dynamic OFF
Accept Changes
Return
Auto Flip SEMI
Proportional OFF
Freeze Presets ON
Zoom Speed 007
OSD Preset Six YES
Ambient Lighting NO
PEL/VCL AF AI PTZ ON
Accept Changes
Return
Col/Mono Change: Dark
Mono On 020
Mono O 013
1=day 7=dusk 20=dark
Brightness Bright
Bright Control Preset
Noise Reduction Auto
Aperture 010
Accept Changes
Return
Fast Shutter OFF
Fast Shutter Speed
g:1/1000
Slow Shutter 1/3 sec
Accept Changes
Return

Page 12
© 360 Vision Technology Ltd.
Visiondome VR Installation Manual Ver 2.7
8 OSD Operation/Navigation
Dome menu
• Seek Preset
• Start Tour
• Start Mimic
• Dome Settings Menu
Dene Tour
A tour of presets is stored in the Visiondome VR as a list of tour points. Each tour point consists of a preset
number, the dwell time for which the Visiondome VR will pause and the speed parameter that will be used to
seek the preset. Each of the four tours of presets can contain between 2 and 360 points.
When programming a tour of presets it is necessary to rst store all the required presets into the Visiondome
VR and to dene the required dwell times and speeds of travel that you will require the Visiondome VR to use
when the tour is started.
A maximum of four individual tours of presets can be stored in each Visiondome VR. Each tour can have
between 2 and 360 points, each point can be a preset in the range 1 to 360. Dierent points can use any preset
number, including repeats of ones that have been used before. The speed that the camera will travel at to reach
the preset can be in the range 1°/sec (slowest) to 100°/sec (fastest). To seek the preset at maximum speed, set
speed to 0. The delay (dwell) at each point is dened in seconds, range 1 to 100.
This page will open on Tour 1, use the joystick left and right to change to another tour. To add item 1, use the
joystick to tilt down. This will highlight the number line so that the tour can be programmed. Use the joystick to
navigate along the number line and zoom in to select the number. This will add the number in to the NEW tour.
Add in the gures for the item/point in the tour using the sequence labelled above (PREDELSPD. PRE is preset
position, DEL is delay in seconds and SPD is speed at °/second). This is how the camera will be programmed to
move to a preset for a period of time at a set speed. All nine gures must be added into the item. Figures must
be added in three i.e. preset 21 will be added as 021.
Example of an item/point
021005100 = Move to preset 21 for 5 seconds at 100°/sec
Highlight ACCEPT ITEM and zoom in, this will add the item/point into the tour. The OLD item/point will be shown
on the screen. If these settings are acceptable, highlight the ACCEPT ITEM option and zoom in. There is no
need to add in these points again. Keep adding points until the tour is complete. On the nal item/point of the
tour highlight and zoom in on ACCEPT FINAL ITEM. This will complete the tour programming.
Dene Mimic
When a mimic tour is started, the Visiondome VR will perform all the actions which were dened when the
mimic was programmed. Up to four mimic tours can be dened.
Before going into the OSD screen to programme a Mimic tour it is recommended to move the camera in to the
start position, any movement or delay will be recorded once the recording has started.
Highlight and zoom in on START RECORDING, this will allow a mimic tour to be programmed into the camera.
The mimic tour can then be used to playback any manual movement, preset seek or delay. Program a preset to
end the mimic tour program.
Dene Preset
Before going into the OSD screen to programme a preset, the camera must be in the position required. Once in
the OSD you cannot manually move the camera.
Dene Home Function
The camera will perform an ACTION (goto preset, start preset or mimic tour), after a period of inactivity. Use the
NUMBER option to set which preset or tour to start, and the DELAY MINUTES/SECONDS to input the inactivity
time period.

Page 13
© 360 Vision Technology Ltd.
Visiondome VR Installation Manual Ver 2.7
Settings Menu
Oers more camera options.
General 1
• Digital Zoom - Use this option to enable or disable digital zoom.
• White Balance - Change the camera white balance settings to suit the area.
• Line Lock - Used to line lock the camera.
• Line Phase - Can be used to manually adjust the line phase.
• Video Gain - Used to adjust the video level to suit dierent lengths of coax cable.
• Video Lift - Used to adjust the frequency of the video level to suit dierent lengths of coax cable.
• Wide Dynamic - Enable WDR. Options available are ON, Auto and O. Default is o.
General 2
• Auto Flip - Use this option to set how the camera behaves when full tilt down is reached.
Semi - Requires a second tilt down command when at full tilt down to spin camera 180°.
Full - Automatically spins the camera 180°
• Proportional - Automatically reduces/increases pan/tilt speed depending on zoom ratio.
• Freeze Presets - This option freezes the image, when moving between presets.
• Zoom Speed - Use to set prefered zoom speed, 5 is slow and 8 is fast.
• OSD Preset Six - Go into OSD using preset 95 and you can switch o OSD access using preset 6.
• Ambient Lighting - Sets how the camera will focus (when in mono) to suit the light source in the
scene. If this is set incorrectly the image may not be in focus.
• PEL/VCL AF AI PTZ - Auto focus/iris will activate when PTZ is used, can be switched o. Default is
on. Pelco and VCL protocols only.
Night
• Col/Mono Level - Col/Mono level settings can be changed to suit the site requirements. Options are
dark, medium and light. Default is dark. This sets when the camera goes into ‘mono mode’.
• Mono On - Range is 7 to 25. A lower value will set the level on when the scene is brighter, a higher
value will set the level on when the scene is darker.
• Mono O - Range is 1 to 20. A lower value will set the level o when the scene is brighter, a higher
value will set the level o when the scene is darker.
• Brightness - Can be used to articially brighten the image, options are low, medium and bright.
• Bright Control - Options are automatic or preset seek activation.
(See also Special Presets page 14).
• Noise Reduction - Used to reduce noise with scenes of low illumination. NR must be set to suit the
environment. Default is o.
• Aperture - Can be used to increase the picture detail. Default is 10.
Shutter
• Fast Shutter - Option to enable fast shutter and set speed of the shutter.
• Slow Shutter - Option to alter the slow shutter speed. Altering this gure will have an eect on the low
light capabilities of the camera.
Text Field Menu
Navigate along alpha-numeric characters and use zoom in to select. Choose text position by inputting x and y
co-ordinates. Set text display to on, if required.
Servicing
• Power Reset - This will reboot the camera, no settings will be lost.
• Factory Reset - This will reboot the camera and all the settings will be lost.
• Visiondome VR Software Version - This shows the software version of the camera.

Page 14
© 360 Vision Technology Ltd.
Visiondome VR Installation Manual Ver 2.7
Privacy Zone Menu
Can be used to obscure a scene within an image e.g. private residence. Move the camera to the position
required for the privacy zone before going into the camera OSD. You cannot manually move the camera once
in the OSD. Use the zoom to set the size of the privacy zone. Privacy zone will cover the whole scene viewed
when set.
• Dene Privacy Zone - Used to set a privacy zone.
• Seek Privacy Zone - Used to seek a privacy zone.
• Remove Privacy Zone - Used to remove a privacy zone.
9 Special Presets
Set Privacy Zone
(scene being viewed) Seek 91
Clear Privacy Zone
(privacy zone being viewed) Seek 92
Clear Privacy Zone
(all privacy zones) Seek 93
Bright Control
Seek 240
(On)
Seek 249
(O)
10 Important - Care of Painted Surfaces
The powder coating applied to the Visiondome VR external housing is recognised as being in the forefront
for quality and nish. However, in order to preserve the aesthetic nish it is recommended that the coating is
regularly cleaned.
Regular cleaning on a maximum three month interval, using warm and mild detergent must be undertaken.
Abrasive cleaners including strong solvent must NOT be used at any time.
In areas where the coating may come in contact with concentrated atmospheric pollutants [marine, chemical
and especially bird droppings] it would be prudent to clean more frequently e.g. monthly.
Full documentation of the cleaning schedule MUST be maintained to ensure that a warranty claim can be
considered.
If damage occurs to the coating (e.g. the Visiondome VR is dropped, scrapped etc.), repairs MUST be carried
out immediately.
When the Visiondome VR is installed in areas where there is a high risk of damage from birds or their
droppings, additional precautions and measures should be used to keep the birds away from the Visiondome
VR e.g. t anti-bird spikes.

Page 15
© 360 Vision Technology Ltd.
Visiondome VR Installation Manual Ver 2.7
11 Storage and Handling
Visiondome VR unit should be handled with care and must not be dropped. When the Visiondome VR is inside
the transit packaging which is used for despatch from the factory, they should not be stacked to a height of more
than two.
When Visiondome VR units are being stored before installation they should be kept in the transit packaging
and located in a dry indoor environment preferably between 1°C and 35°C which is dry and dust free. Humidity
should be such that water vapour is non-condensing. Visiondome VR unit can be allowed to be outside this
range for short periods of time (24 hours maximum) for transport (e.g. in aircraft or vans) but must never be
allowed to be outside the normal operating temperature range of -40°C to +60°C even during storage.
Before installation the Visiondome VR should be clean and dry. (If necessary it should be cleaned and dried
taking care that the cover is not scratched).
12 Warranty
This information and/or any technical information – whether received verbally or writing – is given in good faith
but without warranty and this also applies where proprietary rights of third parties are involved. The information
provided does not release you from your obligation to check its validity and to test the products suitability for
the intended purpose(s) and use(s). The application, use and installation of the products either in isolation or in
conjunction with other products used, provided and installed by you on the basis of the technical advice issued
are beyond our control and therefore remain entirely your own responsibility.
©2017 ALL DESIGNS AND SPECIFICATIONS ARE SUBJECT TO CHANGE WITHOUT NOTICE

Page 16
© 360 Vision Technology Ltd.
Visiondome VR Installation Manual Ver 2.7
Table of contents
Other 360 Vision Security Camera manuals

360 Vision
360 Vision Invictus Hybrid Manual

360 Vision
360 Vision Eclipse HD Stainless Steel Instruction sheet

360 Vision
360 Vision PRED-3M Instruction sheet

360 Vision
360 Vision Predator Ultra Instruction sheet

360 Vision
360 Vision Illuminator HD Instruction sheet

360 Vision
360 Vision Vision-i-Dome Instruction sheet

360 Vision
360 Vision Affiniti Thermal IP Instruction sheet

360 Vision
360 Vision Invictus Hybrid Instruction sheet

360 Vision
360 Vision Vision i Dome Instruction sheet

360 Vision
360 Vision Visiondome-HD Instruction sheet