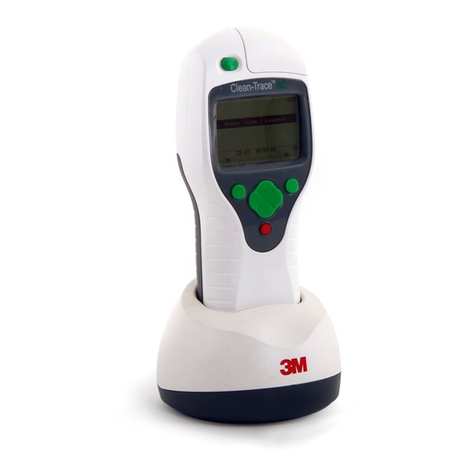
3M LM1 User manual

3M ™ Clean-Trace™ LM1
Luminometer
User Manual

EN
(English)
ii
Table of Contents
I. INTENDED USE.................................................. 1
II. USER RESPONSIBILITY ...................................... 1
III. ENVIRONMENTAL OPERATING CONDITIONS.......2
IV. INSTRUMENT SPECIFICATIONS .......................... 2
V. LIMITED WARRANTY .........................................3
VI. LIMITED WARRANTY AND DISCLAIMER .............. 3
VII. LIMITATION OF LIABILITY .................................3
VIII. PRODUCT DESCRIPTION .................................... 3
IX. HOW TO USE THIS MANUAL............................... 4
X. HOW TO OPERATE THE 3M CLEAN‑TRACE
LUMINOMETER .................................................. 4
a.
Operating Controls of the 3M Clean
‑
Trace
Luminometer
...................................................... 4
b.
Inserting and removing 3M™ Clean-Trace™ test
swab into the LM1 Luminometer
........................ 5
c.
Using the Base
................................................... 5
d.
Battery usage and maintenance
.........................5
e.
Charging the battery
.......................................... 5
f.
When the battery is charged
.............................. 6
g.
The battery level indicator
..................................6
h.
Power management
........................................... 6
i.
Waking the 3M™ Clean
‑
Trace™ Luminometer
from Sleep Mode
................................................7
j.
3M Clean-Trace Luminometer Calibration
........... 7
k.
How to turn “On” the 3M™ Clean-Trace™ LM1
Luminometer
...................................................... 8
l.
The Diagnostic check
.........................................8
m.
Turning Off or Restarting the 3M™ Clean
‑
Trace™
Luminometer
...................................................... 9
n.
Controlling the Software
.....................................9
o.
How to Sign in on the 3M™ Clean
‑
Trace™ LM1
Luminometer
.................................................... 10
1. On un-registered Luminometer .................................10
2. On registered Luminometer –no Pin required ............10
3.
On registered Luminometer –Pin required
..............11
p.
The Swab Sensor and the Vertical Position Sensor
........................................................................ 12
q.
How to look-up Calibration date and Software
details
.............................................................. 12
r.
How to Sign out of the 3M Clean
‑
Trace LM1
Luminometer
.................................................... 12
XI. HOW TO PERFORM A QUICK TEST OR
UNPLANNED TEST ........................................... 13
a.
Performing an Unplanned test from an un-
registered Luminometer
....................................... 13
b.
Performing an Unplanned test from a registered
Luminometer
........................................................ 13
XII. HOW TO PERFORM A PLANNED TEST RUN............ 15
a.
Performing a Test run on a Test Point within a
Sample Plan
......................................................... 15
b.
Restarting an incomplete Sample Plan
.................. 15
c.
Performing an ATP Test run
................................. 16
d.
Performing a Retest on an ATP Test point before
Moving to a Different Test point
........................... 17
e.
Performing a Retest on an ATP Test point after
Moving to a Different Test point
........................... 17
f.
Performing a Visual Inspection Test on a Test Point
............................................................................ 18
g.
Adding a Comment to a Test result
...................... 18
h.
Recording Temperature or pH for a Test point within
a Sample plan
...................................................... 19
i.
Moving to another Test point in the same Sample
plan
..................................................................... 19
j.
Moving to another Test point in a different Sample
plan
..................................................................... 20
k.
Viewing Test results
............................................. 20
XIII. HOW TO SYNCHRONIZE THE 3M™ CLEAN‑TRACE™
LM1 LUMINOMETER ............................................. 21
a.
Definition
............................................................. 21
b.
Setting up Synchronization with a USB Connection
22
c.
Setting up Synchronization with a Bluetooth
Connection
........................................................... 22
d.
Setting up Synchronization with a Wi-Fi Connection
............................................................................ 23
e.
Setting Wi-Fi auto Synchronization Time
.............. 24
XIV. PERFORMING ADMINISTRATIVE TASKS ................ 25
a.
Setting the Date, Time and Time zone on the 3M™
Clean
‑
Trace™ Luminometer
................................. 25
b.
How to adjust the date/time on the 3M™ Clean-
Trace™ LM1 Luminometer ..................................... 25
c.
Setting the Time zone............................................ 26
d.
Changing Sleep timeout
....................................... 26
e.
Changing the Screen Brightness
........................... 26
f.
Resetting the 3M™ Clean-Trace™ Luminometer
... 27
g.
Looking up Calibration date and device software
details
.................................................................. 27
h.
Troubleshooting
................................................... 28
XV. APPENDIX ........................................................... 30
Cleaning and decontaminating the 3M Clean
‑
Trace
Luminometer
...................................................... 30
EN
(English)
1
I. INTENDED USE
The 3M™Clean-Trace™Luminometer is a battery operated Luminometer utilized primarily for objective and sensitive
determination of the end result of Adenosine Tri-Phosphate (ATP) tests. The 3M Clean-Trace Luminometer power
supply is provided to charge the battery. The 3M™ Clean-Trace™ Hygiene Management Software is designed for the
transfer, organization, and storage of data generated from the 3M™ Clean-Trace™ ATP Tests.
3M has not designed nor documented the 3M Clean-Trace Luminometer, power supply, or 3M Clean-Trace Hygiene
Management Software for use with other manufacturers’ products. Using with other manufacturers’ designs, or in any
other application that has not been evaluated or documented by 3M and may lead to unsafe conditions. The 3M
Clean-Trace Luminometer is not intended to be used in potentially flammable or explosive environments. Although
the 3M Clean-Trace Hygiene Monitoring and Management System is very sensitive, surfaces or solutions should not be
considered sterile based on results. The 3M Clean-Trace Hygiene Monitoring and Management System is not intended
to be used in the diagnosis of conditions in humans or animals. The user is responsible to know and follow applicable
workplace regulations.
3M anticipates that the 3M Clean-Trace ATP Tests, equipment, and software will be utilized by technicians that have
been properly trained on the 3M Clean-Trace ATP Test methods.
If this product is used in a manner not specified, the protection provided by the product may be impaired.
II. USER RESPONSIBILITY
Users are responsible for familiarizing themselves with product instructions and information. Visit our website at
www.3M.com/foodsafety, or contact your local 3M representative or distributor for more information.
When selecting a test method, it is important to recognize that external factors such as sampling methods, testing
protocols, sample preparation, handling, and laboratory technique may influence results.
It is the user’s responsibility in selecting any test method or product to evaluate a sufficient number of samples with
the appropriate matrices and microbial challenges to satisfy the user that the chosen test method meets the user’s
criteria.
It is also the user’s responsibility to determine that any test methods and results meet its customers’ and suppliers’
requirements.
As with any test method, results obtained from use of any 3M Food Safety product do not constitute a guarantee of
the quality of the matrices or processes tested.
ExplanationofSafetyRelatedSymbols
Attention:ReadAccompanyingDocumentation
CAUTION: Recycle 3M Clean-Trace Luminometerto avoid
environmentalcontamination.Thisproductcontains
recyclableparts.For
informationonrecycling,please
contactyournearest 3M Service Center
foradvice.
WEEEmark-Thisproductcontainselectricaland
electroniccomponents
andmustnotbedisposedofusing
standardrefusecollection.Please
consultlocaldirectives
fordisposalofelectricalandelectronic
equipment.
ULNRTLmark(USandCanadaelectricalsafety)
CEmark(conformstoapplicablerequirementsfor
European
EconomicArea).
RCM mark (Australia electrical safety and EMC)
The3M Clean-TraceLuminometermodelnumber,whichis
LM1.
The3M Clean-TraceLuminometerserialnumber

2
EN
(English)
III. ENVIRONMENTAL OPERATING CONDITIONS
Environmental Condition
OperatingCondition
Indooruseonly
▪
Onlyconnectthedataconnectionstoacomputerthat
conforms to IEC/EN/UL/CSA 60950-1
▪
Keep 3M™Clean-Trace™Luminometerawayfromliquids
andhighhumiditywhenconnectedtothecomputer
Altitude
3000
meters
maximum
OperatingtemperaturerRange
+5 to+40,(+41to+104) °C(°F)
Relativehumidity
10 -90 Non-condensing
%RH
Storage temperature range
-40 to+70(-40 to+158)
°C(°F)
AC Voltage for power supply
Mains supply voltage fluctuations up
to+10%ofnominal
voltage
Temporaryovervoltageoccurringon
themainssupply
100-240
Volts
Frequency
50-60
Hertz
AC Current for power supply
300
mA
Powersupplyoutputvoltage
5 VoltsDC
Powersupplyoutputcurrent
1.2
Amps
Luminometerinputcurrent
850
mAmps
Overvoltage
Category II
Pollutiondegree
2
IV. INSTRUMENT SPECIFICATIONS
Specifica
tion
Length
59.27 (2.33) mm(in)
Width
88.47(3.48)
mm(in)
Height
268.17(10.56) mm(in)
Weight
517.83 (18.26)
g(oz.)
Physicalconnector
USB 2.0 -Type mini
Wireless connectors
Wi-Fi 2.4 GHz & 5GHz
Bluetooth® 2.0

3
EN
(English)
V. LIMITED WARRANTY
3M™Food SafetyHardware (“Hardware”)includesthe3M™Clean-Trace™Luminometerand anyassociated Softwareand
other
componentssuppliedby3MwhicharedescribedintheapplicableInstallationandUseGuides(“User
Documentation”).
VI. LIMITED WARRANTY AND DISCLAIMER
3M warrants that for one year from the date of shipment that the Hardware will substantially perform in accordance
with the User Documentation. THIS WARRANTY IS VOID IF: (A) THE HARDWARE HAS BEEN REPAIRED BY PERSONS NOT
AUTHORIZED BY 3M; OR (B) THE HARDWARE HAS BEEN ALTERED, MODIFIED, OR MISUSED; OR (C) THE HARDWARE IS
USED WITH PRODUCTS, SUPPLIES, COMPONENTS OR SOFTWARE NOT SUPPLIED BY 3M FOR USE WITH THE
HARDWARE; OR (D) THE HARDWARE OR A COMPONENT IS USED FOR OTHER USES (FOR EXAMPLE USE WITH OTHER
CIRCUIT BOARDS OR SOFTWARE) OR (E) THE HARDWARE HAS NOT BEEN MAINTAINED OR USED IN ACCORDANCE
WITH THE USER DOCUMENTATION. UNLESS PROHIBITED BY LAW, THIS WARRANTY IS MADE IN LIEU OF ALL OTHER
WARRANTIES, EXPRESS OR IMPLIED, INCLUDING BUT NOT LIMITED TO THE IMPLIED WARRANTY OF FITNESS FOR A
PARTICULAR PURPOSE, THE IMPLIED WARRANTY OF MERCHANTABILITY, OR ANY IMPLIED WARRANTY ARISING OUT
OF A COURSE OF DEALING OR OF PERFORMANCE, CUSTOM OR USAGE OF TRADE. 3M DOES NOT WARRANT THAT THE
SOFTWARE WILL FUNCTION ERROR FREE.
If within one year after shipment, the Hardware does not conform to the express warranty set forth above, 3M’s sole
obligation and User’s sole remedy shall be, at 3M’s option: 1) to repair or replace the non-conforming component; or,
2) refund the purchase price.
VII. LIMITATION OF LIABILITY
UNLESS PROHIBITED BY LAW, 3M WILL NOT BE LIABLE TO USER OR OTHERS FOR ANY OTHER DIRECT, INDIRECT,
CONSEQUENTIAL, INCIDENTAL OR SPECIAL DAMAGES INCLUDING, FOR EXAMPLE, LOST PROFITS, BUSINESS,
INVESTMENTS, OR OPPORTUNITIES EVEN IF 3M HAS BEEN ADVISED OF THE POSSIBILITY OF SUCH DAMAGES. The
parties agree that 3M’s total cumulative liability to User for direct damages for all causes shall not exceed One
Hundred Dollars, or the price paid for the Hardware, whichever is higher. Some states or countries may have laws
which require liability rights different from those stated above. In such state or countries, the minimum required
liability terms shall apply.
To request service, you must request a Returned Material Authorization (RMA) number from the service center.
Please call 1-800-328-1671.
VIII. PRODUCT DESCRIPTION
Using ATP Detection for Hygiene Monitoring and Management
The 3M Clean-Trace Hygiene Monitoring and Management System consists of the following: 3M Clean-Trace
Luminometer, 3M™ Clean-Trace™ Tests, and 3M Clean-Trace Hygiene Management Software. This system is used to
detect ATP on surfaces or in water samples in order to measure levels of contamination for the purpose of hygiene
monitoring and management.
The detection technology used is ATP bioluminescence. ATP is present in all animal and vegetable material (including
most food debris), living and dead bacteria, fungi, and other microorganisms. The 3M
Clean-Trace Tests use Luciferin/Luciferase enzyme to produce light that is proportional to the amount of ATP present.
The 3M Clean-Trace Luminometer measures the intensity of the light emitted from a sample, and it displays the test
result in Relative Light Units (RLU). Users do a validation study on their surfaces or water samples to determine the
RLU test result pass, caution and fail thresholds.
The rapid test results provided by the 3M Clean-Trace Luminometer allow users to take immediate remedial action in
response to a failing test result. The Test Point with a failing test result can be re-cleaned and retested before
production, ensuring that hygiene management goals are achieved. The results provide data that can be used to
advise the decision to begin food or beverage production.
Read the Instructions for Use documents for 3M Clean-Trace Tests before using them along with a 3M Clean-Trace
Luminometer.

4
EN
(English)
IX. HOW TO USE THIS MANUAL
1.
The 3M™Clean-Trace™Luminometer User Manual is provided in electronic format. There are two ways to
access it:
▪
Click (Help) on the menu bar in the 3M Clean-Trace Hygiene Management Desktop Software, then
click
[User manual]
.
▪
Go to www.3M.com/CleanTraceLM1manual
2.
Click any heading in the Table of Contents to get to that section or scroll or page through the User Manual to
the desired section. The table of contents helps get directly to specific section of the document.
3.
3M Clean-Trace Desktop Software upgrades will include updates to this User Manual, which will automatically
be applied as part of the software updates.
4.
This User Manual describes the operation and characteristics of the 3M Clean-Trace LM1 Luminometer.
5.
In the step-by-step instructions for using the software, the following style guidelines are used:
▪
Italic type is the name of a section in this User Manual or in the 3M Clean-Trace software.
▪
Bold type
is the exact text for a term that appears on a screen.
▪
[Bold type with brackets]
is the name of a button that you can tap, click, or select using the cursor control
button on a screen.
X. HOW TO OPERATE THE 3M CLEAN‑TRACE LUMINOMETER
a.
Operating Controls of the 3M Clean
‑
Trace Luminometer
The image below shows the operating controls on the 3M Clean-Trace LM1 Luminometer.
1.
On/Off Switch - For instructions see Turning Off or Restarting the 3M Clean
‑
Trace Luminometer.
2.
Navigation buttons - For instructions, refer to Controlling the Software.
3.
Display/Touch screen - For instructions, refer to Controlling the Software.
4.
USB/Power port.
5.
Rocker cap - For instructions, refer to the next section below.
?
Press to move Up
Press to move Right
Press to move Left
Press to move Down
Press to Select

5
EN
(English)
b.
Inserting and removing 3M™Clean-Trace™test swab into the LM1
Luminometer
1.
Open the 3M Clean-Trace LM1 Luminometer by pressing the rocker cap.
2.
Insert an activated 3M Clean-Trace test swab into the chamber, making sure
the cuvette is at the bottom of the chamber.
3.
The 3M Clean-Trace Test handle should be visible at the top of the chamber.
4.
Release the rocker cap. The user may now start the ATP test run for the 3M
Clean-Trace Test swab inside the chamber.
5.
After the ATP test is completed, open the chamber by pressing the rocker cap.
6.
To remove the 3M Clean-Trace Test, grasp the top of the test swab and pull
upwards. Follow the instructions for disposal in the 3M Clean-Trace Test
Instructions for Use. Consult with local regulations for any additional
regulations regarding disposal.
c.
Using the Base
For extra stability and convenience, the 3M Clean-Trace LM1 Luminometer can be
placed on the 3M™ Clean-Trace™ Base. The 3M Clean-Trace Base holds the
Luminometer at an optimum working and viewing angle.
The 3M Clean-Trace LM1 Luminometer also has a fold-out stand built into the
bottom of the instrument. The fold-out stand allows the instrument to stand
without the base.
d.
Battery usage and maintenance
▪
The 3M Clean-Trace Luminometer holds an internal, rechargeable lithium-ion battery that must
be charged to use the 3M Clean-Trace Luminometer.
▪
In normal usage, the battery provides up to eight hours of operation from full charge.
▪
As the battery ages, it will provide less than eight hours of operation from full charge.
▪
The battery must be charged when the indicator is red, indicating less than 10% charge capacity.
▪
The battery does not need to be fully discharged before recharging.
▪
When storing a 3M Clean-Trace Luminometer for more than a month, the battery level should be at minimum
of 50% charge. Do not store a 3M Clean-Trace Luminometer with a fully discharged battery, it may cause the
battery to lose the ability to be recharged.
▪
Battery replacement is recommended after two years of normal use. For battery replacement, the 3M Clean-
Trace Luminometer must be sent to a 3M Service Center.
e.
Charging the battery
▪
The 3M Clean-Trace LM1 Luminometer is shipped with a USB cord, a charger and various charger power
adapters.
▪
Select the charger adapter that is appropriate for power outlet in your country.
▪
Connect the charger to the 3M Clean-Trace Luminometer using the provided USB cord.
▪
Connect the charger to a power outlet.
▪
The battery will start charging and becomes fully charged in approximately 2 hours.
▪
To monitor the charge status, turn on the 3M Clean-Trace Luminometer. A lightning bolt icon appears in the
battery charge level. Refers to the Battery level indicator section for more details.

6
EN
(English)
f.
When the battery is charged
▪
Disconnect the charger from the power outlet.
▪
Unplug the charger from the 3M™ Clean-Trace™LM1 Luminometer.
g.
The battery level indicator
▪
The battery level indicator is located at the upper right corner of the screen.
▪
When a 3M Clean-Trace Luminometer is on, the indicator shows the remaining battery level.
▪
As the battery charge decreases, the filled segment of the indicator becomes smaller as well as does the
number indicating the percentage charge.
▪
When the battery level is less than 20%, a notification will display, showing the
battery should be recharged.
▪
When the battery level is less than 10%, the indicator becomes red, showing the
battery should be recharged.
▪
When the battery level is less than 5%, the 3M Clean-Trace Luminometer
automatically shuts down.
h.
Power management
The 3MClean-TraceLuminometer conserves battery power if the device is not in use.
▪
After 5 minutes of inactivity, the 3M Clean-Trace LM1 Luminometer goes into Sleep mode and the screen
darkens. This time can be customized, refer to Changing sleep timeout section.
▪
After 2 additional hours of inactivity, the 3M Clean-Trace Luminometer automatically shuts down and must be
powered on again before use. Refer to the Switching the Power on section of this User manual for more
information.
The LM1 battery indicator shows
the remaining battery level
The LM1 battery indicator shows
charging through a computer
The LM1 battery indicator shows
charging through a power outlet
This is the indication of a depleted battery and no charging source detected.
This will display for approximately 5 seconds then the unit will shut down.
Connect the LM1 to the charger now
This is the indication of a depleted battery with charging source detected.
This will display for approximately 5 seconds then the unit will shut down.
This is the indication of battery level going under 20%.
Tap [OK] to acknowledge
Connect the LM1 to the charger as soon as possible

7
EN
(English)
i.
Waking the 3M™Clean
‑
Trace™Luminometer from Sleep Mode
1.
To wake the 3M Clean-Trace Luminometer from sleep mode, press and hold the up navigation button for 3
seconds.
2.
The screen displays the information that appeared before the Sleep mode began so you can continue working.
If the 3M Clean-Trace Luminometer does not wake from the Sleep mode:
▪
The 3M Clean-Trace Luminometer might be turned off. Press and hold the On/Off button for about 3
seconds to turn it on. Refer to the Switching the Power On section in this User Manual for more details.
▪
The battery might be completely discharged. Refer to the Charging the Battery section for more details.
▪
The 3M Clean-Trace Luminometer might need repair. Contact your 3M Representative for more details.
j.
3M Clean-Trace Luminometer Calibration
Annual maintenance and calibration are recommended for the 3M Clean-Trace LM1 Luminometer. During the
annual maintenance and calibration process:
▪
The instrument will run through the whole factory release testing to confirm every part of the instrument is
working properly.
▪
The instrument is cleaned, and any contamination inside the instrument due to a spill is checked.
▪
A certificate of calibration will be issued.
The calibration process of the 3M Clean-Trace Luminometer includes re-setting the Luminometer factory default
configurations. Consequently, all data present in the 3M Clean-Trace Luminometer, including
test results, are erased
during the calibration process
. Users are advised to secure collected results by synchronizing their 3M Clean-Trace
Luminometer prior to sending it in for calibration or any other service.
A calibration due reminder will display on the LM1 screen at 60 days, then at 30 days before the recommended
next calibration date. The user will have the option to set custom remind dates or chose to not show reminders.
A calibration past due notification will display on the 3M Clean-Trace LM1 screen if it has been more than 365 days
since the last calibration.
Note:
This reminder will not affect operability of the Luminometer. Reminder and calibration notifications are
based on recorded calibration date, and 3M Clean-Trace LM1 current date. The calibration date can be seen in 3M
Clean-Trace LM1 about screen.
This notification is displayed 60 days
or less, before the recommended
next calibration date.
This notification is displayed
if user tap on More info.
This notification is displayed
30 days before the
recommended next
calibration date.
▪
Tap [Remind me] to set custom
reminder date
▪Tap [Do not show again] to
discard permanently

8
EN
(English)
k.
How to turn On the 3M™Clean-Trace™ LM1 Luminometer
Before turning On the 3MClean-TraceLuminometer, check the chamber to ensure it is empty.
1.
Press and hold the gray On/Off button located below the navigation buttons. The 3M logo
appears confirming the power-on process has started.
The 3M Clean-Trace Luminometer
startup process may take up to a minute.
2.
If this 3MClean-Trace LM1 device has been connected to a 3M Clean-Trace
Desktop software before, the screen will take you to the next step –step 3.
If not, the
Welcome
screen offers a guided walk-through of the 3MClean-
Trace LM1 Luminometer initialization process.
▪
Tap
[Get started]
to go through the guided initialization
▪
Tap
[I‘ll do this later]
to skip it for now
3.
The
Diagnostic Check
screen appears. During the diagnostic check, a progress bar
is visible –refer to the next section for more details.
4.
Tap
[Got It]
when complete.
5.
The
Sign in
screen appears. To sign in, refer to the How to Sign in on the 3M
Clean
‑
Trace Luminometer section for sign in instructions.
l.
The Diagnostic check
The Diagnostic check is a self-check procedure that is automatically initiated each time the 3M Clean-Trace LM1
Luminometer is turning on. The Diagnostic check ensures all components are within specifications before
commencing with ATP testing.
▪
The check enables the identification of fault in the instrument.
▪
The check verifies the reading in an empty chamber.
▪
The check verifies the reading when light is present.
During the Diagnostic check, a progress bar is visible:
▪
If no fault is found during the Diagnostic check, the
“
Diagnostic check complete!
”message will display.
Tap
[Got It]
to continue.

9
EN
(English)
▪
If any fault is found during the Diagnostic check, a message will display with information about the fault:
o
Error code #
o
Basic description of the fault
o
Mitigation steps (when possible)
The user is presented with two options:
o
[Retry]
which will re-run the Diagnostic check
o
[Sync]
which will initiate the synchronization. This option is important
as it allows uploading Test results from the instrument to the 3M™
Clean-Trace™Desktop Software.
m.
Turning Off or Restarting the 3M™Clean
‑
Trace™Luminometer
▪
Press and hold the power button for about 3 seconds.
▪
The 3M Clean-Trace LM1 Screen displays power options:
o
Tap
[Restart]
if you wish to power cycle the device.
o
Tap
[Power off]
if you wish to turn off the device.
o
Tap
[Cancel]
to skip.
n.
Controlling the Software
To control the 3M Clean-Trace Luminometer software, use either the touch screen or the navigation buttons.
▪
To use the touch screen, use common gestures such as tap, swipe, and scroll.
▪
To use the navigation buttons on the front of the 3M Clean-Trace Luminometer, press one of the
navigation buttons to move, or select:
o
Press the
Up
button to move up.
o
Press the
Down
button to move down.
o
Press the
Left
button to move left.
o
Press the
Right
button to move right.
o
Press the
Center
button to select.
Touchscreen
Navigation
buttons
Press to move Up
Press to move Right
Press to move Left
Press to move Down
Press to Select

10
EN
(English)
o.
How to Sign in on the 3M™Clean
‑
Trace™LM1 Luminometer
1. On un-registered Luminometer
An un-registered Luminometer is one that has never been synchronized with the
3M Clean-Trace Hygiene Management Software, therefore it has not been
assigned to a Location.
Follow the steps to turn “On”the LM1 Luminometer
The
Sign in
screen provides current set Date and Time, as well as options to
Sign in
or
Sync
(for synchronize).
▪
Tap
[Sign in],
the user list will display.
In the users list, “
Default User
” will be the only user account available for sign in.
▪
Tap
[Default User]
to sign in as Default User.
Upon sign in, the home screen displays:
oThe current set date, the time remains available at the top right of the screen.
oUnplannedTest.
2. On registered Luminometer –no PIN required
A registered Luminometer is one that had previously been synchronized with the 3M Clean-Trace Hygiene
Management Software, therefore is assigned to a Location.
Follow the steps to turn “On”the 3M Clean-Trace LM1 Luminometer
The Sign in screen provides current set Date and Time, as well as options to Sign in or Sync
(synchronize).
▪Tap [Sign in].
▪If the 3M Clean-Trace LM1 Luminometer is assigned to only one Location though the
3M Clean-Trace Desktop software, the list of authorized users for the assigned
Location will be presented –listed alphabetically and searchable.
▪If the Luminometer is assigned to more than one Location though the 3M Clean-Trace
Desktop software, the user will be prompted to select the Location they would like to
sign-in to –Locations will be listed alphabetically, and searchable.
After selecting the Location, the list of authorized users for the selected Location will be presented –listed
alphabetically and searchable.

11
EN
(English)
▪Locate your user account or the Default User, then tap it to sign in. The Default User is authorized to log-in on any
Location but can only perform Unplanned test.
▪Upon sign in, the home screen displays:
oThe current set date, the time remains available at the top right of the screen.
oUnplanned test.
oThe list of Sample plans assigned to the user, if any.
3.
On registered Luminometer –with PIN required
Follow the steps to turn On the
3M Clean-Trace
LM1 Luminometer
Signing in with a PIN code, assumes the
3M Clean-Trace
LM1 Luminometer has previously been synchronized
with the 3M™ Clean-Trace™Hygiene Management Desktop Software, and that the Luminometer is assigned
to a Location that requires users to provide PIN code when using the Luminometer.
The
Sign in
screen provides current set date and time, as well as options to
Sign in
or
Sync
(for Synchronize).
Tap [
Sign in
].
▪
If the
3M Clean-Trace
LM1 is assigned to only one Location though the 3M Clean-Trace Desktop software,
the list of authorized users for the assigned Location will be presented –listed alphabetically and
searchable.
▪
If the Luminometer is assigned to more than one Location though the 3M Clean-Trace Desktop software,
the user will be prompted to select the Location they would like to login to –Locations will be listed
alphabetically, and searchable.
After selecting the Location, the list of authorized users for the selected Location will be presented –listed
alphabetically and searchable.
▪
Locate your user account, then tap it,
the number pad will display
oUse the number pad to enter your 4-digit PIN. An asterisk (*) appears on the
screen for each digit keyed. Then tap the check mark to submit .
oAfter five (5) consecutive failed attempts, the user account will lock out for
2 minutes. Try again after 2 minutes.
▪Upon Sign in, the home screen displays:
oThe current set date, the time remains available at the top right of the screen.
oUnplannedtest.
oThe list of Sample plans assigned to the user.
Company Name
Assigned Locations
Selected Location
Authorized users for
selected Location
Assigned Sample plans
Logged-in
user initials

12
EN
(English)
p.
The Swab Sensor and the Vertical Position Sensor
The
3M™Clean-Trace™LM1Luminometer has a swabs detection sensor built in as well as a device orientation
detection sensor.
▪If a user initiates an ATP test run without any swab inserted in the
chamber, an alert will display, tap
[Got It]
to acknowledge.
▪
Removethe 3M Clean-Trace Test swab from the Luminometer
chamber, as soon as test measurement iscomplete, and the result
displayed. If a Test swab remains in the 3M Clean-Trace
Luminometer chamber for more than 30 seconds, a visual and
audible alert will notify the user that the used swab must be
removed from the chamber
, tap
[Got It]
to acknowledge.
▪An “Unidentified swab detected” message will display if a swab
from an unknown source is detected or, the 3M Clean-Trace LM1 is
unable to read the barcode on the 3M swab. Tap
[Got It]
to
acknowledge.
▪
Keepthe3MClean-TraceLuminometeruprightwheneveraTest
swabis inthechambertoensureaccurateresultsand
avoidspillage
ofreagents,whichcoulddamagethesensitivecomponents ofthe
instrument.
▪
Ifthe3MClean-Trace Luminometerisheldatgreaterthana 68° angle
fromvertical when atest is in progress, the measurement will be
cancelled, and the notification displays to notify the user that the measurement was cancelled.
Tap
[OK]
,thenholdthe3MClean-TraceLuminometerinaverticalposition
and start thetestagain.
q.
How to look-up Calibration date and Software details
1.
Tap Settings . (If the setting tab is not visible, tap Home first )
2.
Scroll down in the Settings menu, then tap
[About]
. the About
screen will appear, scroll up or down as needed in the About
screen.
r.
How to Sign out of the 3M Clean
‑
Trace LM1 Luminometer
1.
Tap Settings . (If settings is not visible, tap Home first )
2.
Scroll down in the Settings menu, then tap
[Sign Out]
, the Login screen will appear.

13
EN
(English)
XI. HOW TO PERFORM A QUICK TEST OR UNPLANNED TEST
a.
Performing an Unplanned test from an un-registered Luminometer
Unplanned tests are part of the Unplanned test Sample plan.
An un-registered Luminometer is a Luminometer that has not yet been synchronized to a
3M™
Clean-Trace™
Desktop Software, therefore not assigned to a Location.
To perform an Unplanned test, on an unregistered Luminometer, follow the steps below:
▪Log-in on the Luminometer
▪Tap [Unplanned test] in the home screen.
▪In the “Add unplanned test” screen, adjust the unplanned test point name as needed.
▪Select the Test type.
▪
Tap [Next]
oIn the case of Visual Inspection as Test type,
recording the result will means tap
[Pass]
or
[Fail]
.
oIn the case of ATP test, follow the Instructions for Use for the 3M Clean-Trace Test to collect a
sample, activate the test and shake it for at least 5 seconds. Open the 3M Clean-Trace
Luminometer by pressing the rocker cap. Then insert the activated test into the chamber. Keep the
3M Clean-Trace Luminometer upright whenever a test is in the chamber to ensure accurate results
and avoid spillage of reagents, which could damage the sensitive components of the instrument.
▪For ATP Test type, tap [Start] to begin measuring. A progress bar appears and moves from left to right. The ATP
results will be displayed after about 7 seconds in the number of RLU (Relative Light Unit).
▪After ATP test completion, remove the Test swab from the 3M Clean-Trace Luminometer; press the rocker cap, grasp
the top of the Test swab, and pull upwards. Follow current industry standards and local regulations for disposal of
used Test swabs.
Note: Unplanned test results will be saved in the device memory for future references. Unplanned test results from an
unregistered device cannot be uploaded to the Clean-Trace Desktop Software.
b.
Performing an Unplanned test from a registered Luminometer
A registered Luminometer is one that has previously been synchronized with the 3M Clean-Trace Hygiene
Management Software, and therefore is assigned to a Location.
Unplanned tests are part of the Unplanned test Sample plan. To perform an Unplanned test, follow the steps below:
▪Login to the appropriate Location on the 3M Clean-Trace LM1 Luminometer
▪Tap [Unplanned test] in the home screen.
▪In the “Add unplanned test” screen, adjust the Unplanned test name as needed.
▪Select the Test type
▪
Tap [Next]
oIn the case of Visual Inspection as Test type
recording the result will means tap
[Pass]
or
[Fail]
.
oIn the case of ATP test, follow the Instructions for Use for the 3M™Clean-Trace™Test swabs
(UXL100 or AQF100) to collect a sample, activate the test and shake it for at least 5 seconds.
Open the 3M Clean-Trace Luminometer by pressing the rocker cap. Then insert the activated test
into the chamber. Keep the 3M™Clean-Trace™Luminometer upright whenever a test is in the
chamber, to ensure accurate results and avoid spillage of reagents, which could damage the
sensitive components of the instrument.

14
EN
(English)
▪For ATP Test type, tap [Start] to begin measuring. A progress bar appears and moves from left to right. The ATP
results will be displayed after about 7 seconds in the number of RLUs. This result will be stored in the Luminometer
memory so it can be synchronized with the
3MClean-Trace
Hygiene Management Software.
▪After ATP test completion, remove the Test swab from the
3MClean-Trace
Luminometer; press the rocker cap, grasp
the top of the Test swab, and pull upwards. Follow current industry standards and local regulations for disposal of
used Test swabs.
To perform another unplanned ATP test, tap [Add new] or [Add unplanned test] and repeat this process.
To do a retest, tap [Retest] then tap [Start].
For Unplanned test, “Retest” is
only allowed if the result has not been synchronized yet.
Tap to edit
Unplanned Test Name
Tap to Select
Test type
Tap Pass or Fail
For Visual Inspection
Tap Start
for ATP Test

15
EN
(English)
XII. HOW TO PERFORM A PLANNED TEST RUN
a.
Performing a Test run on a Test Point within a Sample Plan
To perform a test run, follow the steps below:
▪Login to the appropriate Location on the Luminometer
▪
Tap the Sample plan from the home screen. Scroll up or scroll down the
list, as needed to display additional Sample plan(s).
▪
If the Sample plan has been tested earlier, start a new run, tap the Sample plan, then
tap [
New Test Run…].
▪
In the
Sample plan
screen, the first Test point and Test type will be ready for testing.
oIn the case of Visual Inspection as Test type
recording the result will means tap
[Pass]
or
[Fail]
.
oIn the case of ATP test, follow the Instructions for Use for the
3M™Clean-Trace™
Test swab to collect a
sample, activate the test and shake it for at least 5 seconds (UXL100 or AQF100). Open the 3M™Clean-
Trace™Luminometer by pressing the rocker cap. Then insert the activated test into the chamber. Keep
the 3M Clean-Trace Luminometer upright whenever a test is in the chamber, to ensure accurate results
and avoid spillage of reagents, which could damage the sensitive components of the instrument.
o
For ATP Test type, tap [Start] to begin measuring. A progress bar appears and moves from left to right. The ATP
results will be displayed after about 7 seconds in the number of RLUs. This result will be stored in the
Luminometer memory so it can be synchronized with the 3M Clean-Trace Hygiene Management Software.
The
result is also interpreted using established Pass/Fail limits and is displayed on the screen as
Pass
,
Caution
or
Fail
▪
Use directional buttons or touchscreen to navigate to the next Test type or Test point.
▪
Retest is allowed up to 12 hours after the initial test.
▪
In the Test Point screen, tap the information icon next to Test point name to display additional details: Picture, Test
types, Location, Description.
b.
Restarting an incomplete Sample Plan
Must be the user who initially ran the Sample plan
▪From the home screen, tap the Sample plan.
▪In the Sample plan screen, tap on the date of the last run –you may need to scroll down up or down. .
▪In the List view, all Test points in this sample plan will be listed, with all associated Test type(s). The Test point/type
tested will have a check mark; the Test point(s) that have not been tested yet will not have a check mark.
o
Tap on a Test point/type without a check mark to run a test.
o
Tap on a Test point with a check mark to retest.
Logged-in user
Assigned
Sample plans
Sample plan name
Sample plan run date
Sample plan run time
Results synchronized
Not tested, tap to run test
Tested, PASSED, tap to retest
Total Test Points
(+ Test types)
Tested
Passed
Tested
Caution
Tested
Failed
Tested, FAILED, tap to retest

16
EN
(English)
c.
Performing an ATP Test run
Follow the Instructions for Use for the
3M™Clean-Trace™
Tests swabs (UXL100 or AQF100). Collect a sample, activate
the test swab and shake it for at least 5 seconds.
▪Open the 3M™Clean-Trace™Luminometer by pressing the rocker cap. Then insert the activated test into the
chamber. Keep the 3M Clean-Trace Luminometer upright whenever a test is in the chamber to ensure accurate
results and avoid spillage of reagents, which could damage the sensitive components of
the instrument.
▪Tap [Start] to begin measuring. A progress bar appears and moves from left to right.
▪The test result appears and is stored in the memory so it can be synchronized with the 3M
Clean-Trace Hygiene Management Desktop Software. The result is also interpreted using
your established Pass/Fail criteria and is displayed on the screen as Pass,Caution, or Fail.
▪Remove the Test swab from the 3M™Clean-Trace™Luminometer; press the rocker cap, grasp the top of the Test swab,
and pull upwards. Follow current industry standards and local regulations for disposal of used Test swabs.
oTo test another Test point, tap the next Test point at the bottom right of the LM1 screen, or Previous Test point at
the bottom left of the 3M Clean-Trace LM1 screen.
oTo do a retest, tap [Retest] then tap [Start]. Retest is allowed up to 12 hours after the initial test.
oTo display the list of Test points, tap [List View].
If result is within the Fail criteria, the
screens below will be presented
If result is within the pass criteria, the
screens below will be presented
BLENDER
If result is between the Pass and the Fail
limits, the screens below will be presented

17
EN
(English)
d.
Performing a Retest on an ATP Test point before Moving to a Different Test point
After completing a test run, the
3M Clean-Trace
LM1 Luminometer offers the option to do a re-test before moving to a
different Test point. To perform a retest, follow the steps below:
▪Follow the Instructions for Use for the 3M™ Clean-Trace™Test to collect a sample, activate the test, and shake it for
at least 5 seconds.
▪Open the 3M Clean-Trace Luminometer by pressing the rocker cap. Then insert the activated test into the chamber.
Keep the 3M Clean-Trace Luminometer upright whenever a test is in the chamber, to ensure accurate results and
avoid spillage of reagents, which could damage the sensitive components of the instrument.
▪Tap [Retest] then tap [Start] to begin measuring. A progress bar appears and moves from left to right.
▪The Test result appears and is stored in the memory so it can be synchronized with the 3M Clean-Trace Hygiene
Management Software. The result is also interpreted using established Pass/Fail limits and is displayed on the screen
as Pass,Caution, or Fail.
▪Remove the test swab from the 3M Clean-Trace Luminometer; press the rocker cap, grasp the top of the Test swab,
and pull upwards. Follow current industry standards and local regulations for disposal of used Test swabs.
e.
Performing a Retest on an ATP Test point after Moving to a Different Test point
The 3M Clean-Trace LM1 Luminometer offers the option to retest a test point within 12 hours from the original test run.
To select the Test point to retest while in the same Sample plan, tap Next [>] or Previous [<] to locate the Test point.
To retest a Test point from a different Sample plan:
▪Tap (Home), then tap the Sample plan, then tap the date and time of the run.
▪In the Sample plan, locate then tap the Test point you wish to retest - Scroll down or up as needed.
▪
Follow the Instructions for Use for the 3M Clean-Trace Test to collect a sample, activate the test and shake
it for at least 5 seconds.
▪
Open the 3M Clean-Trace Luminometer by pressing the rocker cap. Then insert the activated test into the chamber.
Keep the 3M™Clean-Trace™Luminometer upright whenever a test is in the chamber, to ensure accurate results and
avoid spillage of reagents, which could damage the sensitive components of the instrument.
▪
Tap [Retest] then tap [Start] to begin measuring. A progress bar appears and moves from left to right.
▪
The Test result appears on the screen and is stored in the memory so it can be synchronized with the 3M
Clean-Trace Hygiene Management Software. The result is also interpreted using your established Pass/Fail
limits and is displayed on the screen as Pass,Caution, or Fail.
▪
Remove the Test swab from the 3M Clean-Trace Luminometer; press the rocker cap, grasp the top of the Test swab,
and pull upwards. Follow current industry standards and local regulations for disposal of used Test swabs.
Sample plan name
Sample plan run date
Sample plan run time
Results synchronized
Not tested, tap to run test
Tested, PASSED, tap to retest
Total Test Points
(+ Test types)
Tested
Passed
Tested
Caution
Tested
Failed
Tested, FAILED, tap to retest

18
EN
(English)
f.
Performing a Visual Inspection Test on a Test Point
If a Test point includes an ATP test and a Visual Inspection Test type, the Visual Inspection Test type appears immediately,
before the ATP Test type. The user may run the tests in sequence, or in any order.
If the Test type is set to Visual Inspection, recording the result will means tap
[Pass]
or
[Fail]
.
Tap home anytime to return home, to the list of assigned Sample plan(s)
g.
Adding a Comment to a Test result
Comment(s) must be pre-set in the
3M™Clean-Trace™
Hygiene Management Desktop Software and transferred to
the 3M Clean-Trace LM1 Luminometer through synchronization.
Comments are currently allowed for Pass, Caution or Fail results, and must be added before the result is
synchronized. Multiple comments may be selected per test run.
To add a comment to a test result
▪Tap the icon to add comment. The Comments screen and any previously added
commentsappears.
▪Tap[Comments] drop down, then tap to select comment(s)to add.
▪Tap[Save] to append selected comment to the Test result.
Tap to add/view comment
Tap to reveal pre-set
comments
Tap to view Test point details
Other manuals for LM1
2
Table of contents
Other 3M Measuring Instrument manuals
Popular Measuring Instrument manuals by other brands

Alpha Communications
Alpha Communications TekTone Tek-MMARS II NC386B Operation, installation and service manual

Spectrum Technologies
Spectrum Technologies Fieldscout TDR 350 product manual

Hanna Instruments
Hanna Instruments HI 8424 instruction manual

Motrona
Motrona touchMATRIX DP350 operating manual

Malmbergs
Malmbergs 99 090 00 manual

ADE
ADE MZ10027-1 operating manual