manuals.online logo
Brands
  1. Home
  2. •
  3. Brands
  4. •
  5. 3M
  6. •
  7. Respiratory Product
  8. •
  9. 3M Versaflo TR-800 User manual

3M Versaflo TR-800 User manual

Other manuals for Versaflo TR-800

1

Other 3M Respiratory Product manuals

3M Adflo 15-5401-01 Installation instructions

3M

3M Adflo 15-5401-01 Installation instructions

3M Scott Safety ELSA 2000 User manual

3M

3M Scott Safety ELSA 2000 User manual

3M Versaflo TR-800 User manual

3M

3M Versaflo TR-800 User manual

3M 9820 User manual

3M

3M 9820 User manual

3M Versaflo TR-603E-ASB User manual

3M

3M Versaflo TR-603E-ASB User manual

3M N100 User manual

3M

3M N100 User manual

3M Versaflo TR-300 Service manual

3M

3M Versaflo TR-300 Service manual

3M FF-403 User manual

3M

3M FF-403 User manual

3M Secure Click HF-800 Series User manual

3M

3M Secure Click HF-800 Series User manual

3M Aura Particulate Respirator 9300+Gen3 Series Instruction Manual

3M

3M Aura Particulate Respirator 9300+Gen3 Series Instruction Manual

3M 9541V User manual

3M

3M 9541V User manual

3M 8515/07189 User manual

3M

3M 8515/07189 User manual

3M 7907S User manual

3M

3M 7907S User manual

3M 8511 User manual

3M

3M 8511 User manual

3M Versaflo TR3712N Service manual

3M

3M Versaflo TR3712N Service manual

3M 820007023 User manual

3M

3M 820007023 User manual

3M 9210/37021 User manual

3M

3M 9210/37021 User manual

3M 8810 User manual

3M

3M 8810 User manual

3M 9928 User manual

3M

3M 9928 User manual

3M Versaflo TR-600 Series User manual

3M

3M Versaflo TR-600 Series User manual

3M 7800 Installation instructions

3M

3M 7800 Installation instructions

3M Versaflo TR-300+ User manual

3M

3M Versaflo TR-300+ User manual

3M SCOTT Vision C5 User manual

3M

3M SCOTT Vision C5 User manual

3M 6700 User manual

3M

3M 6700 User manual

Popular Respiratory Product manuals by other brands

Dräger PSS Series Instructions for use

Dräger

Dräger PSS Series Instructions for use

ResMed MIRAGE SWIFT II 60891/1 user guide

ResMed

ResMed MIRAGE SWIFT II 60891/1 user guide

Omron COMP A-I-R NE-C801 instruction manual

Omron

Omron COMP A-I-R NE-C801 instruction manual

Ombra 63506 Instructions for use

Ombra

Ombra 63506 Instructions for use

Lotus M-9520A quick start guide

Lotus

Lotus M-9520A quick start guide

CERES nosko nebulizer kit manual

CERES

CERES nosko nebulizer kit manual

Dr.Frei NE-SM1 user manual

Dr.Frei

Dr.Frei NE-SM1 user manual

North 5400 series instruction manual

North

North 5400 series instruction manual

John Bunn Neb-u-Lite LX2 user manual

John Bunn

John Bunn Neb-u-Lite LX2 user manual

Philips Respironics EE Leak 1 AF541 Instructions for use

Philips

Philips Respironics EE Leak 1 AF541 Instructions for use

Sperian Panther Hip-Pac P9684 Series Operation manual

Sperian

Sperian Panther Hip-Pac P9684 Series Operation manual

Dräger X-plore 6570 quick start guide

Dräger

Dräger X-plore 6570 quick start guide

Respironics SideStream HS860 Instructions for use

Respironics

Respironics SideStream HS860 Instructions for use

Sundstrom SR 500 Instructions for use

Sundstrom

Sundstrom SR 500 Instructions for use

Ambu SPUR II Instructions for use

Ambu

Ambu SPUR II Instructions for use

BLS 8000 Instructions for the use

BLS

BLS 8000 Instructions for the use

Dräger saver PP Series Instructions for use

Dräger

Dräger saver PP Series Instructions for use

SATA Vision 2000 operating instructions

SATA

SATA Vision 2000 operating instructions

manuals.online logo
manuals.online logoBrands
  • About & Mission
  • Contact us
  • Privacy Policy
  • Terms and Conditions

Copyright 2025 Manuals.Online. All Rights Reserved.

Below is a summary of steps to follow each time a 3M™ Versaflo™ TR-800 Powered Air Purifying Respirator (PAPR) is worn.
1. Push ‘Test’ button to confirm
battery charge – 5 bars =
80-100%.
2. Attach battery pack to
motor/blower. Gently tug bat-
tery pack to confirm a secure
connection.
3. Attach filter/cartridge (with filter
cover), and belt to motor/blower.
Gently tug filter/cartridge to confirm
a secure connection.
4. Turn on PAPR. Confirm LEDs
flash on startup. Confirm audible
alarm sounds.
5. Confirm airflow is sufficient.
Bottom of the ball above airflow
indicator zone flow level.
6. Align pins and insert breathing
tube into PAPR air outlet, turn
connector 1/4 turn clockwise.
Confirm connection by tugging
lightly on connection next to
outlet.
7. Inspect headtop for damage.
Connect breathing tube to headtop. 8. Don PAPR per workplace
procedures.
WARNING
!
This product is part of a system that helps reduce exposures to certain airborne contaminants. Before use, the wearer must read
and understand the User Instructions. Follow all local regulations. In the U.S., a written respiratory protection program must be
implemented meeting all the requirements of 29CFR1910.134, including training, fit testing and medical evaluation. In Canada,
CSA standard Z94.4 requirements must be met and/or requirements of the applicable jurisdiction, as appropriate. Misuse may
result in injury, sickness or death. For correct use, consult supervisor and User Instructions, or call 3M Technical Service in USA
at 1-800-243-4630 and in Canada at 1-800-267-4414.
Quick Start Guide: TR-800
NOTE: This sheet supplements, but does not replace, User Instructions. Always read and follow User Instructions.
Personal Safety Division
3M Center, Building 235-2W-70
St. Paul, MN 55144-1000
3M PSD products are
occupational use only.
© 3M 2018. All rights reserved.
3M and Versaflo are trademarks of of
3M Company and its affiliates.
Used under license in Canada.
All other trademarks are property
of their respective owners.
Please recycle. Release 1, March 2018
In United States of America
Technical Service: 1-800-243-4630
Customer Service: 1-800-328-1667
3M.com/workersafety
In Canada
Technical Service: 1-800-267-4414
Customer Service: 1-800-364-3577
3M.ca/Safety
The following is designed to be a Quick Start Guide for reference purposes only. Before using the TR-800 PAPR, all users must read and
understand the product User Instructions. If you have questions, consult your supervisor or call 3M Technical Service at 1-800-243-4630
(USA) or 1-800-267-4414 (Canada).
WARNING
!
This product is part of a system that helps reduce exposures to certain airborne contaminants. Before use, the wearer must
read and understand the User Instructions. Follow all local regulations. In the U.S., a written respiratory protection program
must be implemented meeting all the requirements of 29CFR1910.134, including training, fit testing and medical evaluation.
In Canada, CSA standard Z94.4 requirements must be met and/or requirements of the applicable jurisdiction, as
appropriate. Misuse may result in injury, sickness or death. For correct use, consult supervisor and User Instructions, or
call 3M Technical Service in USA at 1-800-243-4630 and in Canada at 1-800-267-4414.
1. Inspect the TR-800 PAPR system
If parts are missing or damaged, replace only with 3M TR-800 replacement parts before proceeding.
•Motor/blower. Inspect for cracks, holes, damage to user interface panel and belt attachments.
•Battery pack. Confirm battery pack case is intact. Confirm battery pack charge is sufficient for duration of the work period by pressing the
TEST button on the battery pack.
•Breathing tube. Examine breathing tube for tears, holes or cracks. Bend the tube to verify that it is flexible and not showing signs of wear.
Ensure the o-rings located at both ends of the breathing tube are present and intact.
•Filter/cartridge. Closely inspect filter/cartridge plastic housing including the corners and latches, outer rectangular barrier, and inner circular
filter seal gasket for cracks, tears, cuts, distortion, indentations or debris. Replace filter/cartridge if damaged. If the filter/cartridge has been
mishandled or dropped, re-inspect fully. If you have any concern, contact 3M Technical Service for guidance.
•Headgear. Inspect the headgear for tears, cuts, loose stitching, cracks, discoloration or other signs of damage.
2. Assembly and flow check for TR-800 PAPR system
• Using battery tool, attach battery pack to bottom of motor/blower. Gently pull to confirm a secure connection.
• (If being used) Install spark arrestor, then prefilter into filter cover.
• Place the filter/cartridge into the filter cover, ensuring bottom latching tab snaps into place. Note: If not using the filter cover, proceed to next
step and attach the filter/cartridge directly to the motor/blower.
• Place the hinge side of the filter/cartridge into the motor/blower, then snap latch side into the filter latch. Filter/cartridge latches with a
distinct click. Gently pull to confirm a secure connection.
• Attach motor/blower to belt or backpack.
• Insert the end of the breathing tube with the two small prongs into slots in the motor/blower air outlet. Twist the breathing tube ¼ turn to the
right (clockwise) to lock.
• Attach breathing tube to headgear. Push the QRS end of the breathing tube (blue pinch clip) onto the air inlet of the headgear. Headgear will
secure with a distinct click. Gently pull to confirm a secure connection.
3. Perform flow check (daily)
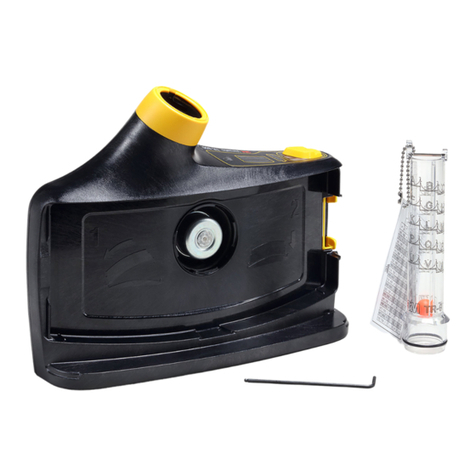
• If installed, remove breathing tube. Insert air flow indicator TR-971 into the outlet on the TR-800 motor/blower unit.
• Start motor/blower. Run for 1 minute.
• With the airflow indicator TR-971 in a vertical position, bottom of the floating ball must be at, or above, the minimum flow level
indicated on airflow indicator chart for your ‘zone’. If not above minimum level, respirator system must not be used until
evaluated and repaired.
• Remove air flow indicator TR-971 and perform low flow alarm test per TR-800 User Instructions.
• Reattach breathing tube and headgear before use.
4. Don TR-800 PAPR system
• Turn on motor/blower by pressing and holding blue on/off button.
• Use belt or backpack to attach PAPR to wearer.
• Pull headgear over head and adjust. Adjust following the User Instructions for the specific headgear.
5. Post Use
• Exit work area. Turn off motor/blower by pressing and holding blue on/off button.
• Remove the PAPR system making sure to follow workplace procedures so as not to expose yourself to contaminants on unit.
• Clean PAPR following practices established by your employer and in compliance with the product User Instructions. Charge battery if needed.
Quick Start Guide: TR-800
NOTE: This sheet supplements, but does not replace,
User Instructions. Always read and follow User Instructions.