manuals.online logo
Brands
  1. Home
  2. •
  3. Brands
  4. •
  5. 3P Technik
  6. •
  7. Water Filtration System
  8. •
  9. 3P Technik VF1 Technical specifications

3P Technik VF1 Technical specifications

Installation
Maintenance
Instruction
Innovative Rainwater Harvesting
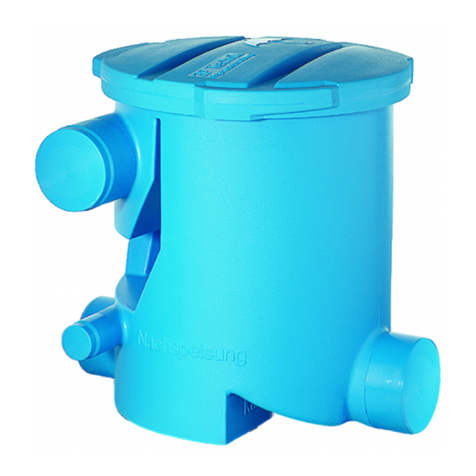
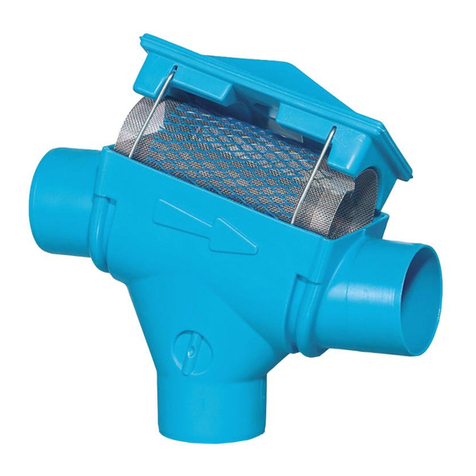
3P Volume Filter VF1
3P Technik
Installation
and Maintenance
Instruction
Rainwater Filter > for Installation in the ground or Inspection Chambers
www.3PTechnik.co.uk
From our rainwater product range:
Thank you for selecting a 3P filter. This filter has been designed to
provide years of trouble free service. Please familiarize yourself
with these instructions to ensure correct and reliable operation.
1. Technical data
02
450m
2Ø 100 0,65 mm Ø 100 300 mm
Pedestrian Traffic Loading Vehicle Traffic Loading
2. How it works
As water arrives
the level builds up
and is equally distributed
across the cascade
Pre cleaning through the cascades.
Largest dirt particles are led across
the primary filter cascades
directly to the stormwater.
Pre filtered water then flows
over the secondary filter sieve
(mesh size 0.65 mm).
Due to the special mesh structure
of the sieve, any dirt washes
directly into the stormwater.
Very low maintenance.
Cleaned water flows to storage.
Dirt goes to the stormwater.
1
2
3
4
5
Inlet
rainwater
110 mm
>
Cleaned water
to storage tank
110 mm
<
Inlet rainwater
110 mm
<
Dirty water
to stormwater
110 mm
>
1
3
4
5
2
Vehicle Traffic Loading
Where vehicle loading is required the filter should be installed
beneath a suitable cover to an appropriate highway specification.
Pedestrian Traffic Loading
For pedestrian loading only, the standard filter lid is suitable.
03
Installation direct in ground Installation in an inspection chamber
3. Installation advice
4. Installation
3P Volume Filter
– Connections to the 3P Volumefilter VF1
can be made with universal connectors.
– Rainwater enters through the upper Inlets,
at 110 mm. For roof areas up to 200 m2
connect from either right or left.
– For roof areas above 200 m2connect
on both sides for maximum efficiency.
– Saw off 1 cm from the outside
of the selected Inlet(s).
– Cleaned water is led via the outlet
at 110 mm to the storage tank.
– Dirty water goes via the outlet
at 110 mm to waste.
– Install the 3P Volumefilter VF1 horizontally
on a level stable surface. For deeper
installations the 3P Telescopic Extension
can be used to reach ground level.
4
5
Installation of the Telescopic Extension
– Lift the lid off the 3P VF1 and lock the lower
part of the 3P Telescopic Extension tube,
using the bayonet socket fitting,
onto the 3P Volumefilter VF1.
It has to be fully engaged.
– The upper surface of the upper ring collar
to the upper section of the Telescopic Tube
can be fitted flush at ground level.
This leaves the VF1 lid just proud of the
ground surface for easy removal and access.
– Push the upper section of the 3P Telescopic
Extension on to the lower part until you
reach the required height.
– If the final required height is lower than
the minimum with the two pieces, simply
cut by sawing the upper or the lower part
with a fret saw to the required height.
– If the final required height is higher than
the maximum you can use a second
Telescopic Extension on top.
– Next, back fill the tube surround with
gravel or stone chippings.
Compress the back fill below the upper
collars of the upper extension section, so
that the collars take the loading, and not
the VF1 below.
– If installed in a block built inspection
chamber there may be no need for the
Telescopic Extension Tube, or it can be fitted
to the base of an inspection chamber floor.
storage tank
dirt
retention
basket
calmed inlet
over-
flow
siphon
Inlet rainwater
infiltration
chamber
inspection
chamber
cleaned water
Innovative Rainwater Harvesting
3P Technik
5. Maintenance advice
The filter requires cleaning regularly. If it is not raining unscrew the lid of the
housing and clean with a water jet the tray and the filter element.
Then remove the filter element. Where necessary, use a 3 mm Allen key undo
the screws retaining the filter mesh. Rinse the filter mesh with water. Clean
with mild detergent and a stiff brush, both sides to help dissolve any fatty
deposits or hydrocarbon build up. Rinse it again. Do not use a metal brush
which may damage the filter mesh. You may also put the filter mesh into a
dishwasher. After cleaning examine the filter by holding up against the light
and inspect for any blocked holes in the filter mesh. If the filter is clean put
the filter mesh back and re-fix it with the screws.
Insert the filter element into the housing.
6. Accessories
7. Guarantee
3P Technik offers this product
the guarantee of two years (from date of purchase).
04 w w w.3PTechnik.co.uk
info
@3PTechnik.co.uk
www.3PTechnik.co.uk
1002500UK 01/2006
Subject to change without notes.
3P Removal Handle
3P Telescopic Extension
Art.-Nr. 1000560
Plastic telescopic shaft
for installation directly
into the ground.
Material: Polyethylene.
3P Removal Handle
Art.-Nr. 1000550
Ideal for removal
of the 3P Filters
from deeper installations.
Remains in position.
Length: 500 mm.
3P Telescopic Extension

Other 3P Technik Water Filtration System manuals

3P Technik VF12 Product guide

3P Technik

3P Technik VF12 Product guide

3P Technik 1000300 User manual

3P Technik

3P Technik 1000300 User manual

3P Technik 1000300 Product guide

3P Technik

3P Technik 1000300 Product guide

3P Technik 3P Rustico User manual

3P Technik

3P Technik 3P Rustico User manual

3P Technik 1000200 Product guide

3P Technik

3P Technik 1000200 Product guide

3P Technik 1000400 Product guide

3P Technik

3P Technik 1000400 Product guide

3P Technik VF1 Product guide

3P Technik

3P Technik VF1 Product guide

3P Technik 1000600 User manual

3P Technik

3P Technik 1000600 User manual

3P Technik Twin Filter User manual

3P Technik

3P Technik Twin Filter User manual

Popular Water Filtration System manuals by other brands

AQV AQV5 user manual

AQV

AQV AQV5 user manual

ACO Lipumax-P installation guide

ACO

ACO Lipumax-P installation guide

Celestron ECLIP SMART 94246 manual

Celestron

Celestron ECLIP SMART 94246 manual

emaux NT-UV Series user manual

emaux

emaux NT-UV Series user manual

BWT bestaqua 14ROC Installation and operating instructions

BWT

BWT bestaqua 14ROC Installation and operating instructions

Aqua PRO AP-600W-A5-GST2 manual

Aqua PRO

Aqua PRO AP-600W-A5-GST2 manual

Whirlpool WHER25 Performance data sheet

Whirlpool

Whirlpool WHER25 Performance data sheet

Culligan RVF-10 Installation and operation instructions

Culligan

Culligan RVF-10 Installation and operation instructions

Sera pond UV-C System 55 W manual

Sera

Sera pond UV-C System 55 W manual

Perma Pure Baldwin series instruction manual

Perma Pure

Perma Pure Baldwin series instruction manual

amiad AMF-36K Installation and operation instructions

amiad

amiad AMF-36K Installation and operation instructions

BWT PERMAQ COMPACT 51 Installation and operating manual

BWT

BWT PERMAQ COMPACT 51 Installation and operating manual

CALEFFI 548 Series Installation, commissioning and servicing instructions

CALEFFI

CALEFFI 548 Series Installation, commissioning and servicing instructions

ACO Oleopator P Installation guidelines

ACO

ACO Oleopator P Installation guidelines

Titan 200 user manual

Titan

Titan 200 user manual

Pentair Autotrol 255 Logix 740-760 Installer manual

Pentair

Pentair Autotrol 255 Logix 740-760 Installer manual

AquaScape 77011 installation instructions

AquaScape

AquaScape 77011 installation instructions

Whirlpool WHEUFF Installation and operation manual

Whirlpool

Whirlpool WHEUFF Installation and operation manual

manuals.online logo
manuals.online logoBrands
  • About & Mission
  • Contact us
  • Privacy Policy
  • Terms and Conditions

Copyright 2025 Manuals.Online. All Rights Reserved.