manuals.online logo
Brands
  1. Home
  2. •
  3. Brands
  4. •
  5. Aaeon
  6. •
  7. Motherboard
  8. •
  9. Aaeon PCM-6890 User manual

Aaeon PCM-6890 User manual

Quick Installation Guide
PCM-6890 Installation Guide 1
PCM-6890
Notice:
This guide is designed for experienced users to
setup the system within the shortest time. For
detailed information, please always refer to the
electronic user's manual.
Safety Precautions
PCM-6890
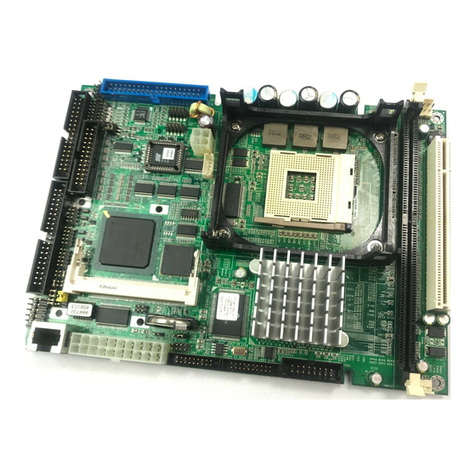
All-in-One Socket 370 Celeron Single Board Computer
with LCD, Ethernet, Audio, & 4 COMs
Part no. 2007689000 1st Ed. Printed in Taiwan May 1999
Quick Installation Guide
Warning! Always completely disconnect the power cord
from your chassis whenever you work with the
hardware. Do not make connections while the
power is on. Sensitive electronic components
can be damaged by sudden power surges. Only
experienced electronics personnel should open the
PC chassis.
Caution! Always ground yourself to remove any static
charge before touching the CPU card. Modern
electronic devices are very sensitive to static
electric charges. As a safety precaution, use a
grounding wrist strap at all times. Place all
electronic components in a static-dissipative
surface or static-shielded bag when they are not
in the chassis.
PCM-6890
All manuals and user guides at all-guides.com
all-guides.com
PCM-6890
2PCM-6890 Installation Guide
BC-599/596
Locating jumpers
SW1
J5
J9
J8J10
J1
J2
J7
J6
J3
J4
All manuals and user guides at all-guides.com
Quick Installation Guide
PCM-6890 Installation Guide 3
PCM-6890
Locating connectors
CN1
CN2
U18
CN6
CN8
CN7
CN17
CN13
LED2
CN17
CN15
CN14 CN16
CN9
CN10
CN4
CN11
CN16CN14 CN12CN15
All manuals and user guides at all-guides.com
PCM-6890
4PCM-6890 Installation Guide
BC-599/596
Jumpers and connectors
Connectors on the board link it to external devices such as hard
disk drives, a keyboard, or floppy drives. In addition, the board
has a number of jumpers that allow you to configure your system
to suit your application.
The following tables list the function of each of the board's jumpers
and connectors.
Jumpers
Label Function
J1 Clear CMOS
J2 System temperature thermal sensor
J3 COM4 RI pin voltage select
J4 COM3 RI pin voltage select
J5 Audio output select
J6 ATX soft-power switch connector
J7 COM2 RS-232/422/485 select
J8 LCD clock select
J9 LCD driving voltage select
J10 COM2 RS-232/422/485 select
SW1 (4~6) CPU frequency ratio
SW1 (2~3) DOC address select
All manuals and user guides at all-guides.com
Quick Installation Guide
PCM-6890 Installation Guide 5
PCM-6890
Connectors
Label Function
CN1 CPU fan power connector
CN2 PC/104 connector
CN3 USB ports connector
CN4 CD-ROM signal input connector
CN6 IDE drive connector
CN7 Front panel connector
CN8 IrDA connector
CN9 ATX power connector
CN10 LCD display connector
CN11 Keyboard and PS/2 mouse connector
CN12 VGA display connector
CN13 Audio connector
CN14 Printer port connector
CN15 100Base-Tx Ethernet connector
CN16 Serial ports connector
CN17 Floppy dirve connector
U18 DiskOnChip socket
LED2 Ethernet Tx/Rx/Link LED connector
All manuals and user guides at all-guides.com
PCM-6890
6PCM-6890 Installation Guide
BC-599/596
COM3/COM4 RI pin voltage select
(J3, J4)
The 9th pin of COM3 and COM4 (9-pin D-sub connector) can be
selected as RI, +5V, or +12V by setting J3 & J4.
COM3 RI pin setting (J4)
RI* +5V +12V
J4
COM4 RI pin setting (J3)
RI * +5V +12V
J3
*default
Clear CMOS (J1)
You can use J1 to clear the CMOS data if necessary. To reset the
CMOS data, set J4 to 2-3 closed for just a few seconds, and then
move the jumper back to 1-2 closed.
Clear CMOS (J1) Protect* Clear CMOS
J1
*default
1
2
3
1
2
3
1 3 5
2 4 6
1 3 5
2 4 6
1 3 5
2 4 6
1 3 5
2 4 6
1 3 5
2 4 6
1 3 5
2 4 6
All manuals and user guides at all-guides.com
all-guides.com
Quick Installation Guide
PCM-6890 Installation Guide 7
PCM-6890
ATX Soft-Power Switch connector
(J6) The ATX Soft-Power switch connector is a 2-pin header. Locate
the power switch cable from your system. It is a 2-pin female
connector. Plug this connector to the Soft-Power switch connector
marketedJ6.
Audio output select (J5)
You can select the output mode of onboard audio connector
(CN14) by setting J5.
"Speaker out" is the output signal amplified by onboard amplifier
Audio output select (J5)
Line out * Speaker out
J5
*default
2 1
4 3
6 5
2 1
4 3
6 5
All manuals and user guides at all-guides.com
PCM-6890
8PCM-6890 Installation Guide
BC-599/596
COM2 RS-232/422/485 select (J10, J7)
ThePCM-6890 COM2 serial portcan be selected asRS-232, RS-422,
or RS-485 by setting J10 & J7.
COM2 Select (J10, J7)
RS-232* RS-422 RS-485
J10
J7
*default
1 4 7 10
3 6 9 12
1 4 7 10
3 6 9 12
1 4 7 10
3 6 9 12
1 3 5
2 4 6
1 3 5
2 4 6
1 3 5
2 4 6
All manuals and user guides at all-guides.com
Quick Installation Guide
PCM-6890 Installation Guide 9
PCM-6890
J8
LCD clock signal select (J8)
You can select the LCD control signal by setting J8. The following
charts show the available option.
LCD clock signal select (J8)
SHF CLK * ASHF CLK
*default
1 2 3 1 2 3
J9
LCD driving voltage select (J9)
You can select the LCD connector CN10 (pin 5 and pin 6) driving
voltage by setting J9. The configurations are as follows:
LCD driving voltage select (J9)
5V 3.3V *
*default
1 2 3 1 2 3
All manuals and user guides at all-guides.com
PCM-6890
10 PCM-6890 Installation Guide
BC-599/596
SW1 (4~6) CPU frequency ratio
CPU core frequency = CPU frequency ratio (2~5.5) * External bus
clock(66or100MHz)
UPC YCNEUQERF OITAR )4(1WS)5(1WS)6(1WS
X2NOFFOFFO
X5.2NOFFONO
X3NONOFFO
X5.3NONONO
X4FFOFFOFFO
X5.4FFOFFONO
X5FFONOFFO
X5.5FFONONO
*
* default
Note:
Most Celeron CPUs' frequency ratio are pre-locked
within the CPUs. These CPUs run at fixed speed
(frequency)regardlessoftheconfigurationslistedabove.
IftheCPUyouare using requires higher ratiothen5.5X,it
is most likely pre-locked.
All manuals and user guides at all-guides.com
Quick Installation Guide
PCM-6890 Installation Guide 11
PCM-6890
SW1 (2~3) DOC address select
The DiskOnChip 2000 occupies an 8 Kbyte window in the upper
memory address range of D400 to E000. You should ensure this
does not conflict with any other device's memory address. J7
controls the memory address of the Flash disk.
These addresses might conflict with the ROM BIOS of other
peripheral boards. Please select the appropriate memory address
to avoid memory conflicts.
COD SSERDDA )2(1WS)3(1WS
004DFFOFFO
008DNOFFO
00CDFFONO
ELBASIDNONO
*
* default
All manuals and user guides at all-guides.com
all-guides.com
PCM-6890
12 PCM-6890 Installation Guide
BC-599/596
All manuals and user guides at all-guides.com

Other manuals for PCM-6890

3

Other Aaeon Motherboard manuals

Aaeon EMB-B75B User manual

Aaeon

Aaeon EMB-B75B User manual

Aaeon GENE-U15B User manual

Aaeon

Aaeon GENE-U15B User manual

Aaeon EPIC-5536 User manual

Aaeon

Aaeon EPIC-5536 User manual

Aaeon ECM-5716 Series User manual

Aaeon

Aaeon ECM-5716 Series User manual

Aaeon EMB-9658T Mini-ITX User manual

Aaeon

Aaeon EMB-9658T Mini-ITX User manual

Aaeon SBC-670S User manual

Aaeon

Aaeon SBC-670S User manual

Aaeon Compact Board PCM-9452 User manual

Aaeon

Aaeon Compact Board PCM-9452 User manual

Aaeon EMB-830 User manual

Aaeon

Aaeon EMB-830 User manual

Aaeon PCM-LN05 Rev.B User manual

Aaeon

Aaeon PCM-LN05 Rev.B User manual

Aaeon GENE-1350 User manual

Aaeon

Aaeon GENE-1350 User manual

Aaeon ATX-Q670A User manual

Aaeon

Aaeon ATX-Q670A User manual

Aaeon GENE-WHU6 User manual

Aaeon

Aaeon GENE-WHU6 User manual

Aaeon IMBM-B75A User manual

Aaeon

Aaeon IMBM-B75A User manual

Aaeon EMB-945T User manual

Aaeon

Aaeon EMB-945T User manual

Aaeon SBC-410 User manual

Aaeon

Aaeon SBC-410 User manual

Aaeon EMB-Q87A User manual

Aaeon

Aaeon EMB-Q87A User manual

Aaeon EMB-LN9T Rev.B User manual

Aaeon

Aaeon EMB-LN9T Rev.B User manual

Aaeon SBC-557 User manual

Aaeon

Aaeon SBC-557 User manual

Aaeon IMBM-Q87A User manual

Aaeon

Aaeon IMBM-Q87A User manual

Aaeon MAX-H310A User manual

Aaeon

Aaeon MAX-H310A User manual

Aaeon GENE-9455 Rev.B User manual

Aaeon

Aaeon GENE-9455 Rev.B User manual
Aaeon PICO-BT01 User manual

Aaeon

Aaeon PICO-BT01 User manual

Aaeon PICO-WHU4 User manual

Aaeon

Aaeon PICO-WHU4 User manual

Aaeon GENE-HD05 User manual

Aaeon

Aaeon GENE-HD05 User manual

Popular Motherboard manuals by other brands

Intel MB865 user manual

Intel

Intel MB865 user manual

Maxtang ALN50 user manual

Maxtang

Maxtang ALN50 user manual

Texas Instruments DP83826EVM user guide

Texas Instruments

Texas Instruments DP83826EVM user guide

NXP Semiconductors FRDM-KW41Z user guide

NXP Semiconductors

NXP Semiconductors FRDM-KW41Z user guide

ASROCK H55ICAFE user manual

ASROCK

ASROCK H55ICAFE user manual

TechNexion PICO-PI-IMX8M quick start guide

TechNexion

TechNexion PICO-PI-IMX8M quick start guide

Espressif Systems ESP8266-DevKitS user guide

Espressif Systems

Espressif Systems ESP8266-DevKitS user guide

Supermicro Supero X8DTH-6 Quick reference guide

Supermicro

Supermicro Supero X8DTH-6 Quick reference guide

Biostar M6VSA user manual

Biostar

Biostar M6VSA user manual

Acer V70LA Technical manual

Acer

Acer V70LA Technical manual

AOpen MX3ZA user guide

AOpen

AOpen MX3ZA user guide

Unicorn ENDAT-GM451 user manual

Unicorn

Unicorn ENDAT-GM451 user manual

S&T Kontron Mini ITX Skylake S/C236 user guide

S&T

S&T Kontron Mini ITX Skylake S/C236 user guide

ISIC PCM4-H77 manual

ISIC

ISIC PCM4-H77 manual

Albatron KM400A series user manual

Albatron

Albatron KM400A series user manual

HP XP-P4IM533GV user manual

HP

HP XP-P4IM533GV user manual

JETWAY NF792 Series user manual

JETWAY

JETWAY NF792 Series user manual

Biostar M7SXD user guide

Biostar

Biostar M7SXD user guide

manuals.online logo
manuals.online logoBrands
  • About & Mission
  • Contact us
  • Privacy Policy
  • Terms and Conditions

Copyright 2025 Manuals.Online. All Rights Reserved.