manuals.online logo
Brands
  1. Home
  2. •
  3. Brands
  4. •
  5. A&D
  6. •
  7. Accessories
  8. •
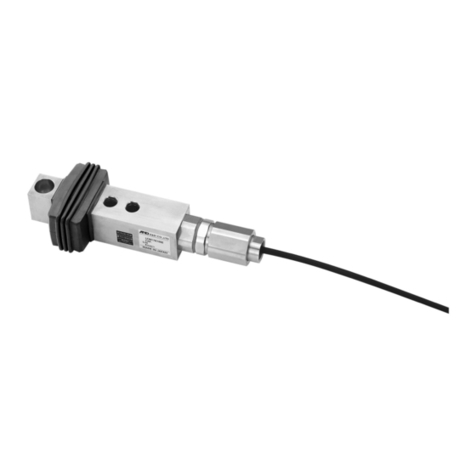
  9. A&D LCM19K500 User manual

A&D LCM19K500 User manual

ビーム型ロードセル
LCM19シリーズ
LCM19K500 /LCM19T001 /LCM19T1.5 /LCM19T002
LCM19K500-C3/LCM19T001-C3/LCM19T1.5-C3/LCM19T002-C3
LCM19K500-C6/LCM19T001-C6/LCM19T1.5-C6/LCM19T002-C6
本社 〒170-0013 東京都豊島区東池袋3-23-14
(ダイハツ・ニッセイ池袋ビル5F)
TEL03-5391-6126(代) FAX03-5391-6129
1. 概要
LCM19シリーズは、フロアスケールに最適なビーム型ロードセルです。
設置方法が容易なため、シンプルな計量機器を製作できます。
2. 仕様 (
*
:無記、 -C3、 -C6)
型式名 LCM19K500
*
LCM19T001
*
LCM19T1.5
*
LCM19T002
*
定格容量 5 kN
509.9kg
10 kN
1.020 ton
15 kN
1.530 ton
20 kN
2.039 ton
定格出力 2.0394 mV/V ±0.1%
最大許容過負荷 150 % OF R.O.
無記 0.03 % OF R.O.
-C3 0.025 % OF R.O.
1
総合誤差
-C6 0.010 % OF R.O.
1
ゼロバランス ±1% OF R.O.
温度補償範囲 -10 ℃ ~ 40 ℃
推奨印加電圧 5 V ~ 12 V
最大印加電圧 15 V
入力端子間抵抗 380 Ω±20 Ω
出力端子間抵抗 350 Ω±3.5Ω
絶縁抵抗 5000 MΩ以上/DC 50 V
ゼロ点の温度影響 0.011 % OF R.O./10℃
無記 0.013 % OF LOAD/10℃
-C3 0.011 % OF LOAD/10℃
1
出力の
温度影響
-C6 0.010 % OF LOAD/10℃
1
ケーブル太さ、長さ φ4×3 m
質量 1 kg 2 kg
1
: 数値は参考値。
3. 設置にあたっての注意点
3.1. ロードセルの設置
1 ロードセルを固定する部分の強度は十分強固なものにしてください。
この部分が簡単に傾いたり、曲がったりすると精度に悪影響を及ぼします。
2 ロードセル取付面は算術平均粗さ25a(三角記号で )以上に仕上げてください。
3 ロードセルの取付けには、強度区分10.9相当以上の六角穴付ボルト又は、
ハイテンション六角ボルトを使用してください。 一般的な市販ボルト
(低引張強度)は強度が不足しますので、使用しないでください。 ボルト
の推奨締め付けトルクは次表の通りです。
(
*
:無記、 -C3、 -C6)
型式名 ボルト径 推奨締め付けトルク
LCM19K500
*
、 LCM19T001
*
、 LCM19T1.5
*
M12 80 N・m
LCM19T002
*
M20 400 N・m
4 ロードセルを取付ける前に、取付面に付着しているゴミ等を必ず取り除い
てください。ボルトを締め付ける時は、ロードセルに横荷重やねじりが加
わらないように注意してください。
3.2. ロードセルへの負荷
ロードセルへの負荷の方法は、必要とされ
る計量精度、計量機器の構造により様々な
方法が考えられます。以下に例を示します
ので、参考にしてください。
1 ロードセルに直接計量台の脚(ア
ジャスタブルパッド) を 取 付 け る 。
構造はシンプルであるが計量精度はそれほど期待できない。
アジャスタブルパッドはパッドの部分が自在に動くものを選択する。
BEAM LOAD CELL
LCM19 Series
LCM19K500 /LCM19T001 /LCM19T1.5 /LCM19T002
LCM19K500-C3/LCM19T001-C3/LCM19T1.5-C3/LCM19T002-C3
LCM19K500-C6/LCM19T001-C6/LCM19T1.5-C6/LCM19T002-C6
3-23-14 Higashi-Ikebukuro, Toshima-ku, Tokyo
170-0013 JAPAN
Tel: [81](3)5391-6132 Fax: [81](3)5391-6148
1. INTRODUCTION
The LCM19 series are ideally suited for platform scale and designed for
the simple installation. Therefore, it is possible to design a simple
weighing instrument.
2. SPECIFICATIONS ∗
is the mark (space, -C3, -C6) of product.
Model No. LCM19K500
∗
LCM19T001
∗
LCM19T1.5
∗
LCM19T002
∗
Rated capacities 5 kN
509.9 kg
10 kN
1.020 ton
15 kN
1.530 ton
20 kN
2.039 ton
Rated output 2.0394 mV/V ±0.1 %
Maximum safe
overload 150 % OF R.O.
-
0.03 % OF R.O.
-C3 0.025 % OF R.O.
1
Combined erro
r
-C6 0.010 % OF R.O.
1
Zero balance ±1 % OF R.O.
Compensated
temperature range -10 °C to 40 °C
Recommended
excitation voltage 5 V to 12 V
Maximum excitation
voltage 15 V
Input terminal
resistance 380 Ω±20 Ω
Output terminal
resistance 350 Ω±3.5 Ω
Insulation resistance Greater then 5000 MΩat DC 50 V
Temperature effect
on zero 0.011 % OF R.O. / 10°C
-
0.013 % OF LOAD / 10°C
-C3 0.011 % OF LOAD / 10°C
1
Temperature
effect on span
-C6 0.010 % OF LOAD / 10°C
1
Diameter and length
of cable φ4×3 m
Mass of load cell 1 kg 2 kg
1
: Reference value.
3. NOTE ON INSTALLATION
3.1. ATTACHING THE LOAD CELL
1 Attach the load cell to a rigid and flat base. If there is slope or distortion
on a part of the base, it affects the measurement accuracy.
2 Prepare the mounting surface so that the arithmetic mean roughness is
within 25μm.
3 Use high tensile bolts or hexagonal bolts that have strength
classification 10.9 (tensile grade: 1000MPa, yield grade: 900MPa).
If a low tensile bolt is used, it will be damaged because of weak tensile
strength. Recommended torque is as follows:
∗
is the mark (space, -C3, -C6) of product.
Model No. Bolt diameter Recommended
torque
LCM19K500
∗
, LCM19T001
∗
, LCM19T1.5
∗
M12 80 N•m
LCM19T002
∗
M20 400 N•m
4 Clean the mounting surface before attaching the load cell. Avoid
torsional force or stress without specified direction when tightening the
load cell mounting bolts.
ロー
ド
セル
脚
アジャスタ
ブルパッド
計量台
1WMPD4002686
3.2. LOADING TO THE LOAD CELL
There are many loading methods, depending on the required accuracy
and the weighing instrument. Refer to the following examples of applying
loading to the load cell.
1 Attaching the foot to the load cell directly.
This structure is simple, but scale is
a low precision. Use a leveling foot
that the height can be adjusted.
2 Using a ball and socket.
Complicated structure, difficult
construction. The platform sways
easily. It is necessary to use this
structure for precision scales.
3.3. CAUTIONS
1 The signal of the load cell is very sensitive. Therefore, it is necessary to
avoid interfering noise. Separate load cell signal lines from power line and
other noise generators at least one meter.
2 Keep a constant temperature using insulation, when the load cell is
installed in direct sun light or radiant heat.
3 Keep the same temperature at each load cell, when a summing box is
connected to multiple load cells.
4 Use six wire cable, when expanding the length of the load cell cable.
5 Make a single ground point for the load cell and indicator to avoid loop
current between multiple ground lines. Separate the load cell ground line
from ground line of the power system.
3.4. CABLE COLOR CODE
Red.........Excitation +(Input) Green .......Signal +(output)
White ......Excitation -(Input) Blue ..........Signal -(output)
Yellow.....Shield
4. MAINTENANCE
1 Remove all dirt and dust from the load cell, and always use it in a clean
environment.
2 When cleaning, use an air blower.
5. DIMENSION ∗
is the mark (space, -C3, -C6) of product.
Model No. A B C D E F
LCM19K500
*
LCM19T001
*
LCM19T1.5
*
130 16 25 76 13 32
LCM19T002
*
171 19 38 95 19 38
Model No. G H J K L M
LCM19K500
*
LCM19T001
*
LCM19T1.5
*
32 58 φ14 M12 φ21 15
LCM19T002
*
38 76 φ21 M20 φ30.2 18
Unit: mm
2 球面受けと鋼球で負荷を受ける。
構造は複雑となり、組み立ても難
しい。計量台が簡単に横揺れする
ようになる。しかし、計量精度を
重視する場合はこのような構造に
する必要がある。
3.3. その他の注意点
1 ロードセルの出力信号は微弱なため、誘導障害などを避ける必要がありま
す。このため、ロードセルやロードセルケーブルは動力線やその他のノイズ
発生源から1m以上離してください。
2 ロードセルを直射日光や輻射熱が当たる場所に設置する場合は、ロードセル
に温度勾配が生じないよう断熱材等により対策を施してください。
3 多点のロードセルを和算する場合は、各ロードセルの温度が常に同一温度と
なるように配慮してください。
4 ロードセルケーブルに延長ケーブルを接続する時はシールド付き6芯ケーブ
ルを使用してください。
5 ロードセルとインジケーターを接続してアースする場合、多点アースにする
とループを描き、設置間に電位差が生じて誘導により不安定な状態となりま
すので、必ず一点アースとし、またアースは電力系統と共用せず単独で行っ
てください。
3.4. ロ-ドセルケーブルの芯線の色と接続の対応
赤 ....... 電源+ 緑 ....... 出力+
白
........ 電源- 青 ....... 出力-
黄
........ シールド
4. 日常点検
1 ロードセルのゴミ、ホコリ、汚物等の付着を取り除いて、常にクリーンな状
態で使用してください。
2 清掃する時は、エアー等を使用してください。
5. 外形寸法図 (
*
:無記、 -C3、 -C6)
型式名 A B C D E F
LCM19K500
*
LCM19T001
*
LCM19T1.5
*
130 16 25 76 13 32
LCM19T002
*
171 19 38 95 19 38
型式名 G H J K L M
LCM19K500
*
LCM19T001
*
LCM19T1.5
*
32 58 φ14 M12 φ21 15
LCM19T002
*
38 76 φ21 M20 φ30.2 18
単位:mm
ロードセル
球
面受け 計量台
フレーム
鋼球
球
面受け
Load cell
Leveling
foot
Platform
Load cell
Socket Platform
Frame
Ball
Socket
A
BC D E
F
G
H
J K L
M
力方向
固定面 2
A
B C D E
F
G
H
J K L
M
Force direction
Fixed surface 2

This manual suits for next models

12

Other A&D Accessories manuals

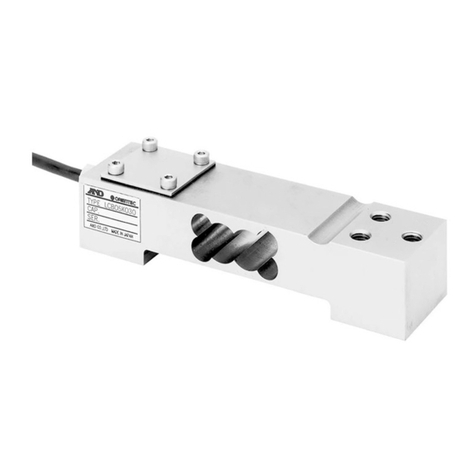
A&D AD-1671 User manual

A&D

A&D AD-1671 User manual

A&D LCB05 Series User manual

A&D

A&D LCB05 Series User manual

A&D AD-4408A User manual

A&D

A&D AD-4408A User manual

A&D AD-4401A User manual

A&D

A&D AD-4401A User manual

A&D AD4329A-DLC User manual

A&D

A&D AD4329A-DLC User manual

A&D FG-D-CWP User manual

A&D

A&D FG-D-CWP User manual

A&D AD-4328 User manual

A&D

A&D AD-4328 User manual

A&D LCM17K100E User manual

A&D

A&D LCM17K100E User manual

A&D AD-4329A User manual

A&D

A&D AD-4329A User manual

A&D Weighing Indicator AD-4405 User manual

A&D

A&D Weighing Indicator AD-4405 User manual

A&D AD-4329 User manual

A&D

A&D AD-4329 User manual

A&D GX Series User manual

A&D

A&D GX Series User manual

A&D AD-4406A User manual

A&D

A&D AD-4406A User manual

A&D AD-4212D-33 User manual

A&D

A&D AD-4212D-33 User manual

A&D AD-1672 User manual

A&D

A&D AD-1672 User manual

A&D AD-4402 User manual

A&D

A&D AD-4402 User manual

A&D TM-2564G User manual

A&D

A&D TM-2564G User manual

A&D AD-4323 User manual

A&D

A&D AD-4323 User manual

A&D LCB22 SERIES User manual

A&D

A&D LCB22 SERIES User manual

A&D AD-1612 User manual

A&D

A&D AD-1612 User manual

A&D AD-4961-2KD-2035 User manual

A&D

A&D AD-4961-2KD-2035 User manual

A&D Analog signal conditioner AD-4541-V User manual

A&D

A&D Analog signal conditioner AD-4541-V User manual

A&D FS-D Manual

A&D

A&D FS-D Manual

A&D AD-4405A User manual

A&D

A&D AD-4405A User manual

Popular Accessories manuals by other brands

Uniden U-Bell quick start guide

Uniden

Uniden U-Bell quick start guide

LSI LASTEM DNA310.1 user manual

LSI LASTEM

LSI LASTEM DNA310.1 user manual

TMT Automation ChowBELL2 Pro user manual

TMT Automation

TMT Automation ChowBELL2 Pro user manual

Atlona OmniStream AT-OMNI-232 installation guide

Atlona

Atlona OmniStream AT-OMNI-232 installation guide

Clevertouch WL10A-G user manual

Clevertouch

Clevertouch WL10A-G user manual

Thule Omnistor 8000 installation manual

Thule

Thule Omnistor 8000 installation manual

Oase InScenio 230 operating instructions

Oase

Oase InScenio 230 operating instructions

CORA CS1010 user guide

CORA

CORA CS1010 user guide

NeuLog NUL-213 Guide

NeuLog

NeuLog NUL-213 Guide

HEIDENHAIN LIC 4007 Mounting instructions

HEIDENHAIN

HEIDENHAIN LIC 4007 Mounting instructions

AREBOS AR-HE-HD Series Original user manual

AREBOS

AREBOS AR-HE-HD Series Original user manual

LEGRAND Wattstopper CU-250 installation instructions

LEGRAND

LEGRAND Wattstopper CU-250 installation instructions

IFM MK59 Series operating instructions

IFM

IFM MK59 Series operating instructions

jost JSK Series Installation and operating instructions

jost

jost JSK Series Installation and operating instructions

Burster 86-2800 Operation manual

Burster

Burster 86-2800 Operation manual

Alnor HRQ-PremAIR-GATE user manual

Alnor

Alnor HRQ-PremAIR-GATE user manual

Sonoff SNZB-04 user manual

Sonoff

Sonoff SNZB-04 user manual

Yamaha SWK-W10 owner's manual

Yamaha

Yamaha SWK-W10 owner's manual

manuals.online logo
manuals.online logoBrands
  • About & Mission
  • Contact us
  • Privacy Policy
  • Terms and Conditions

Copyright 2025 Manuals.Online. All Rights Reserved.