ABB RVC User manual

Installation and
Operating Instructions Power Factor Controllers
RVC

3
Table of contents
Page
1. Read this first . . . . . . . . . . . . . . . . . . . . . . . . . . . . . . . . . . . . . . . . . . . . . . . . . . . . . . . . . . .4
About this Instruction Manual . . . . . . . . . . . . . . . . . . . . . . . . . . . . . . . . . . . . .4
Safety . . . . . . . . . . . . . . . . . . . . . . . . . . . . . . . . . . . . . . . . . . . . . . . . . . . . . . . .4
Electromagnetic compatibility . . . . . . . . . . . . . . . . . . . . . . . . . . . . . . . . . . . . .4
2. Figures . . . . . . . . . . . . . . . . . . . . . . . . . . . . . . . . . . . . . . . . . . . . . . . . . . . . . . . . . . . . . . . .5
Fig.1 Front view . . . . . . . . . . . . . . . . . . . . . . . . . . . . . . . . . . . . . . . . . . . . . . . .5
Fig.2 Rear view . . . . . . . . . . . . . . . . . . . . . . . . . . . . . . . . . . . . . . . . . . . . . . . .6
Fig.3 LCD display & keypad . . . . . . . . . . . . . . . . . . . . . . . . . . . . . . . . . . . . . .7
3. Mounting . . . . . . . . . . . . . . . . . . . . . . . . . . . . . . . . . . . . . . . . . . . . . . . . . . . . . . . . . . . . . .8
4. Connection arrangement . . . . . . . . . . . . . . . . . . . . . . . . . . . . . . . . . . . . . . . . . . . . . . . . .11
5. Switching strategy . . . . . . . . . . . . . . . . . . . . . . . . . . . . . . . . . . . . . . . . . . . . . . . . . . . . . .12
6. Modes . . . . . . . . . . . . . . . . . . . . . . . . . . . . . . . . . . . . . . . . . . . . . . . . . . . . . . . . . . . . . . .12
7. Programmable parameters . . . . . . . . . . . . . . . . . . . . . . . . . . . . . . . . . . . . . . . . . . . . . . .13
8. Operation of the user interface . . . . . . . . . . . . . . . . . . . . . . . . . . . . . . . . . . . . . . . . . . . .15
9. Easy commissioning . . . . . . . . . . . . . . . . . . . . . . . . . . . . . . . . . . . . . . . . . . . . . . . . . . . .16
10. Manual operation . . . . . . . . . . . . . . . . . . . . . . . . . . . . . . . . . . . . . . . . . . . . . . . . . . . . . . .19
11. Programming . . . . . . . . . . . . . . . . . . . . . . . . . . . . . . . . . . . . . . . . . . . . . . . . . . . . . . . . . .19
A. Manual setting of parameters . . . . . . . . . . . . . . . . . . . . . . . . . . . . . . . . . .19
B. Auto setting . . . . . . . . . . . . . . . . . . . . . . . . . . . . . . . . . . . . . . . . . . . . . . . .24
12. Alarm – Temperature . . . . . . . . . . . . . . . . . . . . . . . . . . . . . . . . . . . . . . . . . . . . . . . . . . . .26
13. Testing and troubleshooting . . . . . . . . . . . . . . . . . . . . . . . . . . . . . . . . . . . . . . . . . . . . . .27
14. Electromagnetic compatibility . . . . . . . . . . . . . . . . . . . . . . . . . . . . . . . . . . . . . . . . . . . . .32
15. Technical specifications . . . . . . . . . . . . . . . . . . . . . . . . . . . . . . . . . . . . . . . . . . . . . . . . . .33
4
1. Read this first
About this Instruction Manual
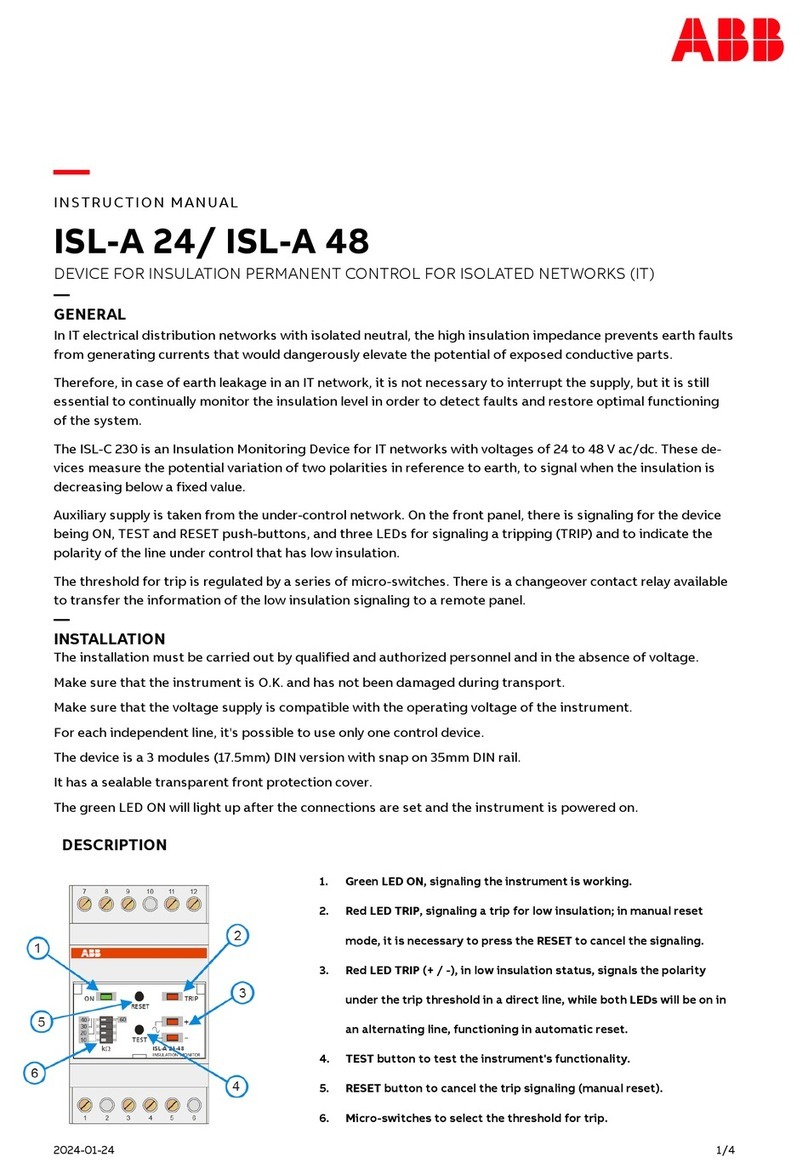
This Instruction Manual is designed to help you quickly install and operate the RVC Controller.
Before installation and operation of the RVC Controller, read this notice carefully. Keep it at the
disposal of people in charge of installation, maintenance and operation.
Safety
Installation, maintenance and operation of the PF Controller must be performed by qualified
electricians.
Do not work under voltage.
Do not open the PF Controller’s housing. There are no user serviceable parts inside.
The PF Controller is connected to a current transformer. Do not unplug the current transformer
connections before making sure it is short-circuited or connected to another parallel load of
sufficiently low impedance. Failure to do so can create dangerous over voltages.
Do not use this product for any other purpose than its original aim.
Electromagnetic compatibility
This PF Controller has been verified for compliance with EU (European Union) directives for
EMC (electromagnetic compatibility) for operation at 50 Hz and bears the CE marking to this
effect.
Useful guidelines for improvement of EMC performance may be consulted in chapter 14
Electromagnetic Compatibility.

5
AUTOSET
MODE
AUTOSET
MODE
POWERFACTORCONTROLLER
RVC 12
1
7
2
8
3
9
4
10
5
11
6
12
AUTO MAN SET
COS
PHASE
DELAY
OUTPUT
SEQUENCE
C/k
2. Figures
Fig.1. Front view
LCD Display
Keypad
Mounting
brackets

6
AUTOSETTING MODEAUTOSETTING MODE
MANUAL SETTING MODEMANUAL SETTING MODE
PUSH '+' & '-' TO STARTPUSH '+' & '-' TO START
AUTOMATIC MODEAUTOMATIC MODE
NETWORK SUPPLYNETWORK SUPPLY LOAD
AUTO :
MAN :
AUTO SET :AUTO SET :
MAN SET :MAN SET :
MANUAL MODE
Made in Belgium
M1
L1
L2 L3 kl
l
L2
L3
M2 1
A23 4 567 8 910 11 12
Fig.2. Rear view Voltage connection inputs
Curent
connection
unputs
Mounting
brackets
Step outputs
Mounting
brackets
l
k
L3
L2

7
1
7
2
8
3
9
4
10
5
11
6
12
AUTO MAN SET
COS
PHASE
DELAY
OUTPUT
SEQUENCE
C/k
AUTOSET
MODE
Fig.3. LCD display and keypad
A. LCD Display
1. Activated outputs
2. Inductive PF
3. Capacitive PF
4. Undercompensation alarm
5. Overtemperature indication
B. Keypad
10. Mode button
11. - button
12. + button
6. Demand for switching on or
off capacitor steps
7. Numerical display
8. Programmable parameters
9. Modes
A
1
2
3
4
5
9
6
7
8
10 11 12
B

8
AUTOSET
MODE
AUTOSET
MODE
POWERFACTORCONTROLLER
RVC 12
1
7
2
8
3
9
4
10
5
11
6
12
AUTO MAN SET
COS
PHASE
DELAY
OUTPUT
SEQUENCE
C/k
3. Mounting
1.
Slide the Controller (1)
into the Capacitor Bank
cubicle (2)
2
1

9
2. A.
Insert the Mounting Brackets (3) in the corresponding
Fixation Holes (4) of the Controller
2. B.
Pull the Mounting
Brackets
backwards.
43

10
AUTOSETTING MODEAUTOSETTING MODE
MANUAL SETTING MODEMANUAL SETTING MODE
PUSH '+' & '-' TO STARTPUSH '+' & '-' TO START
AUTOMATIC MODEAUTOMATIC MODE
AUTO :AUTO :
MAN :MAN :
AUTO SET :AUTO SET :
MAN SET :MAN SET :
MANUAL MODEMANUAL MODE
Made in BelgiumMade in Belgium
NETWORK SUPPLYNETWORK SUPPLY LOAD
M1
L1
L2 L3 kl
l
L2
L3
M2 1
A23456 7 8 910 11 12
3.
Turn the Screw (7) into the
Mounting Brackets (3) and
tighten until the Controller is
fixed
7

11
NETWORK SUPPLY LOAD
M1
L1
L2 L3 k l
l
L2
L3
M2 1A 2 3 4 5 6 7 8 9 10 11 12
6mm
4. Connection arrangement
Wiring diagram
k, l: leads of the current transformer
L2, L3: 2 of the 3 phases
(not monitored by the CT)
M1, M2: leads of the normally closed
contact
A: output relay common source
1-12: outputs
Leads connection
1. Push the lever of
the connector
backwards with a
screwdriver.
2. Insert the wire in
the corresponding
connection hole
while keeping the
pressure on the
lever.
3. Release the
screwdriver. 4. The wire is
properly connected.
1234

12
5. Switching strategy
Steps switching is based on the average value of the reactive power consumption of the load
during the switching delay time.
It allows:
• to control the PF in the presence of rapidly varying loads
• to use a longer switching delay time and as a result, to reduce the number of switchings.
On the basis of the reactive power demand measured during the switching delay time, the
RVC identifies the number of steps to be switched on.
It then automatically switches the bigger outputs first to avoid unnecessary intermediary
switchings.
During this switching sequence, a fixed 12-second delay time between each step is
introduced in order to avoid transient problems and to fulfil EMC requirements.
When several steps must be switched off, the controller does it in one shot because capacitor
switch-off is transient-free.
All the switching sequences are circular.
Circular switching increases the lifetime of capacitors and contactors by balancing the
switching stress among all the outputs.
In case of “double first step” (1:1:2:2…; 1:1:2:4:4:…; 1:1:2:4:8:8:..), the circularity applies to
the first two outputs and also on the outputs of higher value.
6. Modes
AUTO Mode
• Steps are automatically switched on and off to reach the target cos ϕaccording to the
measurement of the reactive current, the C/k setting, the switching delay, the number of
outputs and the type of sequence
• The LCD display shows the actual cos ϕ

13
MAN Mode
• Steps are switched on and off manually by pressing + and - buttons
• The LCD display shows the actual cos ϕ
AUTO SET Mode
Automatic setting of the following parameters:
•C/k: automatic setting of the sensitivity
•PHASE: automatic connection recognition (including inverted CT leads and single phase)
•DELAY: automatic setting of the switching delay time to 40s
•OUTPUT: automatic recognition of number of outputs
•SEQUENCE: automatic recognition of type of sequence
Factory default target cos ϕ: 1.00
MAN SET Mode
Manual setting of the following parameters:
•COS ϕ: target PF
•C/k: PF controller sensitivity
•PHASE: phase connection
•DELAY: switching delay time
•OUTPUT: number of outputs
•SEQUENCE: type of sequence
7. Programmable parameters
COS
ϕ
It is the target power factor that the PF Controller has to reach by switching steps. The value
can be set between 0.70 inductive and 0.70 capacitive in the Manual Set Mode (MAN SET –
COS ϕ).

14
C/k
C/k is the sensitivity of the PF Controller. It is usually set equal to 2/3 of the current of the first
capacitor step. It represents the threshold current value for the PF Controller to switch on or
off a capacitor step.
The C/k can be programmed from 0.050 to 1.00.
The value can be set either automatically (AUTO SET) or manually (MAN SET – C/k).
Phase shift
If the RVC is connected as shown on the connection diagram of the PF Controller, the phase
shift is 90° (default setting).
For special connections, please refer to chapter 10 – Programming.
Setting the phase shift may be done either automatically (AUTO SET) or manually (MAN SET –
PHASE).
Switching delay
The default value of the switching delay time between steps is 40s and can be programmed
from 1s to 999s.
Setting of switching delay time may be done manually (MAN SET – DELAY)
Output
Output represents the number of physical outputs and can be programmed from 1 to 12
according to the RVC type.
Setting the output may be done either automatically (AUTO SET) or manually (MAN SET –
OUTPUT).
Sequence
Switching sequences allowed by the RVC Controllers are:
1:1:1:1:1:...:1
1:2:2:2:2:...:2
1:2:4:4:4:...:4
1:2:4:8:8:...:8
1:1:2:2:2:...:2
1:1:2:4:4:...:4
1:1:2:4:8:...:8

15
8. Operation of the user interface

16
AUTO
COS
AUTO SET
PHASE
OUTPUT
SEQUENCE
C/k
9. Easy Commissioning
Step 1. Energize the PF Controller
Note: If you have a short-circuit on the CT’s secondary winding
do not forget to open it after having connected the current
input of the PF Controller.
After a power outage, the reset delay time is 40 seconds.
During this delay time, the alarm icon blinks and the alarm
contact remains closed.
The AUTO Mode is activated and the LCD display indicates
the cos ϕmeasurement.
WARNING: for automatic capacitor banks with a switching
delay time greater than 40s., set delay time before starting
Autoset (see chapter 10).
Step 2. Activate the AUTO SET Mode by
pressing twice the Mode button.
AU appears on the LCD display.
Step 3. Press the + and – buttons simultaneously
to start the automatic setting.
2x

17
AUTO SET
PHASE
OUTPUT
SEQUENCE
C/k
MAN SET
COS
AU starts flashing.
C/k, phase, output and sequence are automatically set.
The switching delay time is also set to 40 seconds except if a
higher value has been previously programmed. Any lower value
is erased and replaced by 40 seconds.
During this procedure which may take several minutes, the
capacitor steps are activated.
The setting procedure is finalized once AU stops flashing.
If the load is changing rapidly, the controller may have to switch
on steps several times.
If an error is detected, the Autoset procedure is stopped and an
error message is displayed.
Re-start the procedure once the fault has been corrected.
Please refer to chapter 13 for a complete description of error
messages and solutions.
Step 4. Press the Mode button once to
activate the manual setting of the target cos
ϕ
.
The already programmed value is displayed. If the RVC has
never been programmed before, 1.00 appears on the LCD
display.

18
Step 5. Set your target cos
ϕ
by pressing
either the - or + button.
indicates an inductive PF and
iindicates a capacitive PF.
Step 6. Reactivate the AUTO Mode by using
the Mode button repeatedly.
During this procedure, the values of the parameters
automatically set in the previous step will be displayed.
All parameters are also programmable manually (see
chapter 11).
Once in AUTO Mode, the RVC automatically switches on the
necessary steps to reach the programmed target cos ϕ.
The actual cos ϕappears on the LCD display.
Note: a negative cos ϕindicates that the load is re-injecting
reactive power on the network. The RVC continues to work
normally.

19
10. Manual Operation
In the AUTO Mode, press on the Mode button once to activate the MAN Mode
Switching on or off is done manually by pressing on the + or – button.
and respectively indicate the demand to switch on or off one step is being
processed.
The display indicates the measured cos ϕ, for inductive and for capacitive.
11. Programming
11. A. Manual setting of the parameters
• To navigate between the different modes, use the
Mode button as represented on the flow
chart p. 8.
• To adjust the selected parameter,
use the - or + buttons
1. Target cos
ϕ
indicates an inductive PF and indicates a capacitive PF.
The programmed target cos ϕvalue is displayed.
ou

20
2. C/k
The programmed C/k value is displayed.
The recommended setting of C/k can be calculated by the following formula or can be read
directly in the table here after.
Q: reactive 3-phase power of one step
(kvar)
U: system voltage (V)
k: current transformer ratio
CT Ratio kCapacitor step rating (kvar)
5 101520304050607090100120
10/1 50/5 10 .45 .90
20/1 100/5 20 .23 .45 .68 .90
30/1 150/5 30 .15 .30 .45 .60 .90
40/1 200/5 40 .11 .23 .34 .45 .68 .90
60/1 300/5 60 .07 .15 .23 .30 .45 .60 .75 .90
80/1 400/5 80 .056 .11 .17 .23 .34 .45 .56 .68 .79 .90
100/1 500/5 100 .09 .14 .18 .27 .36 .45 .54 .63 .81 .90
120/1 600/5 120 .07 .11 .15 .23 .30 .38 .45 .53 .68 .75 . 9 0
160/1 800/5 160 .056 .08 .11 .17 .23 .28 .34 .40 .50 .56 . 6 8
200/1 1000/5 200 .067 .09 .13 .18 .23 .27 .31 .40 .45 . 5 4
300/1 1500/5 300 .060 .09 .12 .15 .18 .21 .27 .30 . 3 6
400/1 2000/5 400 .067 .09 .11 .14 .16 .20 .23 . 2 7
600/1 3000/5 600 .06 .07 .09 .11 .14 .15 . 1 8
C/k table for a 3-phase / 400V system.
Three-phase network: Single phase network:
Q: reactive power of one step (kvar)
U: system voltage (V)
k: current transformer ratio

21
3. Phase
The programmed phase value is displayed.
The phase shift to be programmed can be selected from the tables below.
Three-phase connection (Phase to phase)
Voltage is measured between L2 and L3.
L1
Direct
L1
Inverted
L2
Direct
L2
Inverted
L3
Direct
L3
Inverted
90
270
330
150
210
30
CT Connection Connection Drawing Phase to be programmed
Other manuals for RVC
2
Table of contents
Other ABB Controllers manuals

ABB
ABB LME series User manual

ABB
ABB STD-MTS User manual

ABB
ABB ControlMaster CM10 User manual

ABB
ABB AC 800M User manual

ABB
ABB Advant Controller 80 User manual

ABB
ABB Relion 605 Series Instructions for use

ABB
ABB Relion 670 series Installation and operation manual

ABB
ABB ACS880-01 Series User manual

ABB
ABB PSE18 User manual

ABB
ABB RVC User manual

ABB
ABB PLUTO Safety-PLC User guide

ABB
ABB ACS550-01 User manual

ABB
ABB AC500 Series User manual

ABB
ABB LP User manual

ABB
ABB MS116 User manual

ABB
ABB COMMANDER 300 Operating instructions

ABB
ABB RHD16000 Series User manual

ABB
ABB IRC5 Compact User manual

ABB
ABB IED 670 User manual

ABB
ABB ACS880-07 User manual