manuals.online logo
Brands
  1. Home
  2. •
  3. Brands
  4. •
  5. ABB
  6. •
  7. Inverter
  8. •
  9. ABB PVS-166-TL-US User manual

ABB PVS-166-TL-US User manual

This manual suits for next models

1

Other ABB Inverter manuals

ABB PVS300 User manual

ABB

ABB PVS300 User manual

ABB ACS880-07CLC User manual

ABB

ABB ACS880-07CLC User manual

ABB ACS880-107 User manual

ABB

ABB ACS880-107 User manual

ABB PVS980-58 Guide

ABB

ABB PVS980-58 Guide

ABB PVI-3.0-OUTD-US User manual

ABB

ABB PVI-3.0-OUTD-US User manual

ABB UNO-2.0-I-OUTD User manual

ABB

ABB UNO-2.0-I-OUTD User manual

ABB REACT-BATT-AP1 User manual

ABB

ABB REACT-BATT-AP1 User manual

ABB PVI-3.0-TL-OUTD-S-US User manual

ABB

ABB PVI-3.0-TL-OUTD-S-US User manual

ABB PVS-120-TL User manual

ABB

ABB PVS-120-TL User manual

ABB UNO-DM-6.0-TL-PLUS-US-Q User manual

ABB

ABB UNO-DM-6.0-TL-PLUS-US-Q User manual

ABB UNO-2.0-I-OUTD User manual

ABB

ABB UNO-2.0-I-OUTD User manual

ABB UNO-DM-2.0-TL-PLUS-Q User manual

ABB

ABB UNO-DM-2.0-TL-PLUS-Q User manual

ABB TRIO-TM-60.0-US-480 User manual

ABB

ABB TRIO-TM-60.0-US-480 User manual

ABB ACS350 Series User manual

ABB

ABB ACS350 Series User manual

ABB PVS-175 Series User manual

ABB

ABB PVS-175 Series User manual

ABB EMIU 1500W User manual

ABB

ABB EMIU 1500W User manual

ABB REACT-3.6-TL User manual

ABB

ABB REACT-3.6-TL User manual

ABB PVS980-58 Use and care manual

ABB

ABB PVS980-58 Use and care manual

ABB UNO-DM-3.3-TL-PLUS-US User manual

ABB

ABB UNO-DM-3.3-TL-PLUS-US User manual

ABB PVI-5000-OUTD-US User manual

ABB

ABB PVI-5000-OUTD-US User manual

ABB RSD2.0-1PN6-MC4 User manual

ABB

ABB RSD2.0-1PN6-MC4 User manual

ABB UNO-DM-2.0-TL-PLUS User manual

ABB

ABB UNO-DM-2.0-TL-PLUS User manual

ABB TRIO-20.0-TL-OUTD-S-US-480 User manual

ABB

ABB TRIO-20.0-TL-OUTD-S-US-480 User manual

ABB PVS-100-TL User manual

ABB

ABB PVS-100-TL User manual

Popular Inverter manuals by other brands

Omnik New Energy Omniksol-1.5k-TL user manual

Omnik New Energy

Omnik New Energy Omniksol-1.5k-TL user manual

Agilent Technologies 33250A user guide

Agilent Technologies

Agilent Technologies 33250A user guide

4-noks ZR-SWITCH-RC instruction manual

4-noks

4-noks ZR-SWITCH-RC instruction manual

V&T V5 Series user manual

V&T

V&T V5 Series user manual

Hon Turing HT-T-S1000-12 introduction

Hon Turing

Hon Turing HT-T-S1000-12 introduction

Metabo E 140 SP Plus Original operating instructions

Metabo

Metabo E 140 SP Plus Original operating instructions

BARRON EXITRONIX Tucson Micro Series installation instructions

BARRON

BARRON EXITRONIX Tucson Micro Series installation instructions

Baumer HUBNER TDP 0,2 Series Mounting and operating instructions

Baumer

Baumer HUBNER TDP 0,2 Series Mounting and operating instructions

electroil ITTPD11W-RS-BC Operation and Maintenance Handbook

electroil

electroil ITTPD11W-RS-BC Operation and Maintenance Handbook

Silicon Solar TPS555-1230 instruction manual

Silicon Solar

Silicon Solar TPS555-1230 instruction manual

Mission Critical Xantrex Freedom SW-RVC owner's guide

Mission Critical

Mission Critical Xantrex Freedom SW-RVC owner's guide

HP 3312A Operating and service manual

HP

HP 3312A Operating and service manual

Hoymiles HM-500T user manual

Hoymiles

Hoymiles HM-500T user manual

Nitecore SPM10 user manual

Nitecore

Nitecore SPM10 user manual

AEG Protect PV installation manual

AEG

AEG Protect PV installation manual

On Board TruePower Plus 1200MS owner's manual

On Board

On Board TruePower Plus 1200MS owner's manual

Plugreen PGM-200P-230 Installation and operation manual

Plugreen

Plugreen PGM-200P-230 Installation and operation manual

Fourgroup Easy use and Programming Handbook

Fourgroup

Fourgroup Easy use and Programming Handbook

manuals.online logo
manuals.online logoBrands
  • About & Mission
  • Contact us
  • Privacy Policy
  • Terms and Conditions

Copyright 2025 Manuals.Online. All Rights Reserved.

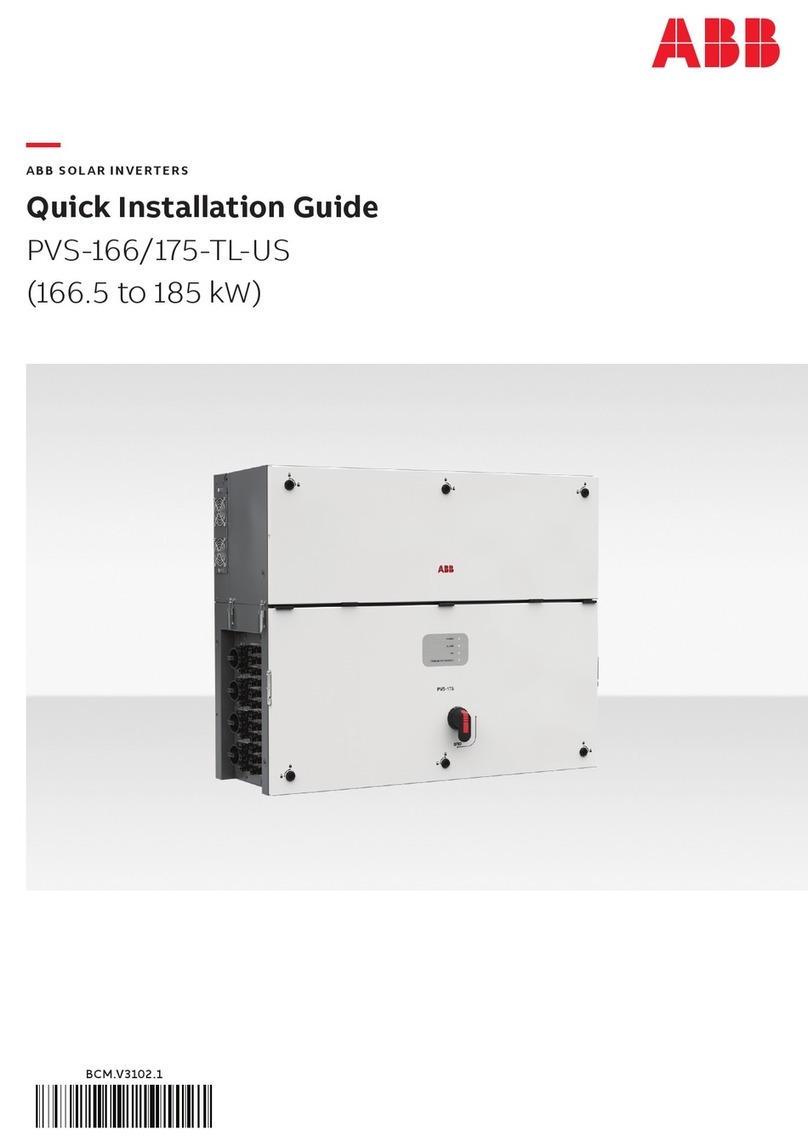
ABB SOLAR INVERTERS
Product manual
PVS-166/175-TL-US
(166.5 to 185 kW)
IMPORTANT SAFETY INSTRUCTIONS.
ATTENTION –AThis manual contains important safety instructions that must be followed
during the installation and maintenance of the equipment.
SAVE THESE INSTRUCTIONS!
NOTE –DKeep this document in a safe place near the inverter for easy access during installation,
operation and maintenance.
The installer must read this document in its entirety before installing this equipment.
Operators are required to read this manual and scrupulously follow the instructions given in it, since ABB
cannot be held responsible for damage caused to people and/or things, or the equipment, if the conditions
described below are not observed.
The purpose of this document is to support the qualified technician, who has received training and/or has
demonstrated skills and knowledge in construction, to install, operate and maintain the inverter. This
manual covers only inverter, not any equipment (photovoltaic modules, external disconnects, etc) to which
it is connected.
Warranty requirements are included in the Terms and Conditions of sale included with the inverter order.
NOTE –DAny changes made to the product or to the installation conditions that hasn’t been
approved by ABB will void the warranty.
NOTE –DAll pictures and illustrations shown in this user manual are indicatives and must be
intended as support for installation instruction only. Actual product may vary due to product
enhancement. Specifications subject to change without notice. The latest version of this
document is available on the ABB website.
The products are designed to be connected to and to communicate information and data via a network
interface. It is the user’s sole responsibility to provide and continuously ensure a secure connection
between the product and the user’s network or any other network (as the case may be). The user shall
establish and maintain any appropriate measures (such as but not limited to the installation of firewalls,
application of authentication measures, encryption of data, installation of anti-virus programs, etc) to
protect the product, the network, its system and the interface against any kind of security breaches,
unauthorized access, interference, intrusion, leakage and/or theft of data or information. ABB and its
affiliates are not liable for damages and/or losses related to such security breaches, any unauthorized
access, interference, intrusion, leakage and/or theft of data or information. The data, examples and
diagrams in this manual are included solely for the concept or product description and are not to be
deemed as a statement of guaranteed properties.
All persons responsible for applying the equipment addressed in this manual must satisfy themselves that
each intended application is suitable and acceptable, including that any applicable safety or other
operational requirements are complied with. In particular, any risks in applications where a system failure
and/or product failure would create a risk for harm to property or persons (including but not limited to
personal injuries or death) shall be the sole responsibility of the person or entity applying the equipment,
and those so responsible are hereby requested to ensure that all measures are taken to exclude or mitigate
such risks. This document has been carefully checked by ABB but deviations cannot be completely ruled
out. In case any errors are detected, the reader is kindly requested to notify the manufacturer. Other than
under explicit contractual commitments, in no event shall ABB be responsible or liable for any loss or
damage resulting from the use of this manual or the application of the equipment.
FCC REMARKS
The equipment has been tested and found to comply with the limits for a Class B digital device, pursuant
to Part 15 of the FCC Rules. These limits are designed to provide reasonable protection against harmful
interference in a residential installation. This equipment generates, uses and can radiate radio frequency
energy and, if not installed and used in accordance with the instructions, may cause harmful interference
to radio communications.
However, there is no guarantee that interference will not occur in a particular installation. If this equipment
does cause harmful interference to radio or television reception, which can be determined by turning the
equipment off and on, the user is encouraged to try to correct the interference by one or more of the
following measures:
• Reorient or relocate the receiving antenna.
• Increase the separation between the equipment and receiver.
• Connect the equipment into an outlet on a circuit different from that to which the receiver is connected.
• Consult the dealer or an experienced radio/TV technician for help.
Table of contents
1. Safety and accident prevention
6 1.1 Safety information and instructions
7 1.2 Symbols and signs
8 1.3 Installation and maintenance safety
8 1.3.1 General safety information
8 1.3.2 Environmental conditions and risks
9 1.3.3 Electrical and thermal safety
9 1.3.4 Clothing and protection of personnel
10 1.4 Residual risks
2. Introduction and general information
11 2.1 Warranty and supply conditions
11 2.1.1 Not included in the supply
12 2.2 Scope and target audience
12 2.2.1 Purpose and document structure
12 2.2.2 List of appendix documents
12 2.2.3 Operator and maintenance personnel
skills/prerequisites
13 2.3 Application area, general conditions
13 2.3.1 Intended or allowed use
13 2.3.2 Limits in field of use
13 2.3.3 Improper or prohibited use
3. Characteristics
14 3.1 General conditions
15 3.2 Equipment identification and
manufacturer
15 3.2.1 Regulatory label
16 3.2.2 Inverter identification label
16 3.2.3 Communication Identification label:
17 3.3 Models and range of equipment
18 3.4 Component reference designators
21 3.5 Characteristics and technical data
21 3.5.1 Technical data and types
23 3.5.2 Tightening torques
24 3.5.3 Overall dimensions of the inverter
24 3.5.4 Overall dimensions of the mounting
bracket
25 3.6 Efficiency curves
25 3.6.1 PVS-175-TL-US - Efficiency Vs Nominal
Power
26 3.7 Power derating
26 3.7.1 Power derating due to environmental
conditions
26 3.7.2 Power derating due to the input
voltage
27 3.8 P-Q Capability
28 3.9 Characteristics of a photovoltaic
generator
29 3.10 Description of the equipment
29 3.10.1 Operating diagram (example)
29 3.10.2 Mutual connection of multiple
inverters
30 3.10.3 Notes on the system sizing
31 3.11 Functionality and components of the
equipment
31 3.11.1 Highlights
31 3.11.2 Improved commissioning and
maintenance
31 3.11.3 Aurora Vision Plant Management
Platform
32 3.11.4 Configurable relays
32 3.11.5 Remote switch-on/switch-off
32 3.11.6 Reactive power feed into the grid
32 3.11.7 Limiting the active power fed into the
grid
33 3.11.8 Overvoltage surge arrester
monitoring(-SX/SX2 models only)
33 3.11.9 Data transmission and control
33 3.12 Communication connection diagrams
33 3.12.1 Communication interface
33 3.12.2 Ethernet bus connection
34 3.13 Topographic diagram of the
equipment
36 3.14 Safety devices
36 3.14.1 Anti-Islanding
36 3.14.2 Ground fault of the photovoltaic
panels
36 3.14.3 Overvoltage surge arresters
36 3.14.4 Other safeguards
4. Lifting and transport
37 4.1 General conditions
37 4.1.1 Transport and handling
37 4.1.2 Equipment weight
37 4.1.3 Storage
38 4.1.4 Unpacking and checking
38 4.1.5 Lifting
40 4.1.6 List of supplied components
41 4.1.7 Kit of recommended spare parts
5. Installation
42 5.1 Installation warnings
43 5.2 Installation planning
43 5.2.1 Characteristics of the protective
grounding cable
43 5.2.2 Load protection breaker and RCD
downstream of the inverter
44 5.2.3 Characteristics and sizing of the line
cable
44 5.2.4 Sizing the configurable relay (ALARM
and AUX)
44 5.2.5 Installation procedure for quick-fit
connectors
46 5.3 Installation site and position
46 5.3.1 General recommendation on
installation position
46 5.3.2 Tilting admittance
46 5.3.3 Distances
48 5.3.4 Installation of multiple units
49 5.3.5 Wireless signal environmental checks
49 5.3.6 Installations above 2000 metres
49 5.3.7 Installations with a high level of
humidity
50 5.4 Installations of IP65 protection covers
for wiring box openings (long term
installation)
51 5.5 Mounting Instruction
51 5.5.1 Bracket (03) assembly
52 5.5.2 Assembly the inverter to the bracket
54 5.5.3 Opening the Wiring box cover
54 5.5.4 Final fastening operations
55 5.5.5 Opening the Power module cover
56 5.5.6 Connection of the AC interface power
cables
57 5.5.7 Connection of the interface signal
connectors
57 5.5.8 Connection of the DC and AFD
interface cables
59 5.6 Routing the cable to the inverter
60 5.7 Grid output connection (AC side)
62 5.8 Checking the correct polarity of the
strings and Input connection (DC)
64 5.9 Connection of the communication and
control signals
64 5.9.1 Communication and control board
(28) references
65 5.9.2 Connections to the communication
and control board
65 5.9.3 Ethernet connection
67 5.9.4 Serial communication connection
(RS485 - Slave mode)
70 5.9.5 Serial communication connection
(RS485 - Master mode)
70 5.9.6 Remote control connection
71 5.9.7 Multifunction Relay connection
(ALARM and AUX)
6. Instruments
72 6.1 General conditions
72 6.2 Description of the LED panel
73 6.3 User interface
73 6.3.1 ABB Installer for Solar Inverters
73 6.3.2 Embedded Web User Interface
73 6.3.3 Aurora Vision Plant Management
Platform
73 6.4 Arc fault reset button
7. Operation
74 7.1 General conditions
74 7.2 Commissioning
75 7.2.1 Commissioning via Installer for Solar
Inverters mobile APP
79 7.2.2 Commissioning Via Web UI - Wireless
connection
84 7.3 LEDs behaviour
86 7.4 Arc fault detection
86 7.5 Grid support functions and Voltage &
Frequency trip limits
88 7.6 Connection to Web User Interface
88 7.6.1 Access to the Web User Interface
89 7.6.2 Web UI - Login page
89 7.7 Web User Interface menu structure
90 7.7.1 MAIN menu
90 7.7.2 SETTINGS menu
95 7.7.3 INVERTER LOG menu
95 7.7.4 USER menu
96 7.7.5 CONNECTIVITY menu
100 7.7.6 SERVICE TOOLS menu
102 7.7.7 INFORMATION menu
8. Maintenance
103 8.1 General conditions
104 8.2 Inverter total de-energization and
safe access
104 8.2.1 Operator and maintenance personnel
skills/prerequisites
104 8.2.2 Clothing and protection of personnel
104 8.2.3 Safety equipment and tools
105 8.2.4 Inverter total de-energization and
safe access procedure
116 8.3 Routine maintenance
116 8.3.1 Recommended replacement intervals
of components
117 8.4 Replacing of fan sections
117 8.4.1 Replacing of the side fan section
118 8.4.2 Replacing of the top fan section
119 8.4.3 Replacing the internal fan section
120 8.5 Replacing the DC surge arrester
cartridge
121 8.6 Replacing the AC surge arrester
cartridge
122 8.7 Replacement of the MEMORY board
123 8.8 Replacement of the COMM RS485
board
124 8.9 Replacement of the buffer battery
125 8.10 Procedure for dismantling the
equipment
127 8.11 Troubleshooting
127 8.11.1 Web User Interface and wireless
5
EN
communication troubleshooting
129 8.11.2 Alarm Messages of the Inverter
137 8.11.3 Power limitation messages
138 8.12 “Registration website” and “Admin
Plus token”
140 8.13 Verification of ground leakage
140 8.13.1 Behaviour of a system without
leakage
141 8.13.2 Behaviour of a system with leakage
142 8.14 Measuring the isolation resistance
of the PV generator
143 8.15 Storage and dismantling
143 8.15.1 Storage of the equipment or
prolonged stop
143 8.15.2 Dismantling, decommissioning and
disposal
9. Attachments
144 9.1 Port and network services used by the
inverter
144 9.1.1 IP Network Services
145 9.1.2 Network Hosts
145 9.1.3 Inverter network configuration
6Product manual - PVS-166/175-TL-US
EN
1. Safety and accident prevention
1.1 Safety information and instructions
This chapter contains the safety instructions which you must obey when you install and operate the
inverter and perform maintenance operations on the inverter. Obey these safety instructions to prevent
injury or death, or damage to the equipment.
The instructions provided in the manual do not replace the safety devices and technical data for installation
and operation labels on the product, and they do not replace the safety regulations in force in the country
of installation.
The operators must read and comply with the technical information and instruction provided in the
manual and in the attached documentation.
ABB accepts no liability for failure to comply with the instructions for correct installation and cannot be
held responsible for the upstream or downstream equipment.
Specific safety information are provided during installation, commissioning and maintenance operation
instructions. Always follow the reading order of instruction exactly as described in this manual.
7Safety and accident prevention
EN
1.2 Symbols and signs
In the manual and/or in some cases on the equipment, the danger or hazard zones are indicated with
signs, labels, symbols or icons.
Symbol Description
Note - General information about product
General warning - Important safety information. Indicates a potentially hazardous situation
which, if not avoided, could result in death or serious injury.
Dangerous Voltage - Indicates a potentially hazardous situation, in particular a high voltage,
which, if not avoided, could result in death or serious injury. The inverter has high voltages
and energy levels.
Hot parts - Indicates a potentially hazardous situation, in particular a hot surface, which, if
not avoided, could result in death or serious injury. Some surfaces in the inverter will become
hot during operation and must not be touched until the parts have cooled down.
Risk of injury due to the weight of the equipment. Take care during lifting and transport
Indicates that the area in question must not be accessed or that the operation described
must not be carried out.
Keep out of the reach of children
Indicates that it is mandatory to carry out the described operations using the clothing and/or
personal protective equipment provided by the employer.
Point of connection for protective earth.
Rated temperature range.
Indicates a risk of electric shock. The discharge time of the stored energy (represented in the
figure by the letters XX), is provided on the identification label.
Direct Current
Alternate current
Without isolation transformer
Positive pole of the input voltage (DC)
Negative pole of the input voltage (DC)
Indicates the center of gravity of the equipment.
Indicates the requirement to wear acoustic protection devices in order to prevent damage to
hearing
8Product manual - PVS-166/175-TL-US
EN
1.3 Installation and maintenance safety
1.3.1 General safety information
ATTENTION –ADonotproceed withinstallation ifthe integrity oftheequipmentiscompromised.
Do not use the equipment if you find any operating anomalies.
ATTENTION –AAvoid temporary repairs. All repairs should be carried out using only genuine
spare parts, which must be installed in accordance with their intended use.
ATTENTION –AThe labels affixed on the equipment must strictly NOT be removed, damaged,
defaced, hidden, etc.The technical data provided in this manual does not in any case replace
that shown on the labels affixed on the equipment.
ATTENTION –ADo not do work on the photovoltaic generator, or the inverter, or its input
or output cables, when the inverter is connected to an electrical power system, or to the
photovoltaic generator. Before performing any maintenance operation on the inverter, follow
this steps:
• Prepare the work: Do an on-site Risk Assessment or Job Hazard Analysis (Check for proper
tools and PPE for the Job; Engage the person responsible for electrical equipment or
system to review single-line, schematics, switching plans; Decide on the appropriate work
methods and initiate the permit to work process).
• Clearly identify the work location and equipment.
• Disconnect all sources and Secure against reconnection by means of a ‘Lockout/Tagout
procedure to ensure it cannot accidentally become live.
• Verify the absence of operating voltage (This must be by means of a proper test instrument).
• Complete the permit to work and “Walk the Permit” (Now we have verified a ‘safe working
area’ it is time to validate the ‘Permit to Work’ and “Walk the Permit”).
ATTENTION –ARefer to “Inverter total de-energization and safe access” paragraph on this
manual to know all detailed necessary steps to safely operate on the inverter.
1.3.2 Environmental conditions and risks
ATTENTION –AThe device can be installed outdoors, but only in environmental conditions that
do not prevent its regular operation. These conditions are listed in the technical data and in
the installation chapter.
ATTENTION –ADo not open the front covers of the inverter when it is raining, or when sand or
dust can blow into the unit. Water or sand in the inverter can cause damage in the unit. In the
risk assessment prior any intervention on the equipment it is of paramount importance to
evaluate the weather conditions. Any intervention on the inverter can be done only in case of
dry environment. Don’t proceed in case of rain (even light) or high humidity.
ATTENTION –AThe device is not designed to operate in environments that are particularly
inflammable or explosive.
ATTENTION –AIn the event of fire, use CO2 extinguishers and auto-extraction systems to
extinguish the fire in closed environments.
ATTENTION –AThe installer or maintenance technician must always pay attention to the work
environment, ensuring that it is well-lit and there is enough room to ensure an escape route.
9Safety and accident prevention
EN
1.3.3 Electrical and thermal safety
ATTENTION –AObey these instructions to prevent injury or death, or damage to the equipment.
If you are not a qualified electrician, do not perform any electrical installation or maintenance
work.
ATTENTION –AObey all installation safety standards. This can require, among other things,
the use of personal protection equipment (PPE), such as arc-proof clothing, arc-proof masks,
protective footwear, insulating and protective gloves, eye protection and hearing protection.
High power inverter installations have high fault currents.
ATTENTION –ABefore you operate on the inverter, isolate the AC line cables from the electrical
power system with the AC disconnect switch of the power system transformer (downstream
of inverter). Also, isolate the inverter from the photovoltaic generator with the DC disconnect
switch of the generator or by other means (upstream of inverter). The internal AC disconnect
switch (if present) do not isolate the AC output cables and terminals of the inverter from the
electrical power system. The internal DC disconnect switches (if present) do not completely
isolate the DC input cables or terminals from the DC voltage supplied by the photovoltaic
generator. Refer to “Inverter total de-energization and safe access” paragraph on this manual
for further details.
ATTENTION –ADo not work on the communication and control signal cables when power is
applied to the inverter or to the external control circuits.
ATTENTION –ADo not perform insulation or voltage withstand tests on the inverter.
WARNING –BABB inverters must be earthed via the connection points marked with the
protective earth symbol and using a cable with an appropriate conductor cross-section for
the maximum ground fault current that the generating system might experience.
WARNING –BDo not switch-on the inverter with the front covers open, even during
troubleshooting. The inverter front covers act as arc hazard protection. If a highly unlikely arc
flash incident occurs when the inverter front covers are open, the arc-flash proof protection
equipment might not provide sufficient protection for the operators.
HOT SURFACE –CWhen the device has just been switched off, it may have hot parts as a result
of overheating of the heated surfaces (e.g.: transformers, accumulators, coils, etc.) so be
careful where you touch.
1.3.4 Clothing and protection of personnel
NFPA - 70E, article 130.5 standard requires the equipment owner to field-label electrical equipment, to
protect both in-house and contract workers from electric shock and arc flash, with labels containing the
following information:
• Nominal system voltage
• Arc flash boundary
• At least one of the following information:
- Available incident energy and the corresponding working distance
- Arc flash PPE category in Table 130.7(C)(15)(a) or Table 130.7(C)(15)(b)
Label requirements are determined by site-specific arc flash studies and depend on the inverter model,
types and exact locations of external disconnects upstream and downstream of the inverter, by voltages
and power levels at any given installation.
NFPA 70E Article 130.3 states that the analysis must be reviewed at least every 5 years or whenever a major
modification occurs. This means that the label should include a date, and the date must be documented.
The system is not ready for commissioning until PPE labels have been installed.
FORBIDDEN –HPersonnel must not wear clothes or accessories that could start fires or
generate electrostatic charges or, in general, clothing that can compromise personal safety.
10 Product manual - PVS-166/175-TL-US
EN
1.4 Residual risks
ATTENTION –ADespite the warnings and safety systems, there are still some residual risks
that cannot be eliminated.
These risks are listed in the following table with some suggestions to prevent them:
Risk analysis and description Suggested remedy
Noise pollution due to installation in unsuitable
environments or where individuals routinely work
and/or animals dwell most of the time.
Reassess the environment or the place of
installation.
Suitable local ventilation that does not cause
overheating of the equipment and is sufficient not
to create discomfort to people in the room.
Restore suitable ambient conditions and air the
room.
External weather conditions, water seepage, low
temperatures, high humidity, etc.
Maintain ambient conditions suitable for the
system.
Overheating of surfaces at temperature
(transformers, accumulators, coils, etc. ) can cause
burns. Also be careful not to block the cooling slits
or systems of the equipment.
Use suitable PPE. Wait for the parts to cool down
before opening the inverter. Do not restrict
cooling openings or heatsinks.
Inadequate cleaning compromises cooling and
does not allow the safety labels to be read. Clean the equipment, labels and work environment
Stored energy in components can generate
hazardous discharges.
Ensure components have discharged their energy
before working on them.
Inadequate training of staff. Ask for a supplementary course.
During installation, temporarily mounting the
equipment or its components may be risky.
Prevent unauthorized access to the installation
area. Use sufficient people and PPE.
Accidental disconnections of the quick-fit
connectors with the equipment in operation, or
wrong connections, may generate electric arcs
Prevent unauthorized access to the installation
area and lock out/tag ou the inverter before
working on it.
Use the same brand for the counterparts of the
quick-fit connectors installed on the inverter
Mismatched connectors may void the warranty
and cause potential damage