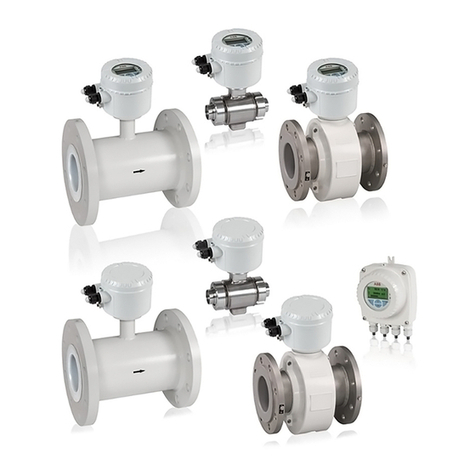
ABB ProcessMaster Installation and operation manual

CI/FEX300/FEX500-EN ProcessMaster, HygienicMaster
FEX300, FEX500
Commissioning Instruction
Electromagnetic Flowmeter


CI/FEX300/FEX500-EN FEX300, FEX500 EN - 1
Neu
Electromagnetic Flowmeter
ProcessMaster, HygienicMaster
FEX300, FEX500
Commissioning Instruction - EN
CI/FEX300/FEX500-EN
05.2012
Rev. D
Translation of the original instruction
Manufacturer:
ABB Automation Products GmbH
Process Automation
Dransfelder Straße 2
D-37079 Göttingen
Germany
Tel.: +49 551 905-534
Fax: +49 551 905-555
Customer service center
Phone: +49 180 5 222 580
Fax: +49 621 381 931-29031
ABB Inc.
125 E. County Line Road
Warminster, PA 18974
USA
Phone: +1 215 674 6000
Fax: +1 215 674 7183
ABB Engineering (Shanghai) Ltd.
No.5, Lane 369, Chuangye Road,
Kangqiao Town, Nanhui District
Shanghai, 201319, P.R. China
Phone: +86(0) 21 6105 6666
Fax: +86(0) 21 6105 6677
© Copyright 2012 by ABB Automation Products GmbH
Subject to changes without notice
This document is protected by copyright. It assists the user in safe and efficient operation of the device. The contents of this
document, whether whole or in part, may not be copied or reproduced without prior approval by the copyright holder.
Contents

Contents
2 - EN FEX300, FEX500 CI/FEX300/FEX500-EN
1Safety....................................................................................................................................................................5
1.1 General information and notes for the reader ................................................................................................5
1.2 Intended use...................................................................................................................................................6
1.3 Improper use ..................................................................................................................................................6
1.4 Target groups and qualifications ....................................................................................................................6
1.5 Plates and symbols ........................................................................................................................................7
1.5.1 Safety- / warning symbols, note symbols................................................................................................7
1.6 Transport safety information ..........................................................................................................................8
1.7 Installation safety information.........................................................................................................................8
1.8 Safety instructions for electrical installation ...................................................................................................8
1.9 Safety instructions for operation.....................................................................................................................9
1.10 Technical limit values .....................................................................................................................................9
1.11 Allowed Fluids ................................................................................................................................................9
1.12 Returning devices.........................................................................................................................................10
1.13 Disposal........................................................................................................................................................10
1.13.1 Information on WEEE Directive 2002/96/EC (Waste Electrical and Electronic Equipment).................10
1.13.2 RoHS Directive 2002/95/EC..................................................................................................................10
2Device designs ..................................................................................................................................................11
2.1.1 Model with compact design...................................................................................................................11
2.1.2 Model with remount mount design ........................................................................................................12
3Transport............................................................................................................................................................13
3.1 Inspection .....................................................................................................................................................13
3.2 Transport of flanged units smaller than DN 450 ..........................................................................................13
3.3 Transport of flanged units larger than DN 400 .............................................................................................13
4Mounting ............................................................................................................................................................14
4.1 General information on installation...............................................................................................................14
4.1.1 Supports for meter sizes larger than DN 400........................................................................................14
4.1.2 Mounting the measuring tube................................................................................................................15
4.2 Torque information .......................................................................................................................................16
4.2.1 ProcessMaster in flange design and HygienicMaster in flange or wafer-type design ..........................16
4.2.2 Variable process connections HygienicMaster .....................................................................................20
4.3 Information on EHEDG conformity...............................................................................................................21
4.4 Information on 3A conformity .......................................................................................................................21
4.5 Installation Requirements.............................................................................................................................22
4.5.1 Flow direction ........................................................................................................................................22
4.5.2 Electrode axis........................................................................................................................................22
4.5.3 In- and outlet pipe sections ...................................................................................................................22
4.5.4 Vertical connections ..............................................................................................................................22
4.5.5 Horizontal connections..........................................................................................................................22
4.5.6 Free inlet or outlet .................................................................................................................................22
4.5.7 Strongly contaminated fluids.................................................................................................................22
4.5.8 Installation in the vicinity of pumps .......................................................................................................23
4.5.9 Installing the high temperature design ..................................................................................................23
4.5.10 Devices with extended diagnostic functions .........................................................................................23
4.5.11 Installation in pipelines with larger nominal diameters..........................................................................23
4.6 Ground..........................................................................................................................................................24
4.6.1 General information on ground connections .........................................................................................24
4.6.2 Metal pipe with fixed flanges.................................................................................................................24
4.6.3 Metal pipe with loose flanges................................................................................................................25
4.6.4 Plastic pipes, non-metallic pipes or pipes with insulating liner .............................................................26
4.6.5 Sensor type HygienicMaster .................................................................................................................27

Contents
CI/FEX300/FEX500-EN FEX300, FEX500 EN - 3
4.6.6 Ground for devices with protective plates .............................................................................................27
4.6.7 Ground with conductive PTFE grounding plate ....................................................................................27

5Electrical connections ......................................................................................................................................28
5.1 Routing the signal and magnet coil cable ....................................................................................................28
5.2 Preparing the signal and magnet coil cable in the case of transmitters with dual-compartment housing ...29
5.2.1 Cable with part number D173D027U01 ................................................................................................29
5.2.2 Cable with part number D173D031U01 ................................................................................................30
5.3 Preparing the signal and magnet coil cable in the case of transmitters with single-compartment housing.31
5.3.1 Cable with part number D173D027U01 ................................................................................................32
5.3.2 Cable with part number D173D031U01 ................................................................................................32
5.4 Connecting the transmitter ...........................................................................................................................33
5.4.1 Connecting the power supply................................................................................................................33
5.4.2 Transmitter with dual-compartment housing.........................................................................................34
5.4.3 Transmitter with single-compartment housing ......................................................................................34
5.4.4 Connecting the signal and magnet coil cables......................................................................................35
5.5 Connecting the flowmeter sensor.................................................................................................................36
5.5.1 Metal terminal box in the case of ProcessMaster and HygienicMaster ................................................36
5.5.2 Plastic terminal box in the case of ProcessMaster ...............................................................................37
5.5.3 Connection via cable conduit ................................................................................................................38
5.5.4 Protection class IP 68 ...........................................................................................................................39
5.6 Terminal connection diagrams .....................................................................................................................41
5.6.1 Devices with HART protocol .................................................................................................................41
5.6.2 Devices with PROFIBUS PA or FOUNDATION fieldbus ......................................................................42
5.6.3 Connection examples for the peripherals .............................................................................................43
6Commissioning..................................................................................................................................................45
6.1 Preliminary checks prior to start-up..............................................................................................................45
6.2 Operation......................................................................................................................................................45
6.2.1 Menu navigation....................................................................................................................................46
6.3 Menu levels ..................................................................................................................................................47
6.3.1 Process display .....................................................................................................................................48
6.4 Configuring the current output......................................................................................................................50
6.4.1 Transmitter with dual-compartment housing.........................................................................................51
6.4.2 Transmitter with single-compartment housing ......................................................................................52
6.5 Commissioning the unit................................................................................................................................53
6.5.1 Downloading the system data ...............................................................................................................53
6.5.2 Parameterizing via the "Easy Set-up" menu function ...........................................................................55
7Parameter overview...........................................................................................................................................59
8Extended diagnostic functions ........................................................................................................................67
8.1 General remarks...........................................................................................................................................67
8.1.1 Detection of partial filling .......................................................................................................................67
8.1.2 Detection of gas bubbles.......................................................................................................................67
8.1.3 Electrode coating detection...................................................................................................................68
8.1.4 Conductivity monitoring.........................................................................................................................68
8.1.5 Electrode impedance monitoring ..........................................................................................................68
8.1.6 Sensor measurements ..........................................................................................................................69
8.1.7 Trend .....................................................................................................................................................69
8.1.8 Fingerprint .............................................................................................................................................69
8.1.9 Checking the grounding ........................................................................................................................69
8.2 Performing the grounding check ..................................................................................................................70
8.3 Recommended settings for diagnostic limit values ......................................................................................71
8.3.1 Limit values for the coil resistance ........................................................................................................71

Contents
4 - EN FEX300, FEX500 CI/FEX300/FEX500-EN
8.3.2 Limit values for the electrode deposits..................................................................................................72
8.3.3 Limit values for the electrode impedance .............................................................................................72
8.3.4 Recommended settings for the Trend Logger ......................................................................................72
9Appendix ............................................................................................................................................................73
9.1 Other applicable documents ........................................................................................................................73
9.2 Approvals and certifications .........................................................................................................................73

Safety
CI/FEX300/FEX500-EN FEX300, FEX500 EN - 5
1 Safety
1.1 General information and notes for the reader
You must read these instructions carefully prior to installing and commissioning the device.
These instructions are an important part of the product and must be kept for future reference.
These instructions are intended as an overview and do not contain detailed information on all
designs for this product or every possible aspect of installation, operation and maintenance.
For additional information or if specific problems occur that are not discussed in these
instructions, contact the manufacturer.
The content of these instructions is neither part of any previous or existing agreement, promise
or legal relationship nor is it intended to change the same.
This product is built based on state-of-the-art technology and is operationally safe. It has been
tested and left the factory in perfect working order from a safety perspective. The information in
the manual must be observed and followed in order to maintain this state throughout the period
of operation.
Modifications and repairs to the product may only be performed if expressly permitted by these
instructions.
Only by observing all of the safety instructions and all safety/warning symbols in these
instructions can optimum protection of both personnel and the environment, as well as safe and
fault-free operation of the device, be ensured.
Information and symbols directly on the product must be observed. They may not be removed
and must be fully legible at all times.
Important (Note)
For a list of all additional documents associated with the product, see section 9.1, "Other
applicable documents".
Important (Note)
• An additional document with Ex safety instructions is available for measuring systems that
are used in explosion hazardous areas.
• Ex safety information is an integral part of this manual. As a result, it is crucial that the
installation guidelines and connection values it lists are also observed.
The icon on the name plate indicates the following:

Safety
6 - EN FEX300, FEX500 CI/FEX300/FEX500-EN
1.2 Intended use
This device is intended for the following uses:
• To transmit fluid, pulpy or pasty substances with electrical conductivity.
• To measure the flowrate of the operating volume or mass flow units (at constant pressure /
temperature), if a mass engeineering unit is selected.
The following items are included in the intended use:
• Read and follow the instructions in this manual.
• Observe the technical ratings; refer to the section 1.10 „Technical limit values“.
• Use only allowed liquids for measurement; refer to the section 1.11 „Allowed Fluids“.
1.3 Improper use
The following are considered to be instances of improper use of the device:
• Operation as a flexible adapter in piping, e.g., to compensate for pipe offsets, pipe vibrations,
pipe expansions, etc.
• As a climbing aid, e. g., for mounting purposes
• As a support for external loads, e. g., as a support for piping, etc.
• Adding material, e. g., by painting over the name plate or welding/soldering on parts
• Removing material, e. g., by spot drilling the housing
1.4 Target groups and qualifications
Installation, commissioning, and maintenance of the product may only be performed by trained
specialist personnel who have been authorized by the plant operator to do so. The specialist
personnel must have read and understood the manual and comply with its instructions.
Prior to using corrosive and abrasive materials for measurement purposes, the operator must
check the level of resistance of all parts coming into contact with the materials to be measured.
ABB Automation Products GmbH will gladly support you in selecting the materials, but cannot
accept any liability in doing so.
The operators must strictly observe the applicable national regulations with regards to
installation, function tests, repairs, and maintenance of electrical products.

Safety
CI/FEX300/FEX500-EN FEX300, FEX500 EN - 7
1.5 Plates and symbols
1.5.1 Safety- / warning symbols, note symbols
DANGER – <Serious damage to health / risk to life>
This symbol in conjunction with the signal word "Danger" indicates an imminent danger.
Failure to observe this safety information will result in death or severe injury.
DANGER – <Serious damage to health / risk to life>
This symbol in conjunction with the signal word "Danger" indicates an imminent electrical
hazard. Failure to observe this safety information will result in death or severe injury.
WARNING – <Bodily injury>
This symbol in conjunction with the signal word “Warning“ indicates a possibly dangerous
situation. Failure to observe this safety information may result in death or severe injury.
WARNING – <Bodily injury>
This symbol in conjunction with the signal word "Warning" indicates a potential electrical
hazard. Failure to observe this safety information may result in death or severe injury.
CAUTION – <Minor injury>
This symbol in conjunction with the signal word “Caution“ indicates a possibly dangerous
situation. Failure to observe this safety information may result in minor or moderate injury.
This may also be used for property damage warnings.
NOTICE – <Property damage>!
The symbol indicates a potentially damaging situation.
Failure to observe this safety information may result in damage to or destruction of the product
and/or other system components.
IMPORTANT (NOTE)
This symbol indicates operator tips, particularly useful information, or important information
about the product or its further uses. It does not indicate a dangerous or damaging situation.

Safety
8 - EN FEX300, FEX500 CI/FEX300/FEX500-EN
1.6 Transport safety information
• Depending on the device, the center of gravity may not be in the center of the equipment.
• The protection plates or protective caps installed on the process connections of devices lined
with PTFE / PFA must not be removed until just before installation; to prevent possible
leakage, make sure that the liner on the flange is not cut or damaged.
Prior to installation, check the devices for any damage that may have occurred as a result of
improper transport. Details of any damage that has occurred in transit must be recorded on the
transport documents. All claims for damages must be submitted to the shipper without delay
and before installation.
1.7 Installation safety information
Observe the following instructions:
• The flow direction must correspond to the direction indicated on the device, if labeled.
• Comply with the maximum torque for all flange bolts.
• Install the devices without mechanical tension (torsion, bending).
• Install flange and wafer type units with coplanar counter flanges.
• Only install devices for the intended operating conditions and with suitable seals.
• Secure the flange bolts and nuts against pipeline vibrations.
1.8 Safety instructions for electrical installation
Electrical connections may only be established by authorized specialist personnel in
accordance with the electrical circuit diagrams.
The electrical connection information in the manual must be observed; otherwise, the type of
electrical protection may be adversely affected.
Ground the flowmeter and the sensor housing.
The line for the supply power must be installed according to the relevant national and
international standards. A separate fuse must be connected upstream and in close proximity to
each unit. The fuses must be identified accordingly. The rated current of the circuit breaker must
not exceed 16 A.
The unit has a protection class of I and overvoltage class II (IEC664).
The power supply and the electrical circuit for the coils of the flowmeter sensor are dangerous
and pose a contact risk.
The coil and signal circuit may be connected with the corresponding ABB flowmeter sensors
only. Use the supplied cable.
Only electrical circuits that do not pose a contact risk can be connected to the remaining signal
inputs and outputs.

Safety
CI/FEX300/FEX500-EN FEX300, FEX500 EN - 9
1.9 Safety instructions for operation
During operation with hot fluids, contact with the surface may result in burns.
Aggressive fluids may result in corrosion or abrasion of the parts that come into contact with the
medium. As a result, pressurized fluids may escape prematurely.
Wear to the flange gasket or process connection gaskets (e.g., aseptic threaded pipe
connections, Tri-Clamp, etc.) may enable a pressurized medium to escape.
When using internal flat gaskets, these can become embrittled through CIP/SIP processes.
If pressure shocks exceeding the device's permissible nominal pressure occur continuously
during operation, this can have a detrimental effect on the device's service life.
Warning – Risk to persons!
Bacteria and chemical substances can contaminate or pollute pipeline systems and the
materials they are made of.
The appropriate installation conditions must be observed in order to achieve an installation
that complies with EHEDG requirements.
For an installation to comply with EHEDG requirements, the process connection/gasket
combinations created by the operator must always be made of parts that conform to EHEDG
stipulations (EHEDG Position Paper: "Hygienic Process connections to use with hygienic
components and equipment").
1.10 Technical limit values
The device is designed for use exclusively within the stated values on the name plate and within
the technical limit values specified in the data sheets.
The following technical limit values must be observed:
• The permissible operating pressure (PS) in the permissible temperature (TS) may not
exceed the pressure-temperature ratings.
• The maximum operating temperature may not be exceeded.
• The permitted operating temperature may not be exceeded.
• The housing protection system must be observed.
• The flowmeter sensor may not be operated in the vicinity of powerful electromagnetic fields,
e.g., motors, pumps, transformers, etc. A minimum spacing of approx. 1 m (3.28 ft) should
be maintained. For installation on or to steel parts (e.g., steel brackets), a minimum spacing
of approx. 100 mm (3.94 inch) should be maintained (based on IEC801-2 and IECTC77B).
1.11 Allowed Fluids
When measuring fluids, the following points must be observed:
• Fluids may only be used if, based on state-of-the-art technology or the operating experience
of the user, it is assured that chemical and physical properties of the components coming
into contact with the fluids (signal electrodes, ground electrodes, liners and, possibly,
process connections, protective plates or protective flanges) are not affected during the
operating life.
• Fluids with unknown properties or abrasive fluids may only be used if the operator can
perform regular and suitable tests to ensure the safe condition of the device.
• Observe the information on the name plate.

Safety
10 - EN FEX300, FEX500 CI/FEX300/FEX500-EN
1.12 Returning devices
Use the original packaging or suitably secure shipping containers if you need to return the
device for repair or recalibration purposes. Fill out the return form (see the Appendix) and
include this with the device.
According to EC guidelines for hazardous materials, the owner of hazardous waste is
responsible for its disposal or must observe the following regulations for shipping purposes:
All devices delivered to ABB Automation Products GmbH must be free from any hazardous
materials (acids, alkalis, solvents, etc.).
Rinse out and neutralize hazardous materials from all hollow spaces such as between meter
tube and housing. For flowmeters larger than DN 400, the service screw (for draining
condensate fluid) at the lower point of the housing must be opened to dispose of hazardous
substances and to neutralize the coil and electrode chamber. These activities must be
confirmed in writing using the return form.
Please
Please contact Customer Center Service acc. to page 1 for nearest service location.
1.13 Disposal
This product is manufactured from materials that can be reused by specialist recycling
companies.
1.13.1 Information on WEEE Directive 2002/96/EC (Waste Electrical and Electronic Equipment)
This product is not subject to WEEE Directive 2002/96/EC or relevant national laws
(e.g., ElektroG in Germany).
The product must be disposed of at a specialist recycling facility. Do not use municipal garbage
collection points. According to the WEEE Directive 2002/96/EC, only products used in private
applications may be disposed of at municipal garbage facilities. Proper disposal prevents
negative effects on people and the environment, and supports the reuse of valuable raw
materials.
If it is not possible to dispose of old equipment properly, ABB Service can accept and dispose of
returns for a fee.
1.13.2 RoHS Directive 2002/95/EC
With the Electrical and Electronic Equipment Act (ElektroG) in Germany, the European
Directives 2002/96/EC (WEEE) and 2002/95/EC (RoHS) are translated into national law.
ElektroG defines the products that are subject to regulated collection and disposal or reuse in
the event of disposal or at the end of their service life. ElektroG also prohibits the marketing of
electrical and electronic equipment that contains certain amounts of lead, cadmium, mercury,
hexavalent chromium, polybrominated biphenyls (PBB), and polybrominated diphenyl ethers
(PBDE) (also known as hazardous substances with restricted uses).
The products provided by ABB Automation Products GmbH do not fall within the current scope
of the directive on waste from electrical and electronic equipment according to ElektroG. If the
necessary components are available on the market at the right time, in the future these
substances will no longer be used in new product development.

Device designs
CI/FEX300/FEX500-EN FEX300, FEX500 EN - 11
2 Device designs
Important (Note)
An additional document with Ex safety instructions is available for measuring systems that are
used in explosion hazardous areas. As a result, it is crucial that the specifications and data it
lists are also observed.
2.1.1 Model with compact design
The transmitter and the flowmeter sensor form a single mechanical entity.
The transmitter is available in two housing designs:
Single-compartment housing:
With the single-compartment housing, the electronics area and the connection area are not
separated from each other.
ProcessMaster HygienicMaster
G01316
Fig. 1: Transmitter with single-compartment housing
Dual-compartment housing:
With the dual-compartment housing, the electronics area and the connection area are
separated from each other.
ProcessMaster HygienicMaster
G00638
Fig. 2: Transmitter with dual-compartment housing

Device designs
12 - EN FEX300, FEX500 CI/FEX300/FEX500-EN
2.1.2 Model with remount mount design
The transmitter is mounted in a separate location from the flowmeter sensor. The electrical
connection between the transmitter and the sensor is provided by a signal cable.
Without a pre-amplifier, the maximum permissible signal cable length is 50 m (164 ft) with a
minimum conductivity of 5 µS/cm.
With a pre-amplifier, the maximum permissible signal cable length is 200 m (656 ft).
Two terminal box variants are available for the ProcessMaster flowmeter sensor:
• Aluminum terminal box
• Plastic terminal box
The external transmitter is available in two housing designs:
Single-compartment housing:
With the single-compartment housing, the electronics area and the connection area are not
separated from each other.
ProcessMaster HygienicMaster
G01317
Fig. 3: Transmitter with single-compartment housing
Dual-compartment housing:
With the dual-compartment housing, the electronics area and the connection area are
separated from each other.
ProcessMaster HygienicMaster
G00639
Fig. 4 : Transmitter with dual-compartment housing

Transport
CI/FEX300/FEX500-EN FEX300, FEX500 EN - 13
3 Transport
3.1 Inspection
Check the devices for possible damage that may have occurred during transport. Damages in
transit must be recorded on the transport documents. All claims for damages must be claimed
without delay against the shipper and before the installation.
3.2 Transport of flanged units smaller than DN 450
Warning – Danger of injuries due to slipping meter.
The center of gravity for the complete device may be higher than the lifting straps.
Make sure the device has not rotated or slipped unintentionally during transport. Support the
meter laterally.
For transport of flanged units smaller than DN 450 use a lifting strap. Wrap the straps around
both process connections when lifting the device. Avoid chains since these may damage the
housing.
Fig. 5: Transport of flanged units smaller than DN 450
3.3 Transport of flanged units larger than DN 400
Notice - Potential damage to device!
Use of a forklift to transport the device can bend the housing and damage the internal magnet
coils.
Flanged units may not be lifted at the middle of the housing when transporting via forklift.
Flanged units may not be lifted by the terminal box or at the middle of the housing. Use only the
eye bolts on the device to lift and install it in the pipeline.
Fig. 6: Transport of flanged units larger than DN 400

Mounting
14 - EN FEX300, FEX500 CI/FEX300/FEX500-EN
4 Mounting
Important (Note)
An additional document with Ex safety instructions is available for measuring systems that are
used in explosion hazardous areas. As a result, it is crucial that the specifications and data it
lists are also observed.
4.1 General information on installation
The following points must be observed for the installation:
• The flow direction must correspond to the identification if present.
• The maximum torque for all flange connections must be complied with.
• The devices must be installed without mechanical tension (torsion, bending).
• Install flange and wafer type units with coplanar counter flanges and use only appropriate
gaskets.
• Use only gaskets made from a compatible material for the fluid and fluid temperatures.
• Gaskets must not extend into the flow area since possible turbulence could influence the
device accuracy.
• The pipeline may not exert excessive forces or torques on the device.
• Do not remove the plugs in the cable connectors until you are ready to install the electrical
cable.
• Make sure the gaskets for the housing cover are seated properly. Carefully seal the cover.
Tighten the cover fittings.
• A separate transmitter must be installed at a largely vibration-free location.
• Do not expose the transmitter and sensor to direct sunlight. Provide appropriate sun
protection if necessary.
• When installing the transmitter in a control cabinet, make sure adequate cooling is provided.
4.1.1 Supports for meter sizes larger than DN 400
Notice - Potential damage to device!
Improper support for the device may result in deformed housing and damage to internal
magnet coils.
Place the supports at the edge of the housing (see arrows in the figure).
Devices with meter sizes larger than DN 400 must be mounted with support on a sufficiently
strong foundation.
Fig. 7: Support for meter sizes larger than DN 400

Mounting
CI/FEX300/FEX500-EN FEX300, FEX500 EN - 15
F
4.1.2 Mounting the measuring tube
The device can be installed at any location in a pipeline under consideration of the installation
conditions.
Notice - Potential damage to device!
Use of graphite with the flange or process connection gaskets is prohibited. In some
instances, an electrically conductive coating may form on the inside of the measuring tube.
Vacuum shocks in the pipelines should be avoided to prevent damage to the liners (PTFE).
Vacuum shocks can destroy the device.
1. Remove protective plates, if present, to the right and left of the measuring tube. To prevent
possible leakage, make sure that the liner on the flange is not cut or damaged.
2. Position the measuring tube coplanar and centered between the pipes.
3. Install gaskets between the surfaces.
Important (Note)
For best results, make sure the flowmeter sensor gaskets fit concentrically with the measuring
tube.
4. Use the appropriate bolts for the flanges as per the section "Torque information”.
5. Slightly grease the threaded nuts.
6. Tighten the nuts in a crosswise manner as shown in the figure. Observe the torque values
specified under "Torque information".
First tighten the nuts to 50 % of maximum torque, then to 80 % and finally on the third time
tighten to the maximum. Do not exceed the maximum torque.
G00034
1
2
7
8
5
3
4
6
1
2
3
4
Fig. 8

Mounting
16 - EN FEX300, FEX500 CI/FEX300/FEX500-EN
4.2 Torque information
4.2.1 ProcessMaster in flange design and HygienicMaster in flange or wafer-type design
Meter size DN Nominal
pressure Max. tightening torque [Nm]
Hard/soft rubber lining PTFE, PFA, ETFE liningmm Inch PN
Steel flange Stainless steel
flange
Steel flange Stainless steel
flange
PN40 - - 12.43 12.43
PN63/100 - - 12.43 12.43
CL150 - - 12.98 12.98
CL300 - - 4.94 17.38
3 ... 101) 1/10 ...
3/8“1)
JIS 10K - - 12.43 12.43
PN40 6.74 4.29 14.68 14.68
PN63/100 13.19 11.2 22.75 22.75
CL150 3.65 3.65 12.98 12.98
CL300 4.94 3.86 4.94 17.38
CL600 9.73 9.73 - -
15 1/2“
JIS 10K 2.84 1.37 14.68 14.68
PN40 9.78 7.27 20.75 20.75
PN63/100 24.57 20.42 42.15 42.15
CL150 5.29 5.29 18.49 18.49
CL300 9.77 9.77 33.28 33.28
CL600 15.99 15.99 - -
20 3/4“
JIS 10K 4.1 1.88 20.75 20.75
PN40 13.32 8.6 13.32 8.6
PN63/100 32.09 31.42 53.85 53.85
CL150 5.04 2.84 23.98 23.98
CL300 17.31 16.42 65.98 38.91
CL600 22.11 22.11 - -
25 1“
JIS 10K 8.46 5.56 26.94 26.94
PN40 27.5 15.01 45.08 45.08
PN63/100 42.85 41.45 74.19 70.07
CL150 4.59 1.98 29.44 29.44
CL300 25.61 14.22 45.52 45.52
CL600 34.09 34.09 - -
32 1 1/4“
JIS 10K 9.62 4.9 45.08 45.08
PN40 30.44 23.71 56.06 56.06
PN63/100 62.04 51.45 97.08 97.08
CL150 5.82 2.88 36.12 36.12
CL300 33.3 18.41 73.99 73.99
CL600 23.08 23.08 - -
40 1 1/2“
JIS 10K 12.49 6.85 56.06 56.06
Continued on next page
1) Connection flange DIN/EN 1092-1 = DN10 (3/8"), connection flange ASME = DN15 (1/2")

Mounting
CI/FEX300/FEX500-EN FEX300, FEX500 EN - 17
Meter size DN Nominal
pressure Max. tightening torque [Nm]
Hard/soft rubber lining PTFE, PFA, ETFE liningmm Inch PN
Steel flange Stainless steel
flange
Steel flange Stainless steel
flange
PN40 41.26 27.24 71.45 71.45
PN63 71.62 60.09 109.9 112.6
CL150 22.33 22.33 66.22 66.22
CL300 17.4 22.33 38.46 38.46
CL600 35.03 35.03 - -
50 2“
JIS 10K 17.27 10.47 71.45 71.45
PN16 14.94 8 37.02 39.1
PN40 30.88 21.11 43.03 44.62
PN63 57.89 51.5 81.66 75.72
CL150 30.96 30.96 89.93 89.93
CL300 38.38 27.04 61.21 61.21
CL600 53.91 53.91 - -
65 2 1/2“
JIS 10K 14.94 8 37.02 39.1
PN40 38.3 26.04 51.9 53.59
PN63 63.15 55.22 64.47 80.57
CL150 19.46 19.46 104.6 104.6
CL300 75.54 26.91 75.54 75.54
CL600 84.63 84.63 - -
80 3“
JIS 10K 16.26 9.65 45.07 47.16
PN16 20.7 12.22 49.68 78.19
PN40 67.77 47.12 78.24 78.19
PN63 107.4 95.79 148.5 119.2
CL150 17.41 7.82 76.2 76.2
CL300 74.9 102.6 102.6 102.6
CL600 147.1 147.1 - -
100 4“
JIS 10K 20.7 12.22 49.68 78.19
PN16 29.12 18.39 61.4 64.14
PN40 108.5 75.81 123.7 109.6
PN63 180.3 164.7 242.6 178.2
CL150 24.96 11.05 98.05 98.05
CL300 81.64 139.4 139.4 139.4
125 5“
CL600 244.1 244.1 - -
PN16 46.99 23.7 81.23 85.08
PN40 143.5 100.5 162.5 133.5
PN63 288.7 269.3 371.3 243.4
CL150 30.67 13.65 111.4 111.4
CL300 101.4 58.4 123.6 123.6
150 6“
CL600 218.4 218.4 - -
PN10 45.57 27.4 113 116.9
PN16 49.38 33.82 70.42 73
PN25 100.6 69.17 109.9 112.5
PN40 196.6 144.4 208.6 136.8
PN63 350.4 331.8 425.5 282.5
CL150 49.84 23.98 158.1 158.1
200 8“
CL300 133.9 78.35 224.3 224.3
Continued on next page

Mounting
18 - EN FEX300, FEX500 CI/FEX300/FEX500-EN
Meter size DN Nominal
pressure Max. tightening torque [Nm]
Hard/soft rubber lining PTFE, PFA, ETFE liningmm Inch PN
Steel flange Stainless steel
flange
Steel flange Stainless steel
flange
PN10 23.54 27.31 86.06 89.17
PN16 88.48 61.71 99.42 103.1
PN25 137.4 117.6 166.5 133.9
PN40 359.6 275.9 279.9 241
CL150 55.18 27.31 146.1 148.3
250 10“
CL300 202.7 113.2 246.4 246.4
PN10 58.79 38.45 91.29 94.65
PN16 122.4 85.64 113.9 114.8
PN25 180.6 130.2 151.1 106.9
PN40 On request On request On request On request
CL150 90.13 50.37 203.5 198
300 12“
CL300 333.3 216.4 421.7 259.1
PN10 69.62 47.56 72.49 75.22
PN16 133.6 93.61 124.9 104.4
PN25 282.3 204.3 226.9 167.9
CL150 144.8 83.9 270.5 263
350 14“
CL300 424.1 252.7 463.9 259.4
PN10 108.2 75.61 120.1 113.9
PN16 189 137.2 191.4 153.8
PN25 399.4 366 404 246.7
CL150 177.6 100 229.3 222.8
400 16“
CL300 539.5 318.8 635.8 328.1
CL150 218.6 120.5 267.3 192.3
450 18“
CL300 553.8 327.2 660.9 300
PN10 141.6 101.4 153.9 103.5
PN16 319.7 245.4 312.1 224.8
PN25 481.9 350.5 477.1 286
CL150 212.5 116 237.3 230.4
500 20“
CL300 686.3 411.8 786.8 363.1
PN10 224.7 164.8 238.7 149.1
PN16 515.1 399.9 496.7 365.3
PN25 826.2 600.3 750.7 539.2
CL150 356.6 202.8 451.6 305.8
600 24“
CL300 1188 719 1376 587.4
PN10 267.7 204.9 On request On request
PN16 455.7 353.2 On request On request
PN25 905.9 709.2 On request On request
CL150 364.1 326.2 449.2 432.8
700 28“
CL300 1241 On request On request On request
CL150 423.8 380.9 493.3 442
750 30“
CL300 1886 On request On request On request
Continued on next page
This manual suits for next models
3
Table of contents
Other ABB Measuring Instrument manuals