abc PHASER User manual

Phaser Pure Water System Operation and Maintenance Manual - 1
Overview
Thank you for purchasing the Phaser Pure Water
System! With proper care, this unit will provide you with
years of trouble free service. This system was designed
with professional window cleaners in mind. The Phaser
will help you clean faster, safer, and better than ever
before, leaving spot free results that you and your
customers will love!
The following is provided to help you understand how
your system puries water. The Phaser is a multi-stage
water purication unit using Carbon/Sediment, Reverse
Osmosis (RO), and Deionization (DI) to remove impurities
from water before delivery to surfaces for cleaning.
General lifespan of the lters will vary depending on
feed water TDS (Total Dissolved Solids). Based on an
average TDS of 100 ppm (parts per million) in your water,
approximately 10,000 gallons of water can be passed
through the Carbon/Sediment and DI lters before
replacement lters are needed. Lower TDS levels in
the source water will allow for a longer lifespan, while a
higher TDS source levels will lead to a shorter lifespan. It
is recommended that the Carbon/Sediment and DI lters
be replaced at the same time. The RO membrane is
rated to process 100,000 gallons under ideal conditions.
Failure to properly maintain the RO membranes will
reduce the life of the lter
Congratulations on your purchase.
In The Box
1. Unpacking/Inspecting The System
• TS-2200 (Phaser) System
• RO Filter
• DI Filter
• TDS Meter
• Quick-Connect Shut O
• Bypass Hose
• Carbon Filter
Your system is packaged to stay undamaged in transit.
Please inspect all components to ensure no damage
has occurred prior to continuing. Carefully remove the
packaging material from around the system and discard.
Inspect your Phaser for any shipping damage. If damage
has occurred, notify the shipping company that made
delivery to begin a damage claim.
Parts Check
PHASER
Pure Water System
Window Cleaning System
Pure Water
Operation and Maintenance
Manual
Eective August, 2020

2 - Phaser Pure Water System Operation and Maintenance Manual
2. Initial Setup 3. Hooking Up To Water Source
1. Attach bypass hose to the tting on the side
of the RO lter.
2. Open valve on bypass hose fully.
3. Attach Carbon/Sediment lter to the inlet end
of the RO lter. Do not overtighten.
4. Attach DI lter to outlet end of the RO lter.
Do not overtighten.
5. Attach quick connect shut o to the DI lter.
6. Attach pole to quick connect shut o and turn
to open position.
7. Attach source hose to water source and the
other end to the Carbon/Sediment lter.
8. Turn on water.
9. Elevate the outlet side of the unit until air has been
purged from the RO housing through the bypass
line. Failure to bleed the air out of the system can
result in lower production and possible damage to
the lter housings. Trapped air may also result in the
plastic overheating and pressure rating of the RO
housing dropping. Setting up your system up out
of direct sunlight on hot days will also help protect
the plastic RO housing from heat damage.
10. Once the air has been pushed out of the lters,
close the bypass valve partially to begin producing
pure water. DO NOT CLOSE OFF FLOW THROUGH
THE BYPASS LINE WHILE USING THE SYSTEM
(some bypass water should always be owing out).
See Bypass Valve Operation section below for more
information.
11. Start cleaning windows.
Locate an external water source. Attach one end
of the feed hose (not supplied) to the water source.
Open the faucet at the building and make sure all air
is out of your source hose. Turn o water and attach
to inlet of Carbon/Sediment lter. A ¾” garden hose
is preferred. Attach the other end of the feed hose to
the female connection on the Carbon/Sediment lter.
Open bypass valve fully and turn on source water.
Once the air in the lters has left the bypass line,
adjust valve to desired ow rate. Open the shut-o
valve between the hose and the pole to allow water
to ow through the pole and wash glass. Do not
drink pure water made from your system. If using a
pump, wait for water to ow from brush before turning
the pump on. Do not exceed 120 PSI.
You can also watch the quickstart video at:
www.abcWindowSupply.com/PhaserQuickStart
4. Bypass Valve Operation
The system comes with a bypass hose and valve
that control the amount of water leaving the RO lter.
RO membrane lters use the bypass ow to remove
concentrated dissolved solids from the lter. There
should always be water owing out of the bypass
hose. Inadequate bypass ow will result in fouling and
possibly damage the RO lter.
The water coming out of the bypass hose may initially
appear milky. This milky appearance is actually small
air bubbles being pushed out of the lter housing
through the bypass line.
The bypass valve is also the primary way you can
control the pressure of your system. Opening the

Phaser Pure Water System Operation and Maintenance Manual - 3
5. TDS (Total Dissolved Solids) Meter
Total Dissolved Solids are the minerals and salts within
source water that lead to spotting on glass as the water
evaporates. Your TDS meter measures the amount of
dissolved solids using the conductivity of the water. The
meter can test water before and after individual lters or
the entire system to determine how they are performing.
TDS levels are measured in parts per million (ppm).
Remove the cap from the TDS meter and ll with the
sample you wish to test. Push the “On” button on the
handheld TDS meter to get a TDS reading of the water
sample. A TDS reading of 0 – 10 is acceptable for
cleaning most windows, though specic conditions and
results may vary.
When measuring source water before pure water TDS
levels, it is important to rinse out any source water with
pure water to ensure accurate readings. Even a single
drop of source water will cause the pure water TDS
reading to appear higher than it actually is.
6. Using A WaterFed Pole
®
Once your Phaser system is hooked up, and you have
a WaterFed® pole connected to the unit, you’re ready
to clean windows.
Always begin by cleaning the top row or highest
windows rst, including scrubbing the frames. Work
the WaterFed® pole up one side of the frames, across
the top, and back down the other side. Scrub the glass
in an up and down motion, moving the pole the entire
length of the glass with each stroke if possible. Return
the pole to the top of the window, and with a side to
side motion, allow rinse water to ow completely down
the surface of the glass.
Frame rinsing may not be required. If the height of the
glass and the weight of the pole allow for it, hold the
brush slightly o of the surface of the glass to rinse. If
this is not possible, move the pole side to side slowly
with the brush on the glass at the top, and let the water
ow down the glass to rinse.
bypass valve more will reduce the amount of pressure
that is used to produce pure water resulting in lower
ow rates at the brush. Closing the bypass valve will
increase the amount of pressure which will lead to
higher ow rates at the brush. Closing your valve so
that the ow of the bypass is roughly equal to the
ow of pure water exiting the system is a good place
to start. This will restrict ow for elevated system
pressure, but also allows waste water to exit your
membranes. When using a pump, open the bypass
valve fully to start then reduce ow for optimal
pressure. Do not exceed 120 PSI on your lters.
Flushing water through the RO lter after use will
remove excess minerals from the membrane. It is
recommended that your run your system with the
bypass valve fully open for a few minutes each time
you nish using your system to help clean out your
RO membranes and extend their life. See Shutdown
section of this manual for more details.
Once you have completed the top row or highest glass
on one side of the building, repeat these steps for each
tier or level of glass, working your way down. A good
initial scrubbing on the glass followed by a complete
rinse will ensure that the glass dries completely spot-
free.
Pure water is a great natural solvent for many soils.
In some cases, such as heavy soils, a pre-soak or
even a double scrub and rinse may be needed to
achieve optimal results. The agitation of the brush,
coupled with the ow of water through the brush when
scrubbing, should break down and suspend most soils,
readying them for complete removal via the rinse step.
As with any new procedure, practicing the use of your
WaterFed® pole is the best way to achieve optimal
results. Learn more about basic technique at www.
abcWindowSupply.com/StartingWF

4 - Phaser Pure Water System Operation and Maintenance Manual
9. Maintenance
1. Close the shut o valve to the pole. Open bypass
valve to fully open position and ush out the system
for 3-5 minutes.
2. Turn supply water o.
3. Disconnect water line and tip system on end if
draining is desired.
8. Shutdown
7. Soap Residue
Getting spotting when your TDS levels are below 10?
A common issue encountered when transitioning
buildings from traditional window cleaning methods
to pure water cleaning is soap residue. After the initial
cleaning with pure water, small white or gray spots and
runs may be seen on the glass after drying. Most often
this is soap and or detergent residue left behind by
previous traditional cleanings and brought out of the
pores of the glass by the pure water cleaning process.
The soap can take up to 30 minutes to dissolve if it
has been baked on or pushed into seals and frames.
Soaking the glass 15-20 minutes before performing
a normal agitation and rinse cycle will remove soap
spotting. Repeat agitation and rinse if the spots persist.
The Carbon/Sediment Filter should be replaced every
6 months with frequent use and should not be kept
in service for more than a year. Failure to replace the
carbon lter regularly can lead to chlorine reaching
your RO lter and result in damage to the membrane.
We often recommend that users should replace both
their Carbon/Sediment and DI lters at the same time
as this usually ensures that the Carbon/sediment lter
is kept fresh without having to track service dates.
RO membranes have the potential to process 100,000
gallons of water when properly maintained.
To test the health of your RO membrane compare the
TDS levels of the source water to the level of pure
water leaving the RO lter. For example, 100 TDS
source water with 10 TDS leaving the RO indicates
90% rejection. When RO rejection rates drop below
80% it is generally time to replace the RO lter
canister. As stated above, bleeding the RO at the
beginning of each use and ushing the RO at the end
of each use are essential to achieving maximum RO
lifespan. Trapped air can result in the plastic overheating
and pressure rating of the RO housing dropping. Setting
up your system out of direct sunlight on hot days will
also help protect the plastic RO housing from heat
damage.
The lifespan of your DI lter depends on the TDS of
the water entering the lter. Periodically check the
TDS of the puried water leaving the DI lter with the
provided hand held meter. When the TDS levels reach
unacceptable levels for your application (abc suggests
10ppm or less for window cleaning and 40ppm or less
for cleaning opaque surfaces) the DI lter is completely
exhausted and should be replaced. See troubleshooting
section below for more information on high TDS levels
coming from the system.
10. Filter Replacement
1. Unscrew the Carbon/Sediment lter housing
(P/N WF2CSC-6) from the inlet side of the unit.
2. Screw the Carbon/Sediment lter housing back
onto the inlet of of the RO lter. Do not overtighten.
Learn how to change your lters by video:
www.abcWindowSupply.com/PhaserFilter
Learn when to change your lters with this guide:
www.abcWindowSupply.com/FilterTime
Carbon/Sediment Filter
1. Remove quick connect shut o valve.
2. Unscrew the DI lter housing (P/N WF2CDI-6)
from the outlet side of the unit.
3. Screw the DI lter housing back onto the outlet of
the RO lter. Do not overtighten.
4. Replace quick connect shut o valve.
DI Filter
Your TDS meter also has a thermometer which
reads temperature. This can allow you to monitor
the temperature of your feed water. Running your
system at feed water temperatures of less than 10 °C
(50 °F) will result in low ow exiting the system. RO
membranes require more pressure to create the same
amount of clean water as the temperature of the water
gets colder. A pump can help to compensate for low
source water temperatures. Do not let the system or
any lter freeze when operating in lower temperatures.

Phaser Pure Water System Operation and Maintenance Manual - 5
12. Troubleshooting
11. Storage
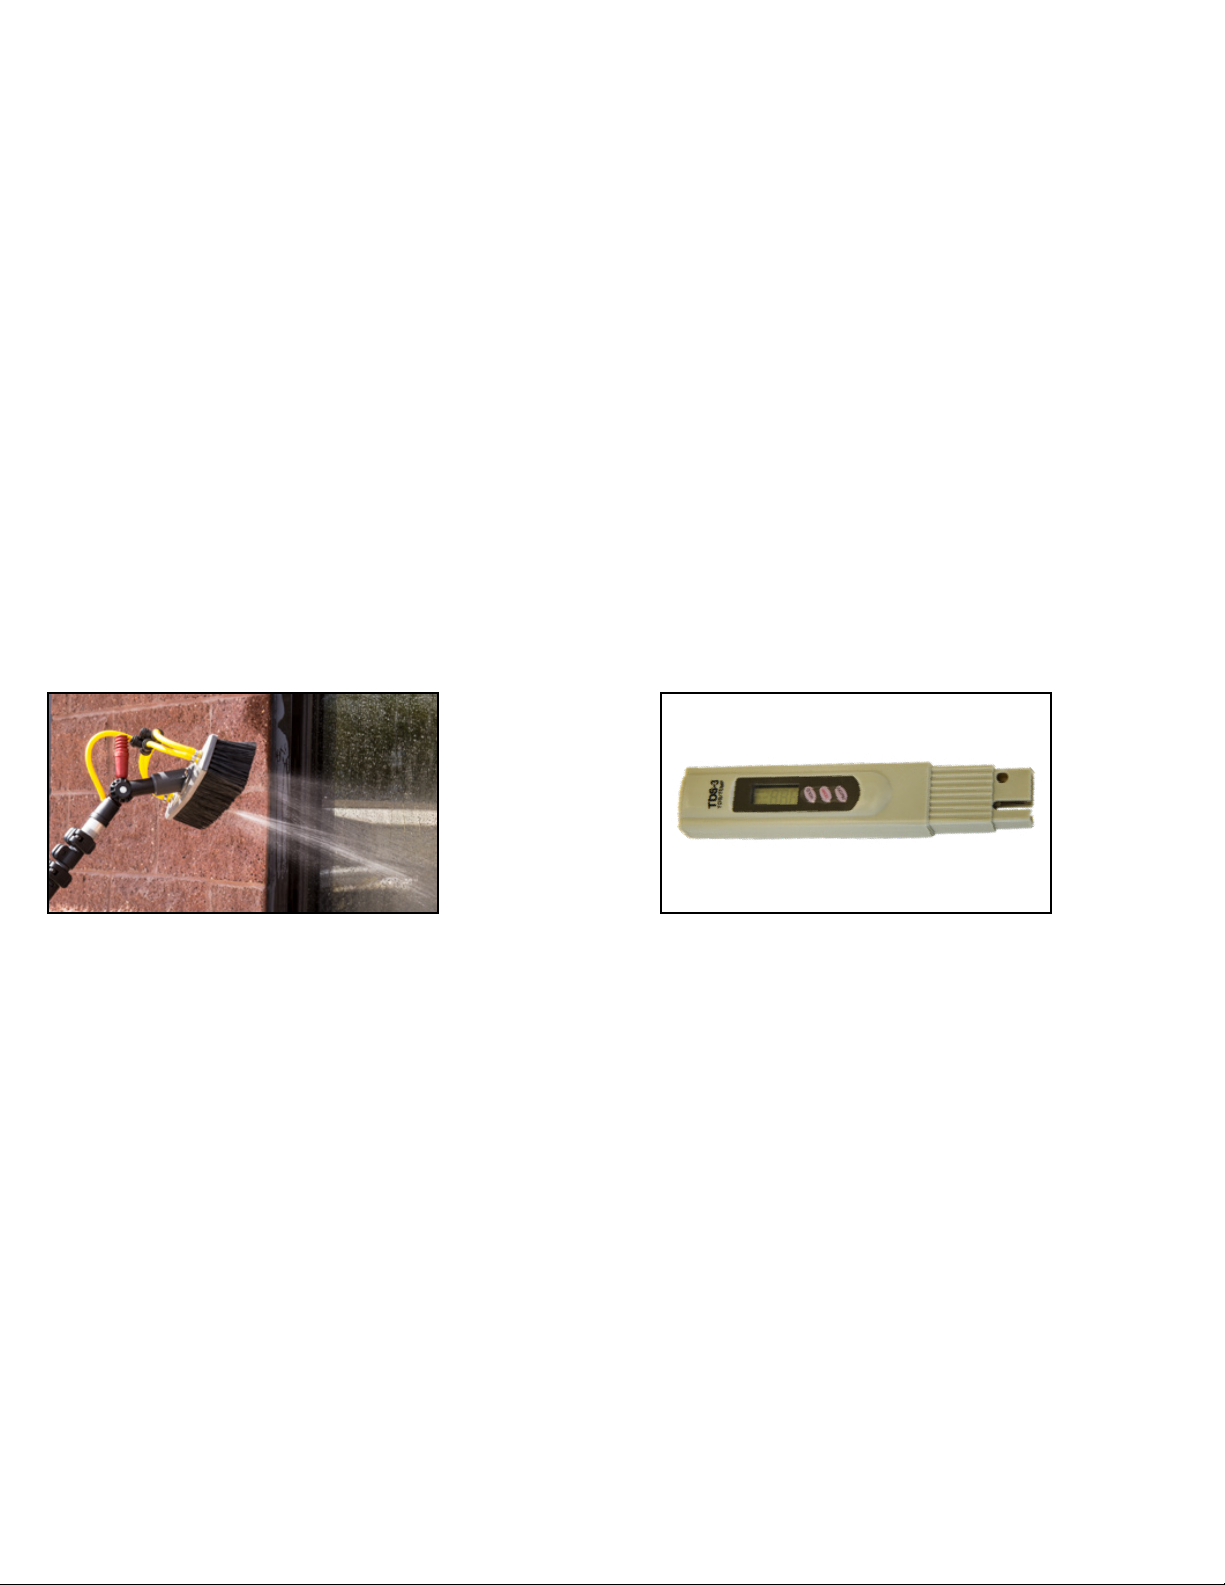
1. Low tap pressure is one of the most common causes
of low ow of pure water. Source water pressure is the
primary driver of system performance. Even sources that
appear to have plenty of ow out of the tap may not have
enough PSI to push water through the RO membrane.
Ensure that the tap pressure is sucient using a pressure
gauge (P/N TA-PG). Trying a dierent source may lead to
better performance. Also check all hoses (incoming and
outowing) for kinks or blockages, especially hose reels
that are wound too tight. Trying a larger diameter hose
(½” or more) or a shorter hose length between the system
and the tap can also improve ow. Adding a pump, such
as the abc boost pump, can help compensate for low
source pressure. Do not exceed 120 PSI when using a
pump.
2. Mineral fouling of the RO membrane will lead to
reduced pure water production from your system.
Processing water through the RO membrane without
enough (or any) bypass ow will lead to increasing
mineral concentration within the RO housing. In minor
cases, this will result in a temporary drop in production
from the RO membrane. Flushing the excess minerals
from the housing will return the lter to normal production
rates. In extreme cases the mineral buildup will
permanently reduce the ow rate of the lter. These cases
can only be xed by replacing the lter.
3. Biologic fouling is another potential cause of reduced
pure water production from the RO lter. Algae, bacteria
and fungi can land and grow on the surface of the RO
membranes. These organisms eventually block o
pores in the membrane leading to reduced production
levels. Letting lters sit for long periods of time without
running any water through them increases the chances
Do not allow the lters or system to freeze. Failure to
do so could result in damage to your lters and Phaser
system. Do not allow DI or RO lters to dry out. Dry
DI resin will lose its charge and therefore become
unable to remove dissolved solids from the water. Dry
RO membranes will develop cracks which allow more
dissolved solids to pass through the membrane. This
will deplete the downstream DI lters at a faster rate.
abc recommends that you run water through your
Carbon and RO membrane lters once every 2 weeks
or so, not only to help keep your lters moist but to
also wash out any microorganisms that might try to
grow in your lters. RO and DI lters need to stay moist
but do not need to be full of water. Always run your
source water through the Carbon lter before the RO
membrane when ushing the lter.
abc strongly recommends ushing out the RO
membrane lter once every 2-4 weeks to ensure
the maximum lifespan of the lters. When ushing
the RO membrane lter, the source water should be
passing through the Carbon/Sediment lter before
the RO membrane. This will prevent damage to the
membranes from chlorine and chloramine. Periodic
ushing will ensure that the lter membrane does not
dry out and will reduce the chance that biological
growth will foul the lter elements while in storage.
If periodic ushing is not feasible, we recommend that
users wrap lters tightly in plastic wrap or plastic bags
and then seal with tape. This will reduce the chance
that the lter dries out when in storage. Do not allow DI
or RO lters to dry out. Dry DI resin will lose its charge
Storage - Short Term (2-4 Weeks) Low Pure Water Flow Out Of The Brush
Storage - Long Term (Winterizing)
1. Remove Carbon/Sediment and DI Filters.
2. Using a 7/16” wrench, remove the clamps from the
RO Membrane lter (P/N WF2CRO-40) that doubles
as the stabilization base for the unit. Retain for
future use.
3. Remove fabric handle and install onto new RO
membrane.
4. Remove bypass hose.
5. Attach handle and clamps to new RO lter.
6. Attach bypass hose to new RO Filter.
7. Attach Carbon/Sediment and DI Filters.
Do not overtighten.
RO Filter and therefore become unable to remove dissolved solids
from the water. Dry RO membranes will develop cracks
which allow more dissolved solids to pass through the
membrane. RO and DI lters need to stay moist but do
not need to be full of water.
Store lters indoors over the winter. Do not allow the
lters or system to freeze. Failure to do so could result
in damage to your lters and Phaser system. After lters
have been stored this way, they will need to be ushed
thoroughly before use. Leaving lters wrapped for
extended periods of time can lead to biological fouling,
which is why we recommend periodic ushing.

6 - Phaser Pure Water System Operation and Maintenance Manual
1. Strong bypass ow is normal during system operation.
This water is the discharge water and it contains a very
high TDS. This water is non-potable but is also not
harmful to plants. DO NOT DRINK DISCHARGE WATER.
3. Milky white bypass ow is a common occurrence when
starting up the system or using a new RO membrane. It is
trapped air being pushed out of the lter housing and will
stop once the air is gone.
Water Coming Out Of Discharge Hose
1. With the source water o, check that the tting is
properly tightened. Tighten until you feel the gasket
engage. DO NOT OVER TIGHTEN
2. Unscrew the leaky connection. Check gasket in the
female tting for damage or deformation. Replace
gasket if necessary.
Leak Between Brass Garden Hose Fittings
1. Unscrew leaky brass tting.
2. Check brass ttings for damage or deformation.
If necessary replace brass ttings. Replacement parts
can be ordered from ABC or bought from a local store.
The plastic hole size is ½” national pipe thread (NPT)
and the Brass tting connection are a standard
¾” Garden hose thread (GHT).
3. Fittings should be attached with an adhesive to
prevent leaks. We recommend Liquid Nails Perfect
Glue from Home Depot.
4. If leak persists replace lter.
Leak Between Brass Garden Hose Fitting And
Plastic Housing
of biological fouling. After long term storage, running a
series of long ushes will often return the RO membrane
to normal production levels. Fully open the bypass hose
and then shut o your system’s pure water outlet at the
DI lter. Run it like this for 10 minutes and then open your
pure water outlet and restrict your bypass to its normal
running setting. Doing this ushing process 2 or 3 times
may be required to return to normal production levels.
4. Expect decreased production rates when running your
RO with colder source water. The ideal temperature for
source water is 77°F. You can expect around half the ow
for water at 50 degrees that you would get at 75 degrees,
even if both sources are at the same PSI. Use your TDS
meter to measure the temperature of your source water
to determine if this is the cause of lowered ow rates.
5. Leaks in the system and the pole tubing can release
pressure and take ow away from the jets in your brush.
A couple of small leaks in the pure water lines can cut
pressure to the jets in half. Read the “leaks” section
below for more information on eliminating leaks in the
system.
1. Retest your water sample. When you get a higher than
expected reading on your handheld TDS meter, it is a
good idea to use the water you are testing to wash out
both the measuring lid and the measuring prongs of the
meter itself. Do not get the body of the meter wet, it is
not waterproof. Minerals can stay in the cup from other
measurements and can make the sample appear to
have a higher TDS than it actually does. Taking multiple
samples ensures maximum accuracy.
2. High TDS coming out of the system usually indicates
that the DI lter is spent. Testing before and after the
DI lter will verify that there is not another issue. If the
TDS levels before and after the DI lter are the same, the
lter is completely depleted. Replace the DI lter (P/N
WF2CDI-6) once depleted. If water coming from the RO
lter has high TDS levels, check the RO performance as
well.
3. Elevated TDS levels coming from the RO membrane
can indicate that both the RO and DI need to be
replaced. First, remove the DI lter from the end of the
RO lter. Use your handheld TDS meter to measure the
TDS water coming out of the RO and compare that to the
TDS levels of the source water. Your RO should have a
rejection rate of over 80%. If the rejection rates are below
normal, follow the step below to ensure that the RO lter
needs to be replaced.
High TDS
4. If your RO rejection is lower than expected, you can
try running a 10 minute ush. Increasing ow through the
lter housing will help the ushing process. Fully open the
bypass hose and then shut o your system’s pure water
outlet at the DI lter. Run it like this for 10 minutes and
then open your pure water outlet and restrict your bypass
to its normal running setting. Check your RO TDS to see
if it is dropping to more acceptable levels. Repeat the
forward ush 2-3 times if necessary to drop the RO TDS.
5. If you RO TDS does not drop, your RO is probably
faulty. You can continue to use the faulty RO, however you
will use up your DI resin faster than normal. Replace the
faulty RO lter (P/N WF2CRO-40) as soon as possible.
13. Leaks

Phaser Pure Water System Operation and Maintenance Manual - 7
Expressed Warranty
abc Window Cleaning Supply warrants new water
purication systems against manufacturing defects under
normal use to the original purchaser.
abc Window Cleaning warrants new equipment for one
year from the original purchase date to be free from
manufacture defect. Any parts sent out for warranty are
warranted from the original purchase date of the machine.
The customer must rst contact abc Window Cleaning
to notify them of the problem. abc may require the
merchandise to be shipped back to them at the customer’s
expense to evaluate the warranty claim. If the equipment
is found to be a manufacture defect abc Window Cleaning
will reimburse shipping expense and parts will be sent out
at no charge including standard ground shipping. Rush
shipping will be the sole responsibility of the customer.
Wear items exempt from warranty include lters and
membranes.
This warranty does not apply to misuse or abuse causing
failure of the system. The customer must contact abc
Window cleaning before attempting any repairs or
modication to the system. Failure to do so will void your
warranty.
abc Window cleaning holds no responsibility for loss
of labor, time or any costs associated with using the
equipment. abc Window Cleaning holds the sole discretion
of whether a claim falls under warranty.
Expressed Warranty
Returns
If for any reason the customer wishes to return the
system they may do so at anytime within 30 days of the
original purchase date.
The customer must rst contact abc Window cleaning
supply to notify them of their intent to return the
merchandise.
The customer is responsible for the return of all
merchandise and insuring that the product is properly
packaged to arrive in a new resellable condition. The
customer is responsible for all costs associated with
returning damaged merchandise to a new resellable
condition.
The customer is also responsible for a 20% restocking
fee, in addition to any costs associated with shipping
and repairing the merchandise to a new resellable
condition. abc Window cleaning supply will issue a
refund to the credit card on le once all repairs are
completed.
3. Check brass ttings for damage or deformation. If
necessary replace brass ttings. Replacement parts can
be ordered from ABC or bought from a local store. The
plastic hole size is ½” national pipe thread (NPT) and the
Brass tting connection are a standard ¾” Garden hose
thread (GHT). Fittings should be attached with an
adhesive to prevent leaks. We recommend Liquid Nails
Perfect Glue from Home Depot.

8 - Phaser Pure Water System Operation and Maintenance Manual
www.abcWindowSupply.com
12371 Mead Way, Littleton, CO 80125
1.800.989.4003 // ©abc Window Cleaning Supply, Inc.
Replacement Parts
Optional Upgrades
Carbon Filter
Saddle Clamp
TDS Meter
DI Filter
Replacement Feet
Shut-o Valve
RO Filter
WF2CSC-6
TA-RO-200588
HMTDS-3
WF2CDI-6
WF7000-RF
WF601311
WF2CRO-40
PSI Pressure GaugeBooster Pump
TA-PGWF1000-BP
Table of contents
Other abc Cleaning Equipment manuals
Popular Cleaning Equipment manuals by other brands

Crystal Clean
Crystal Clean 1678 operating manual

lil-BUDDY
lil-BUDDY PRO1 Operation manual

IBS Scherer
IBS Scherer BK-50 Translation of the original instructions

Rawlins
Rawlins KaiVac 1700 Series Operator and parts manual

HOSPECO
HOSPECO SPHERGO POP TUCK n' GO Starter Kit user guide

SATA
SATA Clean RCS operating instructions