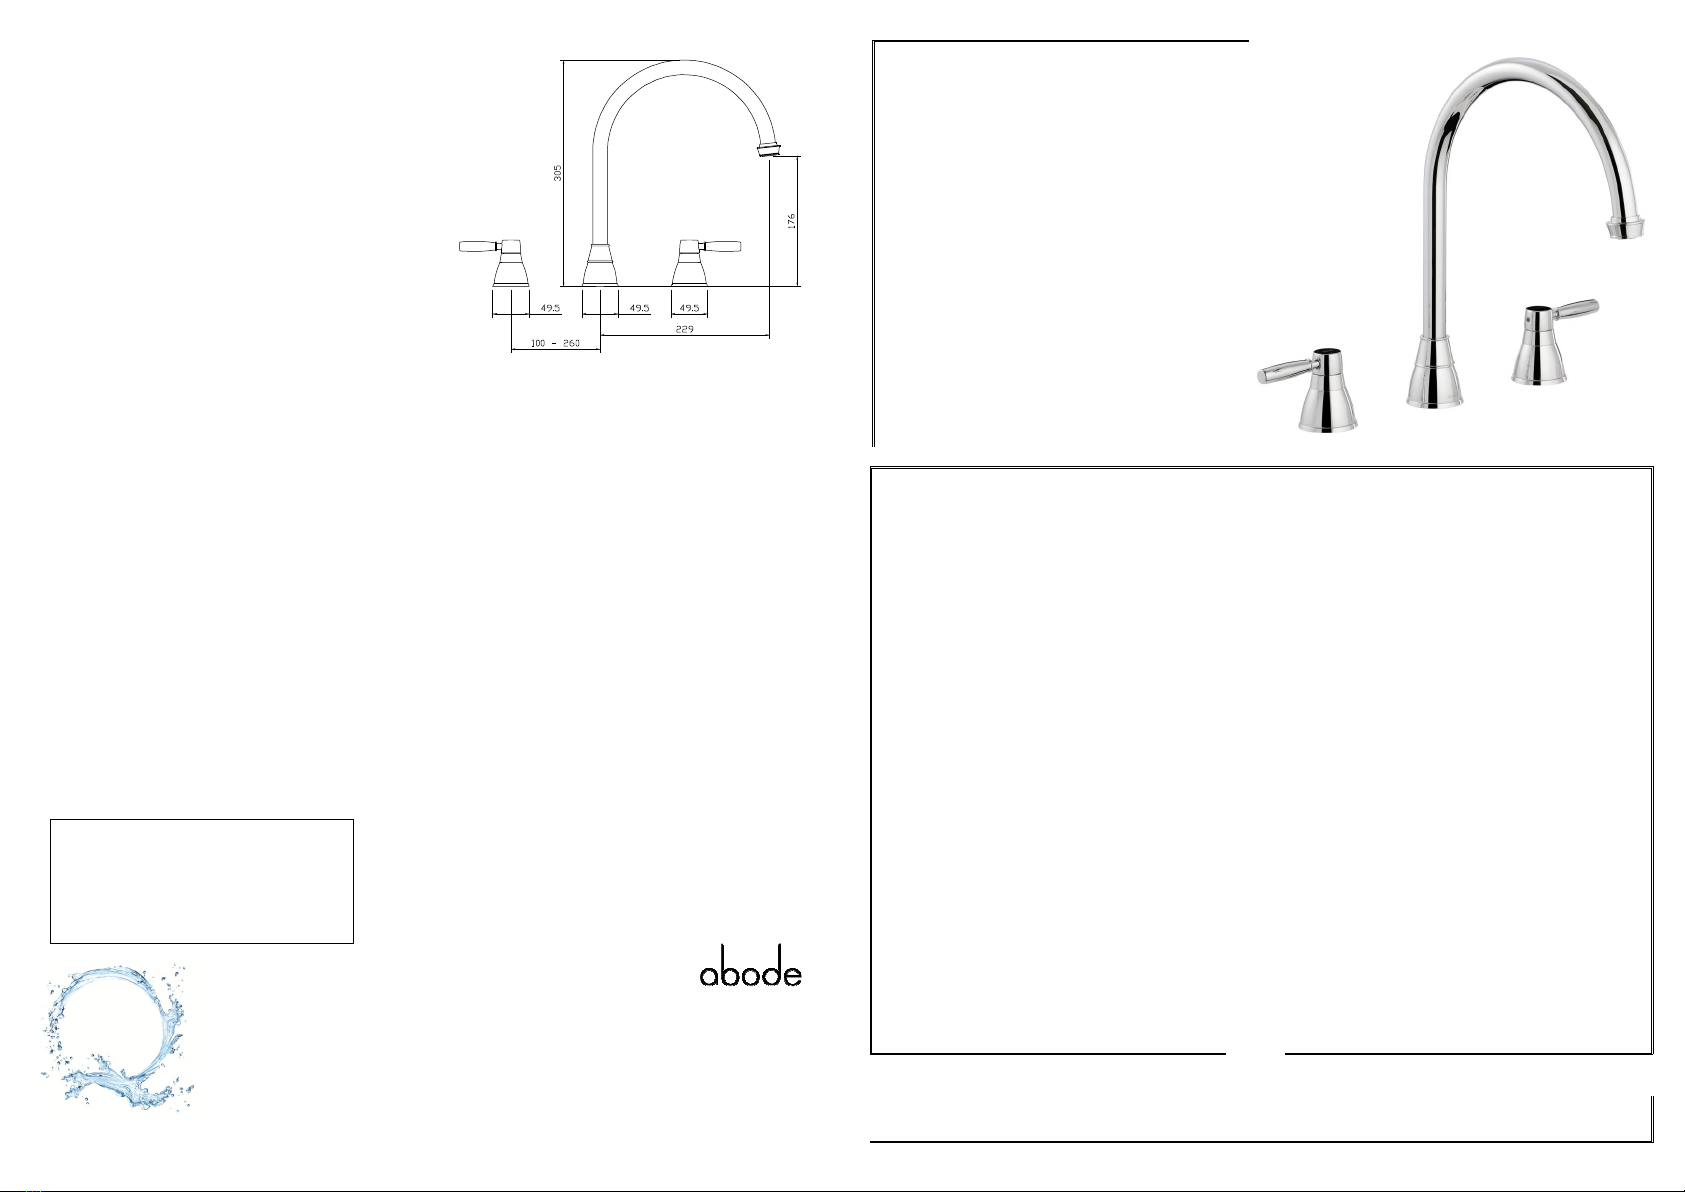
Abode Brompton 3 Part 5692 User manual
Other Abode Plumbing Product manuals

Abode
Abode Althia Pull Out AT1260 User manual

Abode
Abode Tubist Single Lever Pull Out AT2131 User manual

Abode
Abode AT2152 User manual

Abode
Abode Bayenne Bridge 5656 User manual

Abode
Abode Storm Slimline AB2427 User manual

Abode
Abode Brompton Monobloc 5652-2 User manual

Abode
Abode Hex Professional AT2094 User manual

Abode
Abode Ceramic Inset Sink AX4028 User manual

Abode
Abode ACT3023 User manual

Abode
Abode Atlas Monobloc Quad AT2166 User manual

Abode
Abode Globe Single Lever AT2146 User manual

Abode
Abode Vixo User manual

Abode
Abode Langley Bridge User manual

Abode
Abode Coniq–R AT2120 User manual

Abode
Abode Ceramic Inset Sink AX4002 User manual

Abode
Abode Fraction Single Lever Professional AT2160 User manual

Abode
Abode Chao AB4042 User manual

Abode
Abode Zest Pull Out AT2164 User manual

Abode
Abode AX4045 User manual

Abode
Abode AB2450 User manual


Popular Plumbing Product manuals by other brands

Moen
Moen SANI-STREAM 8797 manual

Grohe
Grohe Allure Brilliant 19 784 manual

Cistermiser
Cistermiser Easyflush EVO 1.5 manual

Kohler
Kohler Triton Rite-Temp K-T6910-2A installation guide

BEMIS
BEMIS FNOTAB100 Installation instruction

Hans Grohe
Hans Grohe ShowerTablet Select 700 13184000 Instructions for use/assembly instructions

Akw
Akw Stone Wash Basin Installation instructions manual

Enlighten Sauna
Enlighten Sauna Rustic-4 user manual

Moen
Moen ShowHouse S244 Series quick start guide

Sanela
Sanela SLWN 08 Mounting instructions

Franke
Franke 7612982239618 operating instructions

Heritage Bathrooms
Heritage Bathrooms Granley Deco PGDW02 Fitting Instructions & Contents List

Tres
Tres TOUCH-TRES 1.61.445 instructions

STIEBEL ELTRON
STIEBEL ELTRON WS-1 Operation and installation

Miomare
Miomare HG00383A manual

BELLOSTA
BELLOSTA revivre 6521/CR1 quick start guide

American Standard
American Standard Heritage Amarilis 7298.229 parts list

BorMann
BorMann Elite BTW5024 quick start guide