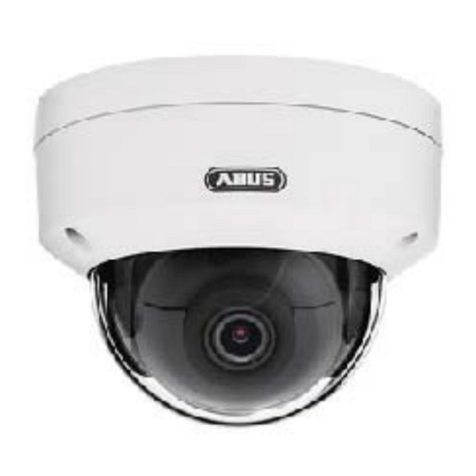
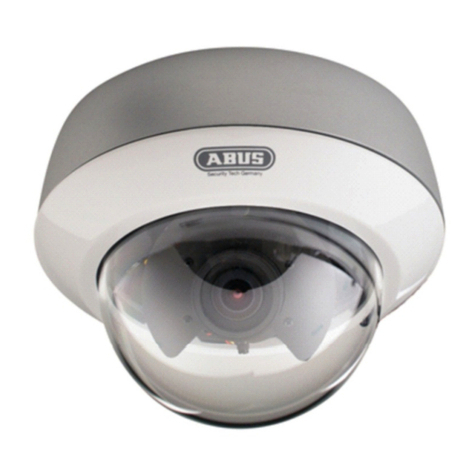
Abus TVCC74000 User manual

19
Day/Night Vario Outdoor Camera
Version 03/2011
Original English user manual. Keep for future use.
TVCC74000
TVCC74010
TVCC74011
TVCC74020
TVCC74021

20
UK Introduction
Dear Customer,
Thank you for purchasing this product.
This product meets the requirements of the applicable European and national guidelines.
The corresponding declarations and documents can be obtained from the manufacturer
(www.abus-sc.com).
To maintain this condition and to ensure risk-free operation, you as the user must observe these
operation instructions!
Before initial start-up, read through the complete operating instructions observing operating and
safety instructions.
All company and product names mentioned in this document are registered trademarks.
All rights reserved.
If you have any questions, please contact your installer or your local dealer!
Disclaimer
This user manual was prepared with greatest care. If you should notice omissions or inaccuracies,
please inform us about these on the back of this manual given address.
The ABUS Security-Center GmbH & Co. KG assumes no liability for technical and typographical
faults and reserves the right to make at any time modifications to the product or user manual
without a previous announcement.
The company is not liable or responsible for direct and indirect subsequent damages which are
caused in connection with the equipment, the performance and the use of this product.
No guarantee for the content of this document is taken.

21
Important safety instructions
The warranty will expire for damage due to non-compliance with these operating
instructions. We shall not be liable for any consequential loss!
We do not accept liability for damage to property or personal injury caused by incorrect
handling or non-compliance with the safety-instructions. In such cases the warranty will
expire.
Dear customer,
The following safety instructions are intended not only for the protection of your health, but also for
the protection of the device. Please read through the following points carefully:
xThere are no parts on the inside of the product which need to be serviced. Apart from this, the license
(CE) and the guarantee/warranty will lapse if you open/take the product apart.
xThe product will be damaged even it falls from a low height.
xThis device can be used in inside as well as outside.
xDuring the installation of the camera please take care that direct sunlight cannot fall onto the image
sensor of the device. Please follow the installation instructions in the corresponding chapter of this
user manual.
Avoid using the device under the following unfavorable ambient conditions:
xwetness or excessive air humidity
xextreme cold or heat
xdirect sunlight
xdust or combustible gases, vapors or solvents
xstrong vibration
xstrong magnetic fields, such as those found in the vicinity of machinery or loudspeakers
xthe camera should not positioned with opened iris towards the sun - this can lead to the
destruction of the sensor.
xthe camera may not be installed on unstable surfaces
General safety instructions:
xDo not leave packaging material lying around carelessly. Plastic/ foil/bags and polystyrene parts etc.
could become dangerous toys for children.
xFor safety reasons don’t give the camera into child hands due to them being able to swallow small
parts.
xPlease do not insert objects through the openings into the device.
xUse only accessories which are specified by the manufacturer.
Please do not connect incompatible parts to the device.
xPlease pay attention to the safety instructions and user manuals of the other connected devices.
xCheck the device for damages before installation. If this should be the case please do not use it.
xPlease adhere to the operational voltage limitations listed in the technical data. High voltage could
destroy the device and pose a health hazard (electric shock).
During the installation into an existing video surveillance system make sure that all devices are
disconnected from the low and supply voltage circuit.
If in doubt allow a professional electrician to mount, install and wire-up your device. Improper or
make-do electrical connection to the mains does only represent at threat to you but also to other
persons.
W
ire-up the entire system making sure that the mains and low voltage circuit remain separated
and cannot come into contact with each other in normal use or due to any malfunctioning.
22
Table of contents
1. Intended use..........................................................................................................................23
2. Explanation of symbols .......................................................................................................23
3. Scope of delivery..................................................................................................................23
4. Features and functions ........................................................................................................23
5. Device description................................................................................................................24
5.1 Overview – type numbers .............................................................................................24
5.2 Unpacking.....................................................................................................................24
6. Connections..........................................................................................................................24
7. Camera description ..............................................................................................................25
8. Camera installation...............................................................................................................25
8.1 Cable routing.................................................................................................................25
8.2 Mounting of the video cable..........................................................................................26
8.3 Camera mounting..........................................................................................................26
8.4 Camera adjustment.......................................................................................................28
8.5 Focus and zoom adjustment.........................................................................................28
9. Servicing and cleaning.........................................................................................................29
9.1 Function test..................................................................................................................29
9.2 Cleaning........................................................................................................................29
10. Disposal.................................................................................................................................29
11. Technical data.......................................................................................................................30

23
1. Intended use
The Day/Night Vario Ball Type Dome Camera is equipped with a high quality image sensor. It is
used for video surveillance in connection with a recorder or monitor.
You can find a detailed description of functions in section “4. Features and functions”.
Any other use than that described above can lead to damage to the product and in
addition involve other risks. This does not include operation for other applications and
would in case of doing so the guarantee and any related liability will lapse. This is
also the case if any unauthorized changes or additions have been made to the
product.
Please read through the entire manual carefully before putting this product into
operation. This operating manual contains guidelines that are important for correct
mounting and operating.
2. Explanation of symbols
A flash in the triangle is used if there is danger for the health, e.g. by an electric shock.
An exclamation mark in the triangle points to an important note in this user manual
which must be minded.
This symbol can be found when you are to be given tips and information on operation.
3. Scope of delivery
xABUS Day/Night IR vario ball type dome camera
x2 meter cable for video signal and power supply (preinstalled)
xHexagon wrench
xAdjustment tool
xScrew pack (screws, pegs)
xInstallation manual
4. Features and functions
xDay/Night function with removable infrared cut filter (ICR)
xBuilt in IR LEDs with range up to 20 meter
xZoom and focus adjustment without open the camera
xVandal proofed metal housing
x3 axis bracket for flexible installation
xProtected cable management possible

24
5. Device description
5.1 Overview – type numbers
Artikelnummer TVCC74000 TVCC74010 TVCC74020
TV-Lines 540 540 540
DNR -
WDR - - 120 dB (max.)
IR
Power source 12VDC 12VDC 12VDC
Artikelnummer TVCC74011 TVCC74021
TV-Lines 650 690
DNR
WDR 46 dB (max.) 120 dB (max.)
IR
Power source 12VDC 12VDC
5.2 Unpacking
While you are unpacking the device please handle it with utmost care.
If you notice any damage of the original packaging, please check at first the device.
If the device shows damages, please contact your local dealer.
6. Connections
TVCC74000 / TVCC74011 / TVCC74010 /
TVCC74020 / TVCC74021
(1) Video signal
(2) Power supply
The required power supply for all cameras is 12 VDC. Please pay attention to the polarity. The
connector is prepared for a 12VDC wall power supply (DC connector 5.5mm x 2.1mm).
1
2

25
7. Camera description
(1) Base plate
(2) Lens window
(3) Infrared LEDs
(4) Focus adjustment
(5) Zoom adjustment
(6) Camera housing
(7) Camera cover
(8) Fixing screw for camera cover
8. Camera installation
8.1 Cable routing
ATTENTION!
During the assembly the camera must be separated from the mains voltage.
For cable routing there are 2 options:
a) Covered cable routing
For covered cable routing please drill a hole at the mounting position. Please route the cables
through this hole, the camera will cover the cable and cable lead through.
b) Surface cable routing
For a visible routing of the cable a cable lead through at the side of the base plate is available.
1
6
7
8
2
3
4 5

26
8.2 Mounting of the video cable
To connect the video signal of the camera with a monitor or recorder, use a coaxial cable of the
type RG59 with BNC-Connector (male) at the “VIDEO-OUT” connector.
The cable length up to the next device should not rise 100 meters.
8.3 Camera mounting
1. Please loose the fixing screws at the
camera cover using the supplied
hexagon wrench. Please remove the
camera cover.
2. Please use the mounting plate inside the
base plate as drill template.

27
3. Please fix the base plate and the
mounting plate at the mounting position,
using the supplied pegs and screws.
4. Put the cover back on the camera and fix
the cover by screwing the fixing screws.

28
8.4 Camera adjustment
To adjust the viewing angle of the camera
please loose the fixing screws first using
the hexagon wrench. After angle
adjustment please fix the screws.
8.5 Focus and zoom adjustment
Please use the supplied tool to adjust focus and zoom.
Zoom:
Focus:

29
9. Servicing and cleaning
9.1 Function test
Check the technical safety of the product such as damage to the housing at regular intervals.
When it can be assumed that the safe operation is no longer possible, the product must be put out
of service and precautions taken o ensure that it is not used unintentionally.
It must be assumed that safe operation is not longer possible if
xthe device shows visible signs of damage
xthe device no longer operates and
xhas been stored for longer periods under unfavorable conditions or
xhas been subjected to considerable stress in transit.
Please note:
The product is absolutely maintenance-free for you. There are no components on the
inside of the product to be checked or services by you, never open it.
9.2 Cleaning
Clean the product with a clean, soft cloth. To remove severe contamination, the cloth can be
dampened with luke-warm water.
Make sure that no liquids can enter the equipment as the device can be destroyed.
Never use chemical detergents as they could attack the surface of the device.
10.Disposal
Products which are labeled with this pictogram may not be disposed by the
domestic rubbish. Please dispose the product in accordance with the prevailing
legal regulations at the end of its life time.
Please consult your dealer or dispose the product over the municipal gathering
point for electric scarp.

30
11. Technical data
Article number TVCC74000 TVCC74010 TVCC74020
Standard PAL
Resolution 540 TVL 540 TVL 540 TVL
Image sensor 1/3“ Sony Super HAD IITM CCD 1/3‘‘ Pixim DPS
CMOS
Picture elements (total) 795(H) x 596(V) Pixel 410.000
Picture elements
(effective) 752(H) x 582(V) Pixel 390.000
Signal-to-noise ratio 48 dB 52 dB 50 dB
Minimum illumination
(day) 0.1 Lux @ F1.4,
30 IRE 0.08 Lux @ F1.4,
30 IRE 0.3 Lux @ F1.4,
30 IRE
Minimum illumination
(night) 0.1 Lux @ F1.4,
30 IRE
(B/W mode)
0 Lux @ F1.4,
30 IRE
(IR On)
0.01 Lux @ F1.4,
30 IRE (B/W mode)
0 Lux @ F1.4,
30 IRE
(IR On)
0.03 Lux @ F1.4,
30 IRE (B/W mode)
0 Lux @ F1.4,
30 IRE
(IR On)
Day/Night Removable infrared cut filter (ICR), Color / B/W
IR LEDs 36 LEDs
Lens 3.3 ~ 12 mm, F1.4
Synchronization Internal
DSS (Frame
Integration) - Auto, 0 ~ 10x Auto, 0 ~ 4x
Automatic gain control
(AGC) Max. 32 dB Max. 24 dB Max. 24 dB
Backlight
compensation (BLC) Automatic
White balance AWB, 2500K ~
9500K ATW,
2856K ~ 9600K ATW,
2000K ~ 7500K
WDR - - 120dB (max.)
DNR
(Digital noise
reduction)
- 3D DNR DNR
Protection class IP66
Video signal Composite; 1.0V p-p, 75 Ohm
Operating temperature -10°C ~ +50°C
Humidity 0 ~ 85%
Nominal supply voltage 12 VDC
Power consumption
(without IR) 3.5 W 2.4 W 2.0 W
Power consumption
(with IR) 6.0 W 5.8 W 5.8 W
Dimensions (H x Ø) 99 x 113 mm
Weight 650 g

31
Article number TVCC74011 TVCC74021
Standard PAL
Resolution 650 TVL 690 TVL
Image sensor 1/3“ Sony Exview HAD IITM
CCD 1/3‘‘ Pixim DPS CMOS
Picture elements (total) 1020(H) x 596(V) Pixel 768(H) x 548(V) Pixel
Picture elements
(effective) 976(H) x 582(V) Pixel 758(H) x 540(V) Pixel
Signal-to-noise ratio 50 dB 50 dB
Minimum illumination
(day) 0.1 Lux @ F1.4,
30 IRE 0.3 Lux @ F1.4,
30 IRE
Minimum illumination
(night) 0.05 Lux @ F1.4, 30 IRE
(B/W mode)
0 Lux @ F1.4,
30 IRE (IR On)
0.03 Lux @ F1.4,
30 IRE (B/W mode)
0 Lux @ F1.4,
30 IRE (IR On)
Day/Night Removable infrared cut filter (ICR), Color / B/W
IR LEDs 36 LEDs
Lens 3.3 ~ 12 mm, F1.4
Synchronization Internal
DSS (Frame
Integration) - Auto, 0 ~ 4x
Automatic gain control
(AGC) Max. 32 dB Max. 60 dB
Backlight
compensation (BLC) Automatic
White balance ATW,
1800K ~ 10500K ATW,
2000K ~ 7500K
WDR 46 dB (max.) 120 dB (max.)
DNR
(Digital noise
reduction)
2D DNR 3D DNR
Protection class IP66
Video signal Composite; 1.0V p-p, 75 Ohm
Operating temperature -10°C ~ +50°C
Humidity 0 ~ 85%
Nominal supply voltage 12 VDC
Power consumption
(without IR) 2.0 W 2.0 W
Power consumption
(with IR) 5.8 W 5.8 W
Dimensions (H x Ø) 99 x 113 mm
Weight 650 g

32
Other manuals for TVCC74000
1
This manual suits for next models
4
Table of contents
Other Abus Security Camera manuals

Abus
Abus TV7150 Ecoline User manual

Abus
Abus TVAC80010B User manual

Abus
Abus IPCA53000 User manual

Abus
Abus Eyseo TVCC40000 User manual

Abus
Abus TVIP91 Series User manual

Abus
Abus PPIC36520 User manual

Abus
Abus tvip21551 User manual

Abus
Abus TVIP52502 User manual

Abus
Abus IPCA22500 User manual

Abus
Abus TVIP52501 User manual

Abus
Abus TVIP61500 User manual

Abus
Abus TVCC71000 User manual

Abus
Abus TVIP48511 User manual

Abus
Abus TVAC19000C User manual

Abus
Abus TVIP10000 User manual

Abus
Abus TVHD40010 User manual

Abus
Abus HDCC68550 User manual

Abus
Abus HDCC45500 User manual

Abus
Abus TVIP42562 User manual

Abus
Abus IPCA33500 User manual