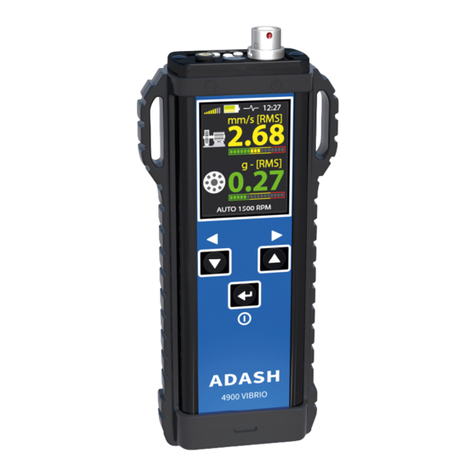
Adash 4900 Vibrio M User manual

USER’S GUIDE
ADASH 4900
VIBRIO M
VIBRATION METER, ANALYZER
AND DATA-COLLECTOR

2
ADASH 4900 - VIBRIO M
www.adash.com
Warnings .............................................................. 4
Before Switching ON.................................................... 4
Inserting Batteries ......................................................4
Connectors - Top Panel .................................................5
Switching ON and OFF .................................................. 6
Switching ON ......................................................... 6
Switching OFF ........................................................ 6
Power Save Mode..................................................... 6
Information Line ........................................................ 6
Measurement .......................................................... 7
Sensor Mounting.......................................................7
Various Screens with Measurements - Use Arrow Buttons.................7
Screens ................................................................8
Overall RMS Values ................................................... 8
Overall PEAK Values .................................................. 8
Spectrum 200 Hz. .................................................... 9
Time Signal for Roller Bearing Diagnosis ................................ 9
Vibrations in Frequency Bands for Gearbox and Bearing .................10
Overall Displacement RMS and 0-Peak. . . . . . . . . . . . . . . . . . . . . . . . . . . . . . . . . 10
Temperature .......................................................... 11
FASIT Expert System.................................................. 12
Evaluation of the Machine and Bearing Conditions ......................13
The Stroboscope ...................................................... 14
Strobo Switch ON ..................................................... 15
Strobo Switch OFF ...................................................15
The Torch ............................................................. 16
Using of Headphones................................................... 18
Saving Data to the Memory ............................................. 19
Memory Info. .........................................................19
Saving the Measurement Screen .......................................19
More Measurements (readings) in One Point ID......................... 20
Loading Memory to the DDS Tree ..................................... 20
Route readings ........................................................ 21
Downloading of the Route to the Instrument............................. 21
Route Collection ...................................................... 21
Special Readings are Taken Differently ................................ 24
TEMPERATURE .................................................. 24
FASIT ............................................................ 24
Erasing of Route Data in Memory ..................................... 25
CLR DATA......................................................... 26
CLR ALL .......................................................... 26
Using Standards to Define Limits .......................................27
ISO 10816 as Default Factory Setting .................................. 27
Classification of Vibration Values for Machines Groups 1 and 3......... 27
Classification of Vibration Values for Machines Groups 2 and 4 ........ 27
Adash Standards Over the ISO 10816.................................. 29
Adash Limit Values of Machine and Bearing Vibrations.................. 30
Set Up the Adash Standard ........................................... 30
Speed Detection ...................................................... 31
Error Messages ........................................................32
Sensor Connection Error ............................................. 32
Overload ............................................................ 32
Input Overload Error ................................................. 33
Unit Error . . . . . . . . . . . . . . . . . . . . . . . . . . . . . . . . . . . . . . . . . . . . . . . . . . . . . . . . . . . . 33
Appendix A - Switch-OFF Screen .......................................34
Appendix B - Special Setup Items .......................................35
SPEED ............................................................. 35
MEASURE........................................................... 36
Contents

3
ADASH 4900 - VIBRIO M
www.adash.com www.adash.com
UNITS ............................................................ 36
DISPLACEMENT VALUES ......................................... 36
RTE MODE (ROUTE MODE)........................................ 37
SET TIME ........................................................... 38
Appendix C - How to Evaluate the Failure .............................. 39
Overall RMS Values .................................................. 39
Overall PEAK Values ................................................. 40
Spectrum 200 Hz - Detection of Unbalance, Looseness, Missalignment .. 41
Vibrations in Frequency Bands – Gearboxes/Bearings ................... 41
Time Signal for Bearing Condition Evaluation ........................... 42
Bearing in Good Condition ......................................... 42
Bearing with Insufficient Lubrication................................. 42
Damaged Bearing ................................................. 42
Appendix D - Adash 4900 – Vibrio M Specifications ......................43
Appendix E - Response Specification for Calibration ......................44
Calibration ........................................................... 44
Vibration Velocity Measurement Frequency Response .................. 44
Vibration Acceleration Measurement Frequency Response.............. 44
Velocity Measurement Amplitude Response ........................... 44
Acceleration Measurement Amplitude Response ....................... 44
Sensor Sensitivity .................................................... 45
Basic Test with the A4801 Sensor Simulator............................ 45
Basic Test with Sensor and Shaker .................................... 45
Advanced Tests of Velocity Measurement ............................. 46
Advanced Tests of Acceleration Measurement.......................... 46
Envelope Demodulation Test .......................................... 46
Appendix F - Adash 4900 - Vibrio Ex - the ATEX Appendix (Option) .......47
Specification According to 94/9/EC (ATEX) Directive ................... 47
Zones Categories .................................................... 47
Using the Instrument.................................................. 47
Certificated Accessories .............................................. 48
Accelerometer AC90x,AC91x....................................... 48
Battery ........................................................... 49
Headphones ...................................................... 50
The Unit Sticker ...................................................... 50
Appendix G - Adash 4900 - Vibrio MP (Proximity Option) ................. 51
Switching the Instrument ON. . . . . . . . . . . . . . . . . . . . . . . . . . . . . . . . . . . . . . . . . . . 51
Screens ............................................................. 52
Speed Entry....................................................... 52
DC Offset ......................................................... 52
Displacement in 1 - 1000 Hz Range................................. 52
Spectrum 1000 Hz or 2500 Hz... .................................. 53
Spectrum 200 Hz ................................................. 53
Time Waveform in 1 - 1000 Hz ..................................... 53
Setup ............................................................... 54
REVCNT .......................................................... 54
CONFIG........................................................... 54
EVAL ............................................................. 55
SENSOR.......................................................... 55
Appendix H - Viewing Data in Memory...................................56
Notes .................................................................57

4
ADASH 4900 - VIBRIO M
www.adash.com
Ignoring any of the recommendations
mentioned below may cause failure of
the instrument.
Handling voltage higher than 24 V
can cause an accident.
Never plug this instrument into
household voltage.
HEADPHONES WARNING !
Listen at moderate volumes to avoid
ear damage. Remove the headphones from
ears while moving the sensor or reconnecting
the cable.
Inserting Batteries
The batteries are accessible after
opening a lid at the bottom of the
instrument. Open the lid by pressing its lower
edge (the edge with hinge) - see figure.
Do not ever use force! Proper polarity is shown
in the picture.
Warnings Before Switching ON
Opening the lid
1. Press gently
2. Open
Placement of batteries
Do not forget to switch the instrument
off before opening the battery lid!
Never handle the batteries with the
instrument switched on!

5
ADASH 4900 - VIBRIO M
www.adash.com www.adash.com
Before Switching ON
Connectors - Top Panel

6
ADASH 4900 - VIBRIO M
www.adash.com
Switching ON and OFF
Switching ON
Press the middle button .
Switching OFF
Press and hold the button .
The POWER OFF screen appears.
Release button and the instrument switches
off.
Power Save Mode
When the user does not press any
button for 15 minutes, the instrument
goes to Power Save mode - the screen is
darkened. When the user does not operate
the instrument for another 15 minutes, the
instrument switches off.
Information Line
An information line is displayed at the top of the screen during all measurement modes.
- moving wave indicates measurement in progress,
- the bar is displayed during measurement initialization,
- headphone output volume bar,
- battery status,
- time.

7
ADASH 4900 - VIBRIO M
www.adash.com www.adash.com
Measurement
Sensor Mounting
Screw the magnetic base onto the sensor.
Do not forget to remove the plastic cover
and the metal washer (it closes the magnetic
field to prolong the lifetime of the magnet)
before measuring. Place the plastic cover and
the metal washer back on the magnet after
measuring.
Place the magnet on a measuring point very
carefully. The best way how to do is to rest the
edge of the magnet on its side and then slowly
attach the sensor to the measuring point. If
you bring the magnet near to the machine
with its whole area hitting the machine all of a
sudden then the strong impact can irreversibly
destroy the sensor.
If you use a measuring tip instead of a magnet,
the measured values are not going to be
stable. This is not surprising because the
measured values depend considerably on the
pressure of the tip at the measurement point.
A magnet which attaches a sensor generates
a constant pressure so the values are stable.
Attention!!! Use the measuring tip only
in hard to reach places where it is not
possible to place the magnetic base.
Various Screens with Measurements - Use Arrow Buttons
The instrument offers many various vibration measurements. Every type of measurement uses its
own screen. When you move between screens, then you will see all measurement results.
Use the arrows for moving.
Use arrows to change screen.

8
ADASH 4900 - VIBRIO M
www.adash.com
Overall RMS Values
Two RMS values appear on first screen.
The top value is velocity. When this value is high then you should
expect machine failures like unbalance, misalignment or looseness.
The bottom value is acceleration and it corresponds the rolling bearing
defect.
The color of the displayed values (green, yellow or red) corresponds to
the warning and alert limits.
Screens
Overall PEAK Values
The same measurement properties as for overall RMS are used.
Only the results are displayed in TRUE O-P.

9
ADASH 4900 - VIBRIO M
www.adash.com www.adash.com
Spectrum 200 Hz
FFT spectrum of velocity in the 200 Hz range.
The speed frequency line is displayed white (if it is known).
Three top peaks are displayed in the list.
Time Signal for Roller Bearing Diagnosis
The acceleration time waveform filtered in 0.5 - 16 kHz band-
pass. It means the speed frequency and harmonic frequencies of
the speed are removed.
The acceleration Demod - gENV RMS value is displayed on the bottom.
continue

10
ADASH 4900 - VIBRIO M
www.adash.com
Vibrations in Frequency Bands for Gearbox
and Bearing
Measurement of RMS acceleration in three bands:
0.5 kHz - 1.5 kHz, 1.5 kHz - 5 kHz, 5 kHz - 16 kHz.
Overall Displacement RMS and 0-Peak
Screens

11
ADASH 4900 - VIBRIO M
www.adash.com www.adash.com
Temperature
It is displayed in degrees of Celsius and
Fahrenheit.
The colored bar is used as well. The ranges of
colors are following:
• less than 30 °C - green,
• 30 - 45 °C - yellow,
• 45 - 60 °C - orange,
• 60 - 75 °C - red,
• more than 75 °C - dark red.
The bearing icon on the other screens is also colored according to the actual temperature value.
continue

12
ADASH 4900 - VIBRIO M
www.adash.com
FASIT Expert System
The FASIT screen displays the
severity levels of machine faults. The
temperature bar is also displayed on the right.
The speed is required for FASIT analysis.
In the bottom left corner you can see the Machine icon. The vertical bar displays the overall
machine condition.
The FASIT displays the severity of failure sources:
- Unbalance (icon of circle with heavy spot),
- Looseness (shoe icon),
- Misalignment (coupling icon),
- Unknown failure source (question mark icon).
In the bottom right corner you can see the roller bearing icon. The vertical bar displays the bearing
condition.
The vertical bar with the temperature icon on the right displays the measured temperature.
If the speed is unknown, then it must be manually entered before the analysis.
Use arrows for setting and press OK.
Screens
Overall velocity
Unbalance
Looseness
Misalignment
Other failure
Bearing acceleration
Temperature

13
ADASH 4900 - VIBRIO M
www.adash.com www.adash.com
Evaluation of the Machine and Bearing Conditions
A diagnostician always asks a basic question after the measurement: “What condition of the machine should I assign to the measured value?”
Machine conditions are divided into 3 levels, which have the same colors as traffic lights:
GOOD – GREEN COLOR
The machine is in a good condition, no defect is found. The operation is without restrictions.
ALERT - YELLOW COLOR
The beginning of a defect has been found in the machine. It is possible to operate the machine.
However, more attention must be paid to the machine and the repair must be planned.
DANGER – RED COLOR
A serious defect has been found in the machine. The machine should not be operated.

14
ADASH 4900 - VIBRIO M
www.adash.com
The Stroboscope
The stroboscope or stroboscopic lamp,
commonly called a strobe, is a device
which produces regular flashes of light on
selected frequency. When we have to study
or to visually inspect machinery, which has
cyclically moving parts, then the stroboscope
enables the user to freeze the movement
(usually rotation). Imagine a rotating disc
with one hole. When the flashes of light are
synchronized with the disc rotation speed,
then there is just one flash made during one
rotation.
It means that the disc is lit up when the hole is
always in the same position. It is the principle
of the illusion of frozen movement.
Press the middle button and the
three buttons appear on screen.
Now the three unit buttons have new functions
(MENU, SAVE, ESC).

15
ADASH 4900 - VIBRIO M
www.adash.com www.adash.com
Strobo Switch ON
Press MENU. The list of menu items appears.
Select LIGHT and press middle button . Next menu appears.
Select STROBO and press middle button .
Initially the strobo uses the speed frequency
(if it is known) or the last speed from memory.
By pressing the arrow buttons ▼ ▲ you can change that frequency
manually.
The step (1, 10, 100 RPM) is displayed on the bottom line of the screen.
If you need to change the step then press the middle button and the
STROBO menu appears.
Select required step and press the middle button .
Strobo Switch OFF
Open the STROBO menu, select -ESC- and press middle button .
The strobo runs now.

16
ADASH 4900 - VIBRIO M
www.adash.com
The Torch
Sometimes you need to inspect or read in dark
corners. The unit has a handy torch built in the front
panel.
Press the middle button .
Now the three unit buttons have new functions (MENU, SAVE, ESC).

17
ADASH 4900 - VIBRIO M
www.adash.com www.adash.com
Press MENU.
The list of menu items appears.
Select LIGHT and press middle button .
Next menu appears.
Select TORCH and press middle button .
The torch screen appears.
Press any key to switch off the torch.
The TORCH lights now.

18
ADASH 4900 - VIBRIO M
www.adash.com
Using of Headphones
Connect the headphones by a stereo 3.5 mm jack to the input
on the top panel. You now hear the signal from the vibration
sensor in the headphones.
The volume can be set-up. Press the middle button . Now the three
unit buttons have new functions (MENU, SAVE, ESC).
Press MENU. The list of menu items appears.
Select VOLUME and press the middle button .
Use arrow buttons to set the volume and press
the middle button .
HEADPHONES WARNING!
Listen at moderate volumes to avoid
ear damage. Remove the headphones from
ears while moving the sensor or reconnecting
the cable.

19
ADASH 4900 - VIBRIO M
www.adash.com www.adash.com
Saving Data to the Memory (For version with memory only)
Memory Info
There is info about used
memory displayed at the
top the screen, when pressing the
middle button . Memory bar is
displayed also on route screen.
- empty memory
- approx. 50% of the memory
used
- over 80% of the memory
used (red area of the bar)
- memory full
Saving the Measurement Screen
You can store measured values (screens) to the memory.
Each screen is stored to a specific address (Point ID) from 1 to 250.
Press the middle button when the measurement is completed.
Now the three unit buttons have new functions (MENU, SAVE,
ESC). If the reading is not completed yet, then the Save button is not
available. The information about used memory is displayed on the top of
screen.
Press the SAVE button.
The screen with Point ID
appears. The last selected point
ID is displayed.
continue

20
ADASH 4900 - VIBRIO M
www.adash.com
If this point ID contains data, then USED is displayed otherwise EMPTY is displayed.
Use the arrow buttons ▼ ▲ and select the required point ID. If you hold the arrow button
for longer time then the movement is faster. To confirm the Point ID press the middle
button .
Now the three buttons have new functions
( REP, OK, ESC). Press the middle button
(OK) to save the screen.
ESC - Escapes back to the measurement screen
OK - Saves data
REP - Goes back to the Point ID selection
More Measurements (Readings)
in One Point ID
When you for example measure some screen
regularly (e.g. each 10 minutes) then you can
save all readings to one point ID number.
Each point can contain more stored screens.
Loading Memory to the DDS
Tree
If you connect the unit to computer, then all
readings can be loaded to DDS software and
saved to the tree structure (database).
See DDS manual for details.
Saving Data to the Memory (For version with memory only)
Table of contents
Other Adash Measuring Instrument manuals

Adash
Adash 4300 - VA3 User manual
Adash
Adash A3716 User manual
Adash
Adash A3900 II User manual
Adash
Adash A4910 Lubri User manual
Adash
Adash A4900 - Vibrio M User manual

Adash
Adash 4900 Vibrio III User manual

Adash
Adash 4300 VA3Pro User manual
Adash
Adash 4400 VA4 Pro User manual

Adash
Adash A4900 - Vibrio M User manual
Adash
Adash 4300 - VA3 User manual
