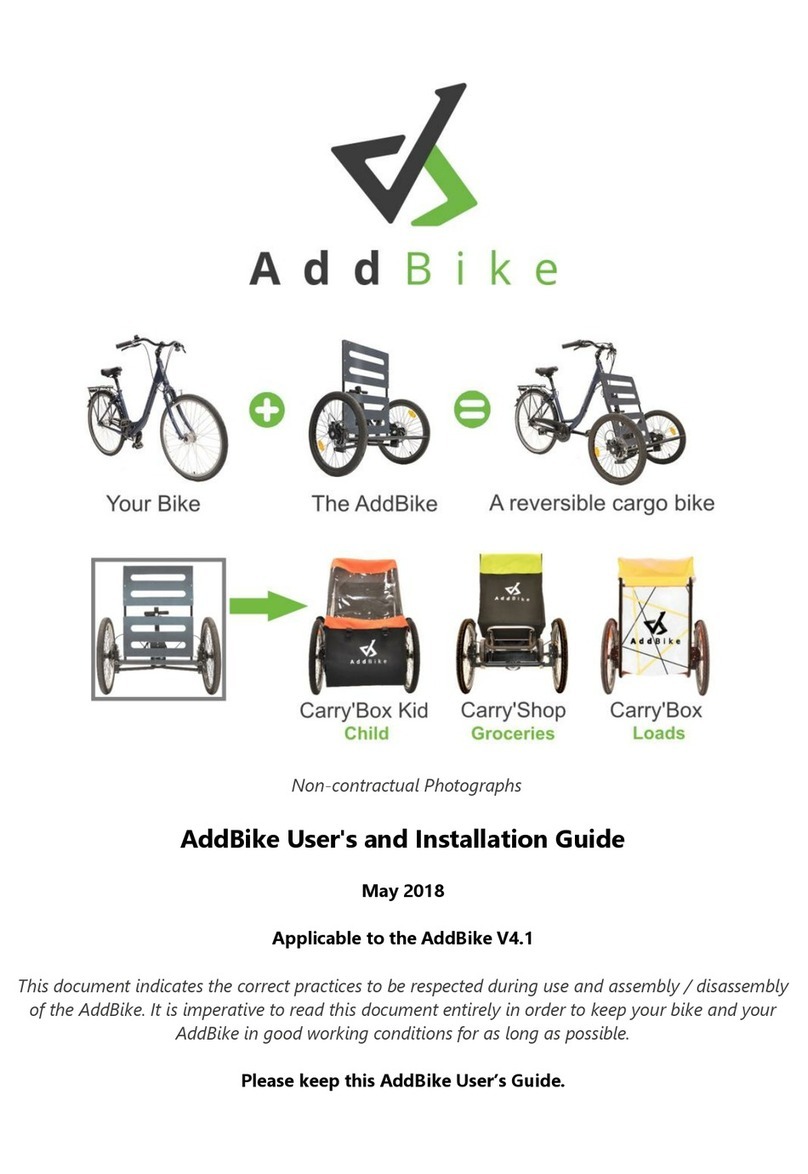
AddBike Carry 'Box User manual

User's and Installation Guide of the AddBike+
July 2020
This document indicates the correct practices to be respected during use and assembly /
disassembly of the AddBike. It is imperative to read this document entirely in order to
keep your bike and your AddBike in good working condition.
Please keep this AddBike User’s Guide.

2
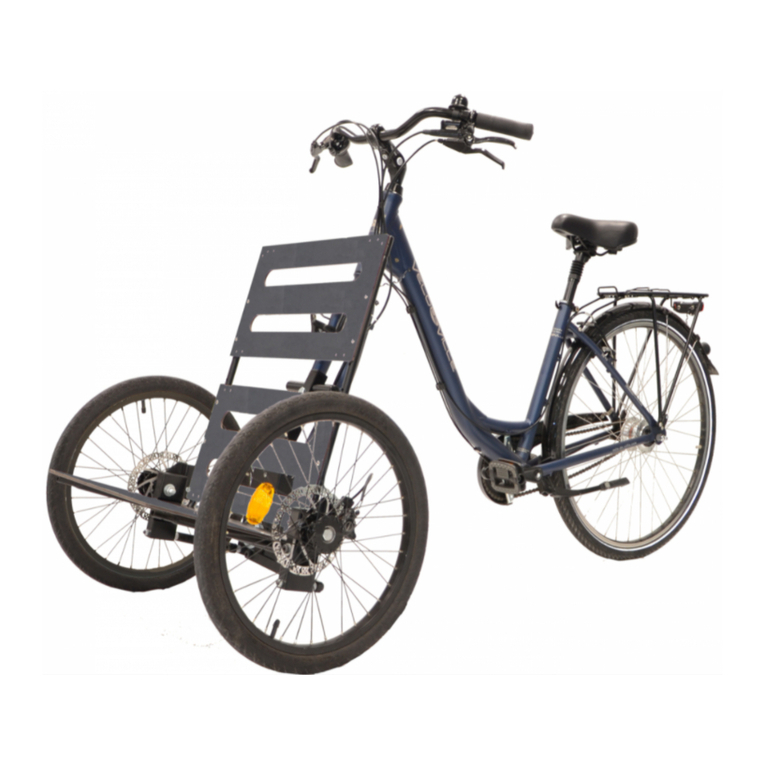
The AddBike is an innovative solution that transforms your bike into a practical, easy to
handle cargo bike. It consists of a two-wheeled base that allows the transportation of
loads and the installation of modules specifically designed for the AddBike. These
modules give your bike the capacity to carry bulkier loads, groceries or a child.
Welcome to the family of
AddBikers!
No more need to invest in expensive and bulky cargo bikes. With the AddBike you can
quickly and easily turn your own bike into a compact cargo bike!
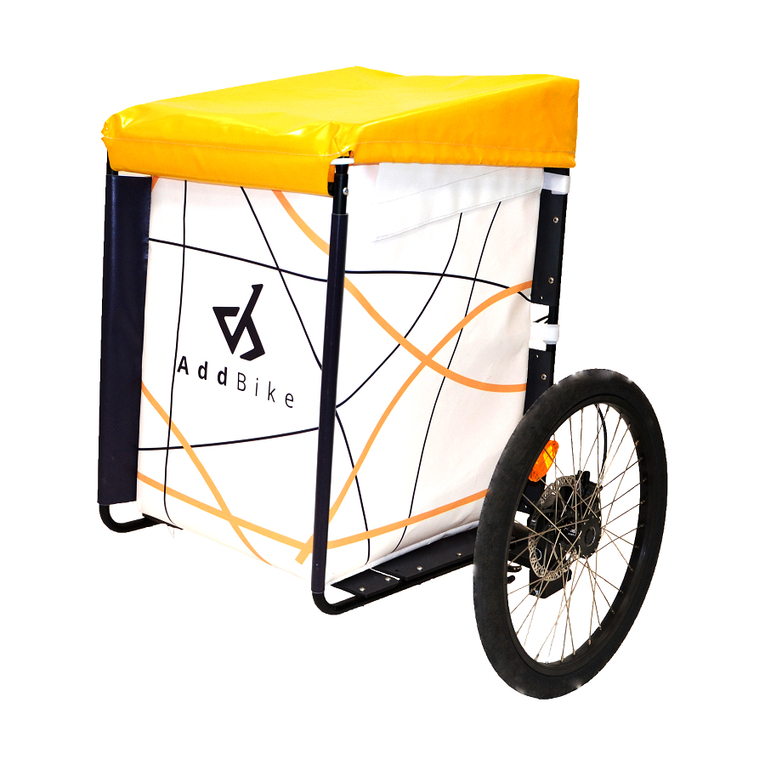
This version of the AddBike is compatible with the following modules:
• Carry
‘
Box
• Carry ‘Box Kid
• Carry
‘
Dog
Maximum capacities
Load
35 kg
Dimensions (lxLxH in cm)
Overall AddBike
71 x 59 x 83
Base volume available
45 x 32 x 60

3
Table of contents
Table of contents.................................................................................................................. 3
1. General warning......................................................................................................... 4
2. Lexicon of the AddBike.............................................................................................. 6
3. Advice for using the AddBike safely ......................................................................11
4. Contents of the AddBike parcel: ............................................................................13
The box containing the AddBike comprises:...................................................................13
5. Assembly of the AddBike ........................................................................................14
6. Installing the AddBike on your bike....................................................................... 22
A. Prepare your bike for installing the AddBike...............................................22
A. Step 1: Remove the front wheel from your bike .........................................23
7. Security check before use....................................................................................... 39
8. Good maintenance of your AddBike .....................................................................42
A. Periodical maintenance..................................................................................42
B. Brakes...............................................................................................................44
9. Using the Addbike....................................................................................................46
A. First use ............................................................................................................46
B. Using the AddBike to transport a load .........................................................46
C. Riding the AddBike with loads....................................................................... 48
D. Using the braking system...............................................................................49
E. Using the tilting wheels system..................................................................... 50
F. Adjusting the position of the wheels ............................................................51
10. Uninstalling the AddBike.........................................................................................54
Restoring the bike .........................................................................................................57
11. Cleaning and storage...............................................................................................58
12. Guarantee Charter...................................................................................................58
13. Assistance in case of problems ..............................................................................58

4
1. General warning
Symbols and warnings:
WARNING!
This symbol indicates a hazard that could result in serious injury if the
instructions are not followed.
CAUTIONING!
This symbol indicates a hazard that may result in minor injury if the instructions
are not followed.
ADVICE!
This symbol indicates advice for the use or maintenance of your AddBike.
The AddBike is compatible with the majority of bicycles; however, it is necessary to be
vigilant about the condition of the host bike. The latter must be in perfect working condition,
equipped with efficient rear brakes and approved in accordance to ISO 4210 norms. The
AddBike can lead to weakening of the steering pivot in case of misuse and non-compliance
with the instructions.
Read and follow the instructions in this guide: Read the entire guide carefully and follow the
instructions to use the AddBike safely. If you do not understand certain indications, please
contact your AddBike dealer or contact AddBike directly at support@addbike.fr. Please keep
this manual for future reference. It is also important to take into account the directions for use
of the bicycle receiving the AddBike.
The AddBike Company disclaims all liability in case of non-compliance with the instructions in
this AddBike User's and Installation Guide and in case of modification of the product by the
user.
Generic Risks
Like the use of any conventional bike, the use of an AddBike carries risks of injury and damage
(mainly by falling). By using the AddBike, you accept full responsibility for these risks. You need

5
to know and apply the rules and road traffic regulations to ride safely and in full compliance
with such rules at the risk of exposure to fines or other legal infractions.
Using the AddBike
The AddBike is designed to be used in an urban context on asphalt surfaces. Do not try to go
down stairs with it, nor jump over or go off sidewalks higher than 5 cm. Do not use the AddBike
on rocky surfaces or any other surface with bumps or holes. In general, try to avoid any obstacle
in your way that might enter in contact with elements of the AddBike and could damage it.
The AddBike is intended for use in daylight on public roads and bike paths. If you choose to use
your AddBike in the evening, at night or in other circumstances of low visibility, you must use
appropriate lighting as stipulated by pertinent traffic laws.
The AddBike is not designed for intensive use in sand or salt-water environments.
The AddBike is not designed to be stored outdoors for prolonged periods. It must be stored in
a dry and temperate place away from corrosive products.
Having a regular maintenance of the AddBike makes it possible to preserve its original qualities
of use and safety.
It is forbidden to use the AddBike on the following bikes:
• Bicycles with a wheel diameter greater than 29 inches;
• Bicycles with only one fork arm;
• Bicycles with road racing handlebars;
• Carbon bikes;
• Children’s bicycles;
• Fat Bikes;
• Speed Bikes (Electric bikes with a speed above 25 km /h).
Specific adaptation kits (not included) are offered by AddBike in order to
install the AddBike on the following types of bicycles:
• Bicycles with a front wheel diameter of 16 to 20 inches;
• Bicycles with front wheel axel hubs of 12 to 15 mm in diameter
Ask your dealer or contact AddBike directly.

6
2. Lexicon of the AddBike
Figure 1: Lexicon of the AddBike
Gripping
mechanism
Brake
Fixing plaque
Tilting wheels blocking
system
Tilting
wheels
handle
Backrest
Mudguard
Wheel
R
L

7
Figure 2 - Zoom on the fixing plaque of the AddBike
Front flange
Rear flange
Thumbwheel
Quick release
axle
Tilting wheels
plaque
Tilting wheels
caliper
Hydraulic
distributor
Flange nut

8
Figure 3 – Brake handle of the AddBike
Figure 4 – Tilting wheels’ system locking
shifter
Screw hardware may be replaced with fast tightening nuts, (visible on figure 3), included in the
bag of this user’s manual.
Brake lever
Parking brake
button
Bold and
screw
hardware
Brake
handle
Fast tightening nut
Fast tightening
nut
Tilting
wheels’
handle
Bold and
screw
hardware
Handle’s
lever

9
Figure 5 - Zoom on the braking system and wheel
Note: Eccentric clamps are not shown on the figure above (Cf. Figure 7) to allow for a clear
reading of the elements fixating the wheels and brake calipers. For the position of eccentric
clamps see next figure (Cf. Figure 6).
Wheel axle
Brake
caliper
Nut fastening the
brake caliper
Long spacer
Brake disc
Stub axle
Nut
Short spacer
Brake caliper bracket
Locking knob

10
Figure 6 - Zoom on eccentric clamps
Figure 7 - Base of the AddBike
Brake caliper
Caliper bracket
Eccentric
clamps
Backrest
Seat
Base

11
3. Advice for using the AddBike safely
Wearing a helmet
Always wear a helmet when using the AddBike to protect your head in case of falling.
Portez toujours un casque lorsque vous utilisez l’AddBike pour protéger votre
tête en cas de chute.
Utilization of the AddBike for parking and/or loading and unloading
To ensure safe loading and unloading, we recommend that you use the parking brake on the
AddBike (located on its brake lever) to stabilize the bike. See explanations in chapter 9.D.
Using the parking brake is also recommended when parking your bike for extended periods.
In addition, for enhanced security, you may activate the tilting wheels lock to avoid a lateral
inclination of the AddBike using the tilting wheels handle reserved for this purpose. See
explanations in chapter 9.E.
Check that the parking brake is deactivated, and that the tilting wheels lock is off before riding
with your bicycle.
Never ride with the tilting wheels locked.
Lighting
It is expressly forbidden by traffic regulations to ride at night or in bad weather without lighting.
You must be visible to other road users:
• Put on reflective and clear clothing, turn on the front and back lighting of your bike.
• Lighting and retro-reflector must be present at the rear and front of your bike.
In case of no compatibility between the AddBike and the lightning device
of your bike, we advise you to add a front lightning device adapted to the
new set (on the handlebar for example).
AddBike offers an option of lights to be positioned on each mudguard. Ask
your dealer or contact AddBike directly.

12
Drive in a way that is adapted to the environment
It is important to adapt the way you drive according to the conditions of use (weight and volume
of the transported load, wind, rain, brightness, etc.).
In case of strong wind, the weight on the AddBike might lead you to lose balance or to make
sudden turns: it is important to take this element into account when riding.
When using your bike in rain or in wet surface conditions, take precautions since the braking
distance may increase and the grip may decrease. Also, the braking symmetry between the two
wheels can be altered if one of the brake discs is wetter than the other. In this case, the discs
should be cleaned with a dry cloth and a suitable degreaser.
The AddBike is equipped with hydraulic disc brakes. When they are under a lot
of pressure, calipers, discs and pads become extremely hot. In case of contact,
a risk of burn is possible. Always wait for the brake to cooldown before
maintenance.
Always control your speed, avoid gaps
Except to indicate direction changes, always hold the handlebar firmly with both hands to be
able to control your bike as much as possible (depending on road deformations, movements
in the handlebar may change your course).
Respect the safety and the rules of the road
The use of the AddBike is subject to traffic regulations (respect for signs, direction of traffic,
prohibition to use sidewalks, etc.). Respect the traffic laws of the country of use, particularly
concerning lightning and warning sounds.
Adjusting and checking the your bike
Always remember to control the rest of the bike and make your usual adjustments for
maximum driving comfort.
Inappropriate use of the AddBike may lead to weakening of the steering pivot. Follow carefully
the instructions in this "AddBike User's and Installation Guide" and check the condition of your
bike regularly.

13
4. Contents of the AddBike parcel:
The box containing the AddBike comprises:
• AddBike chassis
Figure 8 - AddBike chassis
• Wheels and mudguards
Figure 9 – AddBike wheels and mudguards
• Flange system
Figure 10 – Flange system
• A bag containing :
o This V5.3 User and Installation Guide;
o The brakes’instructions “Tektro Auriga Twin”;
o Two protection stickers ;
o The AddBike cable clamp;
Garde-
boue
gauche
Garde-
boue droit
Garde-
boue droit

14
o 3 fast tightening nuts: 2 for the brake handle and 1 for the pendulum lock handle.
5. Assembly of the AddBike
You will find a video on the assembly of the AddBike on our website: www.add-bike.com or on
our YouTube channel (channel name AddBike).
Your AddBike comes partially disassembled, so you will need to assemble the different parts
before mounting your AddBike on your bike. This action is to be performed only once in the
entire life of the product, except if you wish to transport it in its original box. For the assembly
of your AddBike, you will need the following tools:
Figure 11- Tools needed
8mm/17mm/19mm
8mm/17mm/19mm
3mm/4mm/5mm

15
Take out all the contents of the box and close it;
To facilitate assembling, place the AddBike without its wheels on the box, in the position
shown below (Cf. Figure 12) ;
Figure 12 - The AddBike without wheel, on the box
It is easier to assemble the mudguards and the brake calipers before installing the wheels on
the AddBike chassis.
• Each mudguard and caliper is to be fixed to a caliper bracket (Cf. Figure 5) as shown below.
Unscrew bolds and nuts from the mudguards and then place and fix the mudguards on
the brake caliper using the same bolts and nuts, with the screw head oriented towards the
mudguards’ support as shown in figure. The screw head, mudguard tube arms and
washers must be located on the inside of the AddBike as shown in figure 13. Please place
the washers between the mudguard tube arms and the bracket.
Figure 13 - Fixing the mudguard to the brake caliper

16
Now you will be able to mount the wheels.
Be very careful to mount the wheels on the correct side by referring to the
letter on the hub: L for Left and R for Right.
To do so:
• Remove both the nut and the short spacer from each wheel axle, leaving the long spacer
and the wheel axle in place (Cf. Figure 5) ;
• Mount the wheels on the stub axles partially withdrawing the wheel axle while keeping the
long spacer, place the brake disc on the caliper, push the wheel axle and replace the short
spacer and nut;
• The elements must end up in the following order: wheel axle, wheel, long spacer, AddBike
stub axle, short spacer and nut (Cf. Figure 14).
Figure 14 - Mounting the right wheel
• Tighten the nuts on the wheels’axle using the open-end wrench size 19 and the socket-
end wrench size 19 hub side (external) in order to hold the screw head;

17
It is normal that when tightening the threaded part of the wheel axle does
not come out from the Nylstop nut.
• To install the brake caliper, first dismantle the bolt elements and then reassemble them as
shown in Figure 15. The brake cable must go through both mudguards’supports as shown
in figure; the brake cable must have a loose sinusoidal form (Cf. Figure 16);
Figure 15 - Fixing the left caliper on its caliper bracket
Each one of the two brake calipers (left and right) are already positioned on
the appropriate side of the AddBike thanks to the fixing of the whole set of
on the fixing plaque of the AddBike.

18
Figure 16 - Sinusoidal form of the brake cables
• Adjust the position of the brake calipers. To do so, activate the parking brake in order to
block the calipers on the discs (see chapter 9.D). Then tighten the screws for each brake
caliper (Cf. Figure 22) ;
Be careful to adjust your brakes before the very first use.

19
Figure 17 - Adjusting the position of the brake calipers
At first, the wheels must be positioned as rearward as possible (position without loads (Cf.
Figure 18 et 19). Keep the brake in parking position. Loosen the two eccentric levers and the
locking knob as shown in Figure 18 and slide the wheel backwards by grasping it by the hub.
Once the wheel is in position, tighten the eccentric levers and locking knob. (Cf. Figure 19). Do
the same with the other wheel for both wheels to be positioned at the same level. See chapter
9.F.
Figure 18 : Loosened levers and clamping wheel on the right wheel

20
Figure 19 - First positioning of the wheels (here the right wheel)
Figure 20 - Positioning of the eccentric clamps – view from above
When tightening the eccentric clamps for wheel locking, make sure to
position the clamps parallel to the wheels.It is important that the
eccentric clamps are not positioned askew in order to avoid interference
with the leaning movement of the AddBike (Cf. Figure 120).
This manual suits for next models
3
Table of contents
Other AddBike Bicycle Accessories manuals

AddBike
AddBike AddBike+ Instruction sheet

AddBike
AddBike Carry'Box Kid User manual

AddBike
AddBike Carry'Dog User manual

AddBike
AddBike Carry'Box Module Manual

AddBike
AddBike AddBike+ User manual

AddBike
AddBike AddBike+ User manual

AddBike
AddBike V4.1 Manual

AddBike
AddBike Carry'Box Module User manual

AddBike
AddBike Carry'Box Module Manual

AddBike
AddBike AddBike+ User manual