AddBike Carry'Box Module Manual

Non-contractual Photographs
User's and Installation Guide
Carry’Box Module
November 2019
Applicable to the AddBike and AddBike+
This document indicates the correct practices to be respected during use and assembly /
disassembly of the module Carry’Box. It is imperative to read this document entirely in order to
keep your bike, your AddBike, and your Carry’Box in good working conditions for as long as
possible.
Please keep this document.
Child
Groceries
Loads
Your Bike
The AddBike
A reversible cargo bike
2VERSION V4.1
The AddBike is an innovative solution that transforms your bike into a practical, easy to
handle cargo bike. It consists of a two-wheeled base that allows the transportation of
loads and the installation of modules specifically designed for the AddBike. These
modules give your bike the capacity to carry bulkier loads, groceries or a child.
Welcome to the big family of AddBikers!!
There is no need to invest in expensive and large cargo bicycles. With the AddBike you
can quickly and easily turn your own bike into a compact cargo bike.
This document concerns only the module Carry’Box and is complementary to the
“AddBike User's and Installation Guide”.
This module is compatible with the AddBike and the AddBike+
Maximum capacities
Carry’Box
35 kg
Dimensions (LxWxH in cm)
Carry’Box useful volume
40*45*62 –110 L
Size of the Addbike + Carry’Box
68*70*90

VERSION V4.1 3
Table of contents
1. General warning.......................................................................................................................................4
2. Lexicon of the Carry’Box module......................................................................................................5
3. Content of the Carry’Box parcel........................................................................................................6
4. Installing the Carry’Box.........................................................................................................................6
5. Using the Carry’Box module............................................................................................................14
6. Uninstalling the Carry’Box module...............................................................................................14
7. Cleaning....................................................................................................................................................15
8. Guarantee Charter................................................................................................................................15
9. Assistance in case of problem ........................................................................................................15
4VERSION V4.1
1. General warning
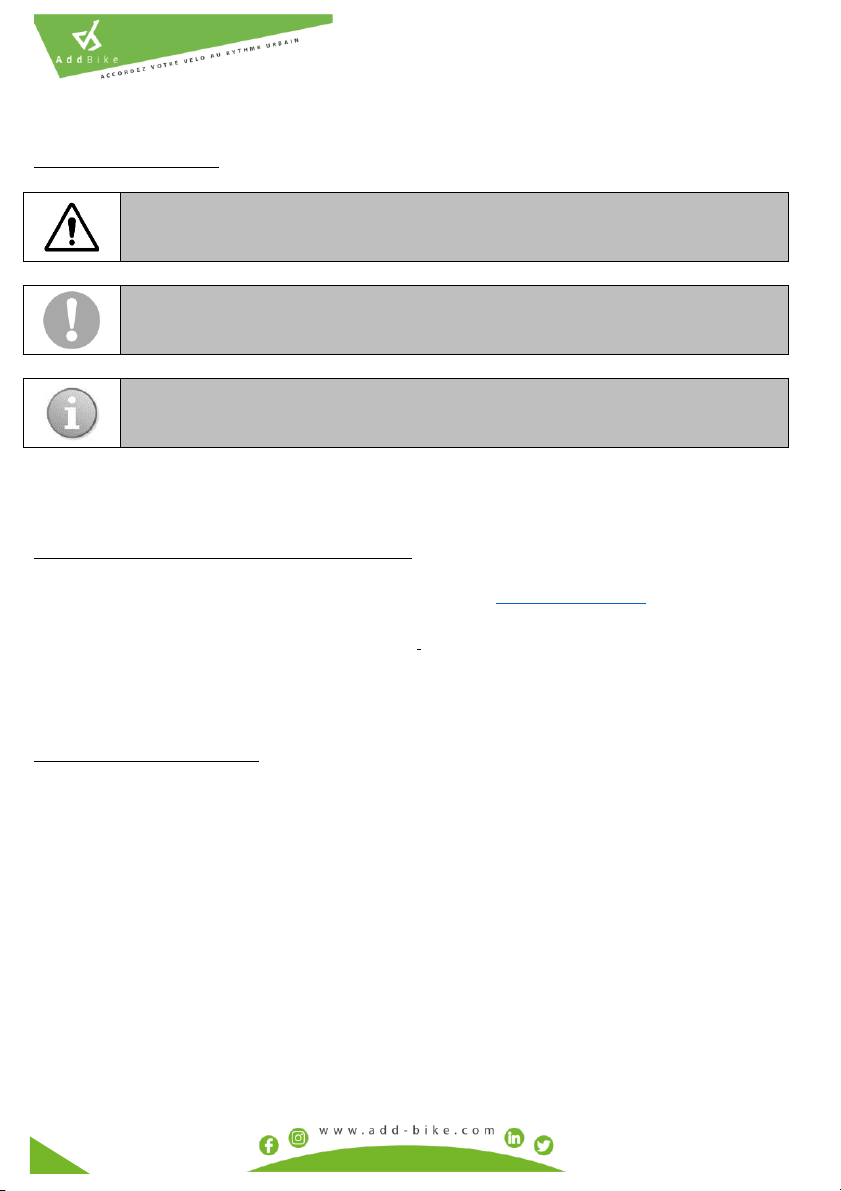
Symbols and warnings:
WARNING! This symbol indicates a hazard that could result in serious injury if
the instructions are not followed.
CAUTIONING!
This symbol indicates a hazard that may result in minor injury if the instructions
are not followed
ADVICE! This symbol indicates advice for the use or maintenance of your
AddBike.
Before installing this module on your AddBike, make sure you have read and understood the »
AddBike User's and Installation Guide ».
Read and follow the instructions in this guide: Read the entire guide carefully and follow the
instructions to use the Carry’Box module safely. If you do not understand certain indications, please
contact your AddBike dealer or contact AddBike directly at: support@addbike.fr. Please keep this
manual for future reference. It is also important to take into account the directions for use of the
AddBike and that of the bike receiving the AddBike.
The AddBike Company disclaims all liability in case of non-compliance with the instructions in this
User's and Installation Guide of the Module Carry’Box and in case of modification of the product by
the user.
Using the Carry’Box module
The Carry’Box module is designed to be used on the AddBike produced by our company. Do not
try to install or use this module on other cargo bikes or on a classic bike.
The Carry’Box module is not designed to be stored outdoors for prolonged periods. It must be
stored in a dry and temperate place away from corrosive products.
VERSION V4.1 5
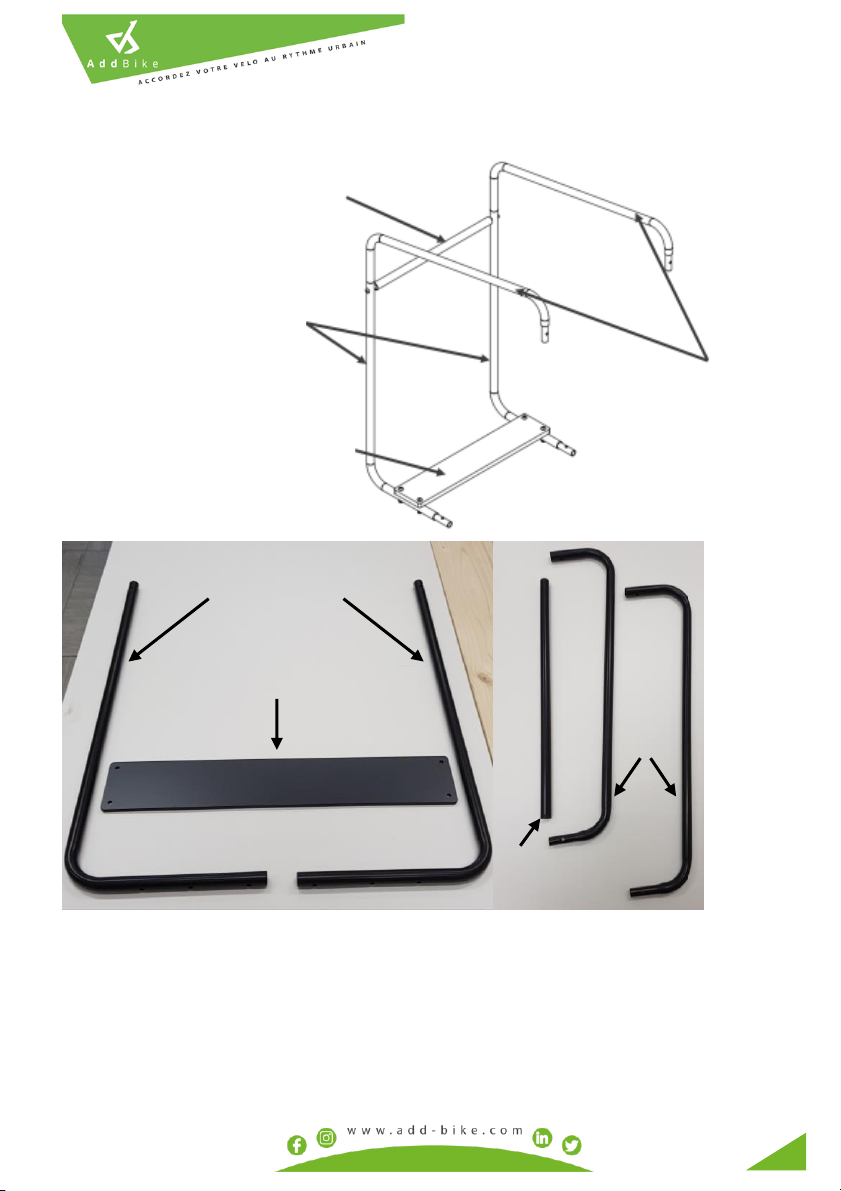
2. Lexicon of the Carry’Box module
Figure 1 –Lexicon of the Carry'Box module
Transerve tube
Upper tubes
Front
tubes
Compact slat
Front tubes
Compact slat
Transverse
tube
Upper
tubes

6VERSION V4.1
3. Content of the Carry’Box parcel
The Carry’Box is delivered in a parcel containing:
•A compact slat ;
•The textile part of the module (white bin);
•The textile lid of the module (yellow);
•2 upper tubes ;
•2 front tubes ;
•1 transverse tube ;
•2 screws BHC M5x30 ;
•4 screws BHC M5x30 with the 4 corresponding nuts;
•This manual for the Carry’Box V4.1. module
Before assembling the Carry’Box module on your bike, please verify the following:
•Check that the product is in good general condition (no scratches or twisted pieces).
4. Installing the Carry’Box
The Carry’Box module must be installed and uninstalled as explained. Improper
installation can lead to accidents that could cause serious injury.
We advise you to add the Carry’Box module to your AddBike only when the
latter is properly installed on your bike so as to make it easier to assembly
For the installation you will need an Allen wrench size 3, and an open-end wrench 8 (Cf. Figure 2).
Open-end wrench (size 8) Allen wrench (size 3)
Figure 2 –Tools needed
VERSION V4.1 7
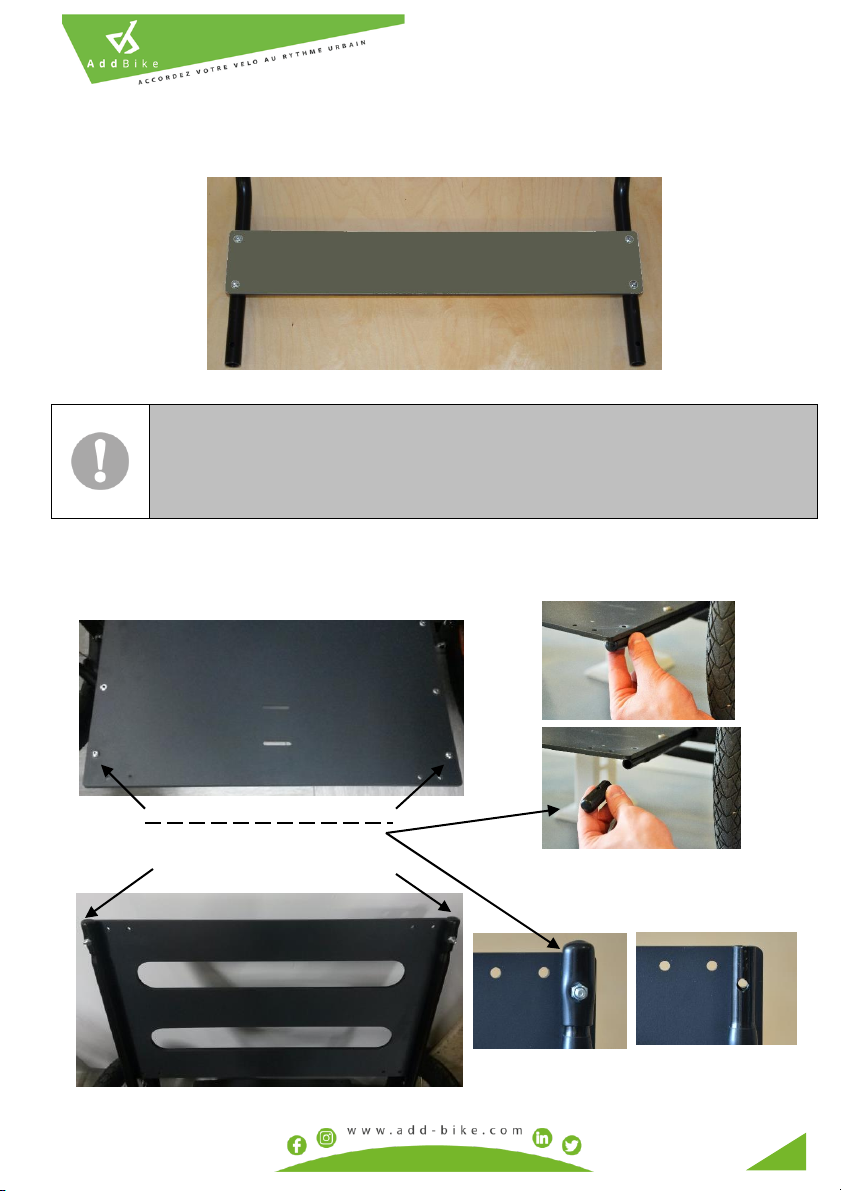
•Screw the provided compact slat to the lower front tubes with the 4 screws BHC M5x30 and
corresponding nuts. You should end up with a set as shown in figure 1;
Figure 3 –Fixing the compact slat to the lower tubes
•Remove the screws, nuts and plastic cap from both sides of the compact plate of the
AddBike’s seat. Also remove the screws, nuts and plastic cap from both sides of the highest
compact plate of the AddBike’s backrest;
Figure 4 –Screws and plastic caps to be removed
During this step, if your AddBike isn't equipped with 4 plastic caps at the 4 bar
ends of the backrest and base structure (at the level of the connection sleeve),
the only preparation to install the bars is to remove the screws at each bar end
(screw without nut). Once the bars are inserted as shown below, tighten the
screws (screw without nut).
Screws and nuts to be removed
Plastic caps to be removed
Screws and nuts to be removed

8VERSION V4.1
•Insert the front tubes into the holes of the seat and line up the screw holes of both parts;
Figure 5 - Insertion of bottom tubes into the seat
•Put back the screws and nuts previously removed from the seat (but not the plastic
caps) making them pass through the holes on the front tubes;
Figure 6 –Screws and nuts to be put back on the seat
Make sure to keep in a safe place the 4 plastic caps removed during the previous
step.

VERSION V4.1 9
•Install the textile :
oThe front tubes slip on the black textile sheaths
oThe rear of the textile is positioned simply in front of the backrest
Figure 7 - Insertion of the textile

10 VERSION V4.1
•At the back of the module, attach the six Velcro straps of the textile on the Addbike’s backrest;
Tighten the fabric on each side, centering very well the textile on the backrest
Figure 8 –Fastening the back of the textile

VERSION V4.1 11
•Open the upper flaps on both sides of the module by pulling on the Velcro strips;
Figure 9 –Textile strip to undo
•Insert the upper tubes in the backrest’s holes and, simultaneously, on those of the front tubes.
If the different sections of the tube are not lined up, it means that you have placed the upper
tube in the wrong direction;
Figure 10 - Insertion of upper tubes in the backrest
12 VERSION V4.1
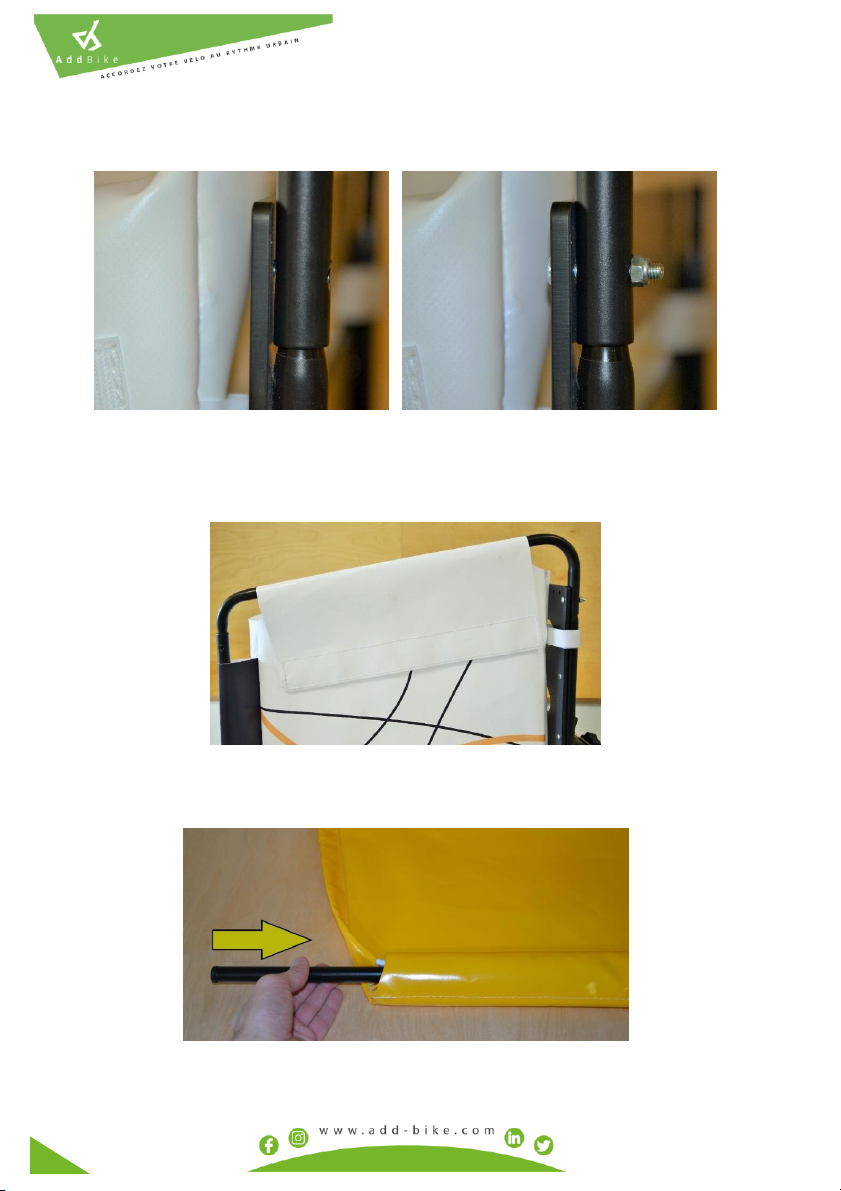
•Put back on the backrest the screws and nuts previously removed making them pass through
the holes of the upper tubes;
Figure 11 –Screws to be put back in the backrest
•Fold the textile over the upper tubes and fasten it on the Velcro strap provided for this
purpose;
Figure 12 –Holding the textile from the top
•Slide the crossbar into the sheath of the textile lid;
Figure 13 –Insertion of the crossbar into the sheath of the textile lid
VERSION V4.1 13
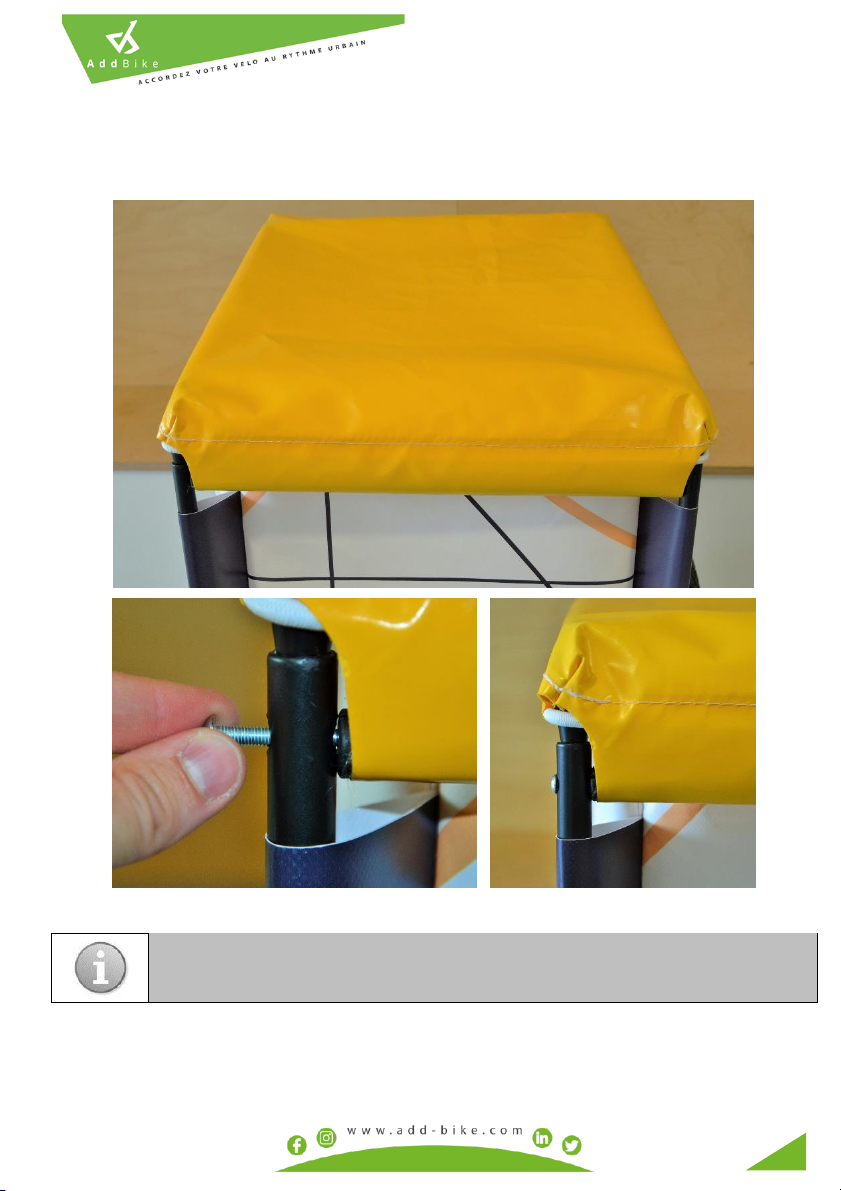
•Put the textile lid on the top of the module. Place the crossbar between the two holes
in the front of the module between the upper tubes and the front tubes, and attach it
to the rest of the structure using the supplied M5x30 BHC screws .
Figure 14 –Placing the crossbar
The lid is placed and adjusted using its drawstring. If you want to use the
Carry’Box without its lid, do not slide the crossbar through the whole when
installing the latter on the module.

14 VERSION V4.1
5. Using the Carry’Box module
Rules related to loading the Carry’Box
When loading the Carry’Box, you must be extremely careful for the load not to exceed the volume
provided for this purpose, i.e. the capacities defined by the module's textile. Make sure that:
•The load is well stalled in the Carry’Box;
•The load does not exceed the width and height of the Carry’Box;
•The transported load does not interfere with the movement of the fork, wheels and
handlebars.
The authorized weight in the Carry'Box is 35 kg.
Do not transport sharp-edged objects in the Carry'Box as the fabric may be
damaged.
When carrying a load in the Carry'Box, check that the load is properly settled
and leaning on the backrest of the Base to avoid any movement of the load
while riding for this may lead to loss of control.
Do not transport children in the Carry’Box.
Riding the AddBike with load
Please read chapter 9.C of the “AddBike User's and Installation Guide»
6. Uninstalling the Carry’Box module
•Take out the crossbar by removing the screws attaching it;
•Detach the Velcros which hold the textile in place and make them pass on the other side of
the upper tubes in order to release them.
•Remove the screws and nuts attaching the upper tubes to the backrest and take away the
upper tubes from the remaining structure;
•Take out the textile by sliding it along the sheath;
•Remove the screws and nuts attaching the bottom tubes to the seat and take away the
bottom tubes;
•Put back the protective plastic caps, screws and nuts to their position on the seat and
backrest.
VERSION V4.1 15
7. Cleaning
Your Carry’Box may be cleaned simply with a sponge or with plain water.
You may remove the textile part to facilitate cleaning.
8. Guarantee Charter
The guarantee of the module Carry’Box extends to two years after purchase. The product must be
used in conformity with its Notice and must be regularly maintained. Any damage which results
from non-compliant use, from violence, from insufficient maintenance or from normal wear is
excluded from the Guarantee.
Achieving the wear limit of different parts depends heavily on the style and intensity of use
adopted by each user, maintenance and service, as well as the following factors:
•Mileage;
•The transported load;
•The way you ride: sudden accelerations and braking, winding paths covered at high
speed;
•Weather and environmental factors: ultraviolet, moisture, dirt, temperature, air salinity,
contact with salt water, road salting;
•Regular maintenance: intervals, maintenance products used, maintenance and overhaul
operations.
9. Assistance in case of problem
If a given part of the Carry’Box does not function correctly, please contact the AddBike Company
(support@addbike.fr) or your dealer. We will do our best to help you.
In our website, www.add-bike.com, you will find a list of dealers who are trained for installation
and maintenance of AddBike products.
If your AddBike is equipped with stainless steel connection sleeves, loosen the
screw (without nut), remove the bars, tighten back the screws (without nut and
plastic caps).

LEGAL NOTICES
SAS AddBike –add-bike.com
Head office address:
12 avenue Joannes Masset 69009 LYON, FRANCE
Postal address :
61 cours de la République 69100 VILLEURBANNE, FRANCE
You may order additional user’s guides from AddBike. This user’s guide has been drafted with
the utmost care. If you have any proposal to improve the clarity of this document we would
appreciate you let us know so that we can make the appropriate modifications.
Other manuals for Carry'Box Module
2
Table of contents
Other AddBike Bicycle Accessories manuals

AddBike
AddBike U-Cargo User manual

AddBike
AddBike AddBike+ User manual

AddBike
AddBike Carry'Box Kid User manual

AddBike
AddBike Carry 'Box User manual

AddBike
AddBike Carry'Box Kid Manual

AddBike
AddBike Carry'Dog User manual

AddBike
AddBike AddBike+ User manual

AddBike
AddBike V4.1 Manual

AddBike
AddBike Carry'Box Module User manual

AddBike
AddBike AddBike+ Manual


