manuals.online logo
Brands
  1. Home
  2. •
  3. Brands
  4. •
  5. ADT
  6. •
  7. Security System
  8. •
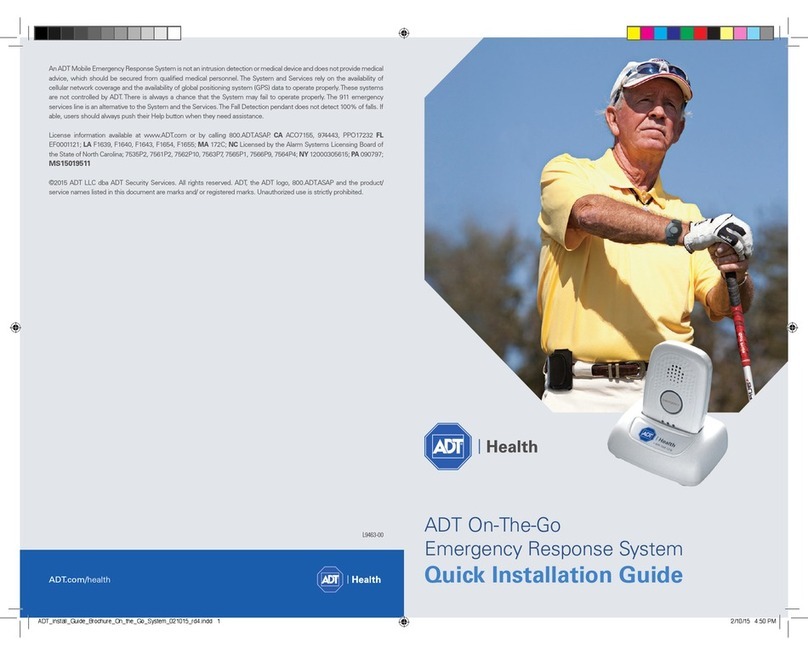
  9. ADT On-The-Go Emergency Response System User manual

ADT On-The-Go Emergency Response System User manual

1
ADT MEDICAL ALERT
On-The-Go
Personal Emergency
Response System
User guide
2
Thank you for choosing ADT
On-The-Go System
The ADT On-The-Go personal emergency
response system is comprised of a digital
cellular mobile device with a wireless
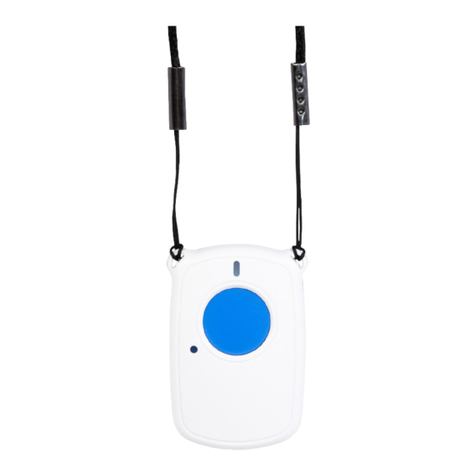
emergency help button (wristband, neck
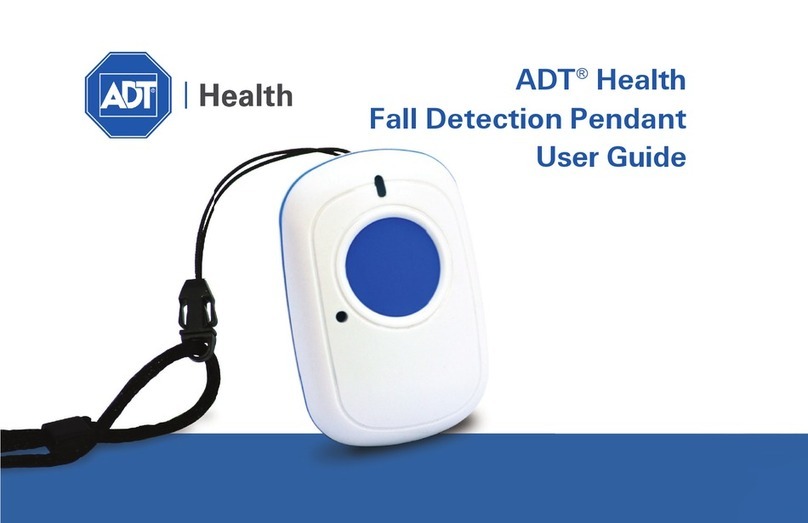
pendant, optional Fall Detection pendant*,
or optional wall mount button). The on-
the-go system has a cellular connection
and does not require a landline.
If you have any questions during the setup
process, please call technical support.
For assistance call
(800)568-1216 and select option 1
2
*Fall Detection pendant does not detect 100% of falls.
33
What’s in the box
1 Mobile device
2 Neck pendant or
wristband
3 Cradle charger
4 Waterproof wall mount
button (optional)
5 Fall Detection pendant
(optional)
The optional Fall Detection
pendant and wall mount
button are available at an
additional cost. The Fall
Detection pendant has a
separate user guide.
1
2
2
3
4
4
5
4
On-the-go device features
On/O button
Speaker
LED indicator
Emergency
help button
Test button
Microphone
Pressure sensor
5
Waterproof help buttons
*Fall Detection pendant does not detect 100% of falls.
LED light
Emergency help button
LED light
Technical support
use only
Wrist button Neck pendant Fall Detection pendant*
(optional accessory)
Wall mount button
(optional accessory)
LED light
6
Setting up your on-the-go system
Please follow these simple steps to get the system set up and tested.
Select a location to connect
the cradle charger
STEP ONE
ƼWe recommend you place your on-the-go device in
your bedroom or any other place around your home
where it can be easily accessbile.
ƼPlace your on-the-go device's cradle charger near
an electrical outlet.
ƼPlug the AC adaptor into an electrical outlet that
is not controlled by a light switch. This will help to
avoid accidentally turning it o.
ƼTo prevent electrical shock, please keep the system
away from wet locations.
Charge your on-the-go device
STEP TWO
ƼThe LED indicator around the emergency button
will illuminate red, indicating that the device still
needs charging.
ƼWhen the device is fully charged, the LED indicator
will change to green.
ƼIt will take up to 3 hours for the device to be fully
charged.
Charge your on-the-go device every night in
the cradle charger to ensure a fully charged
battery during waking hours.
7
Setting up your on-the-go system
Please follow these simple steps to get the system set up and tested.
Conrm your account and test your system
for the rst time with an ADT agent to
ensure your system is working properly.
Please call (800) 568-1216, option 2.
STEP THREE
1. Press and hold the TEST button on the on-the-go device (the
button on the side with the letter "T"). (Please refer to Figure 1).
ƼWhen the test mode is activated the LED ring turns yellow. The
device will announce “User auto test. Please press your emergency
button or pendant.”
2. Press the neck pendant, wristband, OR press and hold the
emergency help button on the mobile device for 2 seconds.
ƼThe on-the-go device will announce “test call sent to emergency
response center.”
ƼIf your test was successful, you will hear “thank you for testing
your device” from the on-the-go device.
Call ADT to conrm your
account and test your system
Figure 1
Emergency
button
TEST button
For monthly testing, you can use the test button on your
on-the-go device to conduct a test without speaking to
an emergency response operator by following these steps:
8
Setting up your on-the-go system
Please follow these simple steps to get the system set up and tested.
To turn ON your on-the-go device:
ƼOption 1: Press the ON/OFF button on the
side of the on-the-go device and hold for
approximately 3 seconds. (Please refer to
Figure 2)
ƼOption 2: Simply place the on-the-go device
in the cradle charger, assuming the cradle
charger is plugged in.
ƼIt takes about 30-60 seconds for the on-
the-go device to register with the cellular
network. All the lights will turn on and the
green LED light on the power button will start
blinking.
ƼWhen the on-the-go device is setup correctly
and connects to the cellular network, it will
announce "system ready."
ƼPress and hold the power button for about 3
seconds. The device will emit a beep and the
power button LED no longer blinks and all
LEDs remain o.
To turn OFF your on-the-go device:
On/O button
Figure 2
9
Event Voice prompt
On the-go device is
powered on
“System ready”
The emergency call is initiated “Call in progress."
The battery is low “Your battery is low. Please
connect to a power source."
The on-the-go device provides voice announcements.
Select announcements are listed below:
Note: There may be situations where the
voice prompts don't complete the entire
phrase because another event occurs. In this
instance, the latter voice prompt event will
cut in and the current voice prompt may be
terminated prematurely.
Radio frequency
All devices frequency transmission= 433 MHz
On-the-go device
Voice guidance
10
Event Voice prompt Notes
On-the-go device
receives a fall signal
“Fall detected. Please press and
hold button to cancel.”
This will occur for about 20 seconds and will allow
you time to cancel the alarm. During this time,
you may press and hold the help button for 5
seconds to cancel the signal.
Fall alarm is cancelled “Alarm cancelled." Alarm has been cancelled.
20-second window for
cancellation has ended
“Fall detected. Contacting
emergency response center"
The signal will then be sent to the monitoring
center and an operator will call your on-the-go
device to assess your situation and dispatch the
appropriate help to you.
Fall Detection with on-the-go device
If your system includes the Fall Detection pendant, your on-the-go
device will have voice announcements. Select announcements are
listed below:
Voice guidance
(Optional
Fall Detection
pendant)
11
On-the-go device light indicator on emergency button
Device Status LED indicator on emergency button
Low battery alert Blinking red LED light - you have about 2 hours of battery left
Charging Solid red LED light
Fully charged Red LED turns o and the green LED turns on, until the device is removed from the charge cradle
No cellular connection
and OFF the charger
Blinking green LED
No cellular connection
and ON the charger
The top half of the LED ring stays red while the bottom half blinks green
Power on All lights (green, yellow, red) around the emergency button will turn on for 25 seconds. Also, a
green LED light on the power button will start blinking.
Press emergency button Red LED light will illuminate and will stay on until call has ended or after 2 minutes – whichever
comes rst. If in low battery status, red LED will continue blinking.
Test mode The LED ring turns yellow when activated
12
Important safety information
• You must always carry the on-the-go device with you when going
outside of your home.
• Keep electrical cords away from heat sources
and sharp edges.
• Keep electrical cords away from areas where someone could trip
over them.
• Use caution when handling electrical cords.
• Do not use any attachment or accessory that is not intended for
use with this system.
• Test your system using the TEST button when possible, as
instructed in this user guide.
• Do not block the on-the-go device's microphone. This will aect
your ability to communicate with the emergency response center.
• The wristband, neck pendant and/or Fall Detection pendant are
designed to work at an approximate range of up to 100 feet from
the on-the-go device, depending on the size and construction of
your home.
• The on-the-go device is water resistant and can be used in the
shower. Do not submerge in water.
• The on-the-go device contains sensitive hardware, take care when
handling and avoid dropping it.
• Do not expose the on-the-go device to dust, dirt, sand or food.
• The on-the-go device's battery is designed to last up to 40 hours
after it has been charged for 3 hours.
• The on-the-go device has a GPS receiver that works best when it
has an unobstructed view to the sky.
• The neck pendant, wristbrand, Fall Detection button, wall mount
button, and on-the-go device are waterproof and can be taken
with you in the shower.
• Do not put the neck pendant, wristband, Fall Detection pendant
or wall mount button through the clothes washer or dryer. Do not
attempt to dry your button out in the microwave or oven.
• The wall mount button must be in range of up to 100 feet from the
mobile device to connect to emergency response.
• The mobile device will not transmit an emergency call if one was
activated within the last two minutes.
Warning: Strangulation and choking hazard. The lanyard has been
designed to break away when tugged. However, the user can still
suer serious personal injury or death if the cord becomes entangled
or stuck on objects.
13
Frequently asked questions
How do I call for help?
Press your neck pendant, wristband, Fall Detection
pendant or wall mount button and hold the emergency
button on your mobile device for 2 seconds.
Do I need my on-the-go device when I
leave my home?
Yes. Always take your on-the-go device with you when
leaving your home. Wear your neck pendant, Fall
Detection pendant, or wrist band at all times, both at
home and away, so help is never out of reach.
What happens if I push the button but
can't speak?
If you are unable to speak or be heard, we will assume it
is an emergency and notify emergency response on your
behalf. We will also notify the personal contacts listed on
your prole.
If I accidentally set o the alarm, what
should I do?
If you accidentally set o the alarm, simply notify
the emergency operator when they respond
that "THIS IS A FALSE ALARM." The operator will
disconnect and no further action will be taken.
How far away from the on-the-go
device will my help button work?
The wristband, neck pendant, Fall Detection
pendant, and wall mount button are designed to
work at an approximate range of up to 100 feet from
the on-the-go device, depending on the size and
construction of your home.
14
Frequently asked questions
How will an emergency response team get
into my home?
Rescue personnel follow dierent procedures. In most
cases, emergency personnel are authorized to break into
your home to help you and cannot be held responsible
for any damages caused as a result of gaining entry. We
recommend you purchase a “lock box” to safely store
your house key. Your lock box code will be stored on your
account and given to emergency personnel in order to
gain entry to your home without causing damage. If you
have your own lock box, please call customer service to
ensure your code is noted on your account.
What happens if I push my help button
but cannot get to the on-the-go device?
If you push your help button, stay where you are. An
emergency operator will attempt to communicate with
you through your on-the-go device. If you are not heard,
we will assume it is an emergency and notify emergency
response on your behalf.
Why is the emergency operator having
trouble understanding me?
The microphone in the on-the-go device are very
sensitive, and will pick up surrounding noises from
your television, radio, wind from ceiling fans, and
the like. To increase the quality of the call, go to a
quiet area with your on-the-go device.
Why is my help button not activating
my on-the-go device?
Be sure to press the help button once rmly in the
center to activate your on-the-go device. A small
red light below the neck pendant, Fall Detection
pendant or wristband will ash. If the on-the-go
device does not respond, check to ensure the help
button is in range of the on-the-go device.
15
give us a call one week before you go to determine
whether the service will be available at your other
home.
I am going to travel. How should I
prepare?
Your on-the-go device will work nationwide
anywhere there is AT&T cellular coverage. We
recommend you call Customer Service at least 2
to 3 days prior to leaving, so we can update our
systems with your new location address, emergency
contacts, and lock box location. This ensures that
if we have to alert emergency responders, they will
have all relevant information to assist you without
delays. Please remember to bring the following
items: neck pendant, wristband, Fall Detection
pendant, on-the-go device, and cradle charger.
Frequently asked questions
Is the on-the-go device waterproof?
The on-the-go device is water resistant. Please do
not submerge in water. However, the neck pendant,
wristbrand, Fall Detection button, and wall mount
button are waterproof. All devices can be taken in the
shower.
What if I move to a dierent home, or my
personal information has changed?
Please contact customer service any time there are
changes to your personal information, including changes
to your address and phone number. Just give us a call
one week before you move to determine whether the
service will be available in your area.
What if I spend part of the year in
another home?
We can transfer your service to another location. Just
16
Frequently asked questions
How do I prepare my device for air travel?
Your on-the-go device will need to be turned OFF. Simply
press and hold the power button for about 3 seconds.
The device will emit a beep and the power button LED
no longer blinks and all LEDs remain o.
Is the on-the-go device lanyard
adjustable?
The lanyard is non-adjustable. If you require an
adjustable lanyard please call customer service to place
your order.
Can I replace the neck pendant cord?
Yes, the neck pendant will work with just about any
chain or cord, so you are able to use any one of your
personal chains or necklaces. However, the risk of
choking may increase if you do not use the lanyard
provided.
Can I replace the wristband?
Yes, you may replace the wristband with
a standard watch band of your choice.
Can I speak into my help button?
No, you can only communicate with the monitoring
center through your on-the-go device only. Your help
buttons do not have a speaker
or microphone.
Does the wristband strap
contain any latex?
No, the strap is silicon based
with no latex content.
17
Compliance statements
FCC statement
This device complies with part 15 of the FCC rules. Operation is subject to the following two conditions:
Product Base Pendant Wrist Button Wall Button
FCC ID PXT-DC-MD5CCR-01 PXTIGP-01 PXTIGP-02 PXTPFD-01, PXT-RFDP-01 PXTWMP-01
FCC ID PXT-DC-MD5-01 PXTIGP-01 PXTIGP-02 PXTPFD-01, PXT-RFDP-01 PXTWMP-01
FDA statement
The manufacturer's quality system complies with regulation 21CFR 820 of the FDA Current Good Manufacturing
Practice. The FDA is the ocial regulatory agency of all food, dietary supplements, medical devices, cosmetics
and veterinary products in the United States.
1. This device may not cause harmful interference.
2. This device must accept any interference received, including interference that may cause undesired operation.
18
Compliance statements
15.105 (b)
This equipment has been tested and found to comply with the limits for a Class B
digital device, pursuant to part 15 of the FCC rules. These limits are designed to provide
reasonable protection against harmful interference in a residential installation. This
equipment generates, uses and can radiate radio frequency energy and, if not installed
and used in accordance with the instructions, may cause harmful interference to radio
communications. However, there is no guarantee that interference will not occur in a
particular installation. If this equipment does cause harmful interference to radio or
television reception, which can be determined by turning the equipment o and on,
the user is encouraged to try to correct the interference by one or more of the
following measures:
ƼReorient or relocate the
receiving antenna.
ƼIncrease the separation between
the equipment and receiver.
ƼConnect the equipment into an outlet on
a circuit dierent from that to which the
receiver is connected.
ƼConsult the dealer or an experienced
radio/TV technician for help.
19
Compliance statements
15.21
You are cautioned that changes or modications not expressly approved by the part
responsible for compliance could void the user’s authority to operate the equipment.
RF exposure information
This device meets the government’s requirements for exposure to radio waves. This device is
designed and manufactured not to exceed the emission limits for exposure to radio frequency
(RF) Energy set by the Federal Communication Commission of the U.S. Government. This
device complies with FCC radiation exposure limits set forth for an uncontrolled environment.
Radio frequency (RF)
All devices frequency transmission = 433MHZ
Technical requirements
Please refer to the website listed on the contact information card that came with your system.
20
©2021 ADT LLC dba ADT Security Services. All rights reserved. ADT, the ADT logo, 800.ADT.ASAP and the product/service names listed in this document are marks and/or registered marks. Unau-
thorized use is strictly prohibited. Third-party marks are the property of their respective owners. License information available at www.ADT.com or by calling 800.ADT.ASAP. CA ACO7155, 974443,
PPO120288; FL EF0001121; LA F1639, F1640, F1643, F1654, F1655; MA 172C; NC Licensed by the Alarm Systems Licensing Board of the State of North Carolina, 7535P2, 7561P2, 7562P10, 7563P7,
7565P1, 7566P9, 7564P4; NY 12000305615; PA090797; MS 15019511 L190376 07/21

Other manuals for On-The-Go Emergency Response System

2

Other ADT Security System manuals

ADT Safewatch Pro 3000EN Assembly instructions
ADT

ADT Safewatch Pro 3000EN Assembly instructions

ADT ADTHYBWL Series User manual

ADT

ADT ADTHYBWL Series User manual

ADT Safewatch QuickConnect Plus Operating instructions

ADT

ADT Safewatch QuickConnect Plus Operating instructions

ADT Entrepreneur 3000EN Operating instructions

ADT

ADT Entrepreneur 3000EN Operating instructions

ADT K5309V2 User manual

ADT

ADT K5309V2 User manual
ADT SA10ADTEG Operating instructions

ADT

ADT SA10ADTEG Operating instructions

ADT ACCORD XPC User manual

ADT

ADT ACCORD XPC User manual

ADT Galaxy 8 User manual

ADT

ADT Galaxy 8 User manual

ADT FOCUS CADET User manual

ADT

ADT FOCUS CADET User manual

ADT BHS-3000C User manual

ADT

ADT BHS-3000C User manual

ADT 6160VPADT Assembly instructions

ADT

ADT 6160VPADT Assembly instructions

ADT Smart Home PM360-R User manual

ADT

ADT Smart Home PM360-R User manual

ADT BHS-4000A User manual

ADT

ADT BHS-4000A User manual

ADT Safewatch Pro 3000 User manual

ADT

ADT Safewatch Pro 3000 User manual

ADT DSC Impassa User manual

ADT

ADT DSC Impassa User manual

ADT Security System 4112 User manual

ADT

ADT Security System 4112 User manual

ADT Security System D7412 User manual

ADT

ADT Security System D7412 User manual
ADT Smart Home PM360 User manual

ADT

ADT Smart Home PM360 User manual

ADT Safewatch Pro 2000 User manual

ADT

ADT Safewatch Pro 2000 User manual

ADT Safewatch Pro 3000 Operating instructions
ADT

ADT Safewatch Pro 3000 Operating instructions

ADT ADTHYBWL Series User manual

ADT

ADT ADTHYBWL Series User manual

ADT SA10ADTEG User manual

ADT

ADT SA10ADTEG User manual

ADT ADT7AIO Series Instruction manual

ADT

ADT ADT7AIO Series Instruction manual

ADT Safewatch Pro 3000 User guide

ADT

ADT Safewatch Pro 3000 User guide

Popular Security System manuals by other brands

VStarcam WPG244 manual

VStarcam

VStarcam WPG244 manual

Honeywell Home ADEMCO VISTA-15P user guide

Honeywell Home

Honeywell Home ADEMCO VISTA-15P user guide

Defender AL00009 quick start guide

Defender

Defender AL00009 quick start guide

Disty Notruf Neo operating instructions

Disty

Disty Notruf Neo operating instructions

Qvis APOLLO-KEYBOARD1 user manual

Qvis

Qvis APOLLO-KEYBOARD1 user manual

SkyLink SA-001S User instructions

SkyLink

SkyLink SA-001S User instructions

NAPCO FREEDOM64 brochure

NAPCO

NAPCO FREEDOM64 brochure

Seas of Solutions McMurdo SmartFind S5A AIS SART user manual

Seas of Solutions

Seas of Solutions McMurdo SmartFind S5A AIS SART user manual

FONESTAR SPR-569BOX instruction manual

FONESTAR

FONESTAR SPR-569BOX instruction manual

Ness 5000 Series installation manual

Ness

Ness 5000 Series installation manual

Uplink 4550-CB Installation & user guide

Uplink

Uplink 4550-CB Installation & user guide

GeoVision Surveillance System V8.4 installation guide

GeoVision

GeoVision Surveillance System V8.4 installation guide

Aura Aura user guide

Aura

Aura Aura user guide

First Alert SC9120B user manual

First Alert

First Alert SC9120B user manual

Interlogix advisorone Quick installation guide

Interlogix

Interlogix advisorone Quick installation guide

Conrad AW50 operating instructions

Conrad

Conrad AW50 operating instructions

Alarm System SEM300 Quick install guide

Alarm System

Alarm System SEM300 Quick install guide

Renkforce GX111 operating instructions

Renkforce

Renkforce GX111 operating instructions

manuals.online logo
manuals.online logoBrands
  • About & Mission
  • Contact us
  • Privacy Policy
  • Terms and Conditions

Copyright 2025 Manuals.Online. All Rights Reserved.