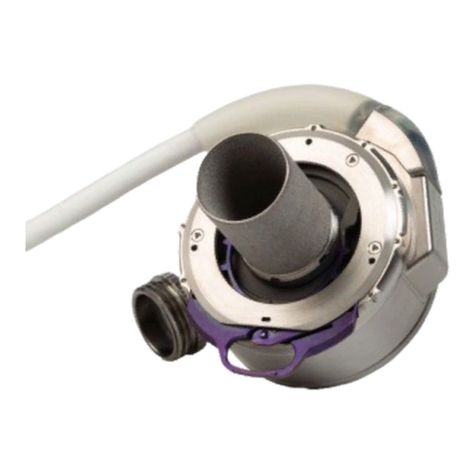
Aesculap PV481 Manual

Aesculap®
Aesculap Endoscopic Technology
Instructions for use/Technical description
2D camera heads PV481, PV482, PV485
Gebrauchsanweisung/Technische Beschreibung
2D-Kameraköpfe PV481, PV482, PV485
Mode d’emploi/Description technique
Têtes de caméra 2D PV481, PV482, PV485
Instrucciones de manejo/Descripción técnica
Cabezales de cámara 2D PV481, PV482, PV485
Istruzioni per l’uso/Descrizione tecnica
Testa per telecamera 2D PV481, PV482, PV485
Instruções de utilização/Descrição técnica
Cabeças de câmara 2D PV481, PV482, PV485
Gebruiksaanwijzing/Technische beschrijving
2D camerakoppen PV481, PV482, PV485
Bruksanvisning/Teknisk beskrivning
2D-kamerahuvuden PV481, PV482, PV485
Инструкция по примению/Техническое описание
2D-головки камер PV481, PV482, PV485
Návod k použití/Technický popis
2D hlavy kamery PV481, PV482, PV485
Instrukcja użytkowania/Opis techniczny
Głowice z kamerą 2D PV481, PV482, PV485
Návod na použitie/Technický opis
2D hlavy kamery PV481, PV482, PV485
Kullanım Kılavuzu/Teknik açiklama
2D kamera kafaları PV481, PV482, PV485
사용 설명서 /기술 설명
2D 카메라 헤드 PV481, PV482, PV485


123 4
4
2
1
5
PV482/PV485
PV481

2
Aesculap®
2D camera heads PV481, PV482, PV485
Aesculap®
2D camera heads PV481, PV482, PV485
Legend
1Endocoupler
2Focus ring
3Zoom ring
4Camera head buttons
5Lock
Symbols on product and packages
Contents
1. Applicable to. . . . . . . . . . . . . . . . . . . . . . . . . . . . . . . . . . . . . . . . . 3
2. Safe handling . . . . . . . . . . . . . . . . . . . . . . . . . . . . . . . . . . . . . . . . 3
3. Product description . . . . . . . . . . . . . . . . . . . . . . . . . . . . . . . . . . . 5
3.1 Scope of supply. . . . . . . . . . . . . . . . . . . . . . . . . . . . . . . . . . . . . . . 5
3.2 Components required for operation . . . . . . . . . . . . . . . . . . . . . . 5
3.3 Intended use . . . . . . . . . . . . . . . . . . . . . . . . . . . . . . . . . . . . . . . . . 5
3.4 Operating principle. . . . . . . . . . . . . . . . . . . . . . . . . . . . . . . . . . . . 5
4. Preparation . . . . . . . . . . . . . . . . . . . . . . . . . . . . . . . . . . . . . . . . . . 6
4.1 Combination with medical electrical equipment. . . . . . . . . . . . 7
4.2 Inspections . . . . . . . . . . . . . . . . . . . . . . . . . . . . . . . . . . . . . . . . . . 7
4.3 First use . . . . . . . . . . . . . . . . . . . . . . . . . . . . . . . . . . . . . . . . . . . . . 7
5. Working with the camera heads . . . . . . . . . . . . . . . . . . . . . . . . . 8
5.1 General notes on use . . . . . . . . . . . . . . . . . . . . . . . . . . . . . . . . . . 8
5.2 System set-up. . . . . . . . . . . . . . . . . . . . . . . . . . . . . . . . . . . . . . . . 8
5.3 Function checks . . . . . . . . . . . . . . . . . . . . . . . . . . . . . . . . . . . . . . 9
5.4 Safe operation . . . . . . . . . . . . . . . . . . . . . . . . . . . . . . . . . . . . . . . 9
6. Reprocessing procedure . . . . . . . . . . . . . . . . . . . . . . . . . . . . . . . . 10
6.1 General information . . . . . . . . . . . . . . . . . . . . . . . . . . . . . . . . . . . 11
6.2 Dismantling prior to carrying out the reprocessing procedure. 11
6.3 Preparations at the place of use . . . . . . . . . . . . . . . . . . . . . . . . . 11
6.4 Preparation before cleaning . . . . . . . . . . . . . . . . . . . . . . . . . . . . 11
6.5 Cleaning/disinfection . . . . . . . . . . . . . . . . . . . . . . . . . . . . . . . . . . 11
6.6 Manual cleaning and disinfecting. . . . . . . . . . . . . . . . . . . . . . . . 12
6.7 Mechanical cleaning/disinfecting with manual pre-cleaning . 14
6.8 STERRAD sterilisation. . . . . . . . . . . . . . . . . . . . . . . . . . . . . . . . . . 15
6.9 Material-compatible cleaning and disinfecting agents. . . . . . . 16
6.10 Inspection, maintenance and checks . . . . . . . . . . . . . . . . . . . . . 16
6.11 Storage . . . . . . . . . . . . . . . . . . . . . . . . . . . . . . . . . . . . . . . . . . . . . 16
7. Service . . . . . . . . . . . . . . . . . . . . . . . . . . . . . . . . . . . . . . . . . . . . . . 16
WARNING
Indicates a hazard. If not avoided, the hazard can result
in death or serious injury.
CAUTION
Indicates a potential hazard. If not avoided, this hazard
may result in injury and/or damage to the product.
Follow the instructions for use
Caution (IEC 60601-1 3rd edition) / Attention, please
take note of the accompanying document (IEC 60601-
1 2nd edition)
Defibrillation-proof type CF rated part according to
IEC 60601-1
Permissible storage temperature
Permissible relative air humidity during storage
Permissible atmospheric pressure during storage
Not permitted for use in a magnetic resonance environ-
ment
Caution, fragile
Article number
Serial number
REF
SN
Manufacturer
Date of manufacture
Federal Law (US) restricts this device to sale to or on
behalf of a physician
Marking of electric and electronic devices according to
directive 2002/96/EC (WEEE). see Disposal

3
8. Maintenance . . . . . . . . . . . . . . . . . . . . . . . . . . . . . . . . . . . . . . . . . 16
9. Troubleshooting list . . . . . . . . . . . . . . . . . . . . . . . . . . . . . . . . . . . 17
9.1 Repairs . . . . . . . . . . . . . . . . . . . . . . . . . . . . . . . . . . . . . . . . . . . . . . 17
10. Technical Service. . . . . . . . . . . . . . . . . . . . . . . . . . . . . . . . . . . . . . 17
11. Accessories/Spare parts . . . . . . . . . . . . . . . . . . . . . . . . . . . . . . . . 18
12. Technical data . . . . . . . . . . . . . . . . . . . . . . . . . . . . . . . . . . . . . . . . 18
12.1 Ambient conditions. . . . . . . . . . . . . . . . . . . . . . . . . . . . . . . . . . . . 18
13. Disposal . . . . . . . . . . . . . . . . . . . . . . . . . . . . . . . . . . . . . . . . . . . . . 19
14. Distributor in the US/Contact in Canada for product
information and complaints. . . . . . . . . . . . . . . . . . . . . . . . . . . . . 19
1. Applicable to
These instructions for use apply to the following devices:
These instructions for use are an integral component of the device and
contain all the information required by users and operators for safe and
proper use.
Target group
These instructions for use are intended for physicians, medical assistants,
medical technicians and employees of sterile services who are entrusted
with the installation, operation, maintenance and reprocessing of the
device.
Using and storing this document
These instructions for use must be stored in a defined location so that it
may be accessed at all times by the target group.
In the event of the sale of this device or its relocation, this document must
be handed over to the new owner.
Supplementary documents
For the use and assignment of the camera head buttons and the related
options and possible functions, observe the instructions for use of the
camera control unit concerned.
The instructions for use of the camera head used and instructions for use
of all other devices used must be observed to ensure the safe use of the
device.
►For item-specific instructions for use and information regarding mate-
rial compatibility, see Aesculap Extranet at
https://extranet.bbraun.com
2. Safe handling
CAUTION
Federal law restricts this device to sale by, or on order of a physician!
Designation Art. no.
Full HD CMOS camera head with pendulum coupler PV481
Full HD CMOS camera head with zoom coupler PV482
Full HD 3CMOS camera head with zoom coupler PV485
WARNING
Risk to user and patient from non-observance of
instructions, warnings and precautions!
►Use the product only according to these instruc-
tions for use.
►Check the product is in good working order
before use.
►Carry out function checks before each use.
►Do not use the product if irregularities are
observed during inspections and checks.
WARNING
Risk to patient due to incorrect application!
►Use the product only after instruction by the
manufacturer or by an authorized person.
►The instructions for use enclosed with the indi-
vidual components and all products used (e.g.
high frequency surgery) must be observed.
►Endoscopic procedures may only be carried out
by specialists who have the necessary medical
training, knowledge and experience.
WARNING
Risk to patient and user due to premature wear!
►Handle and maintain the product properly.
►Use the product only in accordance with the
intended purpose.
CAUTION
Possible restricted function if third party devices
are used!
►Use the product with the recommended compo-
nents and accessories.
►The full functionality of the product can only be
guaranteed if the recommended accessory com-
ponents are used.

4
Aesculap®
2D camera heads PV481, PV482, PV485
Note
Accessories and/or peripheral devices which are connected to the inter-
faces of the medical device must be verified to comply with the relevant
specifications (e.g. IEC 60601-1).
Note
The medical electrical device may not be modified in any way.
Note
To guarantee optimal function of the product, use in controlled environ-
mental conditions is recommended (e.g. air-conditioned operating room).
Note
Always handle the medical device very carefully as it contains sensitive
optic, mechanic and electronic components. Do not strike or drop the cam-
era head.
Note
Ensure that all devices operated in the vicinity meet their relevant EMC
requirements.
Note
The camera components are used to visualize the inside of the body during
minimally invasive procedures. Do not use the components for diagnostic
purposes. This applies in particular with the use of image optimization
algorithms.
Note
Before putting into operation, check the compatibility of all components
using the accessories list.
Note
All accessories and spare parts must only be procured from the manufac-
turer.
►Remove the transport packaging and clean the new product, either
manually or mechanically, prior to its initial sterilization.
►Prior to use, check that the product is in good working order.
►Observe “Notes on Electromagnetic Compatibility (EMC)“, see
TA022130.
►To prevent damage caused by improper setup or operation, and in order
not to compromise warranty and manufacturer liability:
– Use the product only according to these instructions for use.
– Follow the safety and maintenance instructions.
– Only combine Aesculap products with each other.
– Follow the application advisories acc. to standard, see Extracts from
relevant standards.
►Ensure that the product and its accessories are operated and used only
by persons with the requisite training, knowledge, or experience.
►Keep the instructions for use accessible for the user.
►Always adhere to applicable standards.
WARNING
Risk of injury due to electric shock!
►When installing a medical electrical system,
there is a risk of fire, short-circuit or electric
shock. Installation must be performed by quali-
fied personnel only.
►If a number of electrical devices are being used
in combination, observe Annex I of IEC 60601-
1:2006. Non-medical devices that comply with
the applicable IEC safety standards can be con-
nected only via a medical isolating transformer.
Do not connect any additional non-medical
devices to a medical electrical system.
►Signal lines from devices with a functional con-
nection, which are connected to different
branches of the mains power supply, must be
galvanically isolated at both ends.
►Connect the devices only to a power supply with
a protective earth conductor.
►After installing a medical electrical system, it
must be inspected according to IEC 62353.
WARNING
Risk to the patient if the product is not used gen-
tly/a damaged product is used!
►Handle the product with appropriate care.
►Do not use the product if it has been subjected
to strong mechanical stress or if it has been
dropped, and send the product to the manufac-
turer or an authorized repair center for inspec-
tion.
WARNING
Risk to patient if the device power fails!
►Use the device only with an uninterruptible
power supply.
►To guarantee a continuous power supply a med-
ical emergency supply (USP) is suggested.
WARNING
Device failure due to incorrect storage and usage
conditions!
►Store and operate the product only within the
specified environmental conditions.
CAUTION
Restricted function if third party devices are used!
►Use the product only with the recommended
components and accessories.
►Full functionality is only guaranteed if the rec-
ommended components and accessories are
used.

5
3. Product description
3.1 Scope of supply
3.2 Components required for operation
The camera head (PV481/PV482/PV485) is used for visualization during
endoscopic surgical procedures.
The camera head is intended for use with the following components:
■Camera control unit PV480 or PV630
■Disposable sterile cover JG904
■LED light source OP950
These components are optimally aligned with one another and therefore
offer the best possible quality and unlimited functionality.
3.3 Intended use
The Full HD CMOS camera control unit (PV480) serves the 2D HD visual-
ization of the interior of the body during minimally invasive surgical pro-
cedures and endoscopic examinations.
The Full HD CMOS camera control unit is only used for visualizing and not
for diagnosis.
Endoscopic indications
■Minimal invasive surgery
■Surgery
■General endoscopy
Contraindications
The use of the Full HD CMOS camera components and its accessory is con-
traindicated if endoscopic procedures are contraindicated for any reason.
As is appropriate with any surgical procedure, consideration must be given
to patient size and workspace volume when using the Full HD CMOS cam-
era components.
Depending on the patient’s disease, there may exist contraindications that
rely on the general condition of the patient or the specific disease pattern.
The decision to perform an endoscopic procedure rests with the responsi-
ble surgeon and should be made on the basis of an individual risk-benefit
analysis.
3.4 Operating principle
The camera heads within the scope of these instructions for use can be
used with the PV480 and PV630 camera control units and may only be
connected to this unit.
The combination of camera control unit and camera head result in a cam-
era based on CMOS technology.
In combination with a suitable monitor, the camera provides two-dimen-
sional images.
The camera head features four configurable camera head buttons that can
be used to control image display, record images and video, or to navigate
and change the settings in the configuration menu of the camera control
unit.
The camera heads are intended for use with the applicable sterile cover.
(B. Braun JG904).
Camera head buttons
The camera head buttons have different functions depending on the oper-
ating mode.
The assignment of the buttons is always synchronous with the assignment
of the buttons on the front of the camera control unit.
Different functions can be assigned for a short press of the button
(<2 sec.) and a long press of the button (≥2 sec.).
The procedure for changing the assigned functions is described in the
instructions for use of the respective camera control unit.
Designation Art. no.
Full HD CMOS camera head with pendulum coupler
– or –
Full HD CMOS camera head with zoom coupler
– or –
Full HD 3CMOS camera head with zoom coupler
PV481
PV482
PV485
Instructions for use TA014624
CAUTION
If the recommended components are not used, the
following errors/complications may occur, among
others:
■Incorrect color display
■No/incorrect display of the camera menu
■Restricted operating function from the camera
head
■Increased fogging on the optics

6
Aesculap®
2D camera heads PV481, PV482, PV485
Button assignment in live mode
Button assignment when on-screen display is active
When on-screen display is active, the buttons are used to navigate the
menu until the menu is left.
Button assignment when on-screen keyboard is active
When the on-screen keyboard is active, the buttons are used to navigate
the keyboard until the keyboard is left.
4. Preparation
If the following instructions are not observed, the manufacturer assumes
no responsibility for possible consequences.
Before installation and use, ensure that the:
■electrical installations comply with the relevant technical regulations,
■relevant regulations concerning fire and explosion protection are
observed.
Note
For the safety of the user, it is essential that the mains power cord and,
especially, the protective earth connection are intact. In many cases defec-
tive or missing protective earth connections are not registered immedi-
ately.
The button assignment in live mode
depends on whether a standard profile
or user profile is set.
If a user profile is set, the buttons can
be assigned individually, however the
assignment for entering the camera
control unit menu cannot be changed.
In standard profile, the buttons are
assigned as follows:
Short press of
button Long press of
button
Not working Open menu
Zoom White balance
Light source on Light source
on/off
Single frame
image
Video recording
start/stop
Short press of button Long press of but-
ton
up / control + Leave the menu
right / next level / across /
save control setting
down / control – / on
left / back a level / save
control etting
Short press of button Long press of but-
ton
up Not working
right Confirm/enter
down Not working
left Not working
WARNING
Risk to patient from misdirected leakage current
due to incorrect or defective earthing!
►Do not touch the product and patient at the
same time.
WARNING
Risk to patient due to failure of a device!
►Keep an operationally ready replacement device
on hand and if necessary change to conventional
surgical methods.

7
Note
The product including the camera cable is fragile when bent, kinked,
twisted, pulled, or pressed.
Note
Handle the camera head and camera cable with care. Do not exert any
mechanical forces and avoid mechanical impacts.
Note
Connect the equipotential bonding terminals of all equipment used with
the equipotential bonding strip see IEC 60601-1-1 / EN 60601-1-1 or in
accordance with national standards.
Note
Ensure that the corresponding interconnection conditions, standards and
respective national deviations are observed.
4.1 Combination with medical electrical equipment
The product can be combined with components from other manufacturers
provided that all components are compliant with the medical electrical
equipment safety requirements according to IEC 60601-1.
It is the operator’s responsibility to check and make sure that the system
is and remains fully operational.
When using devices from different manufacturers and when operating an
endoscope and/or endoscopic accessories together with medical electrical
equipment, it must be ensured that the applied part is properly isolated:
Type CF, defibrillation-proof.
4.2 Inspections
Carry out the following inspection steps before reprocessing and immedi-
ately before use of the device:
Inspection of the glass surfaces
►Before each use, inspect the camera head for damage such as rough
surfaces, sharp edges or protrusions to avoid injuries to the patient.
►Perform a visual inspection of the glass surfaces. The surfaces must be
clean and smooth.
If there are impairments/damage, see Troubleshooting list.
4.3 First use
WARNING
Danger of explosion from a device that is improp-
erly set up!
►Make certain that the power plug is connected
to the power supply outside of any areas where
there is a risk of explosion.
►Do not use the product in potentially explosive
areas or close to highly flammable or explosive
gases (e.g. oxygen, anesthetic gases).
WARNING
Risk to patient and user due to condensation and
short-circuit!
►Before putting into operation make sure that all
components used have enough time to adjust to
the changed environmental conditions.
WARNING
Risk of injury to the eyes!
►Do not insert the light guide into the light
source during the check of the fibers.
WARNING
Risk of infection and injury!
►Do not use products with damaged fiber optics,
damaged glass surfaces or stubborn deposits
which cannot be removed by cleaning.
WARNING
Risk to patient due to use of damaged products!
►Do not use products if they have sharp edges or
other hazardous surface damage.
CAUTION
Risk to persons and risk of damage to equipment
due to improper cable routing!
►Lay all cables and leads so that they do not pres-
ent a tripping hazard.
►Do not place objects on the cables.
CAUTION
Risk to patient due to poor/lack of vision!
►Adjust the monitors and display elements so
that they are highly visible to the user.
CAUTION
Interference of high frequency energy with the
device!
►Do not use any mobile or portable equipment
that emit high-frequency energy (e.g. mobile
phones, cell phones, GSM phones) in the vicinity
of the product.
WARNING
Risk of injury and/or product malfunction due to
incorrect operation of the medical electrical sys-
tem!
►Follow the instructions for use of all products
required.

8
Aesculap®
2D camera heads PV481, PV482, PV485
5. Working with the camera heads
5.1 General notes on use
The camera cable is fragile when bent, kinked, twisted, pulled, or pressed.
Observe the maximum bend radius of 7 cm and handle the cable with care.
Do not make any changes to the cable and do not load with sharp-edged
objects.
5.2 System set-up
Note
In combination with the camera control unit, PV480 or PV630, the endo-
scope is classed as a type CF defibrillation-proof applied part.
Note
Before application of endoscopic high frequency surgery (HF surgery) pre-
pare the patient accordingly.
Note
Take measures to remove or avoid formation of combustible gases (e.g.
gastro-intestinal tract/colonoscopy, urinary bladder/transuretheral resec-
tion).
Connecting the accessories
Combinations of accessories that are not mentioned in the present
instructions for use may only be employed if they are specifically intended
for the respective application, and if they do not compromise the perfor-
mance and safety characteristics of the products.
Any equipment connected at the interfaces must also demonstrably meet
the respective IEC standards (e.g. IEC 60950 for data processing equip-
ment, and IEC/DIN EN 60601-1 medical electrical equipment).
All configurations must meet the basic standard IEC/DIN EN 60601-1. The
person connecting the devices is responsible for the configuration and
must ensure that the basic standard IEC/DIN EN 60601-1 or the corre-
sponding national standards are met.
►Please contact your B. Braun/Aesculap partner or Aesculap Technical
Service, (address: see Technical Service) with any inquiries in this
respect.
WARNING
Risk of infection due to unsterile parts!
►Ensure that unsterile components do not enter
the sterile area.
►Process products and accessories that are deliv-
ered unsterile before use and only use them with
sterile accessories.
WARNING
Risk of infection due to unsterile, soiled or contam-
inated products!
►Only use the camera head in the sterile area if
it is in sterile condition. To do so, use the camera
head with the correctly applied sterile cover or
after sterilization process.
WARNING
Risk to patient due to addition of leakage currents!
►If the product is used with medical electrical
equipment and/or power-driven endoscope
accessories, the leakage currents can multiply.
WARNING
Risk to patient and user from burns, sparks or
explosion!
►When using a high frequency surgical device
during an endoscopic procedure, observe the
safety instructions of the corresponding
instructions for use.
WARNING
Risk of injury due to improper use!
►Observe the intended use of the product.
►Do not use the endoscope as a lever.
CAUTION
Interference of electromagnetic emissions with the
image quality (e.g. minor banding, minor color
changes on the monitor image)!
►Check the image quality if used in combination
with additional peripheral devices (e.g. monitor,
video equipment).
DANGER
Risk of injury due to unapproved configuration
using additional components!
►For all components used, ensure that their clas-
sification matches that of the applied part (e.g.
type CF defibrillation-proof) of the respective
device.

9
5.3 Function checks
Note
Only perform the surgical procedure if all of the components being used are
in a flawless condition.
Note
Before each use, after a power failure or any interruption, the functionality
of all connected devices must be checked and all connections must be
checked to see they are correct.
Note
The endoscope image must be focused, bright and clean at an appropriate
working distance.
Note
Do not continue to use damaged products.
5.4 Safe operation
Excessive temperatures in combination with light sources
Light sources, especially high-power light sources, emit large amounts of
light energy and thermal energy. The light guide connector and the distal
end of the endoscope may therefore become extremely hot.
Risks from use of light sources:
■Irreversible tissue damage or unwanted coagulation to the patient or
user
■Burns or thermal damage to surgical equipment (e.g. surgical drapes,
plastic materials, etc.)
■If the light source fails during use, this may endanger the patient.
Therefore keep an operationally ready replacement light source on
hand.
Safety precautions
►Do not illuminate the inside of the patient for longer than necessary
with the light source.
►Use the automatic light intensity control or set the light source so that
a bright, well-lit image is visible with the lowest possible light inten-
sity.
►Do not allow the distal end of the endoscope or light guide connector
to come into contact with patient tissue or with combustible or heat-
sensitive materials.
►Do not touch the distal end of the endoscope.
►Remove contaminations on the distal end surface or light emission sur-
face.
WARNING
Risk to patient due to incorrectly displayed image!
►Remove any contaminations on the optical sur-
faces (camera head) before and during the pro-
cedure. Clean the endoscope tip with a cloth
soaked in alcohol (70 % ethanol) or with a neu-
tral cleaning agent.
►Prior to application and after changing the set-
tings, check the correct display of the live
image. If necessary, perform white balance.
WARNING
Risk to patient and user from functional failure or
electric shock!
►Use only dry components (e.g. plug connector
for camera control unit, optical lens).
WARNING
Risk of burns due to development of heat at the tip
of the endoscope!
►Do not put down the endoscope on the patient
during use.
►In the patient's abdominal cavity, always leave a
sufficient distance between the optical lens and
the tissue surfaces and mucous membranes of
the patient.
►Use automatic light intensity control or set the
light source so that a bright, well-lit image is
visible with the lowest possible light intensity.
►Switch off the light source if the illumination is
no longer needed or if the endoscope is out of
the patient for a longer period of time.
WARNING
Risk of injury due to excessive temperature!
►Do not touch the light guide connector or distal
end of the endoscope during use or immediately
after use.
WARNING
Risk of injury and/or malfunction!
►Always carry out a function check prior to using
the product.
WARNING
Risk of injury from burns and unwanted deep pen-
etration and risk of damage to product!
►Only switch on high frequency current when the
corresponding applied part (electrode) can be
seen through the endoscope and there is no
contact between the two.
WARNING
Risk of infection due to contamination of the ster-
ile area!
►Fix the camera cable (unsterile) with sterile
cover (sterile) sufficiently nearby in the opera-
tion area.

10
Aesculap®
2D camera heads PV481, PV482, PV485
Note
The current assignment of the buttons is displayed on the screen as "Cam-
era head information" after opening the camera menu.
Connection to camera control unit
►Insert the connection plug fully into the connection socket of the cam-
era control unit until it engages in place.
6. Reprocessing procedure
WARNING
Risk of injury due to misdirected leakage currents!
►Before thoracic or cardiothoracic surgery, deac-
tivate implanted defibrillators (ICD).
►Before any kind of defibrillation, remove the
used camera head from the patient.
WARNING
Risk of infection/injury to patients and users!
►Only use the sterile cover once.
►Do not clean the sterile cover with ultrasound.
►Do not reprocess the sterile cover.
WARNING
Risk to patient from gas embolism!
►Avoid overinsufflation (e.g. with air or inert gas)
before high frequency surgery.
WARNING
Risk to patient from damage to the optical lens!
►Withdraw the endoscope slowly from the used
trocar.
►If a trocar with a manual opening valve is being
used, only withdraw the endoscope from the
trocar when the valve is open.
WARNING
Risk of infection due to unsterile cover or medical
device!
►Replace the sterile cover or the camera head if
it falls on the ground or if it is touched by
unsterile objects/persons.
CAUTION
Malfunction in connection with magnetic reso-
nance!
►Do not use the product in a magnetic resonance
environment.
WARNING
Risk of infection due to an incorrectly reprocessed
product!
►Adhere to national statutory regulations,
national and international standards and direc-
tives, and local, clinical hygiene instructions for
reprocessing.
►For patients with Creutzfeldt-Jakob disease
(CJD), suspected CJD, or possible variants of
CJD, observe the relevant national regulations
concerning the reprocessing of products.
►The camera head is not autoclavable. Therefore,
the camera head and corresponding sterile cover
must not be used in patients suspected of having
Creutzfeldt-Jakob disease or who have already
been diagnosed with Creutzfeldt-Jakob disease.
►Mechanical reprocessing should be favored over
manual cleaning as it gives better and more reli-
able results.
►Successful reprocessing of this medical device
can only be ensured through a validated repro-
cessing procedure. The operator/reprocessing
technician is responsible for this.
WARNING
Risk of infection for patients and/or user due to:
►Residues of cleaning and disinfectants at the
product.
►Insufficient or incorrect cleaning and disinfec-
tion of the product and accessories.
CAUTION
Risk of damage to and malfunction of the device
due to incorrect reprocessing!
►Do not autoclave the product.
CAUTION
Risk of defects, consequential damage or a short-
ened product service life!
►Follow and observe the manufacturer's require-
ments for reprocessing.

11
6.1 General information
Dried or affixed surgical residues can make cleaning more difficult or inef-
fective and lead to corrosion. Therefore the time interval between appli-
cation and reprocessing should not exceed 6 h; also, neither fixating pre-
cleaning temperatures >45 °C nor fixating disinfecting agents (active
ingredient: aldehydes/alcohols) should be used.
Excessive neutralizing agents or basic cleaners may result in a chemical
attack and/or fading and the laser marking becoming unreadable either
visually or by machine in case of non stainless steel.
Residues containing chlorine or chlorides, e.g., in surgical residues, medi-
cines, saline solutions, and in the service water used for cleaning, disin-
fection, and sterilization, will cause corrosion damage (pitting, stress cor-
rosion) and result in damage to the products in case of non stainless steel.
These must be removed by rinsing thoroughly with demineralized water
and then drying.
Perform additional drying, if necessary.
Only process chemicals that have been tested and approved (e.g. VAH or
FDA approval or CE mark) and which are compatible with the product’s
materials according to the chemical manufacturers’ recommendations
may be used for reprocessing the product. All the chemical manufacturer's
application specifications must be strictly observed. Failure to do so can
result in the following problems:
■Optical material changes (e.g. fading or discoloration) in titanium or
aluminum. For aluminum, the application/process solution only needs
to be pH >8 to cause visible surface changes.
■Material damage (e.g. corrosion, cracks, fracturing, premature aging, or
swelling)
►Do not use metal cleaning brushes or other abrasives that would dam-
age the product surface and could cause corrosion.
►For further detailed information on hygienically safe and material-pre-
serving/ value-preserving reprocessing, see www.a-k-i.org link to Pub-
lications, Red Brochure – Proper maintenance of instruments.
6.2 Dismantling prior to carrying out the reprocessing
procedure
►Unplug the camera plug from the camera control unit.
►Remove the sterile cover from the camera head and dispose of it
according to regulations. The sterile cover is only intended for single
use.
►Remove the endoscope, light guide and all detachable parts.
6.3 Preparations at the place of use
►Remove any visible surgical residues as much as possible with a damp,
lint-free cloth. Use a soft cloth for this to avoid scratching the optical
lens.
►Pre-clean all used parts of the fully disassembled product at the oper-
ating table at the conclusion of the surgery by wiping with a lint-free
wipe wetted with an enzymatic cleaning solution until visibly clean.
►Place the dry product in a sealed waste container and forward it on for
cleaning and disinfection within 6 hours.
6.4 Preparation before cleaning
►Non-fixating/NaCl-free pre-cleaning is mandatory immediately after
use.
6.5 Cleaning/disinfection
The effectiveness of the following procedures:
■Manual cleaning and manual disinfection
■Automated cleaning and thermal disinfection
■Sterilization
as described in this document, has been fully validated.
It is the operator’s responsibility to introduce, document, implement, and
maintain a validated reprocessing procedure. Make sure that the equip-
ment used for reprocessing is properly maintained.
The reprocessing procedure described in this document consists of the fol-
lowing steps:
■Pre-cleaning immediately after use
■Cleaning and disinfection (manual or automated) and
■Sterilization.
WARNING
Damage to the product due to improper reprocess-
ing!
►Do not, under any circumstances, clean or disin-
fect the product in an ultrasonic cleaning bath.
►Use cleaning and disinfecting agents which are
suitable and approved for the present product.
►Observe the manufacturer’s cleaning and disin-
fecting instructions regarding concentration,
temperature and exposure time.
►Only reconnect the system to power when all
cleaned parts are completely dry.
►Never autoclave the product.

12
Aesculap®
2D camera heads PV481, PV482, PV485
Product-specific safety instructions for the reprocessing procedure
Note
There may be significant discoloration of the camera head when using
Cidex OPA. However, this discoloration has no influence on the functional-
ity or safety of the product.
6.6 Manual cleaning and disinfecting
Post use and pre-cleaning activities
►Pre-clean the device immediately after use.
►Remove and discard the sterile drape, if present.
►Decouple the endoscope from the optocoupler.
►Uncouple the camera head from the controller.
►Pre-clean all used parts of the fully disassembled product at the oper-
ating table at the conclusion of the surgery by wiping with a lint-free
wipe wetted (i.e. wetted but not dripping; squeeze out excess solution)
with an enzymatic cleaning solution until visibly clean. Before wetting
the lint-free wipe with the enzymatic clean solution, the solution
should be prepared according to the manufacturer’s instruction.
►Arrange for reprocessing, ensuring that all of the device components
are reprocessed within 6 hours.
DANGER
Risk of electric shock and fire hazard!
►Unplug the device before cleaning.
►Do not use flammable or explosive cleaning or
disinfecting solutions.
CAUTION
Damage to the product due to inappropriate clean-
ing/disinfecting agents and/or excessive tempera-
tures!
►Use cleaning and disinfecting agents according
to the manufacturer’s instructions. The cleaning
and disinfecting agent must be approved for
plastics and high-grade steel, and it must not
attack softeners (e.g. silicone).
►Observe specifications regarding concentration,
temperature and exposure time.
►Do not exceed the maximum permitted cleaning
temperature of 100 °C.

13
Manual cleaning with immersion disinfection
FD-W Fully desalinated water (demineralized, low microbiological contamination, max. 10 germs/ml and low in endotoxins, max. 0.25 Endo-
toxin units/ml)
1) Phase does not apply to US market
Phase I: Cleaning
►Prepare the cleaning solution according to the manufacturer’s instruc-
tions.
►Fully immerse all parts of the fully disassembled device that were used
in the cleaning solution bath for two (2) to five (5) minutes. All acces-
sible surfaces must remain immersed in the cleaning solution bath
throughout the entire cleaning time.
►After soaking in the cleaning solution, clean all external surfaces-
while the items are fully emerged in the cleaning solution – using a
clean, lint-free, soft, non-sterile cloth or a soft bristled brush until all
visible soiling is removed:
– Brush for at least one (1) minute or until no more residues can be
removed.
– During cleaning, move non fixed components 3 times in each direc-
tion and as far as possible.
►Thoroughly rinse all surfaces of products with hidden crevices, lumens
with working channels, or complex geometry five (5) times. Use a dis-
posable 50 ml syringe.
Phase II: Rinse
►Fully immerse all parts in a tap water bath (<45 °C/113 °F) and thor-
oughly rinse all accessible surfaces twice for a minimum of one (1)
minute each.
►Move non fixed components 3 times in each direction and as far as
possible.
►Thoroughly rinse all hidden crevices, lumens or complex geometry at
least three times:
– Use a disposable 50 ml syringe.
– Use fresh water for each rinse.
– Allow water to drip off for a sufficient length of time.
Phase III: Disinfection
►Immerse all parts completely in disinfectant solution for at least
12 minutes. All accessible surfaces must remain immersed in the dis-
infectant solution bath throughout the entire disinfecting time.
►Remove all adherent air bubbles from the component surfaces
►Thoroughly rinse all surfaces of products with hidden crevices, lumens
with working channels, or complex geometry five (5) times. Use a dis-
posable 50 ml syringe.
►Move non fixed components 3 times in each direction and as far as
possible.
Phase IV: Rinse
►Fully immerse all parts in a tap water bath (<45 °C/113 °F) and thor-
oughly rinse all accessible surfaces twice for a minimum of one minute
each.
►Move non fixed components 3 times in each direction and as far as
possible.
►Thoroughly rinse all hidden crevices, lumens or complex geometry at
least three times:
– Use a disposable 50ml syringe.
– Use fresh water for each rinse.
– Allow water to drip off for a sufficient length of time.
Phase Step T [°C/°F] t [min] Water quality Chemicals
I Cleaning as per manufac-
turer’s instruction
2-5 Tap water Enzymatic cleaning agent (Cidezyme/Enzol)
II Rinse 2x <45/113 2x ≥1 Tap water –
III Disinfection1) as per manufac-
turer’s instruction
12 as per manufac-
turer’s instruction
0.55 % Orthophtaldehyde solution (Cidex OPA)
IV Rinse 2x1) <45/113 2x ≥1 Tap water –
VFinalRinse <45/113 ≥1 FD-W –
VI Drying ––––
CAUTION
Damage to the product due to improper handling!
Scratch-sensitive surface.
►Handle the device with appropriate care.
►Do not use metal brushes, metal objects or abra-
sive cleaners.

14
Aesculap®
2D camera heads PV481, PV482, PV485
Phase V: Final rinse
►Fully immerse all parts in a fully desalinated water bath
(<45 °C/113 °F) and thoroughly rinse all accessible surfaces for a min-
imum of one minute.
►Move non fixed components 3 times in each direction and as far as
possible.
►Thoroughly rinse all hidden crevices, lumens or complex geometry at
least three times.
– Use a disposable 50 ml syringe.
– Use fresh water for each rinse.
– Allow water to drip off for a sufficient length of time.
Phase VI: Drying
►Thoroughly dry all parts with a clean, lint-free wipe or a lint-free sur-
gical towel.
►Dry all accessible surfaces, especially the channels with medical-qual-
ity filtered compressed (pmax = 0,5 bar).
►Visually inspect the device in a well-lit area; they should be completely
clean and dry. If necessary please use a magnifying glass and repeat
the manual cleaning performance.
This concludes the manual cleaning and disinfection process.
6.7 Mechanical cleaning/disinfecting with manual pre-cleaning
Post use and pre-cleaning activities
►If applicable, flush not observably surfaces primarily with deionized
water e.g. with a single use syringe.
►Remove as far as possible visible residues with a moist lint free wipe.
Use an enzymatic cleaning solution to moisten the cloth that was pre-
pared in accordance with the instructions of the manufacturer.
►Place the device in a dry and closed disposable container and transport
it within 6 hours to cleaning and disinfection.
Manual pre-cleaning
Phase I: Cleaning
►Fully immerse all parts of the fully disassembled device that were used
in a cleaning solution bath (<40 °C) for ten (10) to thirty (30) minutes.
►Immerse all accessible surfaces in the cleaning solution bath through-
out the entire cleaning time.
►While the components soak in the solution, use a soft wipe or soft
brush to remove all visible residues from all exterior surfaces of the
components.
►Move non fixed components 5 times in each direction and as far as
possible.
Phase 2: Rinse
►Fully immerse all parts in a tap water bath (<45°C/113 °F) and thor-
oughly rinse all accessible surfaces twice for a minimum of one (1)
minute each:
– Use fresh water for each rinse.
– Move non fixed components 5 times in each direction and as far as
possible.
– Allow water to drip off for a sufficient length of time.
Phase Step T [°C/°F] t [min] Water quality Chemicals
I Cleaning <45/113 10-30 Tap water Enzymatic cleaning agent (Cidezyme/Enzol)
II Rinse 2x <45/113 2x ≥1 Tap water –

15
Mechanical alkaline cleaning and thermal disinfecting
►Use a washer/disinfector that has been validated as effective and
meets the performance requirements of ISO 15883-1 (or the respective
country specific version thereof)
►For reprocessing, use the camera tray, which is used without a lid. This
tray is only suitable for the camera and not for instruments.
►Place the device in the provided reusable camera tray. Avoid areas that
cannot be reached during rinsing.
►Place the tray in the automatic washer/disinfector in a suitable carrier
that ensures both the protection of the instrument and access to sur-
faces for cleaning. No lid will be used for the tray.
►Start the cleaning cycle as described (see table) in accordance with the
manufacturer’s instructions and instruction for use for the washer/dis-
infector.
►Remove the tray and the devices from automatic washer.
►Visually inspect the device in a well-lit area; they should be completely
clean, dry and undamaged.
►Use a magnifying glass. Repeat the cleaning process if necessary.
Immediately set aside any damaged components.
6.8 STERRAD sterilisation
The STERRAD® sterilization systems, manufactured by Advanced
Sterilization Products (ASP), use low-temperature, hydrogen peroxide gas
plasma technology for terminal sterilization of properly cleaned, rinsed,
and dried reusable medical devices.
►Refer to the STERRAD® Sterilization Systems User Guide for detailed
instructions for use of any STERRAD® unit and ASP’s STERRAD Sterility
Guide (SSG) at www.sterradsterilityguide.com or contact ASP cus-
tomer service.
Performing sterilization
Note
STERRAD® sterilization may result in cosmetic device changes that do not
necessarily affect the device function.
►Place all parts in a cleaning and storage basket.
►Place a STERRAD® indicator strip in the basket.
►Assemble sterilization container JM441 according to manufacturer’s
instruction.
►Place the basket in the sterilization container JM441.
►Load the container in the sterilizer:
– Position the container such that the plasma can fully surround it.
– Load only one container per cycle in the chamber.
– Leave the other shelf empty.
►Start the sterilization cycle in accordance with the manufacturer’s
instructions and instructions for use for the steam sterilizer.
STERRAD® sterilization was validated for the following cycles:
– STERRAD® 100S short cycle
– STERRAD® NX standard cycle
– STERRAD® 100NX standard cycle
►Remove the sterilized products from the sterilizer.
►Ensure that the products remain sterile after reprocessing.
This concludes sterilization.
Phase Step T [°C/°F] t [min] Water quality Chemicals/Note
I Prerinse <25/77 3 Tap water –
II Cleaning 55/131 10 Deionized water Alkaline Detergent
Neodisher Mediclean forte 0.5 %
III Intermediate rinse >10/50 1 Deionized water –
IV Thermal disinfection 90/194 5 Deionized water –
VDrying – – – According to the program of the washer/disinfector
CAUTION
Loads containing moisture may cause a cycle can-
cellation!
►Thoroughly dry the product before loading into
the STERRAD® sterilizer.

16
Aesculap®
2D camera heads PV481, PV482, PV485
6.9 Material-compatible cleaning and disinfecting
agents
■Wipe disinfection:
– Meliseptol HBV tissues 50 % Propan-1-ol (B. Braun)
– Chlorine Disinfection (Wetwipe)
■Manual immersion disinfection: Stabimed (B. Braun)
6.10 Inspection, maintenance and checks
►Inspect the product after each cleaning and disinfecting cycle to be
sure it is: clean, functional, and undamaged.
►Check the product for damage or excessive heating.
►Set aside the product if it is damaged.
6.11 Storage
►Store sterile products in germ-proof packaging, protected from dust, in
a dry, dark, temperature-controlled area.
7. Service
Send damaged products to the manufacturer or authorized repair center.
Authorized repair centers can be inquired about from the manufacturer.
Note
If for urgent reasons it is not possible to thoroughly clean/disinfect and
sterilize the product, reprocess the product as far as possible and label it
accordingly.
The specialized repair company may refuse to repair soiled or contaminated
products for safety reasons.
The manufacturer reserves the right to return contaminated products to
the sender.
8. Maintenance
This product is maintenance-free. It does not contain components which
have to be maintained by the user or manufacturer.
However the manufacturer requires that a qualified person or a hospital
technician inspects the product regularly in a preventive safety inspection.
The product should be inspected at least once every 12 months.
In case of preventative safety inspections, no special conditions and mea-
sures have to be observed.
During the inspection, the following tests have to be done according to
section 5 of DIN DIN EN 62353/IEC 62353:
■5.2 Visual inspection
■5.3.2 Measuring of protective earth resistance (only applicable for
devices of protection class I)
■5.3.3 Measurement of leakage currents
■5.3.4 Measurement of insulation resistance
According to section 6 of DIN EN 62353/IEC 62353, the test results must
be fully recorded in a test report, which can be taken from Annex G of the
standard.
After performing the preventive safety inspection, a functional test is to
be carried out.
For relevant services contact your national B. Braun/Aesculap agency, see
Technical Service.
CAUTION
Damage to product due to improper storage!
►Store the product protected from dust in a dry,
well ventilated, and temperature-controlled
room.
►Store the product protected from direct sun-
light, high temperatures, high air humidity or
radiation.
►Protect the product from direct UV light, radio-
activity or strong electromagnetic radiation.
►Store the product separately or use containers
in which it can be fixed in place.
►Always transport the product with care.
CAUTION
Damage to product due to improper handling!
►Do not drop the camera head and handle it with
care.
►When transporting the camera head over
thresholds or uneven ground, store the camera
head securely.
CAUTION
Damage to the optical lens due to inappropriate
transport packaging!
►Use the tray only for the camera head and not
for instruments.
►Use the tray for the camera head only within the
clinic.
►Only place a disinfected camera head in the
tray.
WARNING
Risk of infection due to soiled or contaminated
products!
►Clean, disinfect and sterilize the product and/or
any accessories thoroughly before sending.
►Prior to sending, remove the sterile cover from
the camera head.
►Select suitable and safe packaging (ideally the
original packaging).
►Package the product in such a way that the
packaging does not become contaminated.

17
9. Troubleshooting list
9.1 Repairs
For repairs, contact the manufacturer or authorized repair center. Autho-
rized repair centers can be inquired about from the manufacturer.
For a fast processing of your service requests, send in the product indicat-
ing:
■Article number (REF)
■Serial number (SN)
■Detailed description of defects
Note
If a component of the visualization system is replaced (e. g. service,
upgrade), the system start-up process must be performed again. It is also
recommended to perform a safety inspection after any maintenance or
replacement of a device.
10. Technical Service
Note
Service and repair work must only be carried out by authorized trained per-
sonnel. For service and repairs, please contact your national
B. Braun/Aesculap agency.
Modifications carried out on medical technical equipment may result in
loss of warranty rights and applicable licenses.
Problem Possible cause Remedy
Image cloudy Glass surfaces soiled Clean the glass surfaces according to the Cleaning and Disin-
fection section.
Stubborn residue on the glass surfaces Remove residues according to the Cleaning and Disinfection
section; check water quality.
Image too dark, too little
illumination
Glass surfaces soiled Clean the glass surfaces according to the Cleaning and Disin-
fection section.
Light guide dirty, defective Check light guide (e. g. illuminate onto a white surface).
Excessive chloride concentration Check water quality.
Heavy metal ions and/or silicates, increased content of
iron, copper, manganese in water
Check water quality; if applicable, only use deionized (fully
desalinated) water.
Too high concentration of mineral substances (e.g. cal-
cium) or organic substances
Contaminated cleaning/disinfecting solutions, too fre-
quent use
The cleaning and disinfecting solutions should be replaced
regularly.
Extraneous rust, (e.g. resulting from previously dam-
aged or non-corrosion-resistant instruments being
reprocessed at the same time)
Check supply systems; in case of joint reprocessing, check
material compatibility and for existing damage, and avoid
mutual contact.
Contact corrosion Avoid contact with other components.
WARNING
Risk of injury and/or malfunction!
►Do not modify the product.
CAUTION
Malfunction of the product due to damage in
transport!
►Select suitable and safe packaging (ideally the
original packaging).
►Keep the original packaging for possible returns
in case of service.
►Package the product in such a way that the
packaging does not become contaminated.

18
Aesculap®
2D camera heads PV481, PV482, PV485
Service address
AESCULAP FLEXIMED GmbH
Robert-Bosch-Straße 1
79211 Denzlingen
Germany
Phone: +49 (0) 7666 / 9321-0
E-mail: [email protected]
Web: www.aesculap-fleximed.de
Other service addresses can be obtained from the address indicated above.
11. Accessories/Spare parts
12. Technical data
Classification acc. to Directive 93/42/EEC
12.1 Ambient conditions
Art. no. Designation
JG904 Disposable sterile cover, pack of 25
Art. no. Designation Class
PV481 Full HD CMOS camera head with pendulum
coupler
I
PV482 Full HD CMOS camera head with zoom coupler I
PV485 Full HD 3CMOS camera head with zoom coupler I
JG904 Disposable sterile cover, pack of 25 IIa
Protection rating IPX7
Sensor format Native Full HD 1/3"
Scanning system Progressive scan
Frequency 50 Hz or 60 Hz
Protection class (according to
IEC/DIN EN 60601-1)
I
Weight (excl. cable) ■PV481: 180 g
■PV482: 294 g
■PV485: 380 g
Length of camera cable 3,5 m
Applied part Type CF, defibrillation-proof (in combi-
nation with camera control unit PV480
or PV630)
Dimensions (L x W x H) ■PV481: 50 mm x 38 mm x 171 mm
■PV482: 188 mm x 43 mm x 43 mm
■PV485: 188 mm x 46 mm x 47 mm
EMC IEC/EN/DIN 60601-1-2
Conforming to standard IEC/EN/DIN 60601-1
CISPR 11 Class A
Operation Storage and transport
Temperature
Relative
humidity
Atmospheric
pressure
35 °C
10 °C
50 °C
-10 °C
This manual suits for next models
2
Table of contents
Languages:
Other Aesculap Medical Equipment manuals
Popular Medical Equipment manuals by other brands
Monaghan
Monaghan Aerobika Instructions for use
HeartSine
HeartSine SAM 350P AED quick start guide

Pari
Pari eflowrapid 178G1005 Instructions for use
Maico
Maico DRD Ex Series Original installation and operating instructions
Breg
Breg 100628-020 Instructions for use
Porter
Porter 6256-3 Installation and instructions
