manuals.online logo
Brands
  1. Home
  2. •
  3. Brands
  4. •
  5. aFe Power
  6. •
  7. Automobile Accessories
  8. •
  9. aFe Power SCORPION 79-21008L User manual

aFe Power SCORPION 79-21008L User manual

advanced FLOW engineering
Instruction Manual P/N: 79-21008L
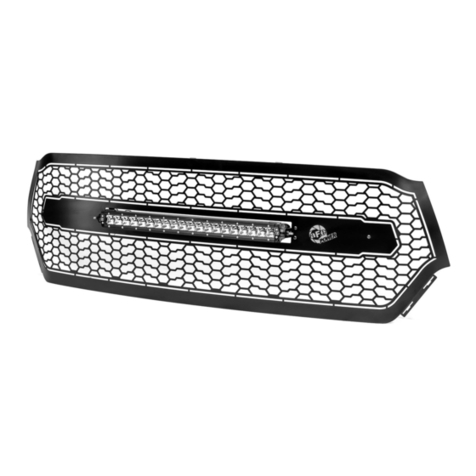
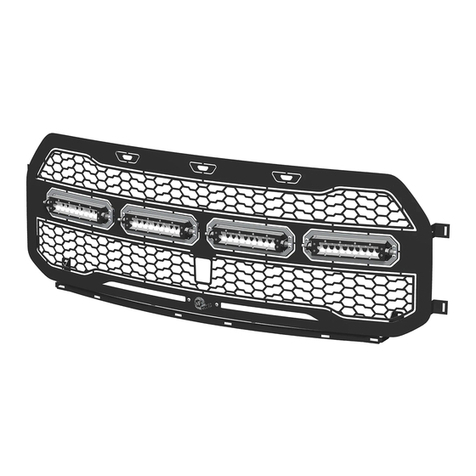
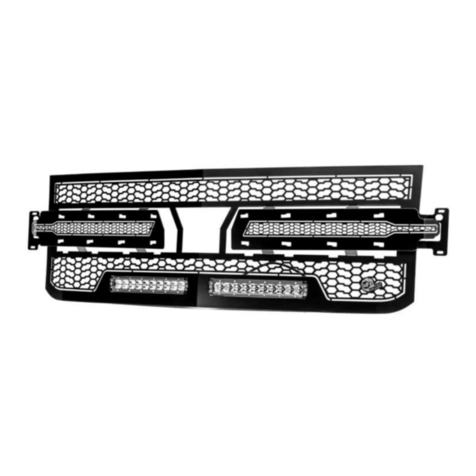
Scorpion Grille without FFC
Make: Ford Model: F-150 Year: 2018-2020
1
•Please read the entire instruction before proceeding.
•Ensure all components listed are present.
•Ensure you have all necessary tools before proceeding.
•Disconnect the negative battery terminal before proceeding.
•If you are missing any of the components, call customer support 951 493 7100
Label
Qty.
Description
A
1
aFe Scorpion Grille
B
5
Bolt, M6 x 1.0mm x 25mm Hex
C
5
Washer, Flat #10
D
5
Clip nut, M6
E
3
Washer, 3/16” x 1 SS Fender (black)
F
3
Lock nut, #10-32 Nylon
G
2
Lock nut, 1/4”-20 Nylon
H
2
Washer, 1/4" Flat
I
1
aFe Logo Back Plate
J
6
Screw, #10-32 x 1/2” Button Head (black)
K
6
Nut, #10-32 Flange SS
L
1
Clamp, Cable 5/16” (black)
M
2
Bracket, LED #1
N
1
Power Harness
O
15
Ties, Cable
P
1
20” Single Row LED
•Applications models vary. We recommend verifying fitment before beginning installation process.
•Images featured in the instruction documents may not always exactly match your grille.
2
3
Note: Before you begin, use “Painters Tape” to apply a protective guard around the work
areas (fender and bumper valance). This will help protect the paint and finish of your vehicle.
1. Disconnect the negative battery terminal.
2. Locate (13) plastic clips on top of plastic shroud. Carefully pry the pins out to remove and
then set aside. Save all parts for reinstallation.
3. Remove the plastic shroud. Set it aside for reinstallation.
4
4. Remove the four (4) bolts that attach the factory grille assembly to the core support. Save
for reinstallation.
5. Located near the hood latch, disconnect the electrical connector.
5
6. If equipped, disconnect the wheel arch moldings. Remove the screw, located nearest the
front of the truck in the wheel well. Pull on the wheel arch moldings carefully until it comes
off the two bottom tabs. Be careful not to break them.
7. Starting on the passenger side, pull on the plastic bumper cap fascia till it disconnects from
the fender. After the passenger side is disconnected, move to the driver’s side and
disconnect it from the fender on that side. When both sides are disconnected, pull on the
plastic bumper cap fascia until it disconnects from the grille and carefully remove it.
6
8. Remove the one (1) bolt located on each side of the grille. Save for reinstallation.
7
Note: To prevent scratching painted parts use protective covering between the grille and a
flat surface.
9. Disconnect the clips (located near the headlights) behind the grille by pulling gently.
10. Remove the grille and active shutter assembly from the truck.
8
11. Remove the eight (8) push pins and remove the plastic lower shroud.
12. Remove the five (5) retaining clips from the top of the grille.
13. Remove the one screw located in the center of the active shutter grille.
9
14. Loosen the four (4) nuts and the four (4) factory studs that attach the active shutter grille to
the factory grille.
15. Disconnect the five (5) clips connecting the active shutter grille to the factory grille.
16. Remove the active grille shutters from the factory grille and set it to the side. Save for
reinstallation.
17. The hardware in Step 14 needs to be completely removed from the active shutter grille and
discarded after the active shutter grille and the factory grille have been separated.
10
18. Remove and discard the two (2) nuts from the supplied 20” single row LED light.
11
Note: Please read the instruction below prior to installation.
19. Locate the drilled hole furthest to the driver’s side. Install one (1) supplied #10-32 x 1/2”
button head screw (black) thru the front of the aFe Scorpion grille. Turn the aFe Scorpion
grille over and install the aFe logo back plate onto the #10-32 x 1/2” button head screw
(black). Install one (1) supplied #10-32 SS flange nut onto the #10-32 x 1/2” button head
screw (black). Snug the #10-32 flange nut up but do not tighten.
20. Install the supplied 20” single row LED light through the front of the aFe Scorpion grille.
While holding the 20” single row LED light, install two (2) supplied #1 LED bar brackets
(bracket feet point away from each other) from the back of the aFe Scorpion grille and onto
the studs on the 20” single row LED light. Install the two (2) supplied 1/4" washers (black)
and two (2) supplied 1/4"-20 nylon lock nuts (black) onto the light. Do not tighten. From the
front, install four (4) #10-32 x 1/2” button head screws (black) through the aFe Scorpion
grille. Turn the aFe Scorpion grille around and make sure that the driver’s side #10-32 x 1/2”
button head screws (black) pass thru the aFe logo back plate and thru the #1 LED bracket.
The passenger side runs thru the #1 LED bracket only. Install four (4) #10-32 SS flange nut
onto the #10-32 x 1/2” button head screws (black). Tighten the #1 LED brackets first. Then
tighten the 20” single row LED light while centering it.
12
Note: Please read the instruction below prior to installation.
21. Install one (1) supplied cable clamp 5/16” (black) around the wiring for the 20” single row
LED light.
22. Locate the drilled hole furthest to the passenger side. Install one (1) #10-32 x 1/2” button
head screw (black) through the aFe Scorpion grille. Turn the aFe Scorpion grille around and
place the cable clamp installed in Step 26 onto the #10-32 x 1/2” button head screw (black).
Install one (1) #10-32 SS flange nut onto the #10-32 x 1/2” button head screw (black) and
tighten.
13
23. Place the aFe Scorpion grille to the side and place the active shutter grille assembly onto the
work surface.
24. Install the five (5) M6 clip nuts to the top of the active shutter grille.
14
25. Place the aFe Scorpion grille back on the workspace.
26. Attach the active shutter grille to the aFe Scorpion grille. At the bottom of the aFe Scorpion
grille assembly, install three (3) supplied 3/16” x 1” SS fender washers (black) and three (3)
#10-32 nylon lock nuts. Do not tighten.
15
27. At the top of the aFe Scorpion grille assembly, install five (5) supplied M6 x 1.0mm x 25mm
hex bolts and five (5) #10 flat washers.
28. Center the aFe Scorpion grille on the active shutter grille and tighten the hardware in Step
26 and the hardware in Step 27.
16
29. Reinstall the eight (8) push pins that attach the plastic lower shroud.
17
30. Before installing the aFe Scorpion grille, install the supplied power harness. The red wire
goes on the positive battery terminal (+) and the black wire goes on the negative battery
terminal (-). You will need to mount the switch inside the cab or to an available prewired
switch. Use the (15) supplied 8” cable ties to secure the wiring loom to the vehicle.
18
Note: There are factory stickers on the headlights that will been seen through the grille if not
removed. If you want to remove them, now is the time.
31. Install the aFe Scorpion grille assembly onto the vehicle.
32. Plug the 20” Single Row LED light into the power harness
33. Reinstall the factory hardware removed in Step 8. Tighten to factory specifications.
19
34. Install the grille assembly and install the four (4) factory screws removed in Step 4. Tighten
to factory specifications.

Other aFe Power Automobile Accessories manuals
aFe Power 54-12742 User manual

aFe Power

aFe Power 54-12742 User manual

aFe Power advanced FLOW engineering User manual

aFe Power

aFe Power advanced FLOW engineering User manual

aFe Power 77-43023 User manual

aFe Power

aFe Power 77-43023 User manual

aFe Power 77-83028 User manual

aFe Power

aFe Power 77-83028 User manual

aFe Power Takeda 56-10005D User manual

aFe Power

aFe Power Takeda 56-10005D User manual

aFe Power advanced FLO engineering User manual

aFe Power

aFe Power advanced FLO engineering User manual

aFe Power 54-82039 User manual

aFe Power

aFe Power 54-82039 User manual

aFe Power takeda 56-70043D User manual

aFe Power

aFe Power takeda 56-70043D User manual

aFe Power 77-83046 User manual

aFe Power

aFe Power 77-83046 User manual

aFe Power 52-10002D User manual

aFe Power

aFe Power 52-10002D User manual

aFe Power SCORCHER BLUE 77-83043 User manual

aFe Power

aFe Power SCORCHER BLUE 77-83043 User manual

aFe Power 440-401006-N User manual

aFe Power

aFe Power 440-401006-N User manual

aFe Power GT MOMENTUM 50-70087D User manual

aFe Power

aFe Power GT MOMENTUM 50-70087D User manual

aFe Power Scorcher User manual

aFe Power

aFe Power Scorcher User manual
aFe Power 46-71110A User manual

aFe Power

aFe Power 46-71110A User manual

aFe Power SCORPION 79-21003L User manual

aFe Power

aFe Power SCORPION 79-21003L User manual

aFe Power SCORCHER GT 77-47004 User manual

aFe Power

aFe Power SCORCHER GT 77-47004 User manual

aFe Power Scorpion 79-21002L User manual

aFe Power

aFe Power Scorpion 79-21002L User manual

aFe Power Scorpion User manual

aFe Power

aFe Power Scorpion User manual

aFe Power 46-20299-B User manual

aFe Power

aFe Power 46-20299-B User manual

aFe Power F1-03003 User manual

aFe Power

aFe Power F1-03003 User manual

aFe Power 46-39102 User manual

aFe Power

aFe Power 46-39102 User manual

aFe Power 46-70162 User manual

aFe Power

aFe Power 46-70162 User manual

aFe Power 46-70022 User manual

aFe Power

aFe Power 46-70022 User manual

Popular Automobile Accessories manuals by other brands

NORAUTO 90 Assembly instructions

NORAUTO

NORAUTO 90 Assembly instructions

Taxitronic TX52 user manual

Taxitronic

Taxitronic TX52 user manual

LENCO BTS-100 Specifications

LENCO

LENCO BTS-100 Specifications

Strong Frontier TE800-T owner's manual

Strong Frontier

Strong Frontier TE800-T owner's manual

Denali LAH.54.10000 instruction manual

Denali

Denali LAH.54.10000 instruction manual

Atera SIGNO 044 114 User information

Atera

Atera SIGNO 044 114 User information

Kuda 047120 Installation instruction

Kuda

Kuda 047120 Installation instruction

MTD 490-900-0067 Operator's manual

MTD

MTD 490-900-0067 Operator's manual

Performance MP-8 installation manual

Performance

Performance MP-8 installation manual

DDMWorks DDM-21-7 quick start guide

DDMWorks

DDMWorks DDM-21-7 quick start guide

Sony DCC-E34CP - Car Battery Cord operating instructions

Sony

Sony DCC-E34CP - Car Battery Cord operating instructions

Redarc Redvision TVMS1280 manual

Redarc

Redarc Redvision TVMS1280 manual

Goobay 44176 user manual

Goobay

Goobay 44176 user manual

Cruz Cruz Cargo XPro SF Assembly instructions

Cruz

Cruz Cruz Cargo XPro SF Assembly instructions

Cruz Evo Rack E21-126 Assembly instructions

Cruz

Cruz Evo Rack E21-126 Assembly instructions

UMBRA RIMORCHI 937 Fitting instructions

UMBRA RIMORCHI

UMBRA RIMORCHI 937 Fitting instructions

Tabernus Peram Hatch-bag Luggage System installation instructions

Tabernus Peram

Tabernus Peram Hatch-bag Luggage System installation instructions

American International TOYK932GB quick guide

American International

American International TOYK932GB quick guide

manuals.online logo
manuals.online logoBrands
  • About & Mission
  • Contact us
  • Privacy Policy
  • Terms and Conditions

Copyright 2025 Manuals.Online. All Rights Reserved.