manuals.online logo
Brands
  1. Home
  2. •
  3. Brands
  4. •
  5. aFe Power
  6. •
  7. Automobile Accessories
  8. •
  9. aFe Power Scorpion 79-21001L User manual

aFe Power Scorpion 79-21001L User manual

Instruction Manual P/N: 79-21001L
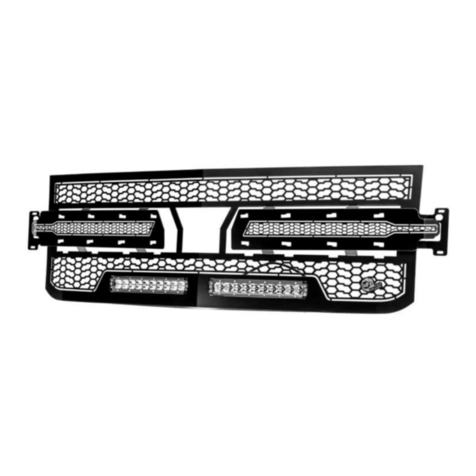
Scorpion Grille
Make: Ford Model: F-150 Raptor Year: 17-20 Engine: V6 –3.5L (tt)
1
•Applications models vary. We recommend verifying fitment before beginning installation process.
•Images featured in the instruction documents may not always exactly match your grille.
•Please read the entire instruction before proceeding.
•Ensure all components listed are present.
•Ensure you have all necessary tools before proceeding.
•Disconnect the negative battery terminal before proceeding.
•If you are missing any of the components, call customer support 951 493 7100
Label
Qty.
Description
A
1
aFe Scorpion Grille
B
4
Raw Aluminum Trim Ring
C
15
Cable tie 8"
D
8
Locknut, 1/4" Nylon (black)
E
8
Washer, 1/4" (black)
F
6
Locknut, 6-32 Nylon
G
2
Washer, #10 SS
H
2
Screw, 10-32 x 1/2" button head (black)
I
2
Locknut, 10-32 Nylon
J
4
Panel Retainer Clip
K
6
Washer, 1/4"
L
6
Locknut, 1/4" Nylon
M
6
Screw, 1/4”- 20 X 3/4"
N
2
Y-adapter
O
1
Power Harness
P
1
Back plate aFe logo
Q
8
Bracket, #5 LED bar
R
4
6” Single Row LED
S
16
Screw, 10-32 x 5/8"
T
18
Nut, 10-32 Flange
U
4
Cable Clamp
2
3
Note: Before you begin, use “Painters Tape” to apply a protective guard around the work areas (fender and
bumper valance). This will help protect the paint and finish of your vehicle.
1. Disconnect the negative battery terminal.
2. Locate ten (10) plastic clips on top of radiator shroud cover and one (1) additional on each side located at
the top of the headlight body panel cover. Carefully pry off to remove and then set aside for reinstallation
later.
3. Remove radiator shroud cover and set aside for reinstallation later.
4
4. The headlight body panel needs to be removed. You will need to gently pull the panel out of the clips on
the lower grille and the headlight. After the clips are out, continue to pull carefully until the headlight body
panel is out from behind the headlight. Pull the headlight body panel straight out of the clips on the
fender.
5
5. Remove the one (1) bolt located on each side of the grille. Save for reinstallation.
6
6. Located near the hood latch, disconnect the two (2) electrical connectors.
7. Remove the four (4) bolts across the top of the grille. Save for reinstallation.
8. Remove three (3) push pins on each side of the grille. Save for reinstallation.
7
9. Remove the grille from the truck.
8
10. Remove the lower trim body panel from the factory grille by pulling gently to release the clips which retain
it. Save for reinstallation.
9
11. Remove the seven (7) nuts that line the outside edge and the one (1) screw that secures the active shutter
assembly.
12. Remove the four (4) plastic clips located on the top lip.
13. Remove the wiring connector for the running lights and air temperature sensor from the active shutter
grille.
14. Remove the air temperature sensor from the inside of the active shutter assembly.
15. Separate the active shutter assembly from the factory grille.
10
16. Remove the factory studs left after removing the nuts and discard
17. Set the active shutter assembly to the side. Save for reinstallation.
11
18. Remove the wire loom from the grille that connects the running lights and the air temperature sensor.
Save for reinstallation.
19. Mark the three (3) running lights before removing them so you know the location (Left, Center, Right).
Remove the three (3) running lights from the grille. Save for reinstallation.
20. Set factory grille aside.
12
Note: To prevent scratching the aFe Scorpion grille while preforming assembly, use a protective covering
between the grille and a flat surface.
21. Remove the supplied aFe Scorpion grille from the box and place it on a flat surface for assembly.
13
Note: Do the next step only if not installed from aFe.
22. Install the main lower grille bracket using four (4) of the supplied 10-32 flange nuts and tighten.
14
Note: Do the next step only if not installed from aFe.
23. Install six (6) of the supplied 6-32 nylon locknuts 3/8” (.375) from the grille. This will act as a stop for the
light when it is installed. Make sure that the outside flat edges of the nuts are facing towards each other.
15
24. Install the factory running lights (removed in Step 19) onto the studs. Use the six (6) remaining 6-32 nylon
locknuts to secure the running lights to the aFe Scorpion grille. Tighten the nuts.
16
25. Install the supplied back plate aFe logo using the two (2) supplied 10-32 x 1/2" button head screws (black)
and two (2) supplied 10-32 flange nuts. Tighten the back plate aFe logo to the aFe Scorpion grille.
17
26. Route the air temperature sensor and running light wiring loom around the outside edge of the grille (on
the left side).
27. Attach the factory wiring harness to the running lights.
28. Secure the wiring harness with two (2) supplied cable ties. There are holes in the grille that are used for
attaching the wiring to the grille with the factory push in wiring holders.
18
29. Remove and discard the two (2) nuts from each of the supplied 6” single row LED lights.
19
Note: Depending on your preferred look of the vehicle, you have the option to install the raw aluminum trim
pieces or leave them off.
Note: Please read the instruction below prior to installation.
30. Begin by taping one (1) of the supplied raw aluminum trim pieces on the front of the aFe Scorpion grille
using two (2) pieces of painter’s tape (one on the top and one on the bottom). This will help hold the raw
aluminum trim piece while you install the light onto the aFe Scorpion grille.
31. Install one (1) supplied 6” single row LED light through the front of the aFe Scorpion grille (over the trim
ring if installed). While holding the 6” single row LED light, install two (2) supplied #5 LED bar brackets
(bracket feet point away from each other) from the back of the aFe Scorpion grille and onto the studs on
the 6” single row LED light. Install two (2) supplied 1/4" washers (black) and two (2) supplied 1/4" nylon
locknuts (black) on the lights. Do not tighten. From the front, install four (4) 10-32 x 5/8" screws through
the raw aluminum trim piece (if installed) and the aFe Scorpion grille. Turn the aFe Scorpion grille around
and make sure the 10-32 x 5/8" screws pass thru the #5 LED bar brackets. Use four (4) 10-32 flange nuts on
the 10-32 x 5/8" screws. Tighten all the hardware. Repeat Steps 30 and 31 for the three (3) remaining
supplied 6” single row LED lights.

Other aFe Power Automobile Accessories manuals

aFe Power SCORCHER 77-44008 User manual

aFe Power

aFe Power SCORCHER 77-44008 User manual

aFe Power 46-70270 User manual

aFe Power

aFe Power 46-70270 User manual

aFe Power 54-13053D User manual

aFe Power

aFe Power 54-13053D User manual

aFe Power advanced FLO engineering User manual

aFe Power

aFe Power advanced FLO engineering User manual

aFe Power advanced FLOW engineering User manual

aFe Power

aFe Power advanced FLOW engineering User manual

aFe Power takeda 56-70043D User manual

aFe Power

aFe Power takeda 56-70043D User manual

aFe Power 46-20299-B User manual

aFe Power

aFe Power 46-20299-B User manual

aFe Power Momentum hd User manual

aFe Power

aFe Power Momentum hd User manual

aFe Power F1-03003 User manual

aFe Power

aFe Power F1-03003 User manual

aFe Power SCORCHER GT 77-47004 User manual

aFe Power

aFe Power SCORCHER GT 77-47004 User manual

aFe Power 54-82039 User manual

aFe Power

aFe Power 54-82039 User manual

aFe Power 50-70007D User manual

aFe Power

aFe Power 50-70007D User manual

aFe Power 46-70022 User manual

aFe Power

aFe Power 46-70022 User manual

aFe Power SCORCHER BLUE 77-83043 User manual

aFe Power

aFe Power SCORCHER BLUE 77-83043 User manual

aFe Power GT MOMENTUM 50-70087D User manual
aFe Power

aFe Power GT MOMENTUM 50-70087D User manual

aFe Power 440-401006-N User manual

aFe Power

aFe Power 440-401006-N User manual

aFe Power 52-10001D User manual

aFe Power

aFe Power 52-10001D User manual

aFe Power Scorpion 79-21002L User manual

aFe Power

aFe Power Scorpion 79-21002L User manual

aFe Power Quantum 2500 User manual

aFe Power

aFe Power Quantum 2500 User manual

aFe Power SCORPION 79-21008L User manual

aFe Power

aFe Power SCORPION 79-21008L User manual

aFe Power 05-01016 User manual

aFe Power

aFe Power 05-01016 User manual

aFe Power 51-74201 User manual

aFe Power

aFe Power 51-74201 User manual
aFe Power dfs780 User manual

aFe Power

aFe Power dfs780 User manual

aFe Power 50-70009S User manual

aFe Power

aFe Power 50-70009S User manual

Popular Automobile Accessories manuals by other brands

Intellitronix DP10002 installation guide

Intellitronix

Intellitronix DP10002 installation guide

Mountain Top MTI 886 070 installation manual

Mountain Top

Mountain Top MTI 886 070 installation manual

McGard Wheel Lock installation instructions

McGard

McGard Wheel Lock installation instructions

iOttie HLCRIO132 Installation instruction

iOttie

iOttie HLCRIO132 Installation instruction

AC Schnitzer 5111 282 540 Fitting instructions

AC Schnitzer

AC Schnitzer 5111 282 540 Fitting instructions

Menabo SIRIO KIT+1 Fitting instructions

Menabo

Menabo SIRIO KIT+1 Fitting instructions

Quadratec 12120.0793 installation manual

Quadratec

Quadratec 12120.0793 installation manual

Brodit ProClip 852057 manual

Brodit

Brodit ProClip 852057 manual

Smittybilt Defender Series installation instructions

Smittybilt

Smittybilt Defender Series installation instructions

Standby L54 quick guide

Standby

Standby L54 quick guide

Hook BTZ 07-26B manual

Hook

Hook BTZ 07-26B manual

ClearView FRIDGE CAGE CAGE-01 Assembly instructions

ClearView

ClearView FRIDGE CAGE CAGE-01 Assembly instructions

Berkeley Varitronics Systems BLUESLEUTH-LITE Quick user guide

Berkeley Varitronics Systems

Berkeley Varitronics Systems BLUESLEUTH-LITE Quick user guide

Prime Design FBM-1061 Assembly instructions

Prime Design

Prime Design FBM-1061 Assembly instructions

Discount Car Stereo AUX-FB Quick start installation guide

Discount Car Stereo

Discount Car Stereo AUX-FB Quick start installation guide

Yakima HullRaiser manual

Yakima

Yakima HullRaiser manual

SAN HIMA SAND-FLAG user manual

SAN HIMA

SAN HIMA SAND-FLAG user manual

Belkin WIC004 Setting up

Belkin

Belkin WIC004 Setting up

manuals.online logo
manuals.online logoBrands
  • About & Mission
  • Contact us
  • Privacy Policy
  • Terms and Conditions

Copyright 2025 Manuals.Online. All Rights Reserved.