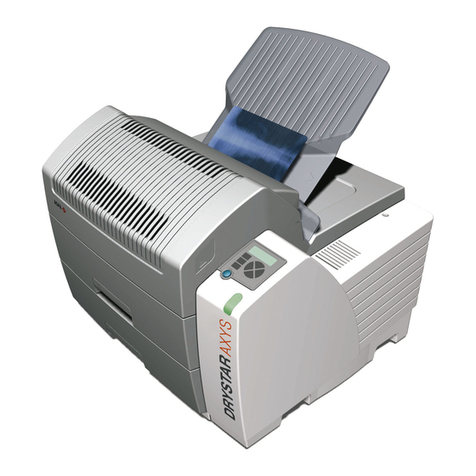
AGFA ADC Solo Guide

HealthCare Maintenance
printed in Germany 01 / 2002
Order-No.: DD+DIS013.02E
*1UT44X1*
1 Piece UT44X MA1
ADC Solo
Type 5155 / 100/200
2nd Edition
ADC Solo
Digitizer
Type 5155 / 100/200
Base: VME
This documentation is separately available. Order No: DD+DIS013.02E

Maintenance DD+DIS013.02E
Section 12 ADC Solo Edition 1, Revision 10
(Type 5155 / 100/200)
Caution:
This system uses high voltage. Please consider the respective safety regulations.
These instructions describe adjustments and routines which must only be performed by qualified
technical personnel.
Note:
Electrical repairs and connections must only be performed by a qualified electrician.
Mechanical repairs and connections must only be performed by a qualified technician.
CE Declaration:
The CE Declaration (CE Conformity) becomes invalid if the product is changed without explicit
consent of the manufacturer! This applies to all parts, not only to safety elements.
We reserve the right to technical changes

DD+DIS013.02E Maintenance
Edition 1, Revision 10 ADC Solo Section 12 / I
(Type 5155 / 100/200)
Section 12
List of Contents
1 Safety.........................................................................1
2 General Information .................................................2
2.1 Maintenance Frequency.......................................................... 2
2.2 Required Time..........................................................................2
2.3 Required Tools ........................................................................3
2.4 Required Cleaning Material ....................................................3
2.5 Required Spare Parts ..............................................................3
3 Maintenance Step by Step ....................................... 4
3.1 Diagnostics ..............................................................................4
3.1.1 Questioning of the customer ..............................................................4
3.1.2 Infocounter Analysis...........................................................................4
3.1.3 How to evaluate the Infocounter.........................................................4
3.1.4 Clear Infocounter ...............................................................................5
3.1.5 Visual Check......................................................................................5
3.2 Safety Switches .......................................................................6
3.3 Inside ........................................................................................6
3.4 Cassette Unit............................................................................6
3.5 VME Rack .................................................................................7
3.6 Scan Unit.................................................................................. 8
3.7 Transport Unit.......................................................................... 8
3.8 Erasure Unit .............................................................................9
3.9 Cassettes ...............................................................................11
3.10 Image Plates...........................................................................11
4 Checking the Image Quality...................................12
4.1 Test Cycles.............................................................................12
4.2 Exposure of a Flatfield ..........................................................12
4.3 Evaluation of a Flatfield ........................................................15
5 Completion of Maintenance...................................16
Maintenance Checklist

Maintenance DD+DIS013.02E
Section 12 / II ADC Solo Edition 1, Revision 10
(Type 5155 / 100/200)

DD+DIS013.02E Maintenance
Edition 1, Revision 10 ADC Solo Section 12 / 1
(Type 5155 / 100/200)
1 Safety
•The ADC Solo has been designed for scanning medical X-ray image
plates and should only be used for these purposes.
•The ADC Solo must only be operated by qualified staff trained on the
machine.
•Make sure that the ADC Solo is constantly monitored in order to avoid
inappropriate handling, especially by children.
•Only trained service personnel must make repairs. Only authorized service
personnel must make changes to the ADC Solo.
•If there is any visible damage to the machine casing, do not start nor use
the ADC Solo.
•If you want to connect the ADC Solo with other devices, components or
assemblies and if the technical data do not permit determining whether the
combination with these devices, components or assemblies involves
hazards, you must consult the respective manufacturers to avoid danger
for operating personnel or the environment.
•Do not override or disconnect the integrated safety features.
•Switch off the ADC Solo before performing any maintenance work or
repairs. Disconnect the ADC Solo from the mains before making repairs or
performing any maintenance activities.
•As is the case for all technical devices, the ADC Solo must be operated,
cared for and serviced correctly.
•If you don't operate the ADC Solo correctly or if you don't have it serviced
correctly, Agfa-Gevaert is not liable for resulting disturbances, damages or
injuries.
•When installing the ADC Solo, care must be taken to ensure that there is
either a mains plug or an all-cable disconnecting device in the internal
installation fitted near the ADC Solo and that it is easily accessible.
•If you notice conspicuous noise or smoke, disconnect the ADC Solo
immediately.
•Check that the voltage setting of the machine matches the power supply
voltage before connecting the machine to the mains.

Maintenance DD+DIS013.02E
Section 12 / 2 ADC Solo Edition 1, Revision 10
(Type 5155 / 100/200)
2 General Information
These maintenance instructions must be considered confidential.
To ensure quality and functional reliability of the system all the points listed
below (minimum maintenance points) must be carried out.
•The maintenance points have been arranged in a chronologically suitable
order to make the work routines as efficient as possible.
The sequence of the maintenance points in the checklist (see appendix) is
identical with these maintenance instructions.
•If there is a detailed description for a certain maintenance point in the
service documentation, this will be noted in the column "details".
•During the maintenance procedure always consider the safety instructions,
see TECHNICAL DOCUMENTATION section 1 / 1.
•Please check if it is necessary to include country specific regulations as
additional maintenance points!
Only for Systems with DRA Contract:
In systems with DRA Contract the infocounters are checked and evaluated in
regular intervals by the GSC. If there is an indication of an upcoming defect,
this is noted in the DRA Report and sent to the respective NSO with
instructions for measures possibly required on the machine.
Therefore we recommend to contact your NSO about this subject before
maintenance, in order to perform these recommended measures in addition
to the "must" maintenance points.
2.1 Maintenance Frequency
The maintenance has to be carried out:
•every 15.000 cycles or
•every 6 months
2.2 Required Time
approximately 3 h

DD+DIS013.02E Maintenance
Edition 1, Revision 10 ADC Solo Section 12 / 3
(Type 5155 / 100/200)
2.3 Required Tools
Order number Description
CM+9.5155.1015.2 Cu Filter (for exposure of test images)
Commercially available Service-PC
Commercially available Flashlight
2.4 Required Cleaning Material
In addition to the standard equipment the following cleaning substances are
required:
Order number Description
CM+9.9999.0895.0 Vacuum cleaner
CM+9.9999.0896.0 Dirt bags for vacuum cleaner (10 x)
ABC-Code: EFOJH ADC Cleaner
Commercially available Dust brush
Commercially available Lint-free cloth
Commercially available Soft dust brush
2.5 Required Spare Parts
The following assortment represents a complete copy of the
Maintenance-assortment (CM+051550100733)
according to the R I M L-assortment categorization in the spare parts list:
Order number Description
CM+9.0362.6031.0 1x Filter with micro insert
CM+9.0450.6553.0 10 x Erasure lamp, 100 W
CM+9.5145.6550.0 2 x Suction cups
CM+9.5145.9100.0 2 x Roller (for cassette unit)

Maintenance DD+DIS013.02E
Section 12 / 4 ADC Solo Edition 1, Revision 10
(Type 5155 / 100/200)
3 Maintenance Step by Step
3.1 Diagnostics
3.1.1 Questioning of the customer
•Ask the customer for any problem that appeared since the last
maintenance.
3.1.2 Infocounter Analysis
•Service PC, required to analyze the infocounter
(1) Insert an empty floppy in the floppy
drive of the VME-Rack.
See Figure 1.
(2) In the service menu select
"Save on floppy"
with the key and press
(3) select "Infocounter file" and press
(4) Remove the floppy from the floppy
drive and insert it in the Service
PC
(5) Unzip the file "5155_xxxx_icn.zip"
(xxxx stands for the serial number)
(6) Start an editor (e.g. notepad or
wordpad).
(7) Open the file
"\D_\infocounter\0\infocounter.txt"
(8) Evaluate the infocounter file.
MG3000
Infocounter
Figure 1
3.1.3 How to evaluate the Infocounter
Evaluation of infocounters.txt
What to check in the
infocounter
Comment
1.1 Device Info: Serial
number and
Installation date
Compare device serial number to section 11
“Technical Standard Modifications” and
section 13 “Field Service Bulletins” to determine
whether the device is modified or requires a
modification.
1.4 Software Info It is recommended to have the latest software
installed. Before you upgrade to a new software,
make sure that your hardware is up to date.
2.2 Throughput For throughput most important are the cycles per
day. They usually count between 50 and 200.

DD+DIS013.02E Maintenance
Edition 1, Revision 10 ADC Solo Section 12 / 5
(Type 5155 / 100/200)
3.3 Hardware
Modification History
By comparing the status of the device with the
available “Modifications”, section 10, the exact
hardware status can be determined.
3.4 Software modification
history
By checking the software modification history it
can be determined, whether a recent software
upgrade solved a problem, that occurred quite
often in the error list.
4.6 Laser power Check that laser power is constant: no more than
1mW difference in between two entries. If the
value is higher, run diagnostic software and
scan&signals and check laser diode module.
4.7 Galvanometer
Monitoring
Check the entries. If the limits of offset (30) or
amplitude (60) are exceeded, check the last
images on the workstation thoroughly for jitter.
Change galvo only if necessary.
5.3 Retries Many retries (> 1%) have to be investigated:
They usually lead to less throughput of the
device. Compare it with frequent error codes.
5.7 Error History Check the last occurred errors (in between two
maintenance), how often they appeared as well
as the CBF (cycles between failures) of these
errors. This gives an overview of the current
status of the machine.
Compare frequently occurring errors to the error
hit list, section 6.3, and take actions.
5.8 Error List Relatives
and
5.9 Error List Total
Troubleshoot these errors with the help of the
technical documentation, section 6.3,
“Troubleshooting”.
3.1.4 Clear Infocounter
(1) Clear the infocounter to refresh relative counters.
3.1.5 Visual Check
•Flashlight
(1) Check overall condition of the machine – outside and inside – for obvious
changes or damage.

Maintenance DD+DIS013.02E
Section 12 / 6 ADC Solo Edition 1, Revision 10
(Type 5155 / 100/200)
3.2 Safety Switches
(1) Check both interlock switches
Aand B, Figure 2.
The machine starts up only,
if both interlocks are pressed.
The power supply is only
interrupted, if the front door
(interlock A) is opened.
A
B
Figure 2
3.3 Inside
•Vacuum cleaner
•Lint free cloth
(1) Vacuum the inside of the digitizer and wipe it.
3.4 Cassette Unit
•Screw driver
•Dust brush
•Roller
(CM+9.5145.9100.0)
•Toothed belt
(CM+9.5145.5195.0)
Opener
mechanism
(1) Remove panel on right hand
side of the digitizer.
(2) Clean the opener mechanism
with a soft dust brush.
Figure 3

DD+DIS013.02E Maintenance
Edition 1, Revision 10 ADC Solo Section 12 / 7
(Type 5155 / 100/200)
(3) Check roller Afor visible wear
and replace if necessary.
(4) To replace the roller, remove
the retaining ring Band pull
the roller off its shaft.
In case of recorded cassette
feeding problems replace the
roller anyway and in any case
replace it once a year.
B
A
Figure 4
Belt (5) Exchange the transport belt
once a year.
3.5 VME Rack
•Vacuum cleaner
VME fan
General
(1) Check the fan function of the
VME rack fan by hand.
There is no air filter to be
replaced.
(2) Remove visible dust and dirt
deposits by means of a
vacuum cleaner.

Maintenance DD+DIS013.02E
Section 12 / 8 ADC Solo Edition 1, Revision 10
(Type 5155 / 100/200)
3.6 Scan Unit
•Soft cloth
•ADC Cleaner
(if not available, use water)
•Allen key 3 mm
Scan rollers (1) Remove the transport unit.
(see section 6.5)
(2) Clean all scan rollers (only with
a soft cloth and ADC Cleaner).
The scan rollers have to be
cleaned in place and must not be
removed. To move the scan rollers
just turn the drive of the slow scan
motor manually C.
Discharge
brush
(3) Check the discharge brush A
for visible wear and heavy dirt
– clean by hand or replace B, if
necessary.
B
A
A
C
Figure 5
3.7 Transport Unit
•Soft cloth
•ADC Cleaner
(if not available, use water)
•Suction cups
(CM+9.5145.6550.0)
Filter (1) Pull the hoses off the filter
(2) Unscrew the filter spot A
(3) Shake the micro-filter Band
blow it clean.
A
B
Figure 6

DD+DIS013.02E Maintenance
Edition 1, Revision 10 ADC Solo Section 12 / 9
(Type 5155 / 100/200)
Suction
cups
(4) Check the suction cups position
(5) Clean the suction cups spot C
with ADC Cleaner
(6) Exchange suction cups once a
year.
(7) In case of vacuum problems,
check the suction cups by
bending up the edges (check
for tears) and replace if
necessary.
A
C
B
Figure 7
3.8 Erasure Unit
•Soft cloth
•ADC Cleaner
(if not available, use water)
•10 x 100 W lamps
(CM+9.0450.6553.0)
(1) Open the front door
(2) Pull the erasure unit out and
remove it
Lamps (3) Remove pane A
(4) Pull all lamps carefully out of their
sockets B
(5) Check all parts of the erasure unit
for damage
515512BM.CDR
A
B
Figure 8

Maintenance DD+DIS013.02E
Section 12 / 10 ADC Solo Edition 1, Revision 10
(Type 5155 / 100/200)
(6) Dust the following parts of the
erasure unit
•Reflector
•Input and output opening of
the air stream (protection
grid)
•KG2 filter A
•Front pane B
In case of persistent dirt, you
may also use ADC Cleaner for cleaning
all the surfaces with the exception of the
inner side of the large glass plate. This
side must not be cleaned with anything
wet since a gelatin layer is attached to it.
(7) Check the KG2 filter Afor
damage and replace if
necessary.
A
B
Figure 9
Fan
(8) Insert the new lamps carefully
Do not touch the glass
bulbs with your bare fingers. Use a
soft cloth to insert the lamps.
(9) Check fan of erasure unit for
dust and clean if necessary.
(10) Re-insert Erasure Unit

DD+DIS013.02E Maintenance
Edition 1, Revision 10 ADC Solo Section 12 / 11
(Type 5155 / 100/200)
3.9 Cassettes
•Aluminum label
(CM+9.8300.1131.0)
Visual Check (1) Check the most frequently
used cassettes and image
plates for damage. If
damage is noticed, check
further cassettes.
(2) Check the following items of
the cassette:
- Outside condition
- Hinges
- Locking
- Opening leaf springs
- Aluminum label
A
LU L
A
BEL
514609AA.CDR
(3) Attach missing aluminum
label.
The digitizer needs the aluminum
label to recognize ADC cassettes.
3.10 Image Plates
Visual Check (1) Check if there are scratches
on the surface
(2) Check if edges are loose as
an indication for mechanical
problems at IP transport

Maintenance DD+DIS013.02E
Section 12 / 12 ADC Solo Edition 1, Revision 10
(Type 5155 / 100/200)
4 Checking the Image Quality
Check the last 20 to 40 images on the VIPS, to see if artifacts or other
image quality problems occur.
4.1 Test Cycles
(1) Carry out four test cycles with each format of the cassettes.
4.2 Exposure of a Flatfield
Expose an image plate of every format and evaluate all the images on the
Processing Station and a printer. Following, check the flat field for
homogenous field or stripes criteria. The hard disk of the digitizer provides two
flat field samples for quality comparison.
Repeat this procedure for all formats on site!
•Flatfield
(1) Print the flat field sample provided by the digitizer:
•Start the service program.
•Select from the service menu
<Checks>
<Send flatfield>
<Calibration pattern>
<Banding pattern>
Print the flat fields "Calibration" and "Banding" via the Processing Station
(window setting of 0.6, without changing the level setting).

DD+DIS013.02E Maintenance
Edition 1, Revision 10 ADC Solo Section 12 / 13
(Type 5155 / 100/200)
(2) Expose a new image plate:
•Place the cassette in length
direction to the X-ray tube,
see figure below.
•Set the following exposure
parameters:
−7.5 mAs, 77 kVp, 1.3 m
distance
−Doses 10 µGy (result of
setting: 7.5 mAs, 77 kVp, 1.3
m distance)
−1.5 mm Cu-filter with small
focus
•Turn cassette by 180°.
•Expose plate a second time
by using the same
parameters.
Notice, that all exposure
parameters are approximate
values.
Rotating
Anode
Cathode
x
-ray tube
Figure 10
(3) Identify the cassette on the ID Station:
•In the <Patient name> field, type a name and a cassette format,
e.g. Flatfield 18 x 24.
•In the <First name> field, type the serial number of the digitizer,
e.g. SN1356.
•In the <Birth date> field, type the current date,
e.g. 20012001 (use date format xxyyzzzz for day/month/year).
•In the <Radiologist> list, click <SERVICE>.
•In the <Examination> list, click <system diagnosis>.
•In the <Sub-examination> list, click <Flat field>.
•Confirm the Exposure class <200>.
Make sure that the outlined areas are filled in as shown in the
example.

Maintenance DD+DIS013.02E
Section 12 / 14 ADC Solo Edition 1, Revision 10
(Type 5155 / 100/200)
(4) Insert the cassette into the digitizer and print the image on a printer with a
window setting of 0.6 without changing the level setting.
Figure 11

DD+DIS013.02E Maintenance
Edition 1, Revision 10 ADC Solo Section 12 / 15
(Type 5155 / 100/200)
4.3 Evaluation of a Flatfield
(1) Inspect the developed image for homogeneity:
Compare the prints of the flat field sample with your exposed flat field at a
light box.
•If there are no lines visible or the effects are less than on the example,
the image quality is all right.
•If there are unacceptable effects, compare with the following sketches.
Calibration lines
Blurred dark lines in slow scan
direction on the flat field (see
beside).
•Expose another flat field and
compare it again with the
sample.
If there are still unacceptable
effects, you have to redo shading
calibration as described in section
6.6.
Expose another flat field and
compare it again with the sample.
If there are still unacceptable
effects, please contact the Support
Center.
Figure 12
Banding
Fine sharp white or gray lines in fast
scan direction on the flat field (see
beside).
•Check diagnostic images.
If there are still unacceptable
effects please contact the Support
Center.
Figure 13

Maintenance DD+DIS013.02E
Section 12 / 16 ADC Solo Edition 1, Revision 10
(Type 5155 / 100/200)
Dust
Fine sharp lines in slow scan
direction on the flat field (see
beside).
•Check if scanner is dusty. In
case of, use the scan-brush to
remove it. Expose another flat
field and compare it again with
the sample.
If there are still unacceptable
effects please contact the Support
Center.
Figure 14
5 Completion of Maintenance
(1) Confirm the maintenance by signing the checklist
(2) Make a backup of the system on floppy.
(3) Inform the customer about what was done during the maintenance and
which repairs need to be done in next future.
Other manuals for ADC Solo
1
This manual suits for next models
3
Table of contents
Other AGFA Medical Equipment manuals

AGFA
AGFA DX-D 100 User manual

AGFA
AGFA DX-D 300 User manual

AGFA
AGFA DR 100e User manual

AGFA
AGFA Auto QC2 User manual

AGFA
AGFA Drystar 4500 Plug & Play User manual

AGFA
AGFA Valory User manual

AGFA
AGFA CR MD1.0 GENERAL SET User manual

AGFA
AGFA CR 30-X User manual

AGFA
AGFA DX-D 60C User manual

AGFA
AGFA CR Series User manual