AgileX TITAN User manual

1 / 49
TITAN
AgileXRoboticsTeam
⽤
户⼿
册
V.2.0.12023.08
Documentversion
TITANUserManual
No. Version Date Edited by Reviewer Notes
1 V1.0.0 2022/10/15 何士玉 first draft
2 V2.0.0 2023/3/23 李圣望、何士玉
Update
agreement
content

2 / 49
Before using the robot, any individual or organization must read and understand the manual. If
you have any questions about it, please do not hesitate to contact us at [email protected] . It is
very important that you should follow and implement all instructions and guidelines in this
manual. Please pay extra attention to the warnings.
ImportantSafetyInformation
This manual does not cover the design, installation, and operation of a robotic application, nor
does it include any equipment that may affect the safety of a robotic system. A robot system
that uses the TITANshould be designed and used in compliance with the safety requirements
and other standards of the corresponding countries.
Any users of the TITANshould comply with laws and regulations of relevant countries and
ensure that there are no obvious hazards in the application of the TITAN. This includes but is
not limited to the following:
Responsibility
Do a risk assessment of the robotic system that uses the TITAN.
The risk assessment should include additional safety equipment to other machinery.
Please ensure that the equipment of the whole robotic system, including software and hardware,
are designed, and installed correctly.
The TITAN is not an autonomous mobile robot with anti-collision, anti-fall, biological
approach warning, and other safety functions. These safety functions are expected to be
developed and assessed by system integrators and end customers under relevant safety
regulations and laws to ensure there are not any major dangers and potential safety hazards in
their practical applications.
3 V2.0.1 2023/09/02
谢
瑞
亲

3 / 49
Read all technical documents: including the risk assessment and this manual.
Know the possible safety risks before using the TITAN.
UseEnvironment
For the first use, please read this manual carefully to understand the basic operation and
operating specifications.
Remote control operation should be in a relatively open area. The TITAN does not have any
automatic obstacle avoidance sensors.
Please use the TITAN under the ambient temperature of 0 ℃~ 40 ℃.
The TITAN
’
s waterproof and dustproof level is IP22 if it is not customized
Check
Make sure each device is fully charged.
Make sure the TITAN has no obvious abnormalities.
Make sure the remote control has sufficient battery power
OperationPrecautions
Ensure that the surrounding area is relatively open when operating the TITAN.
Please do remote control within sight.
The maximum load of the TITAN is 150 KG. Please ensure that the payload does not exceed
150 KG when using.
When installing external equipment on the TITAN, Please ensure their centroid location is at
the TITAN
’
s center of rotation.
Please charge the TITAN in time after low-battery alarm.
When the TITAN is abnormal, please stop using it immediately to avoid secondary injury.
When the TITAN is abnormal, please contact the technical support immediately, and do not
handle it without professional suggestion.

4 / 49
Please use the TITAN in an environment that does not exceed its IP protection level.
Do not push the TITAN directly.
Tail extension power supply current does not exceed 15A, total power does not exceed 720W
BatteryPrecautions
The batteries of TITAN products are not fully charged when they leave the factory. The specific
battery voltage and power can be displayed through the voltage indicator at the rear of the TITAN
chassis or through the vol and batt on the remote control.
Pleasedonotchargethebatteryafteritisexhausted.Pleasechargeitintimewhenthelow
batteryoftheTITANremotecontrolislowerthan15%orthetailvoltagedisplayislower
than25V.
Static storage conditions: The best temperature for storage is -10°C~40°C. When the battery is
not in use, it must be charged and discharged once a month, and then stored at full voltage. Do
not leave the battery Put it in fire, or heat the battery, do not store the battery at high temperature.
Charging: You must use the matching lithium battery charger for charging. Do not charge the
battery below 0°C. Do not use non-original standard batteries, power supplies, and chargers.
Precautionsforuseenvironment
The operating temperature of TITAN is -10°C~40°C, please do not use it in an environment where
the temperature is lower than -10°C and higher than 40°C
Do not use in environments with corrosive or flammable gases or near flammable substances
Please do not use it around heating elements such as heaters or large winding resistors
The waterproof and dustproof grade of TITAN is IP22, please pay attention to the use environment,
check and remove rust regularly
It is recommended that the altitude of the use environment should not exceed 1000M
It is recommended that the ambient temperature difference between day and night does not
exceed 25°C
Regular inspection and maintenance of track tensioning wheels
SafetyPrecautions

5 / 49
If you have any questions about the use process, please follow the relevant instruction manual or
consult relevant technical personnel
Before using the equipment to operate, pay attention to the situation on site to avoid personnel
safety problems caused by misoperation
In case of emergency, power off the device by tapping the emergency stop button
Do not modify the internal equipment structure without technical support and permission
When the equipment is abnormal, please stop using it immediately to avoid secondary injury
When the device is abnormal, please contact the relevant technical personnel, and do not handle
it without authorization.
CONTENTS

6 / 49
1IntroductiontoTITAN
CONTENTS
Documentversion
ImportantSafetyInformation
CONTENTS
1IntroductiontoTITAN
1.1Specifications
1.2Required for Development
2BasicIntroduction
2.1 Status of the TITAN
2.2 Description of Electrical Interfaces
2.3 Remote Control Instructions
3UsageandDevelopment
3.1 Operation
3.2 CAN Communication Protocol
3.3TITAN use manual for ROS
3.4 The Github ROS development kit and user manual
3.5 Firmware Upgrade
3.6 The vehicle body coordinate system
4MaintenanceInstructions
4.1Maintenance method
5ProductSize

7 / 49
TITAN is a programmable front and rear dual-steering UGV (UNMANNED GROUND VEHICLE),
which is a chassis with a modular design. Compared with the former AKM chassis, TITAN not only
greatly reduces the turning radius, but also is more stable and safer. have wider applications.
TITAN chassis, suitable for a variety of complex terrain. At the same time, it can be equipped with
stereo cameras, lidar, GPS, IMU, manipulators and other equipment, and is applied to unmanned
inspection, security, scientific research, exploration and logistics and other fields.
1.1Specifications
Type Description Parameters
Mechanical
Dimensions
(
mm
)
1640×980×1440
Axle Track
(
mm
)
860
Wheel Base
(
mm
)
845
Rated power (w) 1000
Rated torque (N.M) 556
Performance
Maximum Speed
(
m/s
)
10.8
Motion Mode Front and rear Ackermann
Maximum Obstacle Height
(
mm
)
100
(
vertical obstacles
and fully loaded
)
Maximum Climbing Angle
(
°
)
10
Weight
(
kg
)
280(two batteries)
Maximum Load
(
kg
)
300
Battery Life
(
h
)
>5h(1.4km/htest)
Charging efficiency 1C

8 / 49
1.2RequiredforDevelopment
TITAN can be equipped with FS remote control when it leaves the factory. Users can control the
chassis through the remote control to complete mode switching, movement and steering control.
TITAN is equipped with a standard CAN communication interface, and users can carry out
secondary development through the CAN interface.
2BasicIntroduction
This part is a basic introduction to the TITAN, mobile robot chassis. After reading this part, users
and developers can have an overall understanding about it. As shown in Figure 2.1 below, it is an
overview of the TITAN.
Battery Type Lithium iron phosphate
battery
Single Battery Capacity
(
ah
)
24
(
Can support up to 2
batteries
)
Rated Voltage
(
v
)
48
Functional Application
Engineering Investigation
Energy Inspection
Mine Transportation
Intelligent Security
Logistics
Agricultural Product
Collection and Transportation

9 / 49
Figure 2.1 Overview of the TITAN
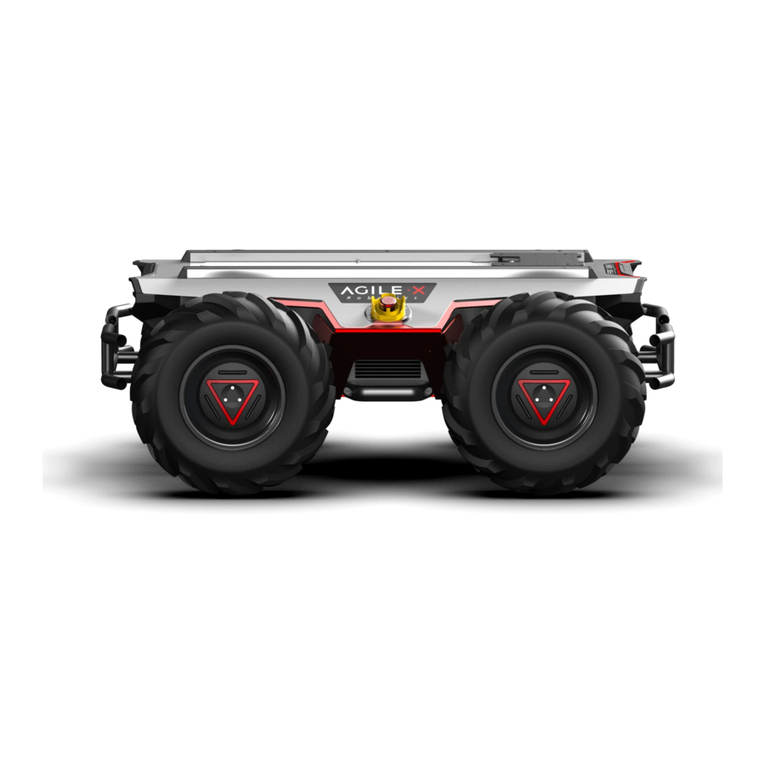
TITAN adopts a modular and intelligent design concept as a whole. It adopts a pneumatic tire
design on the power module, coupled with a powerful permanent magnet synchronous motor,
which makes the TITAN robot chassis have a strong battery life and load capacity. The motor with
a power of 1000W enables TITAN to move flexibly on different grounds.The open electrical
interface and communication interface are configured at the tail of TITAN, which is convenient for
users to carry out secondary development. The design and selection of the electrical interface
adopts aviation waterproof connectors, which is beneficial to the expansion and use of users on
the one hand, and makes the robot platform Can be used in some harsh environments. A standard
aluminum extension bracket is installed on the top of TITAN, which is convenient for users to carry
external equipment for expansion.
2.1StatusoftheTITAN
The user can check the status of the TITANthrough its CAN message. Please refer to Table 2.1 for
specific status.
Status Description
Voltage The current battery voltage can be viewed through BMS (Battery
Management System) feedback

10 / 49
Table 2.1 Status Description Table for the TITAN
2.2DescriptionofElectricalInterfaces
Figure 2.2 Back View of theTITAN
Powered Status Lights on indicate power is on.
Low Voltage
Warning
When the SOC (State of Charge) ofthe battery is lower than 15% through
BMS feedback, the front and rear lights of the RANGER will flash as a
reminder. When the battery power is detected lower than 10%, the
4WDchassis will actively cut off the power supply for external
equipmentand driver to protectthebattery. At this time, the chassis will
not move and accept external command control.
Detailed Status
Information Check by CAN message

11 / 49
The TITAN chassis is equipped with an aviation expansion interface at the rear, which includes a
set of power supplies and a set of CAN communication interfaces. This allows users to provide
power (load current not exceeding 15A, voltage range 46-50V) and communication for expansion
devices. The specific pin definitions are shown in the diagram below. It is important to note that
the expansion power supply is internally controlled, and it will automatically cut off power when
the battery voltage is below the safety voltage. Therefore, users need to be aware that the TITAN
chassis platform will issue a low voltage warning notification before reaching the critical voltage,
and users should pay attention to charging during use.
Figure 2.3 Pin descriptionsof the circular connector
Pin
Number Pin Type Function and
Definition Note
1 Power supply VCC
Positive terminal. The voltage range is
46~50 V
The load current cannot exceed 15 A.
2 Power supply GND Negative terminal
3 CAN CAN_H CAN Hi (High)
4 CAN CAN_L CAN Lo (Low)

12 / 49
2.3RemoteControlInstructions
Figure 2.4 Introductionof the remote control
As shown in the diagram, the functions of the buttons are defined as follows:
SWB is the control mode selection switch. When it is switched to the top position, it is in
command control mode. When it is switched to the middle position, it is in remote control mode.
SWA is the parking switch. When it is switched to the bottom position, the parking mode is
released. When it is switched to the top position, it is in parking mode (remote control can only be
performed after releasing the parking mode).
SWC is the light control switch. For the front lights: When SWC switch is in the bottom position, it
is in normally closed mode. When it is in the middle position, it is in normally open mode. When it
is in the top position, it is in breathing light mode. For the rear lights: When it is switched to the
bottom position, the lights are turned off (SWB needs to be switched to remote control mode first).

13 / 49
After starting the TITAN mobile robot chassis normally, turn on the remote controller and switch
SWB to remote control mode. This will allow you to control the movement of the TITAN platform
using the remote controller.
SWD is the off-road mode switch stick. When switched to the upper position, it is in normal mode.
When switched to the lower position, it is in off-road mode. In off-road mode, the chassis drive
motors operate in independent front and rear speed closed-loop mode to prevent power loss due
to electronic differential when one or more wheels are suspended. The switch to off-road mode
can only be successful when the chassis is completely stationary. To ensure smooth chassis
motion control, please turn off the off-road mode under normal road conditions.
WhenSWA is switched up + SWB is switched to the middle + SWC is switched down + SWD is
switched down + the left scroll wheel is slid to the top = Enter the front steering calibration mode.
In this mode, you can adjust the front wheel angle using the right joystick. Pressing KEY1 sets the
current position as the zero point, and a restart is required for it to take effect.
When SWA is switched up + SWB is switched to the middle + SWC is switched down + SWD is
switched down + the left scroll wheel is slid to the bottom = Enter the rear steering calibration
mode. In this mode, you can adjust the rear wheel angle using the right joystick. Pressing KEY1
sets the current position as the zero point, and a restart is required for it to take effect.
Note: Front and rear steering need to be set separately. After setting the front wheels, restart once
before setting the rear wheels.
Pressing KEY1 in any case = forcibly clear all errors of the RANGER. Attention! To be used only in
special cases where safety is guaranteed.
3UsageandDevelopment
This part mainly introduces the basic operation and usageof the TITAN, and how to carry out
secondary development through the external CAN interface and the CAN bus protocol.
3.1Operation
Check
Check the TITAN status
Check whether there is any obvious abnormality in the TITAN; if so, please contact after-sales
support;

14 / 49
When using it for the first time, check whether the power switch in the rear electrical panel is
pressed, if pressed, please press it, and then release it. At this time, the power switch is released,
and the TITANis powered off.
Poweronandoff
The switch marked with "STOP" at the rear of the TITANis an emergency stop switch. Pressing it
will stop the TITANimmediately andturning itclockwise will exit the emergency stop mode.
Charge
Check the battery voltage. The normal voltage range is 46~50 V. If there is a continuous buzzer
sound "Beep, beep", it indicatesthat the battery voltage is too low, please charge it in time.
This product is equipped with a 20A charger by default. To Charge the TITAN, pleaseinsert the
plug of the charger into its charging socket, connect the charger to the power supply, and turn on
the switch on the charger.
ConnectionoftheCANCable
The 4WDchassis is shipped with ancircular connectormale head. The definition of its linescan
refer to the figure below:

15 / 49
Figure 3.1 Overview of the circular connector
ImplementationofCANcommandcontrol
Start the TITANnormally, turn on the remote control, and then switch the SWB to the command
control mode (move SWB to the top). At this time, the TITANwill accept commands from the CAN
bus, and the host can also analyze the status of the TITANusing the feedbackedreal-time data
through the CAN bus. Refer to the CAN communication protocol for details.
(
By default, the
chassis is in standby mode when the chassis is started and the remote control is not started. At
this time, can data can be sent to switch the control mode of the chassis. When the remote
control is turned on, the remote control has the first control right, which mode the remote control
is in, and which mode the chassis is in.
)
3.2CANCommunicationProtocol
The CAN communication protocol in this product isCAN2.0B standard, its communication baud
rate is 500 K, and its message format is the MOTOROLA format. Through the external CAN
interface, users can switch the control model and control the linear speed and steering angle of
the TITAN. The TITANwill real-time feedback the current movement status information (including
the integrated movement information of the vehicle and the detailed movement information of
each wheel) and the system status information (including self-diagnostic error codes).
Command System Status Feedback Command
Node for sending Node for receiving ID Period
(
ms
)
Receive
timeout (ms)
Drive-by-wire
chassis
Decision-making and
control unit 0x211 20ms None
Data length 0x08
Byte Meaning Data type Note
byte [0]
Current
vehicle status
unsigned int8
0x00 The system is normal
0x02 The system is abnormal

16 / 49
Error message table
byte [1]
Control mode
unsigned int8
0x00 Standby mode
0x01 CAN Command control mode
0x03 Remote control mode
byte [2]
High order
byteof battery
voltage
unsigned int16 Actual voltage X 10 (the unit is 0.1 V)
byte [3]
Low order
byteof battery
voltage
byte [4]
Highest order
byteof error
message
unsigned int32 Refer to the error message table for
details
byte [5]
High order
byteof error
message
byte [6]
Low order
byteof error
message
byte [7]
Lowest order
byteof error
message
Error message

17 / 49
Byte Bit Meaning
byte [4] Reserved, the default value is
0
byte [5]
bit [0] Front steering encoder status
(0: no fault 1: fault)
bit [1] Rear steering encoder status
(0: no fault 1: fault)
bit [2] Reserved, the default value is
0
bit [3] Reserved, the default value is
0
bit [4] Reserved, the default value is
0
bit [5]
Safety edgecollision status,
(0: normal; 1: triggered, the
chassisshould bestopped
immediately.)
bit [6] Reserved, the default value is
0
bit [7] Reserved, the default value is
0
byte [6]
bit [0] driverstatus (0: unfaulty; 1:
faulty)
bit [1]
Communication connection
statuswith upper layer(0:
unfaulty; 1: faulty)
bit [2] Reserved, the default value is
0

18 / 49
bit [3] Reserved, the default value is
0
bit [4] Reserved, the default value is
0
bit [5] Reserved, the default value is
0
bit [6] Over temperature protection
status (0: normal; 1: triggered)
bit [7] Over current protection
status (0: normal; 1: triggered)
byte [7]
bit [0] Battery undervoltage status
(0: normal; 1: triggered)
bit [1] Reserved, the default value is
0
bit [2]
Remote control lost
connection protection status
(0: normal; 1: triggered)
bit [3]
No. 1 motor driver
communication status (0:
unfaulty; 1: faulty)
bit [4]
No. 2 motor driver
communication status (0:
unfaulty; 1: faulty)
bit [5]
No. 3 motor driver
communication status (0:
unfaulty; 1: faulty)
bit [6]
No. 4 motor driver
communication status (0:
unfaulty; 1: faulty)

19 / 49
The motion control feedback frame includes thecurrentlinear speed and steering angle of the
vehicle.
The details of the protocol are as follows
bit [7] Reserved, the default value is
0
Command Motion Control Feedback Command
Node for sending Node for
receiving ID Period
(
ms
)
Receive timeout
(ms)
Drive-by-wire
chassis
Decision-making
and control unit 0x221 20ms None
Data length 0x08
Byte Meaning Data type Note
byte [0]
byte [1]
High order
byteof speed
Low order
byteof speed
signed int16 Actual speed X 1000 (the unit is
0.001 m/s)
byte [2] Reserved - 0X00
byte [3] Reserved - 0X00
byte [4] Reserved - 0X00
byte [5] Reserved - 0X00

20 / 49
The motion control frame includes the linear speed control command and the steering
anglecontrol command. The details of the protocol are as follows:
byte [6]
byte [7]
High order
byteof steering
angle
Low order
byteof steering
angle
signed int16 Actual steering angleX 100 (the unit
is 0.001 rad)
Command Control Command
Node for
sending Node for receiving ID Period
(
ms
)
Receive
timeout (ms)
Decision-
making and
control unit
Node for the chassis 0x111 20ms 500ms
Data length 0x08
Byte Meaning Data type Note
byte[0]
byte[1]
High order byteof
linear speed
Low order byteof
linear speed
signed int16
Vehiclebody traveling speed,
unit mm/s (effective value +
-3000, effective value +
-1500 when the steering
angle is 0.087rad)
byte [2] Reserved - 0X00
byte [3] Reserved - 0X00
byte[4]
byte[5]
Reserved - 0X00
Table of contents
Other AgileX Robotics manuals

AgileX
AgileX TRACER MINI User manual

AgileX
AgileX SCOUT 2.0 User manual

AgileX
AgileX SCOUT MINI User manual

AgileX
AgileX BUNKERpro User manual

AgileX
AgileX SCOUT MINI User manual

AgileX
AgileX SCOUT MINI User manual

AgileX
AgileX BUNKER User manual

AgileX
AgileX BUNKER MINI User manual

AgileX
AgileX SCOUT MINI User manual

AgileX
AgileX BUNKER User manual

AgileX
AgileX SCOUT 2.0 User manual

AgileX
AgileX RANGER User manual

AgileX
AgileX HUNTER SE User manual

AgileX
AgileX RANGER MINI 2.0 User manual

AgileX
AgileX HUNTER 2.0 User manual

AgileX
AgileX SCOUT 2.0 User manual

AgileX
AgileX BUNKER User manual

AgileX
AgileX HUNTER User manual

AgileX
AgileX RANGER MINI User manual