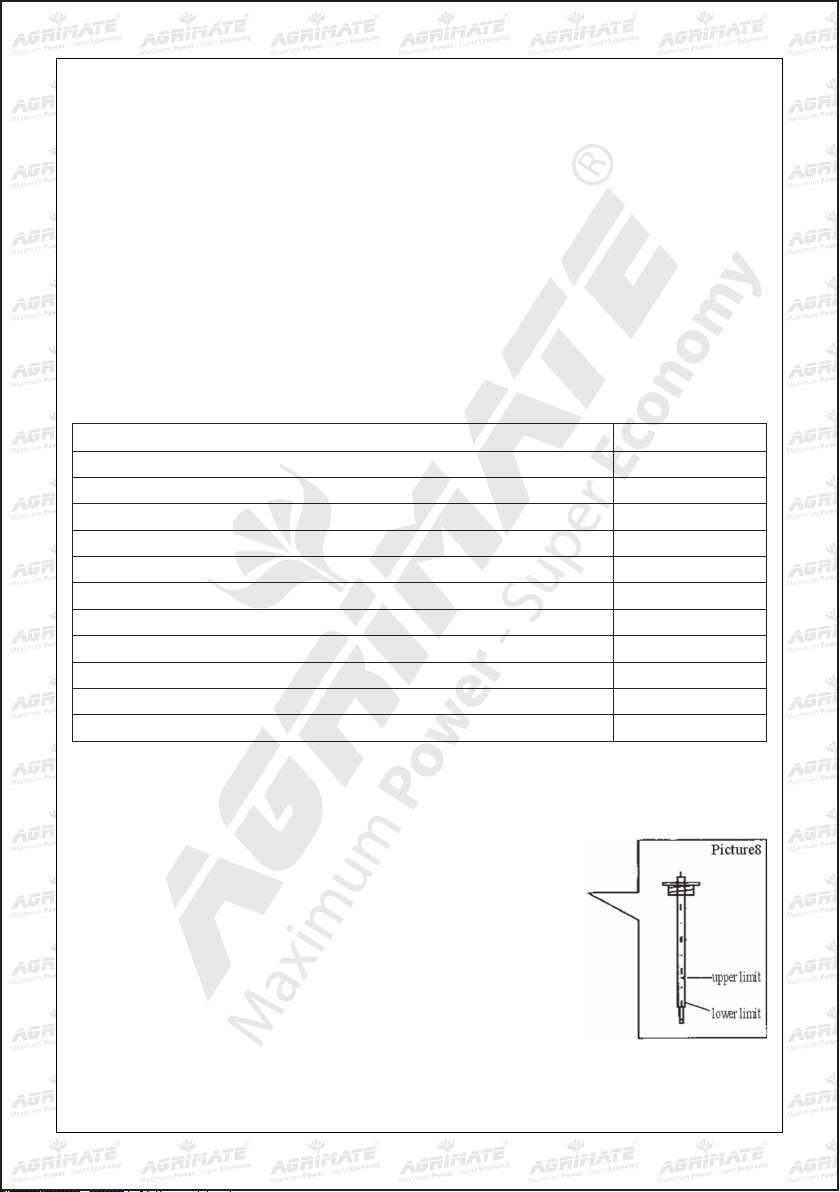
Agrimate AM-MPT-1100-6D User manual

User Manual
BEFORE OPERATING THIS MACHINE,
PLEASE READ THESE INSTRUCTIONS CAREFULLY
DISCLAIMER: DUE TO CONSTANT UPGRADATION, FEATURES AND SPECIFICATIONS ARE
SUBJECT TO CHANGE WITHOUT NOTICE
OPERATION AND MAINTENANCE MANUAL
AM-MPT-1100-6D
Rotary
Tiller/Power
Weeder/
Cultivator
AGRIMATE ROTARY TILLER
AM-MPT-1100-6D-M (MANUAL)
Power Weeder / Rotary Weeder / Cultivator

2
Something about this manual
Thank you for choosing our Rotary Tiller/Power Weeder/Cultivator
• This manual contains about operation and maintenance of Diesel Rotary Tiller/Power
Weeder/Cultivator.
• Allcontentsinthismanualarebasedonthelatestinformationwhenthemanualisprinted.
• Themanufacturehastherighttorevisethemanualwithoutanypriornoticeandwillnotbear
anylegalresponsibility.
• Nonepartsinthismanualcanbecopiedwithoutformalapproval.
• Thismanualshouldberegardedasapartofthetillers,soitshouldbehandedoverwhenresold
or lent.
Safety information
Safetyisveryimportantforyouandothers.Wehavewrittendownimportantsafetyinformationin
bothmanualandmachine.Pleasereaditcarefully.
Safety information gives you warning that you may bring potential danger to yourself and others.
Thekeywordswith“!”areputbeforeeverypieceofinformation.Thesewordsare“danger,warning,
attention”.
• Pleasepayattentiontothemeaningsoftheabove-mentionedidentiers.
! Danger: ifyoudon’toperatefollowthoseindicatedinthemanual,seriousinjures,even
deathwillbecaused.
! Warning: ifyoudon’toperatefollowthoseindicatedinthemanual,devicedamageand
injureswillbecaused.
! Attention: ifyoudon’toperatefollowthoseindicatedinthemanual,devicedamageand
injuresmaybecaused.
Damage prevention
Youcanseeotherimportantinformationmarkedwith“ATTENTION”.
! Attention: Ifyoudon’toperateasthoseindicatedinthemanual,devicedamagewillbe
caused.
Safety prevention
IfRotaryTiller/Power Weeder/Cultivator is operated follow those indicated
in the manual, it will work safely and reliably. Before operating the Rotary
Tiller/PowerWeeder/Cultivator,pleasereadthismanualcarefully.Otherwise,
injuresanddevicedamagewillbecaused.
ATTENTION
• Whenstartingengine,pleaseturngearlevertoneutralposition.
• Whenthemachineisworking,pleasepayattentiontosafety!
• Becarefulabouttherotaryblades,becausetheymayhurtyou!
• Whenholdingthebackshiftbar,thegearlevermustbeputintheneutralposition.
• Fuelandlubeoilmustbeclear.
• Whenshiftingthegear,youmustdisconnecttheclutch.

3
Contents
Chapter1 ProleofRotaryTiller/PowerWeeder/Cultivator
specication
generalpictures
Chapter2 MainfunctionofRotaryTiller/PowerWeeder/Cultivator
rotary tillage
ditchingandridgeforming
shortdistancetransportation
multifunctionalwork
Chapter3 OperationandapplicationofRotaryTiller/PowerWeeder/Cultivator3
unpackingassembly
installationandadjustmentofcables
checking and refueling
starting
operation
connection of attaching tools
attentionitemsofusingRotaryTiller/PowerWeeder/Cultivator
Chapter4 MaintenancemethodofRotaryTiller/PowerWeeder/Cultivator
running-inofRotaryTiller/PowerWeeder/Cultivator
technicalmaintenanceofRotaryTiller/PowerWeeder/Cultivator
technicalmaintenancetableofRotaryTiller/PowerWeeder/Cultivator
long-periodstorageofRotaryTiller/PowerWeeder/Cultivator
Chapter5 DebuggingmethodofRotaryTiller/PowerWeeder/Cultivator
debuggingmethodofbevelgearassy
debuggingmethodofbackshiftgearandcable
debuggingmethodofclutchcable
debuggingmethodofguncable
debuggingmethodofhandlebar
Chapter6 TroubleshootingofRotaryTiller/PowerWeeder/Cultivator
troubleshootingofdieselengine
troubleshootingofclutch
troubleshootingofgear-box
troubleshootingofrunninggear
troubleshootingofotherparts
Chapter7 Instructiontableofattachingtools
Chapter8 BearingsofRotaryTiller/PowerWeeder/Cultivator

4
Chapter 1 - Profile of Rotary Tiller/Power Weeder/Cultivator
General picture:
1 handlebarassy
2 safety cover
3 gearboxassy
4 dragbar
5 shiftlever
6 fender
7 rotarydevicecomponents
8 rotaryblades
9 running case assy
10 dieselengine
Engine Specifications
Engine Model AM178F
Type SingleCylinder,Vertical,DieselEngine-4S,AirCooled
Starting recoil start
Fuel Diesel
EngineOilCapacity(Litre) 1.1
CapacityofFueltank(Litre) 3.5
Valve OHV
RatedPower-kw/HP/RPM 4kw/5.4hp/3600
Displacement(cubiccapacity),(cm3) 296
Bore/Stroke(mm) 78×62
Max.speedatnolaod(HighIdlingSpeed) 3680
Ratedspeed(rpm) 3600
Lowidlingspeed(rpm) 1400
Speedatmaximumtorque(rpm) 2880
Air Cleaner Oilbath
Engine Weight 33Kg
Transmission Specification
Weeding-Width 1100mm
Weeding-depth 150-300mm
Gear Shifting -1,1,0,2(H/L)
Grade of oil SAE-15W-30
GearBoxOilcapacity(Litre) 1.8
GearDistance(mm) 500
Productivity(mu/h) 0.8-1.5
Weight with Accessories with Engine 145Kg

5
Chapter 2 - Main function of
Rotary Tiller/Power Weeder/Cultivator
Weedingbladesassy:
WeedingbladesassycomponentsareinstalledonbothsidesofthedrivingshaftofRotaryTiller/Power
Weeder/Cultivatorrunninggear.TightentheshaftwithtwoboltsM8×55.ThentheRotaryTiller/Power
Weeder/Cultivatorcanwork.(Lookattable2andPicture2).
Table 2
Weeding device
mode
3groups 4groups
3blades 4blades 3blades 4blades
Weedingblades 3×6 4×6 3×8 4×8
Weeding
scope(mm) 765 1050
Suitablesoil Paddyeldwithinsufcient
water; clayed soil solid soil Wet soil Dry soil
Picture 2: Weeding device Picture3: ditching device
Ditching and ridge forming
Take away shift lever, install ditching device and adjust the width and height of ditching device.
(Picture3)
Short distance transportation
InstallforearmofRotaryTiller/PowerWeeder/Cultivatorcaseonthedragbodyandwheelsonthe
drivingshaft.Theratedloadis250kg.Attheratedspeedofdieselengine,fastshiftspeedisabout
10km/handslowshiftspeedis5km/h.
Multifunctional work
Takeawaythesafetycoverofgearbox(num.2inpicture1),nthebackboltofmainshaft,thekey
sleeveoftheshaft,theninstalltheattachingbeltpulleyandcouplingonthemainshaftofgearbox
andfastenwithbolts.OrdinaryV-beltA-modelisusedforthecrosssectionofbeltpulley.Therated
speedofbeltpulleyis3000r/m.Whenitisattachedwithrelativemachinetools,auxiliarytools,you
cancarryoutsuchmultifunctionalwork:bailing,sprinkling,chemicalspraying,threshing,reapingand
generatingpower.

6
Chapter 3 - Operation and application of
Rotary Tiller/Power Weeder/Cultivator
1. FixthebodyofminiWeeder,installrunningwheelsonbothsidesofhexagonalshaftandx
thewheelswith2boltsM8×55,2nutsM8.
2. Handle bar installation: turn the two
uteddiscsonthehandlebartorightwiththe
uteddiscsonbothsidesofthediscplate.Pay
attentiontoadjusthandlebarposition.Connect
it with auxiliary bolts M16×140 and gasket
16,thenxestheclutchcable,guncableand
backshiftcableonthehandlebarwithwiredip.
3. Shift lever installation:takeawaythepins
betweentheshiftleverandconnectingshelfto
get the shift lever and adjust its direction by
180°.
4. Mud fender installation:install frames of
both sides and protection frame components on the Rotary Tiller/Power Weeder/Cultivator.
Theninstallprotectionpanelofbothsidesandpaddyeldprotectionpanelofbothsides.
Installation and adjustment of cables
1. clutchcableadjustment(lookatpicture5and6)
• Unlocknutsonthescrewrod.
• Instantaneouslyrotatethescrewrodtoshowtheshortestpartofthehandlebar.
• Threadthecableheadintoclutchplugbehindthegearboxassyandmakesuretheheadis
inthebigholeoftheplug.
• Threadthesteelwire-ropeintotheM8holeofarmplug,andthenproperlypressdownthe
clutchforkarmtoinsertthecableheadintoclutchplug.
• Rotateoutthescrewrodandclipitrepeatedly,unlocktheclutchhandlebaruntilspring
forceofclutchcanrepositionthebar,andthenfastenthenuts.
2. backshiftcableadjustment(Picture5and6)
• Unlockthefastennutsonthescrewrod.
• Instantaneouslyrotatethescrewrodtoshowtheshortestpartofthehandlebar.
• Threadthecableintothebackshiftshaftatthesideofgearboxandmakesurethecable
headisinthebigholeofshaft.
• Properlycounterclockwiserotatethebackshiftforkshaft,threadthecableintothenarrow
slitofbackshiftplugthroughthesideofthegearboxandmakesurethecableheadisin
thebigholeoftheplug.
• Rotateoutthescrewrodandholdfastitrepeatedly,unlockthebackshiftbar.Whenspring
forcecanrepositionthebar,youshouldfastenthenuts.
Picture 4 : uppackingssembly

7
3. guncableadjustment(lookatpicture7)Diagram
• Turngunswitchtothefastestposition.
• Threadthesteelwire-ropeofthegunintothepoleandplugofregulationpanelofthe
diesel engine gun.
• Fastenthesteelwire-ropeandxthescrew.
• Adjustthegunswitchrepeatedlyuntilthegunbaroftheregulationpanelcanbeinthe
fastestorslowestposition.
Checking and refueling
1. Checkwhethertheconnectionboltsarelooseornotandfastenthelooseboltsaccordingtothe
boltmomentinthefollowingtable3(dieselengineboltsandnutsmomentisindieselengine
instruction).
Table 03
Name Moment(N.M)
Flange and diesel engine 20~25
Flangeandgearbox 35~40
Boltsbehindthemainshaftofgearbox 10~12
Boltsonthebackshiftshaftofgearbox 26~40
Boltsbetweentheengineframeandrunningcase 35~40
Bolts on the end cover of running gear 10.6~15
Boltsonthedragbarofrunninggear 50~60
Boltsbetweentherunninggearandgearbox 35~40
Dragbar 45~60
Boltsonthebottomplateofdieselengine 35~40
Boltsonthehandlebarframe 35~40
2. Checkifthehandlebarsoftheoperationsystem(gun,clutch,shiftlever,backshift)areexible.
Iftheyarenotintheirpositions,pleaseadjustthem.
3. Turnlevertotheneutralposition.
4. Refueling:
• SAE10W-40oilisrecommended.Pleaserefertothepicture9.
• Refuelthegearboxwithoilnum20.Laydownthemachine,
andrefuelthroughtheholeupperthegearbox.Checkingoil
levelby dipstick(attention:notrotatethe oilruler).Theoil
level should be in the range of the dipstick showed in the
picture.

8
• Refuelaircleanerwithoil,takeawaythesyntheticglasscovertentbelowthecleaner,and
refuel0.1Lnum.20oil.
• Choosedieselengineoilaccordingtotheworkingenvironment(Picture9)
5. Refueltheoiltankwithnum.0,num.-10ornum.-20lightoil(pleaserefertothedieselengine
instruction).
! Attention: fuellevelshouldnotexceedabovethemark.
6. Makeforestartingpreparationsaccordingtothedieselengineinstruction.
Starting(attention: the shift lever must be in the neutral position)
1. Startdieselengineaccordingtotheprocedureofinstruction.
2. The diesel engine should run 2 to 3 minutes at the idle speed (1500 to 2000r/m)
withno-load.
3. Checkifthedieselenginerunsnormally.Ifnot,itshouldstopworkingandbeinspected.
operation(attention: Rotary Tiller/Power Weeder/Cultivator must go through running-in
before operating. Please refer to chapter4)
1. Slowgear
• Holdtheclutchbarwithlefthandtoopentheclutch.
• pull back the shift lever with right hand, meanwhile, pay attention if it is in the slow
position,thenholdtherightbarwithrighthand(attention:donotholdthebackshiftbar).
• Slowly unlock the clutch bar to close the clutch. In this situation, Rotary Tiller/Power
Weeder/Cultivator can run at slow gear.
• Speedupproperlywithrighthand,thenRotaryTiller/PowerWeeder/Cultivatorcanrunat
alowspeedof5km/h.

9
2. Fast gear
• Holdtheclutchbarwithlefthandtoopentheclutch.
• Pushtheshiftlevertothefrontwithrighthand,meanwhile,payattentionifitisinthefast
position,thenholdthebarwithrighthand(attention:donotholdthebackshiftbar)
• Slowly unlock the clutch bar to close the clutch. In this situation, Rotary Tiller/Power
Weeder/Cultivator can run at fast gear.
• Speedupproperlywithrighthand,thenRotaryTiller/PowerWeeder/Cultivatorcanrunat
aspeedof10km/h.
3. Back gear
• Holdtheclutchbarwithlefthandtoopentheclutch.
• Adjusttheshiftlevertotheneutralpositionwithrighthand.
• Slowlyunlocktheclutchbartoclosetheclutch,thenRotaryTiller/PowerWeeder/Cultivator
willstepback.(attention:donotunlockthebackshiftbar)
• Ifitisunnecessarytostepback,youshouldholdfastclutchbarslowlywithlefthand,then
unlocktheshiftbarwithrighthand.
4. Whenshiftingintheprocessofrunning,youshoulddecelerate(thestandard should be the
continuous work of diesel engine), then close the clutch. You should change the shift until the
machinestopworking
5. Whenchangingthedirection,youshouldrotatethebartoleftorright.(attention:donotmis-
holdthebar,soastoavoiddamagingthewheelswhendirecting)
6. Stopworking
• Holdtheclutchbarwithlefthandtoopentheclutch.
• Afteradjustingtheshiftlevertotheneutralposition,youshouldunlocktheclutchbarto
makethemachinestopworking.
• Whenitnecessarytostopworking,theprocedureshouldbedoneaccordingtothediesel
engineinstruction.(attention:thisworkisusuallydoneonthesmoothground.)
Connection of attaching tools
1. Whenrotating,youshouldtakeawaythewheels,xhexagonalsleeveofrotarydeviceonboth
sidesofthehexagonalshaftwithboltsM8×55.Attention:therearebladeunitsonbothsides;
makesurethebladecuttingedgeworksrstlywhentheRotaryTiller/PowerWeeder/Cultivator
runs.Aftertherotarybladesareinstalled,youmustinstallthesafetypaneltopreventinjures
byblades.Weedingdepthcanbeadjustedthroughadjustingshiftleveranditsincludedangle
withtheground.(refertotable4)
2. Weeding blades assy of paddy eld:
whenthedepthofpaddyeldisbelow
25cm,youcangoWeedingwithcurved
bladesofpaddyelddirectly.Whenthe
depthofpaddy eld is between25-45
cm, you can go Weeding with rotary
wheelsofpaddyeld.table4

10
3. Whenditching,youshouldtakedownshiftlever,installtheditcherandadjustitsdepthand
height.Afternishingthese,youcandoditchingwork.(lookatpicture3)
Rangeofditchingscope:14cm-40cm
Rangeofditchingdepth:11cm-25cm
4. Short-distancetransportation
Install forearm of Rotary Tiller/Power Weeder/Cultivator case on the drug bar of running
gearandinstallwheelsonthedrivingshiftoftherunninggear.Afternishingthese,youcan
transport.Theratedloadis250kg.Undertheratedrotaryspeedofdieselengine,thefastspeed
isaround10km/handslowspeed5km/h.
5. Multifunctionalwork
Takeawaysafetycoverbehindgearbox,boltsbehindmainshaft,takekeysleeveofshaft,push
thebeltpulleyorkeyslotofcouplingintothekey,thenfastenitwithbolt.V-beltA-modelis
usedforthecrosssectionofbeltpulleyslot.Theratedrotaryspeedofbeltpulleyis3000r/m.
whenitisattachedwithrelativemachinetools,youcancarryoutsuchmultifunctionalwork:
bailing,sprinkling,chemicalspraying,threshing,reapingandgeneratingpower.
Attention items of using Rotary Tiller/Power Weeder/Cultivator
1. WhenusingRotary Tiller/Power Weeder/Cultivator,youshouldpayattentionto theworking
situationandsoundofeverypart,checkiftheconnection is good. There mustn’tbeloosed
connection.Ifthereis abnormal situation, you should stoptheRotaryTiller/Power Weeder/
Cultivator and check..
2. NevercarryoutworkwithheavyloadifRotaryTiller/PowerWeeder/Cultivatorhasnotbeen
usedforalongtime,especiallythenewonesortherepairedones.
3. Payattentiontotheoillevelofdieselengineandgearbox.Whentheyareinsufcient,please
refuelthem.
4. Nevercoolthedieselengineinthewayofwater-pouring.
5. PreventRotaryTiller/PowerWeeder/CultivatorfromfallingdownwhenWeeding.
6. NeverinstallRotaryTiller/PowerWeeder/Cultivatorwithrotarybladesworkonsandorstoneto
avoiddamagingblades.
7. After Weeding, pay attention to clear away dirtiness on the Rotary Tiller/Power Weeder/
Cultivator:mud,grassandoilstain.
8. Frequentlywashthespongeintheairlter,andchangeoilmoreoften.
VIII.Attentions of Operating Engine:
1. BREAK-IN OF NEW ENGINE :
Ifyourenginehasnotbreakinginyet,improperusagewillshortenthelifeofengine.theinitial20hrs
isthebreak-in-period.Theoperatormustobeythefollowingitems:

11
2. RUNNING IN FOR 5 MINS AFTER FIRST START.
Runningwithlowspeedandlowloadbeforetheenginegetshot.Avoidrunningwithhighspeedand
fullload,orlowspeedandnoload.
3. AVOID RUNNING WITH OVERLOAD.
Duringbreak-inperiod,theenginecan'trunwithfullload,butcanrunwith3000rpmand50%load.
4. CHANGE ENGINE OIL REGULARLY.
Afterworkingfor20hrs,changetheoilwhenengineisstillwarm,
otherwiseitwillbedifculttodraintheresidualoilintheengine.
IX. Oil Bath Type Air Filter:
1. Checktheoillevelbeforeoperating.
2. Filloil uptoupperlimit.Ifoilisdirty,changeit.Pleaseusedieseltocleanoilbath element
frequently,thendiptheelementintheoilandsqueezeoutextra.
Running
WARNING
• Besuretooperatetheengineinagoodventilatedplaceinordertoavoidexhaustpoisoning.
• Avoidlettinghands,body&clothesentangleinoutputshaft,beltpulley,V-typebeltpulleyand
othermovingparts,soastopreventfromgettinginjured.
• Stoptheenginerstandthenmaintainthemovablepartsandotherpartsaroundit.Makesure
therearenotoolsandsundriesinthebodyoftheenginebeforeoperating.
Run engine for 5mins to warm up
NOTICE
• Themuferbecomesveryhotduringandimmediatelyafteroperation.Don'ttouchit.
• TheairlterwillinWeederetheairarounditselfwhentheengineworks.
• Don'tletthehands,bodyandclothesapproachtheairltertoavoidinjury.
After the engine becomes warm, put the speed lever on necessary position to run the
engine.
NOTICE
• Besuretousethespeedlevertoadjustthespeedofengine.
• Donotloosethespeedlimitscrewandfuelcontrolscrew;otherwisethespeedandoutputof
enginewillbeabnormal.
Running
a. Iftheenginegivesoutblacksmokecontinuously,itisbecausetheengineisoverloaded.The
beltpulleyoftheengineorthatofthepoweredequipmentmustbeadjusted.
b. Payattentiontothefollowingpointswhentheengineisrunning:
i. Whetherthereisabnormalsoundandvibration?

12
ii. Whethertheexhaustisnormal?
iii. Whethertheenginegivesoutwhiteorblacksmokecontinuously?
Ifanyoftheabovephenomenaisdetected,stoptheengineimmediatelyandcontactthe
nearbydealer.
X. Methods of Starting the Rotary Tiller/Power Weeder/Cultivator
a. StartingbyHand:
• Openfuelswitch.
• Putenginespeedleverinthestartposition
• LockAuto-cutoffswitch.
• Holdrecoilstarterhandle.
• Pullthestartinghandleslowlyuntilyoufeelresistance,thenreleaseitslowly.
• Push the decompression lever down by hand to no compression position. It will get back
automaticallybyitselfaftertheenginegetsstarted.
• Starting : hold the starting handle with two hands, pull the rope lightly until you feel the
resistance,thenpulltheropefastwithstrength.
• Ifitisnoteasytostarttheenginewhentheweathergetscold.Youcouldtakedowntherefuel
screwonthecylindercoverandllin2mloilbeforestarting.
Notice
Tightentherefuelscrewonthecylindercoverexceptllingoilinordertoavoidrainanddusttogetin
theengineandwearingordamageoftheengine.
XI. Safety Instructions:
Do's...
• Dovisualcheckbeforestarting,everytime
• KeepRotaryTiller/PowerWeeder/CultivatorClean
• DouserecommendedFuelandLubricantsOnly
• DoCheckFuelLevel
• DoCheckAirIntakeFilteroillevel
• DoCheckEngineOilandGearOillevels
• DoCheckforanyleakage
• DoCheckDecompressKnobbeforestarting
• DoCheckGearinNeutralpositionbeforestarting
• DouserecommendedattachmentsOnly
• Domaintaindistance(1ft)frombuildingsandotherequipmentswhenoperating,toavoidany
accidents
• Keepawayfromammablematerials
• Keepawayfromchildrenandpetstoavoidanyinjuriesoraccidents.

13
• Only operator with knowledge of machine and its operations must be permitted to operate
Agricultrual Weeder
• Muststopenginebeforerefueling,andrefuelingoodventilationplace
• MustcleanandspilledoroverownfueloftheAgricultrualWeeder
• LetRotaryTiller/PowerWeeder/Cultivatorcooldownbeforestoringindoors.
Don't's...
• Don'toverowthefuel,butalsoneverletfueltankrunoutempty
• Don'tuseadulteratedfuel
• Don'tsmokeorallowameorsparkwhereRotaryTiller/PowerWeeder/Cultivatorisrefueledor
where fuel is stored
• Don'tinWeedereexhaustforitcancontainpoisonouscarbonmonoxide
• Don'trunRotaryTiller/PowerWeeder/Cultivatorwithoutadequateventilation
• Don'tlean/tiltDieselWeedermorethan20°,otherwisefuelmayspill
• Don'tcoverRotaryTiller/PowerWeeder/Cultivatortopsoastoavoidre
• Don'ttouchmufer/exhaust,asitgetshotwhenoperatingandstayshotforsometimeafter
stopping
• Don'tdelayonserviceschedules
• Don'tOperateDieselWeedercontinuouslymorethan2hrs.30minsforanygivenoperation(Give
breakof20mins)
• Don't make any alterations in Design, Operations and Functioning of Rotary Tiller/Power
Weeder/CultivatorotherthanCompany'srecommendation.

14
Chapter 4 - Maintenance of Rotary
Tiller/Power Weeder/Cultivator
Duetorotarysituation,abrasionandloadchangeofRotaryTiller/PowerWeeder/Cultivator,boltswill
becomelooseandpartswillbewornduringthework.Thesechangeswilldestroytheproperworking
stateofRotaryTiller/PowerWeeder/Cultivator,createabnormalttingclearance,degradeoutputof
dieselengine,increaseoilconsumption,leadtothemaladjustmentofspareparts,increasemalfunction
of Rotary Tiller/Power Weeder/Cultivator. All these will seriously affect the working efciency of
RotaryTiller/PowerWeeder/Cultivator.Todecreasethefrequencyoftheabove-mentionedaccidents,
preventionofmaintenanceworkmustbedonestrictlyandregularlytokeeptheRotaryTiller/Power
Weeder/Cultivatorinagoodtechnicalstateandprolongitslife.
Running-in of Rotary Tiller/Power Weeder/Cultivator:
1. Asforrunning-inofRotaryTiller/PowerWeeder/Cultivator,pleaserefertoitsinstruction.
2. IfRotaryTiller/PowerWeeder/Cultivatorisneworisjustheavyrepair,itshouldworkwithout
load for one hour. After the Rotary Tiller/Power Weeder/Cultivator works with light load for
vehours,alloilingearboxandcrankcaseofdieselengineshouldbedrainedimmediately.
Afterwards,youshouldrefueladequatecleanoil,runtheRotaryTiller/PowerWeeder/Cultivator
atidlespeedfor3to5minutestowashit,thendrainoilcompletely.Pleaserefueloilandcarry
outrunning-infor4hoursaccordingtotheforthprocedureofchapter3.Bydoingso,theRotary
Tiller/PowerWeeder/Cultivatorcanworkinnormalcondition.
Technical maintenance of Rotary Tiller/Power Weeder/Cultivator
A. Every-timemaintenance(beforeandafterwork):
1. Listenandcheckifthereismalfunctionofeverypart(suchasabnormalnoise,overheat,
loose screw and so on).
2. Checkifthereisoilleakagefromdieselengine,gearboxandrunninggear.
3. Checkiftheoillevelofdieselengineandgearboxisbetweentheupperandlowerlimitof
dipstick.
4. Cleanthewholemachineandsparepartswhicharewithmud,grassandoilstainregularly.
5. Dodailyrecord.
B. Primarymaintenance(per150hours)
6. Carryoutmaintenanceworkbasedonallcontentsofevery-timemaintenance.
7. Washgearbox,runninggearboxandchangelubeoil.
8. Checkandadjustclutch,shiftsystemandreversegearsystem.
C. Secondarymaintenance(per800hours)
9. Carryoutmaintenanceworkbasedonallcontentsofprimarymaintenance.
10. Checkallgearsandbearings.Iftheyarefrettedseverely,pleasereplacethem.
11. CheckotherpartsofRotaryTiller/PowerWeeder/Cultivator,suchas:rotarybladesorbolts
andsoon.Ifthereisdamage,pleasereplacethem.
D. Technicalinspection(per1500-2000hours)
12. Takethewholemachinetothespecicmaintenancestation,tohaveacheck.Ifthespare
partsareseverelyfretted,theymustbechangedorrepairedaccordingtothesituation.

15
13. Invitespecialtechniciantocheckfrictionplateandclutch.
E. Asforthemaintenanceofdieselengine,pleaserefertoitsinstruction.
Technical maintenance table of Rotary Tiller/Power Weeder/Cultivator(mark”0”
indicates the maintenance contents)
Working intervals
andmaintenance
contents
Every
day
Work with
Weederf
loadfor8
hours
Work for
onemonth
or20hours
Work for 3
monthsor
150hours
Every year
or1000
hours
Per 2 years
or2000
hours
Check and tighten
nuts,bolts
0
Check and refuel
lube
0
Check and change
lube
0(rsttime) 0(second
time)
0(thirdtime
ormore)
Check if there is
oil leakage
0
Cleanmud,grass
and oil stain
0
Debug
malfunction
0
Adjustoperation
parts
0
Frictionplateof
clutch
0
Gears and
bearings
0
Long-period storage of Rotary Tiller/Power Weeder/Cultivator
WhenRotaryTiller/PowerWeeder/Cultivatorneedsstoringforalongperiod,thefollowingmeasures
shouldbetakentopreventtarnishing.
1. Keepdieselenginewithsealaccordingtoitsinstruction.
2. Washoilstainandcleandustonthemachine.
3. Drainlubeoilinthegearboxandrefuelnewoil.
4. Paintpicklingoilonnon-aluminumpartswherethereisnopaint.
5. Store Rotary Tiller/Power Weeder/Cultivator in the dry, safe place where there is enough
aeration.
6. Properly keep the attaching tools, certicates of conformity and instruction of Rotary Tiller/
Power Weeder/Cultivator.

16
Chapter 5 - Debugging method of
Rotary Tiller/Power Weeder/Cultivator
Debugging method of backshift gear and cable
WhenreverseofRotaryTiller/PowerWeeder/Cultivatorisabnormal,youshoulddebugthebackshift
handlebarandcable.Asforthemethod,pleaserefertochapter3.
! Attention: 1. Hold,unlockbackshifthandlebartwicetothreetimes,whichistoputinto
gear.Ifthegearisnotproperlyadjusted,pleasedebugituntilitiswelldone.
2. When driving the Rotary Tiller/Power Weeder/Cultivator, please unlock
backshifthandlebar.Afternishingthis,backshift gearshouldreturntoits
original position immediately, and there should not be abnormal collision
noiseinthegearbox,otherwise,gearwillbedestroyed.
Debugging method of clutch cable
Duetofrictionplateabrasion,clutchforkabrasion,functionoftheclutchbecomepoorafteraperiod
ofuse.Therefore,youshoulddebugtheclutchcable.Asforthedebuggingmethod,pleasereferto
chapter3.
! Attention: 1. Hold,unlocktheclutchhandlebarfortwicetothreetimes.Thisistocheck
workingconditionofclutch.Ifitisabnormal,youshoulddebugtheclutch.
2. If it is debugged for several times, and it is still in bad condition, it is
certain that clutch fork or friction plate is fretted severely. Therefore, you
shouldchangethefrictionplateorclutchforkwithnewpartsinthespecial
maintenancestation.Nevermoveclutchrandomlyincaseofdestroyingthe
clutchandotherparts.
Debugging method of bevel gear assy:
Whenbevelgeardrivesabnormallywithloudnoise,youshouldcheckanddebugitimmediately.The
debuggingmethodsareasfollows:
1. Bevelgearclearancedebuggingofgearbox(lookatpicture10)
• whenbevelgearassyclearance∆﹤0.05,youshouldincreaseclearancebetweengearbox
andrunninggearboxwithsteelgasket.
• Whenbevelgearassyclearance∆﹥0.3,oneshouldadjusttherange0.05~0.10between
thebearingandgearshaft.
2. Bevelgearclearanceassydebuggingofrunninggearbox(lookatpicture11)
• whenbevelgearclearance∆﹤0.05,youshouldadjustthegasketrange0.2~0.3toincrease
clearance. Meanwhile, you should change steel gasket andadjustgasketto ensure
clearance of gear shaftis0.05~0.15.
• When bevel gear assy clearance∆﹥0.3, you should decrease gasket , meanwhile,
ensure clearance of gear shaftis0.05~0.15;orincreasegasket,meanwhile,ensure
clearance of gear is0.05~0.15.

17
Debugging method of gun cable
Whenrevolvingthegunswitchandndingacceleratinganddeceleratingfunctionofthedieselengine
isnotgood,youshoulddebugtheguncable.Asforthemethod,pleaserefertochapter3.
! Attention: 1. Revolvethegunswitchesfortwiceorthreetimesandchecktheaccelerating
and decelerating function of diesel engine.
2. Theguncableandconnectionheadshouldbefastenedwithscrews.
Debugging method of handle bar
Fourdirectionsofhandlebarcanbeproperlysetaccordingtoone’sheightandWeedingrequirement.
Themethodisinthefollowing(lookatpictue12)
1. Up-and-downdebuggingofhandlebar:
• Unlockthehandlebarelements,disengagetheterminalfangsbetweenthehandlebarand
handleframe
• Setthepositionofhandlebaraccordingtoone’sheightandhabits.
• Revolve the handlebar to let terminal fangs meet between the handlebar and handle
frame.
2. Left-and-rightdebugging:
• Unlockthenutonthehandleframe.Thisistounlocktheterminalfangs.
• Sethandlebartotheproperpositionontheleftorright.
• Tightenthenuttoletterminalfangsmeet.

18
Chapter 6 - Troubleshooting
Troubleshooting of diesel engine (refer to the diesel engine instruction)
Troubleshooting of clutch (attention:nevertakeparttheclutchassyjustbyyourself.
Table 6
Phenomenon Reason Solution
Theclutchcannotbeopened
or closed.
Malfunction of clutch
handlebar Repairorchange
Damageofclutchcable change
Misadjustmentofclutchfork Readjustcableorchange
clutch fork
Failure welding of clutch fork
shaft,armandframe Repairorchange
Warpingorbreakingoffork
pins Changeclutchforkpin
Frictionplatebecomesuseless Change
Springbecomesuseless Change
Frictionplatecannotcontact
bearingcrosssectionofclutch
cover
Putgasketbehindthebearing
Burn-outofbearinginclutch Change;refuelthegearbox
Skidding(diesel engine runs
normallyafterunlockingthe
handlebar,butthemainshaft
ofgearboxdoesnotrunor
runs slowly )
Springbecomesuseless Change
Clutchforkshaftbecomes
useless
Checkthejointingsection
betweenthelocatingbearing
andpushertomakeitexible
Maladjustmentofclutchcable Readjustclutchcable

19
Troubleshooting of gear-box
Table 7
Phenomenon Reason Solution
Fast, slow and neutral shift can
notbepositioned
Screwsandroundnutsbehind
theshaftbecomeloose
Take away screws and key
sleevebehindthemainshaft;
reinstall key sleeve and screws
after tightening the round nuts
Gearcannotbepositioned
Auxiliarybrickisseverely
fretted changeauxiliarybrick
Bevelgearbecomesloose Tighten the nuts
Heavyabrasionontheholeof
thearm Changearmelements
Springinthemainshaft
becomesuseless change
Mainshaftmoving:thecover
screwsbehindthecase
becomesloose
Tighten the screws
The distortion of the shift lever Adjusttheshiftlever;change
Backshiftcannotbe
positioned
Abrasionofbackshiftfork Readjustshiftcable;change
shifting fork
Backshiftcablebecomes
useless Readjustcable;changecable
Backshiftshaftbecomesloose Tightenscrewsbehindtheshift
shaft
Backshiftforkisseized
Checkthesectionbetween
backshiftforkandpusherto
makeitexible
Backshiftgearcannotbe
positioned
Backshiftshaftbecomesloose,
makinggearseized
Tightenthescrewsbehindthe
backshiftshaft
Thespringonthebackshift
shaftbecomesuseless Changethespring
Thebackshiftshaftbecomes
curved Changethebackshiftshaft

20
Backshiftshaftbecomesloose
Boltsbehindthebackshift
shaftbecomeloose Tightenthebolts
Thebackshiftshaftandcase
arenotwelltted Change
Gear noise is too loud
Bevelgearshaftandbackshift
shaftbecomecurved Change
Gears are heavily fretted Change gear
Bevelgearshaftandbackshift
shaftarenotwelltted Change
Thereisoilleakageofback
coveronthemainshaft
O-ringonthemainshaft
becomesuseless ChangeO-ringφ17×1.8
Oilsealonthemainshaft
becomesuseless ChangeoilsealB25407
O-ringonthecoverbecomes
useless ChangeO-ringφ46×1.8
There is oil leakage of
backshiftshaft
Boltsbehindthebackshift
shaftbecomeloose Tightenbolts
O-ringonthebackshiftshaft
becomesineffective ChangeO-ringφ18×1.8
There is oil leakage of
backshiftforkshaft O-ringbecomesuseless ChangeO-ringφ1.2×2.65
There is oil leakage of clutch
shift fork O-ringbecomesuseless ChangeO-ringφ1.2×2.65
There is oil leakage of shift
shaft O-ringbecomesuseless ChangeO-ringφ1.2×2.65
There is oil leakage of flange
Boltsbecomeloose Tightenbolts
Steelgasketisdamaged Change
There is oil leakage of case Therearehiddenmicroholes
in the case Weldorpainttostopleakage
This manual suits for next models
1
Table of contents
Other Agrimate Lawn And Garden Equipment manuals

Agrimate
Agrimate AM-MPT-1100-9D/6D-CHAMPION NEW User manual

Agrimate
Agrimate AM-MPT-9D User manual

Agrimate
Agrimate AMTH-PRO-K-2S User manual

Agrimate
Agrimate AM-RTP-7P CHAMPION User manual

Agrimate
Agrimate AMH 200 User manual

Agrimate
Agrimate AM-RT-212-7P User manual

Agrimate
Agrimate AMWL-432 User manual

Agrimate
Agrimate AMH-P888-WITH GX-35-FF User manual