AimTTi EX354RD User manual

EX354RD & EX354RT
Bench Power Supplies
INSTRUCTION MANUAL

1
Table of Contents
Introduction 2
Specification 2
Safety 4
Installation 5
Connections 5
Operation - Main Outputs 6
Operation - Auxiliary Output 7
Operation - General 7
Maintenance 8
Instructions en Francais
Sécurité 9
Installation 10
Connexions 10
Fonctionnement - Sorties principales 11
Fonctionnement – Sortie Auxiliaire 13
Fonctionnement - Généralités 13
Maintenance 14
Bedienungsanleitung auf Deutsch
Sicherheit 15
Installation 16
Anschlüsse 16
Betrieb - Hauptausgänge 16
Betrieb – Hilfsausgang 18
Betrieb - Allgemein 18
Wartung 19
Istruzioni in Italiano
Sicurezza 20
Installazione 21
Collegamenti 21
Funzionamento - Uscite principali 21
Funzionamento – Uscita Ausiliaria 23
Funzionamento - Generale 23
Manutenzione 24
Instrucciones en Español
Seguridad 25
Instalación 26
Conexiones 26
Operación - Salidas Principales 26
Operación – Salida Auxiliar 28
Operación - General 28
Mantenimiento 29

2
Introduction
The EX354RD and EX354RT provide high levels of power (up to 305 watts) in a compact and
attractive case style.
High resolution controls allow precise setting of voltage and current levels which are indicated on
accurate and legible digital meters.
Excellent line and load regulation are matched by low noise and good transient response. High
power efficiency ensures that the unit remains cool without any fan noise. Remote sense
terminals are provided so that good regulation can be maintained across remote loads at high
current.
The EX354RD has two independent and isolated outputs each with a 0 to 35V, 0 to 4A capability.
The outputs operate in constant voltage or constant current mode with automatic cross-over and
mode indication. Each output has its own on-off switch. Where higher voltages or currents are
required the outputs can be wired in either series or parallel to provide voltages up to 70 volts or
currents up to 8 Amps.
The EX354RT has, in addition, an Auxiliary ‘logic voltage’ output with a 5A current capability. To
reflect the increasing usage of low-voltage logic devices, this output can be preset between
1.5 volts and 5 volts via a front panel control.
The total power capability is 280 watts for the dual supply and 305 watts for the triple.
The EX-R series incorporates separate digital voltage and current meters on each main output.
The meters use bright 14mm (0·56”) LED displays and have an update rate of 4 per second
providing near instantaneous response. Simultaneous metering of voltage and current provides
accurate information “at a glance” and avoids any possibility of misinterpretation. When an output
switch is set to “off”, the current limit setting is displayed enabling conditions to be set before the
load is connected. With the right-hand main output off, the right-hand meters can be used to
momentarily display the preset Auxiliary voltage and current limit.
The EX-R series has been designed to meet the stringent requirements of relevant IEC
standards for safety and EMC, including harmonics emissions. All outputs are intrinsically short
circuit proof, and are protected against external voltages and reverse currents.
Specification
MAIN OUTPUTS
Voltage Range:
0V to 35V minimum.
Current Range:
0A to 4A minimum.
Output Voltage Setting:
By coarse and fine controls.
Output Current Setting:
By single logarithmic control.
Operating Mode:
Constant voltage or constant current with automatic cross-over.
Output Switch:
Electronic. Preset voltage and current displayed when off.
Output Terminals:
Universal 4mm safety binding posts on 19mm (0.75”) pitch.
Sensing: Switchable between local and remote. Spring-loaded push terminals
for remote connection.
Output Protection: Output will withstand up to 40V forward voltage.
Reverse protection by diode clamp for reverse currents up to 3A.
Load Regulation:
<0.01% of maximum output for 90% load change, using remote sense.
Line Regulation:
<0.01% of maximum output for 10% line change.

3
Ripple & Noise
(20MHz bandwidth):
Typically <2mVrms, <10mVpk-pk, constant voltage mode.
Transient Response:
<200µs to within 50mV of set level for a 5% to 95% load change.
Temperature Coefficient:
Typically <100ppm/°C.
Status Indication:
Output on lamp. Constant current mode lamp.
METER SPECIFICATIONS (Main Outputs)
Meter Types:
Dual 4 digit meters with 14mm (0·56") LEDs. Reading rate 4 Hz.
Meter Resolutions:
10mV, 1mA.
Meter Accuracies: Voltage 0.3% of reading ± 3 digits,
Current 0.5% of reading ± 3 digits.
AUXILIARY LOGIC OUTPUT (EX354RT only)
Voltage:
Variable <1.5V to >5V by front panel control.
Meter Voltage Accuracy:
0.3% ± 4 digits
Current Limit:
5A minimum.
Output Protection: Output will withstand up to 7V forward voltage.
Diode clamp reverse protection for currents up to 3A.
Load Regulation:
<0.5% for 90% load change.
Line Regulation:
<0.1% for 10% line voltage change.
Ripple & Noise
(20MHz bandwidth):
Typically <2mVrms, <10mVpk-pk (CV mode).
Transient Response: Typically <200µs to within 50mV of set level for a 5% to 95% load
change.
Temperature Coefficient:
Typically <100ppm/ºC.
Status Indication:
UNREG lamp.
GENERAL
AC Input:
110V - 240V AC ± 10%, 50/60Hz. Installation Category II.
Power Consumption:
500VA max.
Operating Range:
+5ºC to +40ºC, 20% to 80% RH.
Storage Range:
−40ºC to + 70ºC.
Environmental:
Indoor use at altitudes up to 2000m, Pollution Degree 2.
Safety & EMC: Complies with EN61010-1 & EN61326-1.
For details, request the EU Declaration of Conformity for this
instrument via http://www.aimtti.com/support (serial no. needed).
Size:
260 x 160 x 320mm (WxHxD).
Weight:
4.3kg

4
Safety
This power supply is a Safety Class I instrument according to IEC classification and has been
designed to meet the requirements of EN61010-1 (Safety Requirements for Electrical Equipment
for Measurement, Control and Laboratory Use). It is an Installation Category II instrument
intended for operation from a normal single phase supply.
This instrument has been tested in accordance with EN61010-1 and has been supplied in a safe
condition. This instruction manual contains some information and warnings which have to be
followed by the user to ensure safe operation and to retain the instrument in a safe condition.
This instrument has been designed for indoor use in a Pollution Degree 2 environment in the
temperature range 5°C to 40°C, 20% - 80% RH (non-condensing). It may occasionally be
subjected to temperatures between +5°C and –10°C without degradation of its safety. Do not
operate while condensation is present.
Use of this instrument in a manner not specified by these instructions may impair the safety
protection provided. Do not operate the instrument outside its rated supply voltages or
environmental range.
WARNING! THIS INSTRUMENT MUST BE EARTHED
Any interruption of the mains earth conductor inside or outside the instrument will make the
instrument dangerous. Intentional interruption is prohibited. The protective action must not be
negated by the use of an extension cord without a protective conductor.
When the instrument is connected to its supply, terminals may be live and opening the covers or
removal of parts (except those to which access can be gained by hand) is likely to expose live
parts. The apparatus shall be disconnected from all voltage sources before it is opened for any
adjustment, replacement, maintenance or repair. Capacitors inside the power supply may still be
charged even if the power supply has been disconnected from all voltage sources but will be
safely discharged about 10 minutes after switching off power.
Any adjustment, maintenance and repair of the opened instrument under voltage shall be
avoided as far as possible and, if inevitable, shall be carried out only by a skilled person who is
aware of the hazard involved.
If the instrument is clearly defective, has been subject to mechanical damage, excessive
moisture or chemical corrosion the safety protection may be impaired and the apparatus should
be withdrawn from use and returned for checking and repair.
Make sure that only fuses with the required rated current and of the specified type are used for
replacement. The use of makeshift fuses and the short-circuiting of fuse holders is prohibited.
Do not wet the instrument when cleaning it.
The following symbols are used on the instrument and in this manual:-
Earth (ground) terminal.
mains supply OFF.
l mains supply ON.
alternating current (ac)
direct current (dc)

5
Installation
Mains Operating Voltage
This instrument has a universal input range and will operate from a nominal 115V or 230V mains
supply without adjustment. Check that the local supply meets the AC Input requirement given in
the Specification.
Mains Lead
Connect the instrument to the AC supply using the mains lead provided. Should a mains plug be
required for a different mains outlet socket, a suitably rated and approved mains lead set should
be used which is fitted with the required wall plug and an IEC60320 C13 connector for the
instrument end. To determine the minimum current rating of the lead-set for the intended AC
supply, refer to the power rating information on the equipment or in the Specification.
WARNING! THIS INSTRUMENT MUST BE EARTHED.
Any interruption of the mains earth conductor inside or outside the instrument will make the
instrument dangerous. Intentional interruption is prohibited.
Connections
All connections are made from the front panel.
The load should be connected to the positive (red) and negative (black) terminals marked
OUTPUT. Both are fully floating and either can be connected to ground.
Remote sense connections to the load, if required, are made from the positive (+) and
negative (−) SENSE terminals. Switch the LOCAL/REMOTE switch to REMOTE when remote
sensing is required. Switch back to LOCAL when remote sensing is not in use.
The terminal marked is connected to the chassis and safety earth ground.

6
Operation - Main Outputs
The operation of both main outputs is identical; the following description applies to both.
Switching On
The POWER switch is located at the bottom left of the front panel. When the POWER switch is
turned on ( l ) the right hand meter briefly indicates the firmware revision before the display
shows Volts and Amps.
Setting Up the Output
With the POWER switch on (l) and the output OFF the output voltage and current limit can
be accurately preset using the VOLTAGE and CURRENT controls; the left-hand meter shows the
set voltage and the right-hand meter shows the set maximum current.
When the output switch is switched ON, the lamp lights; the left-hand meter now shows the
actual voltage and the right-hand meter the actual load current.
Constant Voltage
The output voltage is adjusted using the coarse and fine VOLTAGE controls; the CURRENT
control sets the maximum current that can be supplied.
Constant Current
If the load resistance is low enough such that, at the output voltage set, a current greater than
the current limit setting would flow, the power supply will automatically move into constant current
operation. The current output is adjusted by the CURRENT control and the VOLTAGE controls
set the maximum voltage that can be generated.
The CC lamp lights to show constant current mode.
Instantaneous Current Output
The current limit control can be set to limit the continuous output current to levels down to 10mA.
However, in common with all precision bench power supplies, a capacitor is connected across
the output to maintain stability and good transient response. This capacitor charges to the output
voltage and short-circuiting of the output will produce a current pulse as the capacitor discharges
which is independent of the current limit setting.
Protection
The output has intrinsic short-circuit protection and is protected from reverse voltages by a diode;
the continuous reverse current must not exceed 3 Amps, although transients can be much higher.
The output is protected against externally applied forward voltages of up to 40V.
Remote Sensing
The unit has a very low output impedance, but this is inevitably increased by the resistance of the
connecting leads. At high currents this can result in significant differences between the indicated
source voltage and the actual load voltage (two 20mΩconnecting leads will drop 0.2V at 5 Amps,
for instance). This problem can be minimised by using short, thick, connecting leads, but where
necessary it can be completely overcome by using the remote sense facility.
This requires the sense terminals to be connected to the output at the load instead of at the
source; insert wires into the spring-loaded SENSE terminals and connect directly to the load.
Switch the LOCAL/REMOTE switch to REMOTE. To avoid instability and transient response
problems, care must be taken to ensure good coupling between each output and sense lead.
This can be done either by twisting the leads together or by using coaxially screened cable
(sense through the inner). An electrolytic capacitor directly across the load connection point may
also be beneficial.
The voltage drop in each output lead must not exceed 0.5 Volts.
Switch the LOCAL/REMOTE switch back to LOCAL when remote sensing is not in use.

7
Operation - Auxiliary Output
Output Voltage
The output voltage can be set between 1.5V and 5.0V using the front panel rotary adjustment
beside the centre terminals. With the right-hand main output OFF, pressing the SHOW AUX
PRESET button will display the AUX output voltage and current limit on the right-hand meters.
Current Limit
The output will go into current limit at between 5A and 6A; the UNREG lamp lights in this
condition.
Protection
The output has intrinsic short-circuit protection and is protected from reverse voltages by a diode;
the continuous reverse current must not exceed 3 Amps, although transients can be much higher.
The output is protected against externally applied forward voltages of up to 7V.
Operation - General
Connection to the Load
The load should be connected to the positive (red) and negative (black) output terminals. Both
are fully floating and either can be connected to ground.
Series or Parallel Connection with Other Outputs
The outputs of the power supply are fully floating and may be used in series with other power
supply units to generate high DC voltages up to 300V DC.
The maximum permissible voltage between any terminal and earth ground ( ) is 300VDC; the
maximum permissible voltage between either terminal of one output and any terminal of another
output on the same supply is also 300VDC.
WARNING! Such voltages are exceedingly hazardous and great care should be taken to shield
the output terminals for such use. On no account should the output terminals be touched when
the unit is switched on under such use. All connections to the terminals must be made with the
power switched off on all units.
It should be noted that the unit can only source current and cannot sink it, thus units cannot be
series connected in anti-phase.
The unit can be connected in parallel with others to produce higher currents. Where several units
are connected in parallel, the output voltage will be equal to that of the unit with the highest
output voltage setting until the current drawn exceeds its current limit setting, upon which the
output will fall to that of the next highest setting, and so on. In constant current mode, units can
be connected in parallel to provide a current equal to the sum of the current limit settings.
Ventilation
The power supply is very efficient but nevertheless can generate significant heat at full power.
The supply relies on convection cooling only and it is therefore important that ventilation is never
restricted if performance and safety are to be maintained.

8
Maintenance
The Manufacturers or their agents overseas will provide repair for any unit developing a fault.
Where owner wish to undertake their own maintenance work, this should only be done by skilled
personnel in conjunction with the service manual which may be purchased directly from the
Manufacturers or their agents overseas.
Fuse
The correct fuse type is:
10 Amp 250V HBC time-lag(T), 5 x 20mm.
Note that the main function of the fuse is to make the instrument safe and limit damage in the
event of failure of one of the switching devices. If a fuse fails it is therefore very likely that the
replacement will also blow, because the supply has developed a fault; in such circumstances the
instrument will need to be returned to the manufacturer for service.
Make sure that only fuses of the required rated current and specified type are used for
replacement. The use of makeshift fuses and the short-circuiting of fuse-holders is prohibited.
To replace a fuse, first disconnect the instrument from the AC supply. Remove the 7 cover
securing screws and lift off the cover. Replace the fuse with one of the correct type and refit the
cover.
Cleaning
If the PSU requires cleaning use a cloth that is only lightly dampened with water or a mild
detergent. Polish the display window with a soft dry cloth.
WARNING! TO AVOID ELECTRIC SHOCK, OR DAMAGE TO THE PSU, NEVER ALLOW
WATER TO GET INSIDE THE CASE. TO AVOID DAMAGE TO THE CASE OR DISPLAY
WINDOW NEVER CLEAN WITH SOLVENTS.

9
Sécurité
Cet instrument est de Classe de sécurité 1 suivant la classification IEC et il a été construit pour
satisfaire aux impératifs EN61010-1 (impératifs de sécurité pour le matériel électrique en vue de
mesure, commande et utilisation en laboratoire). Il s'agit d'un instrument d'installation Catégorie
II devant être exploité depuis une alimentation monophasée habituelle.
Cet instrument a été soumis à des essais conformément à EN61010-1 et il a été fourni en tout
état de sécurité. Ce manuel d'instructions contient des informations et avertissements qui doivent
être suivis par l'utilisateur afin d'assurer un fonctionnement de toute sécurité et de conserver
l'instrument dans un état de bonne sécurité.
Cet instrument a été conçu pour être utilisé en interne dans un environnement de pollution
Degré 2, plage de températures 5°C à 40°C, 20% - 80% HR (sans condensation). Il peut être
soumis de temps à autre à des températures comprises entre +5°C et –10°C sans dégradation
de sa sécurité. Ne pas l'utiliser lorsqu'il y a de la condensation.
Toute utilisation de cet instrument de manière non spécifiée par ces instructions risque d'affecter
la protection de sécurité conférée. Ne pas utiliser l'instrument à l'extérieur des tensions
d'alimentation nominales ou de la gamme des conditions ambiantes spécifiées.
AVERTISSEMENT! CET INSTRUMENT DOIT ETRE RELIE A LA TERRE
Toute interruption du conducteur de terre secteur à l'intérieur ou à l'extérieur de l'instrument
rendra l'instrument dangereux. Il est absolument interdit d'effectuer une interruption à dessein.
Ne pas utiliser de cordon de prolongation sans conducteur de protection, car ceci annulerait sa
capacité de protection.
Lorsque l'instrument est relié au secteur, il est possible que les bornes soient sous tension et par
suite, l'ouverture des couvercles ou la dépose de pièces (à l'exception de celles auxquelles on
peut accéder manuellement) risque de mettre à découvert des pièces sous tension. Il faut
débrancher ke cordon secteur de l'appareil avant de l'ouvrir pour effectuer des réglages,
remplacements, travaux d'entretien ou de réparations. Les condensateurs qui se trouvent dans le
bloc d'alimentation risquent de rester chargés, même si le bloc d'alimentation a été déconnecté
de toutes les sources de tension, mais ils se déchargeront en toute sécurité environ 10 minutes
après extinction de l'alimentation.
Eviter dans la mesure du possible d'effectuer des réglages, travaux de réparations ou d'entretien
lorsque l'instrument ouvert est branché au secteur, mais si c'est absolument nécessaire, seul un
technicien compétent au courant des risques encourus doit effectuer ce genre de travaux.
S'il est évident que l'instrument est défectueux, qu'il a été soumis à des dégâts mécaniques, à
une humidité excessive ou à une corrosion chimique, la protection de sécurité sera amoindrie et
il faut retirer l'appareil, afin qu'il ne soit pas utilisé, et le renvoyer en vue de vérifications et de
réparations.
Remplacer les fusibles uniquement par des fusibles d'intensité nominale requise et de type
spécifié. Il est interdit d'utiliser des fusibles bricolés et de court-circuiter des porte-fusibles.
Eviter de mouiller l'instrument lors de son nettoyage.
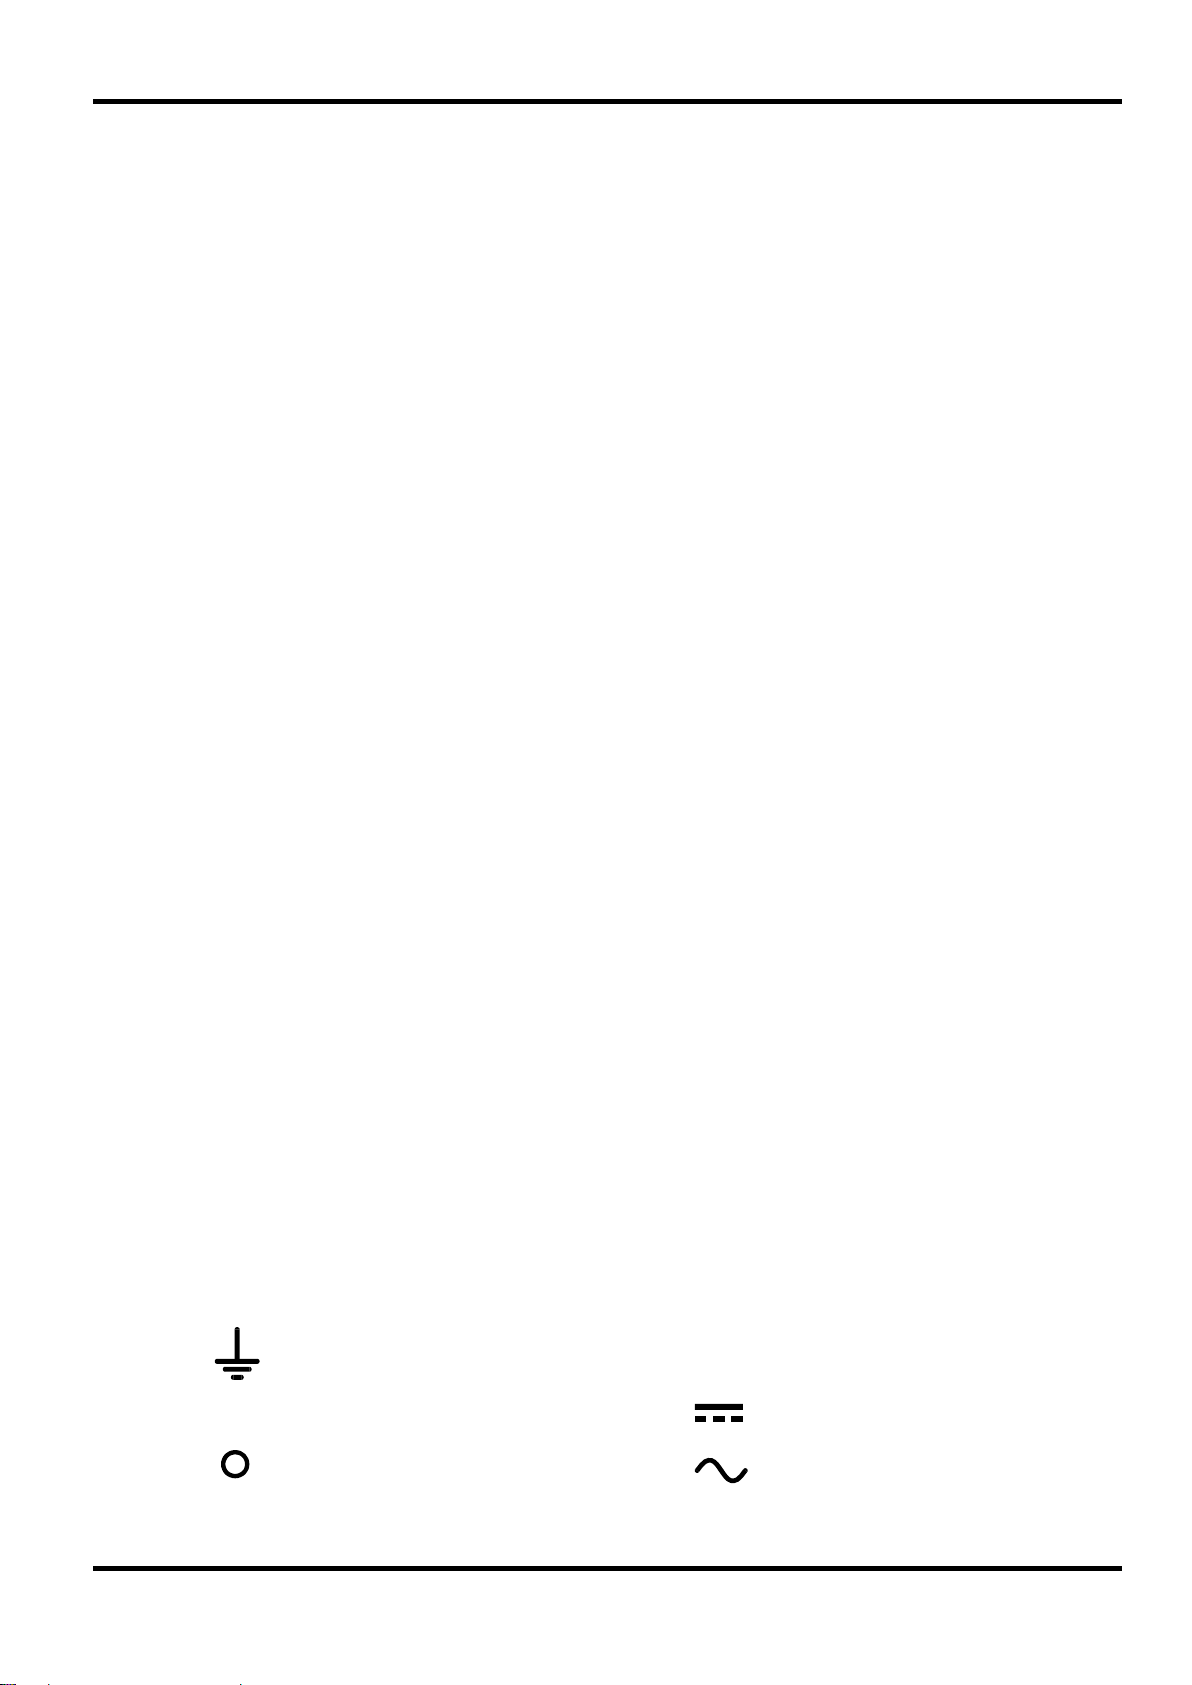
Les symboles suivants se trouvent sur l'instrument, ainsi que dans ce manuel.
Borne de terre (masse)
l
alimentation secteur ON (allumée)
courant continu (c.c.)
alimentation secteur OFF (éteinte)
courant alternatif (c.a.)

10
Installation
Tension d’utilisation secteur
Cet instrument a une plage d'entrée universelle et il fonctionne sur une alimentation secteur de
115 V ou de 230 V, tension nominale, sans ajustement aucun. Vérifier que l'alimentation locale
satisfait aux impératifs d'entrée c.a. indiqués aux Caractéristiques techniques.
Câble secteur
Branchez cet instrument sur l’alimentation secteur en utilisant le câble d’alimentation fourni. Si la
prise murale requiert l’utilisation d’un câble d’alimentation différent, un câble approprié et
approuvé, qui possède une fiche correspondante à la prise murale et un connecteur d’instrument
IEC60320 C13, doit être utilisé. Pour vérifier la tension nominale du câble d’alimentation en
fonction de la prise secteur, consultez les informations de puissance nominale sur l’équipement
ou dans Caractérstiques.
AVERTISSEMENT! CET INSTRUMENT DOIT ETRE RELIE A LA TERRE
Toute interruption du conducteur de terre secteur à l'intérieur ou à l'extérieur de l'instrument
rendra l'instrument dangereux. Il est absolument interdit d'effectuer une interruption à dessein.
Connexions
Toutes les connexions sont effectuées au panneau avant.
Relier la charge aux bornes positive (rouge) et négative (noire) marquées OUTPUT (Sortie).
Les deux bornes sont entièrement flottantes et il est possible de relier chacune à la terre.
Effectuer des connexions de télédétection à la charge, le cas échéant, des bornes de détection
(SENSE) positive (+) et négative (−). Placer le commutateur LOCAL/REMOTE en position
REMOTE lorsque la détection distante est requise. Placer le commutateur en position LOCAL
lorsque cette détection distante n’est pas utilisée.
La borne désignée est reliée au châssis et à la terre de protection.

11
Fonctionnement - Sorties principales
Le fonctionnement des deux sorties principales est identique; la description suivante s’applique
aux deux.
Mise en marche
L’interrupteur d’alimentation (POWER) se trouve en bas à gauche du panneau avant. Lorsque
l'interrupteur d'alimentation est activé ( l ) le mètre de droite indique brièvement le numéro de
version du microprogramme avant d'afficher les Volts et Ampères.
Réglage de la sortie
Lorsque l’interrupteur POWER (alimentation) est en position (l) et la sortie est en position
OFF (éteinte), il est possible de régler avec précision la limite de tension et de courant de sortie
au moyen des commandes VOLTAGE (Tension) et CURRENT (Courant); l’appareil de mesure
gauche indique la tension réglée et l’appareil droit le courant maximum réglé.
Lorsque le commutateur de sortie est en position ON (marche), le témoin s’allume;
l’appareil de mesure gauche indique alors la tension véritable et l’appareil droit le courant de
charge véritable.
Tension constante
Les commandes VOLTAGE de réglage grossier et de précision permettent d’ajuster la tension de
sortie; la commande CURRENT règle le courant maximum qui peut être fourni.
Courant constant
Si la résistance de charge est suffisamment basse qu’un courant supérieur au réglage de limite
de courant puisse passer pour la tension de sortie réglée, l’alimentation passera
automatiquement en mode de fonctionnement de courant constant. La commande CURRENT
ajuste le courant de sortie et les commandes VOLTAGE règlent la tension maximale qui peut être
engendrée. Le témoin CC s’allume pour indiquer le mode de courant constant.
Sortie de courant instantanée
Il est possible de régler la commande de limite de courant pour limiter le courant de sortie
continu à des niveaux aussi bas que 10 mA. Toutefois, ainsi que c’est le cas de toutes les
alimentations de précision sur banc, un condensateur est relié aux bornes de la sortie, afin de
maintenir la stabilité, ainsi qu’une bonne réponse transitoire. Ce condensateur se charge jusqu’à
la tension de sortie, et le court-circuitage de la sortie produira une impulsion de courant, lors du
déchargement du condensateur indépendamment du réglage de limite de courant.
Protection
La sortie dispose d’une protection intrinsèque contre les courts-circuits et elle est protégée contre
la tension inverse par une diode; le courant inverse continu ne doit pas dépasser 3A, bien qu’il
soit possible que l’intensité des transitoires soit nettement supérieure. La sortie est protégée
contre des tensions directes appliquées en externe jusqu'à 40V.
Télédétection
Le bloc a une impédance de sortie très réduite, mais la résistance des câbles de raccordement
l'augmente automatiquement. En cas de courants élevés, ceci peut entraîner des différences
importantes entre la tension de source indiquée et la tension de charge véritable (par exemple,
deux câbles de raccordement de 20 mΩentraîneront une chute de 0,2 V à une intensité de 5A).
Il est possible de réduire ce problème au minimum au moyen de câbles de raccordement courts
et épais et, le cas échéant, le résoudre entièrement au moyen de l'option de télédétection.
Ceci nécessite la connexion des bornes de détection à la sortie de la charge plutôt qu'à la
source ; insérer les fils dans les bornes à ressort SENSE et connecter directement à la charge.
Placer le commutateur LOCAL/REMOTE en position REMOTE. S'assurer qu'il y a un bon
couplage entre chaque fil de sortie et fil de détection pour éviter tout problème d'instabilité et de
réponse transitoire. On peut y parvenir soit par torsion des fils soit par utilisation de câble blindé
coaxialement (détection par le conducteur interne). Il peut s'avérer utile de relier directement un
condensateur électrolytique au point de connexion de charge.

12
La chute de tension de chaque fil de sortie ne doit pas dépasser 0,5 V. Placer le commutateur
LOCAL/REMOTE en position LOCAL lorsque la détection distante n’est pas utilisée.

13
Fonctionnement – Sortie Auxiliaire
Tension de sortie
La tension de sortie peut être réglée entre 1.5V et 5.0V en utilisant la commande rotative du
panneau avant près des bornes centrales. Avec l'afficheur de l'état de la sortie principale droite,
un appui sur le bouton SHOW AUX PRESET (montrer les réglages auxiliaire) provoquera
l'affichage de la tension et de la limite du courant de la sortie auxiliaire sur l'afficheur droit.
Limite de courant
La sortie passe à la limite de courant comprise entre 5A et 6A; le témoin UNREG (dérégler)
s’allume dans ces conditions.
Protection
La sortie dispose d’une protection intrinsèque contre les courts-circuits et elle est protégée contre
la tension inverse par une diode; le courant inverse continu ne doit pas dépasser 3A, bien qu’il
soit possible que l’intensité des transitoires soit nettement supérieure.
La sortie est protégée contre des tensions directes appliquées en externe jusqu'à 7V.
Fonctionnement - Généralités
Connexion à la charge
Relier la charge aux bornes de sortie positive (rouge) et négative (noire). Les deux bornes sont
entièrement flottantes et il est possible de relier chacune à la terre.
Connexion en série ou en parallèle avec d’autres sorties
Les sorties de l’alimentation sont entièrement flottantes et elles peuvent être utilisées en série
avec d’autres blocs d’alimentation, afin de produire des tensions c.c. jusqu’à 300V c.c.
La tension maximale admissible entre une borne et la terre ( ) est de 300V c.c.; la tension
maximale admissible entre la borne d'une sortie et la borne d'une autre sortie de la même
alimentation est également de 300V c.c.
AVERTISSEMENT! Des tensions de ce genre sont extrêmement dangereuses et il faut prendre
toutes les précautions d’usage pour protéger les bornes de sortie en conséquence. Ne jamais
toucher les bornes de sortie lorsque le bloc est allumé pour ces applications. Toutes les
connexions des bornes doivent être effectuées lorsque tous les blocs sont éteints.
Il faut noter que le bloc peut uniquement recevoir du courant, mais non le consommer, de sorte
qu’il n’est pas possible de mettre en opposition de phase les blocs reliés en série.
Il est possible de relier le bloc en parallèle avec d’autres, afin de produire des courants de haute
intensité. Lorsque plusieurs blocs sont reliés en parallèle, la tension de sortie doit être égale à
celle du bloc de réglage de tension de sortie le plus élevé, jusqu’à ce que le courant consommé
dépasse le réglage de limite de courant, auquel cas la sortie descend à celle du réglage le plus
haut suivant, etc. En mode de courant constant, les blocs peuvent être reliés en parallèle, afin
de donner un courant égal à la somme des réglages de limite de courant.
Ventilation
L’alimentation est très performante, mais elle peut toutefois générer beaucoup de chaleur à
puissance maximale. L’alimentation a besoin d’un refroidissement par convection uniquement et
il est donc important que la ventilation ne soit jamais réduite, afin d’assurer une bonne
performance et sécurité.

14
Maintenance
Le Constructeur ou ses agents à l'étranger répareront tout bloc qui tombe en panne. Si le
propriétaire de l'appareil décide d'effectuer lui-même la maintenance, ceci doit uniquement être
effectué par un personnel spécialisé qui doit se référer au manuel d’entretien que l'on peut se
procurer directement auprès du Constructeur ou de ses agents à l'étranger.
Fusible
Type de fusible correct:
10A 250V HBC temporisé (T), 5 x 20 mm.
Il faut noter que l’objet principal de ce fusible est de rendre l’instrument non dangereux et de
limiter les dégâts en cas de panne d’un des dispositifs de commutation. En cas de panne d’un
fusible, il est très probable que le fusible de rechange sautera également, étant donné que
l’alimentation est probablement défectueuse; lorsque c’est le cas, il faudra renvoyer l’instrument
chez le constructeur en vue de réparations.
Uniquement remplacer les fusibles par des fusibles d'intensité nominale requise et de type
spécifié. Il est interdit d'utiliser des fusibles bricolés et de court-circuiter des porte-fusibles.
Pour remplacer un fusible, commencer par débrancher l’instrument de l’alimentation c.a. Enlever
les 7 vis d’immobilisation du couvercle, puis enlever le couvercle. Remplacer le fusible par un
autre de type correct, puis remettre le couvercle.
Nettoyage
S'il faut nettoyer le bloc d'alimentation, utiliser un chiffon légèrement imbibé d'eau ou d'un
détergent doux. Nettoyer le cadran d'affichage au moyen d'un chiffon sec et doux.
AVERTISSEMENT! EMPECHER TOUTE INTRODUCTION D'EAU DANS LE BOITIER AFIN
D'EVITER TOUT CHOC ELECTRIQUE ET DEGATS AU BLOC D'ALIMENTATION. NE JAMAIS
UTILISER DE DISSOLVANTS POUR NETTOYER LE BLOC, AFIN D'EVITER
D'ENDOMMAGER LE BOITIER OU LE CADRAN D’AFFICHAGE.

15
Sicherheit
Dieses Gerät wurde nach der Sicherheitsklasse (Schutzart) I der IEC-Klassifikation und gemäß
den europäischen Vorschriften EN61010-1 (Sicherheitsvorschriften für elektrische Mess-,
Steuer-, Regel- und Laboranlagen) entwickelt. Es handelt sich um ein Gerät der
Installationskategorie II, das für den Betrieb von einer normalen einphasigen Versorgung
vorgesehen ist.
Das Gerät wurde gemäß den Vorschriften EN61010-1 geprüft und in sicherem Zustand geliefert.
Die vorliegende Anleitung enthält vom Benutzer zu beachtende Informationen und Warnungen,
die den sicheren Betrieb und den sicheren Zustand des Gerätes gewährleisten.
Dieses Gerät ist für den Betrieb in Innenräumen der Umgebungsklasse 2 , für einen
Temperaturbereich von +5°C bis +40°C und 20 - 80 % relative Feuchtigkeit (nicht kondensierend)
vorgesehen. Gelegentlich kann es Temperaturen zwischen −10°C und +5°C ausgesetzt sein,
ohne dass seine Sicherheit dadurch beeinträchtigt wird. Betreiben Sie das Gerät jedoch auf
keinen Fall, solange Kondensation vorhanden ist.
Ein Einsatz dieses Gerätes in einer Weise, die für diese Anlage nicht vorgesehen ist, kann die
vorgesehene Sicherheit beeinträchtigen. Auf keinen Fall das Gerät außerhalb der angegebenen
Nennversorgungsspannungen oder Umgebungsbedingungen betreiben.
WARNUNG! -DIESES GERÄT MUSS GEERDET WERDEN!
Jede Unterbrechung des Netzschutzleiters innerhalb oder außerhalb des Gerätes macht das
Gerät gefährlich. Eine absichtliche Unterbrechung ist verboten. Die Schutzwirkung darf durch
Verwendung eines Verlängerungskabels ohne Schutzleiter nicht aufgehoben werden.
Ist das Gerät an die elektrische Versorgung angeschlossen, so können die Klemmen unter
Spannung stehen, was bedeutet, daß beim Entfernen von Verkleidungs- oder sonstigen Teilen
(mit Ausnahme der Teile, zu denen Zugang mit der Hand möglich ist) höchstwahrscheinlich
spannungsführende Teile bloßgelegt weden. Vor jeglichem Öffnen des Gerätes zu Nachstell-,
Auswechsel-, Wartungs- oder Reparaturzwecken, dieses stets von sämtlichen Spannungsquellen
abklemmen. Kondensatoren in der Stromversorgung können auch noch nach Abschalten
sämtlicher Stromversorgung Spannung führen, sie entladen sich jedoch innerhalb von etwa einer
Minute nach Spannungsabschaltung.
Jegliche Nachstellung, Wartung und Reparatur am geöffneten, unter Spannung stehenden
Gerät, ist nach Möglichkeit zu vermeiden. Falls unvermeidlich, sollten solche Arbeiten nur von
qualifiziertem Personal ausgeführt werden, das sich der Gefahren bewusst ist.
Ist das Gerät eindeutig fehlerbehaftet bzw. wurde es mechanisch beschädigt, übermäßiger
Feuchtigkeit oder chemischer Korrosion ausgesetzt, so können die Schutzeinrichtungen
beeinträchtigt sein, weshalb das Gerät aus dem Verkehr zurückgezogen und zur Überprüfung
und Reparatur eingesandt werden sollte.
Sicherstellen, daß nur Sicherungen der vorgeschriebenen Stromstärke und des vorgesehenen
Typs als Ersatz verwendet werden. Provisorische "Sicherungen“ und der Kurzschluss von
Sicherungshaltern ist verboten.
Beim Reinigen darauf achten, dass das Gerät nicht nass wird.
Am Gerät werden folgende Symbole verwendet:
Erdungsklemme
l
Netz ON (ein)
Gleichstrom
Netz OFF (aus)
Wechselstrom

16
Installation
Netzbetriebsspannung
Das Gerät besitzt einen universellen Eingangsbereich und kann ohne jede weitere Einstellung
mit einer Nenn-Netzversorgung von 115 oder 230 V betrieben werden. Stellen Sie sicher, daß die
Versorgung am Ort den in der Spezifikation aufgeführten Eingangsanforderungen entspricht.
Netzkabel
Schließen Sie das Instrument unter Verwendung des mitgelieferten Netzkabels an die
Wechselstromversorgung an. Falls ein Netzstecker für eine unterschiedliche Steckdose
erforderlich ist, muss ein geeigneter zugelassener Netzkabelsatz verwendet werden, der mit der
erforderlichen Steckdose und einem IEC60320 C13-Stecker für das Instrument versehen ist. Die
minimale Nennstromstärke des Kabelsatzes für die beabsichtigte Wechselstromversorgung ist
den Nennleistungsangaben auf dem Gerät oder den Spezifikationen zu entnehmen.
WARNUNG! DIESES GERÄT MUSS GEERDET WERDEN!
Jede Unterbrechung des Netzschutzleiters innerhalb oder außerhalb des Geräts macht das
Gerät gefährlich. Eine absichtliche Unterbrechung ist verboten.
Anschlüsse
Sämtliche Anschlüsse erfolgen von der Fronttafel aus.
Der Verbraucher sollte an die mit OUTPUT (Ausgang) markierte positive (rot) und negative
(schwarz) markierte Klemme angeschlossen werden. Bei beiden Anschlüssen handelt es sich
um vollkommen potentialfreie, die jeweils geerdet werden können.
Istwert-Fernerfassungs-Anschlüsse zum Verbraucher erfolgen, falls erforderlich, über die
positive (+) und negative (−) Fernerfassungsklemme (SENSE). Den Fernbedienungsschalter
(LOCAL/REMOTE) auf Fernbedienung (REMOTE) stellen, wenn eine Istwert-Fernerfassung
gewünscht wird. Wenn die Istwert-Fernerfassung nicht benutzt wird, auf Ortsbedienung
(LOCAL) zurückstellen.
Die mit dem Symbol gekennzeichnete Klemme ist mit dem Chassis und der Schutzerde
verbunden.
Betrieb - Hauptausgänge
Der Betrieb beider Hauptausgänge ist derselbe. Folgende Beschreibung gilt daher für beide.
Einschalten
Der Netzschalter befindet sich unten links auf der Gerätevorderseite. Nach dem Betätigen des
Netzschalters ( l ) wird auf der rechten Anzeige kurz die Firmware-Version angezeigt, gefolgt von
der Spannungs- und Stromanzeige.
Einstellung des Ausgangs
Bei eingeschaltetem POWER (Netzschalter I) und ausgeschaltetem Ausgang läßt sich die
Ausgangsspannung und Strombegrenzung mit Hilfe der Knöpfe VOLTAGE (Spannung) und
CURRENT (Strom) genau voreinstellen. Die linke Anzeige zeigt die eingestellte Spannung und
die rechte den eingestellten Maximalstrom an.
Ist der Ausgangsschalter aktiviert, leuchtet die ON (Ein)-Leuchte auf. Jetzt wird auf der
linken Anzeige die Istspannung und an der rechten Anzeige der Ist-Laststrom angezeigt.
Konstantspannung
Die Ausgangsspannung wird mittels der Grob- (coarse) und Feindrehknöpfe (fine) von VOLTAGE
reguliert. Mit dem Knopf CURRENT (Strom) wird der Maximalstrom eingestellt, der zur Verfügung
gestellt werden soll.

17
Konstantstrom
Ist der Belastungswiderstand ausreichend niedrig, daß bei der eingestellten Ausgangsspannung
ein Strom fließen würde, der größer wäre als die eingestellte Strombegrenzung, so schaltet die
Stromversorgung automatisch auf konstanten Strombetrieb. Der Stromausgang wird mit dem
Knopf CURRENT eingestellt und die maximal generierbare Spannung mit dem Knopf VOLTAGE.
Die CC-Leuchte leuchtet bei eingeschaltetem Konstantstrommodus auf.
Augenblickstromausgang
Mit der Strombegrenzung kann der kontinuierliche Ausgangsstrom bis auf 10 mA begrenzt
werden. Wie bei allen Präzisions-Stromversorgungs-Tischgeräten ist der Ausgang zur
Aufrechterhaltung der Stabilität und zwecks gutem Einschwingverhalten mit einem Kondensator
versehen. Der Kondensator wird bis zur Höhe der Ausgangsspannung aufgeladen. Ein
Kurzschließen des Ausgangs bewirkt beim Entladen des Kondensators einen Stromimpuls, der
von der Strombegrenzungseinstellung unabhängig erfolgt.
Schutzvorrichtungen
Der Ausgang ist mit einem eigenen Kurzschlußschutz versehen und mittels Diode vor
Umkehrspannungen geschützt. Kontinuierlicher Umkehrstrom darf 3 Amp nicht überschreiten.
Transiente Ströme können jedoch wesentlich höher liegen.
Der Ausgang ist vor extern angelegten Durchlaßspannungen von bis zu 40V.
Istwert-Fernerfassung
Die Ausgangsimpedanz ist bei dieser Einheit sehr niedrig, wird aber zwangsläufig durch den
Widerstand der Verbindungsleitungen erhöht. Bei hohen Stromstärken können sich hieraus
erhebliche Unterschiede zwischen der angezeigten Quellenspannung und der tatsächlichen
Lastspannung ergeben (bei zwei 20-mΩ-Anschlussleitungen ergibt sich beispielsweise ein
Spannungsabfall von 0,2V bei 5A). Dieses Problem kann durch die Verwendung einer kurzen
Verbindungsleitung mit großer Drahtstärke minimiert und, falls erforderlich, durch die
Verwendung der Einrichtung zur Istwert-Fernerfassung sogar ganz ausgeschaltet werden.
Zu diesem Zweck müssen die SENSE-Klemmen mit dem Ausgang des Verbrauchers statt mit
dem Ausgang der Quelle verbunden werden. Die Leitungen werden in die federbelasteten
SENSE-Klemmen eingeführt und direkt an den Verbraucher angeschlossen. Der
Fernbedienungsschalter (LOCAL/REMOTE) wird auf Fernbedienung (REMOTE) gestellt. Um
Probleme bezüglich der Stabilität und des Einschwingverhaltens zu vermeiden, ist sorgfältig
darauf zu achten, dass eine gute Kopplung zwischen dem jeweiligen Ausgang und der
Abtastleitung gegeben ist. Dies lässt sich auf zweierleiArten erreichen: entweder indem die
Leitungen miteinander verdrillt werden oder indem ein koaxial geschirmtes Kabel (Abtastung
über den Innerleiter) verwendet wird. Auch ein Elektrolytkondensator direkt am
Lastanschlusspunkt kann hier von Nutzen sein.
Der Spannungsabfall darf bei keiner Ausgangsleitung mehr als 0.5 Volt betragen. Wenn die
Istwert-Fernerfassung nicht benutzt wird, ist der Fernbedienungsschalter (LOCAL/REMOTE) auf
Ortsbedienung (LOCAL) zurückzustellen.

18
Betrieb – Hilfsausgang
Ausgangsspannung
Die Ausgangspannung kann mittels Drehkopf, neben den zentralen Anschlussklemmen, in einem
Bereich von 1,5 V bis 5,0 V eingestellt werden. Ist der rechte Hauptausgang ausgeschaltet, kann
durch drücken der SHOW AUX PRESET Taste die eingestellte Spannung und Strombegrenzung
für den Hilfsausgang in den beiden rechten Anzeigen zu Ansicht gebracht werden.
Strombegrenzung
Zwischen 5 und 6 A erfolgt die Strombegrenzung des Ausgangs. Unter diesen Bedingungen
leuchtet die Leuchte UNREG (ungeregelt)auf.
Schutzvorrichtungen
Der Ausgang ist mit einem eigenen Kurzschlußschutz versehen und mittels Diode vor
Umkehrspannungen geschützt. Kontinuierlicher Umkehrstrom darf 3 Amp nicht überschreiten.
Transiente Ströme können jedoch wesentlich höher liegen.
Der Ausgang ist vor extern angelegten Durchlaßspannungen von bis zu 7V.
Betrieb - Allgemein
Verbraucheranschluß
Der Verbraucher ist an die positive (rote) und negative (schwarze) Ausgangsklemme
anzuschließen. Bei beiden Anschlüssen handelt es sich um vollkommen potentialfreie, die jeweils
geerdet werden können.
Reihen- und Parallelschaltung mit anderen Ausgängen
Da der Ausgang des Netzteils vollständig potentialfrei ist, kann er mit anderen Netzgeräten zur
Erzeugung hoher Gleichspannungen bis maximal 300V in Reihe geschaltet werden.
Die maximal zulässige Spannung zwischen einer beliebigen Klemme und Erde ( ) beträgt 300V
Gleichspannung. Die maximal zulässige Spannung zwischen einer der beiden Klemmen eines
Ausgangs und einer beliebigen Klemme eines anderen Ausgangs desselben Geräts beträgt
ebenfalls 300V Gleichspannung.
WARNUNG! Spannungen in dieser Größenordnung sind überaus gefährlich. Bei einer solchen
Einsatzweise sollten dieAusgangsklemmen mit größter Sorgfalt abgeschirmt werden. Unter
diesen Bedingungen dürfen die Ausgangsklemmen keinesfalls berührt werden, wenn das Gerät
eingeschaltet ist. Wann immer Verbindungen mit den Klemmen hergestellt werden, müssen
sämtliche Geräte ausgeschaltet sein.
Zu beachten ist dabei, daß das Gerät ausschließlich stromliefernd, nicht aber stromziehend
arbeiten kann, und daß die Geräte daher nicht gegenphasig in Reihe geschaltet werden können.
Das Gerät kann zur Erzeugung einer höheren Stromabgabe mit anderen Geräten parallel zu
diesen geschaltet werden. Wenn mehrere Geräte parallel geschaltet werden, entspricht die
Ausgangsspannung der Ausgangsspannung des Geräts, bei dem der Einstellwert für die
Ausgangsspannung am höchsten ist, bis die Stromaufnahme den bei diesem Gerät eingestellten
Grenzwert überschreitet, woraufhin der Ausgang auf die zweilhöchste Einstellung abfällt, und so
weiter. Im Konstantstrombetrieb können Geräte parallel geschaltet werden, wodurch sich eine
Stromabgabe erreichen läßt, die der Summe der Einstellwerte für die Strombegrenzung
entspricht.
Ventilation
Obwohl die Stromversorgung äußerst effizient arbeitet kann sie bei voller Leistung ein
beträchtliches Maß an Wärme erzeugen. Die Kühlung der Stromversorgung erfolgt
ausschließlich durch Konvektion, weshalb es wichtig ist, daß die Ventilation niemals
eingeschränkt wird, wenn Leistung und Sicherheit aufrecht erhalten werden sollen.

19
Wartung
Die Hersteller bzw. deren Vertretungen im Ausland bieten die Reparatur von Geräten an, bei
denen eine Störung aufgetreten ist. Wenn der Eigentümer die Wartungsarbeiten selbst
durchführen möchte, hat er dafür Sorge zu tragen, daß diese Arbeiten ausschließlich von
entsprechend qualifiziertem Personal und gemäß Wartungshandbuch ausgeführt werden, das
direkt von den Herstellern oder deren Vertretungen im Ausland bezogen werden kann.
Sicherungen
Korrekter Sicherungstyp:
Träge Hochleistungssicherung (T) 10 Amp, 250V, 5 x 20 mm
Beachten Sie bitte, daß die Hauptfunktion der Sicherung der Schutz von Personen sowie
Geräteteilen ist bzw. die Begrenzung solcher Schäden im Falle von Störungen an den
Schaltgeräten. Brennt eine Sicherung durch, so ist es höchst wahrscheinlich, daß auch ihr Ersatz
durchbrennt, weil eine Störung im Gerät vorliegt. In einem solchen Falle ist es erforderlich, daß
das Gerät vom Hersteller repariert wird.
Achten Sie darauf, daß nur Sicherungen der vorgeschriebenen Stromstärke und des
angegebenen Typs als Ersatzsicherungen verwendet werden. Die Verwendung von
Behelfssicherungen und das Kurzschließen von Sicherungshaltern ist verboten.
Zum Auswechseln einer Sicherung zuerst das Gerät von seiner Wechselstromversorgung
trennen. Dann die 7 Befestigungsschrauben des Gehäuses entfernen und danach das Gehäuse
abheben. Sicherung durch eine korrekte Ersatzsicherung ersetzen und Gehäuse wieder
montieren.
Reinigung
Falls die Stromversorgung der Reinigung bedarf, einen mit Wasser oder einem milden Detergens
angefeuchteten Lappen benutzen. Anzeigefenster mit einem weichen, trockenen Lappen
polieren.
WARNUNG! ZUR VERMEIDUNG EINES ELEKTRISCHEN SCHLAGS BZW. BESCHÄDIGUNG
DER STROMVERSORGUNGSEINHEIT, DAFÜR SORGEN, DASS KEIN WASSER INS
GEHÄUSE EINDRINGT. UM SCHADEN AM GEHÄUSE BZW. AM ANZEIGEFENSTER ZU
VERMEIDEN, KEINE LÖSUNGSMITTEL ZUR REINIGUNG VERWENDEN!
This manual suits for next models
1
Table of contents
Languages:
Other AimTTi Power Supply manuals

AimTTi
AimTTi EX4210R User manual

AimTTi
AimTTi QPX600D User manual

AimTTi
AimTTi MX180T User manual

AimTTi
AimTTi CPX200D User manual

AimTTi
AimTTi CPX400S User manual

AimTTi
AimTTi MX100Q User manual

AimTTi
AimTTi PowerFlex QPX1200 Series User manual

AimTTi
AimTTi CPX400D User manual

AimTTi
AimTTi MX User manual

AimTTi
AimTTi EX1810R User manual