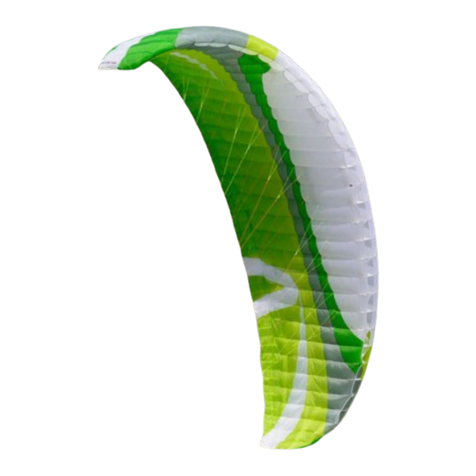
Air Design Volt User manual

Gleitschirm / Paraglider
EN/LTF-C
Betriebshandbuch und Serviceheft
Manual and Service Book
Seriennummer / Serial Number:
……………………………………………………………
Rev3 –18.06.2012
AIRDESIGN GmbH
Rhombergstraße 9 –A-6067 Absam –AUSTRIA
Tel: +43 5223 22480
Tel: +43 664 3307715
e-mail: info@ad-gliders.com

18
Contents
1. Disclaimer and important advice for your own safety ..................................... 20
2. Construction....................................................................................................... 21
3. Technical Data.................................................................................................... 23
4. Pilot target group............................................................................................... 23
5. Harness............................................................................................................... 24
6. Towing / winching.............................................................................................. 24
7. Practical Flying ................................................................................................... 24
a. Pre-flight check .................................................................................................. 24
b. Check-list –pre-flight-check .............................................................................. 24
c. Take-off .............................................................................................................. 25
d. Turning flight...................................................................................................... 25
e. Brake line length ................................................................................................ 26
f. Active flying........................................................................................................ 26
g. Accelerating........................................................................................................ 27
h. Landing ............................................................................................................... 27
i. Towing and winching ......................................................................................... 28
j. Asymmetric and frontal collapses..................................................................... 28
k. Reopening a cravat ............................................................................................ 28
l. Negative spin...................................................................................................... 29
m. Full-stall .............................................................................................................. 29
n. Rapid decent manoeuvres................................................................................. 29
i. Spiral................................................................................................................ 29
ii. B-line stall ....................................................................................................... 30
iii. “Big-ears”....................................................................................................... 30
iv. “Big-ears” with B-line.................................................................................... 31
8. Maintenance and Repairs.................................................................................. 31
9. Checking the glider ............................................................................................ 35
10. The Final Word................................................................................................... 35
A. ANHANG - ANNEX .............................................................................................. 36
a. Übersichtszeichnung –Overview ...................................................................... 36
b. Leinenplan –line plan........................................................................................ 37
c. Tragegurt - Riser................................................................................................. 39
B. Material –Materials .......................................................................................... 40
C. EBL/DDP.............................................................................................................. 41
D. SERVICE BOOKLET - SERVICEHEFT ..................................................................... 46
E. Registry Of Product - Produktregistrierung ...................................................... 51

19
WELCOME TO AIRDESIGN
CONGRATULATIONS ON THE PURCHASE OF YOUR NEW PARAGLIDER.
WE WISH YOU MANY ENJOYABLE HOURS OF FLYING.
We would like to be able to inform you of the latest news and developments at AIRDESIGN as
well as offer relevant advice and special promotions. Please register your new paraglider by
completing the registration form (in the annex) and return it to us.
You may also register online on our web-site at www.ad-gliders.com. Please check the website
for more details.
If you wish, you can register for the AIRDESIGN newsletter.
Simply provide us with your e-mail address and you will always be up to date with the very
latest news from the AIRDESIGN world.
Up to the minute news and information is available on our Facebook page under “AIRDESIGN
gliders”. Become a fan and you are online with us whenever you login to Facebook.
More information about the VOLT can be found on our website: www.ad-gliders.com.
For any further questions, please contact your nearest AIRDESIGN dealer or contact us directly
at AIRDESIGN.
AIRDESIGN GmbH
Rhombergstraße 9, 3.Stock
6067 Absam
AUSTRIA
Tel: +43 (0)5223 22480
Mobil +43 (0)664 3307715
e-mail: info@ad-gliders.com

20
1. Disclaimer and important advice for your own safety
Please read carefully and follow this important advice:
This Paraglider is an air-sport-vehicle with the obligation of type testing and with a glider
weight of less than 120kg. It is not usable as skydiving-glider or for openings in free-fall.
This paraglider complies, at the time of delivery, with the certification requirements of the
German LTF (Lufttüchtigkeitsforderung) and with the European Norm EN - LTF 91/09 & EN
926-1:2006, 926-2:2005
Paragliders must not be flown by persons without a valid qualification unless under the
instruction of a suitably experienced and qualified, registered paragliding school. Flying a
paraglider without the proper knowledge, skills and qualification is dangerous.
The national regulations for flying paragliders must be obeyed in all circumstances.
The pilot must respect and comply with the rules of law.
This paraglider must only be used within the certified weight limits.
This paraglider is used exclusively at your own risk.
The manufacturer or distributor cannot be held responsible for any damages arising to
persons, property or other materials which occur as a result of the use of this paraglider.
All liability arising from the use of this paraglider is exclusively that of the pilot in charge.
The manufacturer or distributor is excluded from any liability resulting for the use, misuse
or otherwise, of this paraglider.
It is the owner’s and/or pilot’s obligation to monitor and to maintain the airworthiness of
this paraglider. To make sure the paraglider always flies with optimum characteristics, take
care of the paraglider and make regular checks.
Any change made to the structure of the paraglider renders it uncertified (non-conformity
of type-testing) and invalidates any warranty. Structural repairs to paragliders must only be
made by an appropriately experienced and recognised service centre. All changes and/or
repairs must be recorded in the service history record in this manual.
It is an implied requirement that the pilot flies a paraglider that matches his skill level. A
pilot should not fly a paraglider outwith his ability to meet the demands of the paraglider in
all states and conditions of flight.
The glider must be ‘test’ flown by an expert before the first use. The ‘conformity checked
by’ box on the certification sticker affixed to the wing must be countersigned with the
signature of the testing pilot and date of the test flight.
Appropriate towing equipment must be used. Never tow or winch the paraglider with a
car, motorboat, or mechanical or other means without appropriate towing gear and /or
appropriately qualified operators.
Ensure before towing or winching that the operator has the proper experience and
qualifications relevant to the type of tow/winch operation.
Acrobatics are not allowed.
Flying in rain or with a wet paraglider is not allowed. Pilots should always land well before
any risk of contact with rain. Flying a wet paraglider can, in certain circumstances, lead to a
deep-stall state.
Before flying a new paraglider practice launch and control techniques on a flat field or
training slope.
21
Make the first flights with a new paraglider at a site that you use regularly and when
meteorological conditions are favourable. Be aware that your new paraglider may have
different characteristics from anything you have flown or trained with. Ensure that you
allow adequate space for the landing approach.
When flying always wear helmet and gloves, as well as suitable shoes and clothing.
Always make sure that the wind direction and speed as well the general meteorological
situations are within the pilot’s capabilities and favour safe flight.
Please read this manual carefully and thoroughly.
IMPORTANT SAFETY NOTICE
2. Construction
Stephan Stiegler - the AirDesign designer and test-pilot - has one aim in mind as
he designs, tests and trims new gliders: “The glider must be easily flyable but
with top performance in its class.” In his own words “I guess the top issue for
the VOLT is that it performs like the PURE and is easy to fly”
The AirDesign PURE generated an huge interest and following in a very short
time due to its ease of flying in combination with the top performance in the
EN-D class.
AirDesign have now refined the PURE genes to bring the PURE flying sensation
into the EN-C class. The result is the brand-new VOLT. The VOLT is aimed at
sports class, cross-country and competition pilots who want ease of handling
with top-end performance in the class.
VOLT is the result of another year of development, testing and trimming and
combines the characteristics and flying sensations of the ‘big-brother’ PURE with
the handling and recovery of the recreational sport class.
VOLT performance is beyond many current LFT/EN D gliders. VOLT is stable and
solid but sensitive enough to give perfect feedback to the pilot.
Precision in handling reaches a new level in the LFT/EN C class.
Brake input is absolute precise but with slightly longer travel and slightly less
pressure than the PURE. This makes the VOLT a real excitement when doing
thermals. The climb-rate is at its best - climbing is that easy you don’t even
notice it.
By the purchase of this equipment, you are responsible for being a certified paraglider pilot and you
accept all risks inherent with paragliding activities including injury and death.
Improper use or misuse of paragliding equipment greatly increases these risks.
Neither Airdesign nor the seller of Airdesign equipment shall be held liable for personal or third
party injuries or damages under any circumstances.
If any aspect of the use of our equipment remains unclear, please contact your local
paragliding instructor, Airdesign dealer or the Airdesign importer in your country.

22
Launch characteristics are impeccable.
The immediate feeling of comfort and stability is becoming a trademark of
AirDesign gliders.
In the words of the AirDesign gliders architect, Stephan Stiegler: “It’s one of the
best gliders I ever made … a glider perfect for those pilots coming into the EN-C
class as well as those who maybe wary of moving onto the new EN-D wings”
Technical details:
performance airfoil from PURE - competition technology with safety
certified without folding lines
3-Line-System : a 3-line concept with the inner C lines split to form short D lines.
Unsheathed ‚race’ lines are used in the upper two cascades to reduce drag.main lines
with sheated aramid lines.
back positioned attachments which improves stability and reduces pitching
Polyamide rods in the leading edge keep the profile in perfect shape and improve
stability and launch characteristics.
3D Cut : a technical sail cutting method used across the leading edge area. This
produces improved air flow and increased performance.
The 2-in-1 progressive brake line layout improves climb characteristics. The center
brake fan is attached slightly in from the trailing edge to improve climb. At the tips,
the line runs through small rings on the trailing edge to gather the tip and assist
precise turning whatever the conditions.
brake-shift option: This gives the pilot the option to modify the way of turning the
wing and adapt to different flying conditions. This is achieved by shifting the brake
(hand) either to the inside or outside which results in a steeper or flatter turning.
Mini-ribs in the trailing edge improve surface finish and reduce drag.
Performance style, reinforced 12mm risers, adjustable brake handles and dirt-holes
at the wing tips complete the quality finish.

23
3. Technical Data
4. Pilot target group
Many years of flying, designing and competing have convinced us that a pilot who is
comfortable flying a glider, will fly more, have more fun and achieve more in cross-country
flying and in competition …
Pilots who are looking for the maximum performance in the LTF/EN C class with no
compromise in passive safety or agility and who rightly demand precise handling will feel
totally at home with the VOLT.
The handling characteristics of the VOLT combined with the evidence from the test
manoeuvres show us that high performance can be manageable and recoverable. VOLT is not a
‘high-end’ LFT/EN C glider. It’s simply a ‘perfect’ sports class glider – suitable for improving
pilots moving up into the Sports class as well as those who maybe unsure about the latest
LFT/EN D gliders.
All pilots flying in this class should be flying regularly and be experienced in ‘active-flying’ in all
conditions.
LTF and EN category
The AirDesign VOLT has been classified as EN-C and LTF-C.
The glider has been type-tested for “one-seated” use only.
Suitability for training
The AIRDESIGN VOLT is NOT suitable for training or use in the school environment.
Recommended weight range
The VOLT must only be flown within the certified weight range as stated in the technical data
under section 3. The take-off weight includes pilot plus clothing, glider, harness, equipment
etc.
The VOLT reacts to a variation in loading with a slight reduction or increase of trim-speed. The
performance remains more or less the same.

24
5. Harness
The VOLT is type-tested for use with all modern harnesses –rated as GH.
6. Towing / winching
The VOLT is suitable for towing/winching. The use of a suitable tow-adapter is not obligatory
but is helpful and gives more confidence during towing.
Hint!
Towing is only recommended if:
The pilot has received towing instruction
The winch and release-links are suitable for towing paragliders
The winch operator is experienced and qualified for towing paragliders
Attention: Danger of accident!
The most common reason for accidents during towing is when the pilot releases the A-riser too
early during take-off. The pilot should make sure that the glider is completely overhead when
giving the command for start.
7. Practical Flying
This manual is not an instruction manual for learning how to fly.
It is assumed that the pilot has had proper training leading to a recognised qualification and
has the ability to fly a paraglider in the EN/LTF-C class.
a. Pre-flight check
A careful pre-flight check is recommended before every flight.
The lines, risers, maillons and canopy should be checked for damage. Do not take off if there is
the smallest amount of visible damage.
Ensure that the main Karabiners between harness and risers are undamaged and are closed.
The harness must be put on with greatest care and all straps secured correctly.
Check the correct position of the reserve (rescue) handle and make sure the pins of the reserve
(rescue) are in place.
The lines and risers should be sorted carefully. Check that the risers are not twisted and that
the brake lines are running free. All lines must run from riser to canopy free from tangles or
knots –during flight it is often not possible to release knots in lines.
Lines lay directly in contact with the ground. Therefore, take care that they don’t get caught or
snagged during take-off.
No lines should be underneath the canopy, line-overs can cause accidents.
The canopy should be laid out in a circular shape facing the wind so that all lines become
tensioned evenly when inflating.
ATTENTION: NEVER TAKE OFF (START) WITH OPEN KARABINAS!
b. Check-list –pre-flight-check
Lay the glider out into a slight arc and check that:
Canopy is dry and undamaged
Cell openings are free of obstructions
Risers are without damage and all stitching is intact

25
Maillons on lines are closed correctly
All lines are free from tangles or knots
Brakes lines run freely through the pulleys
Knots on brake lines are secure
After putting on harness check the:
Position of reserve (rescue) handle and pins
Leg loops and strap are fastened correctly
Main Karabiners are closed
Before launch check that:
Speed-system is connected correctly and runs smoothly through the pulleys
Risers are not twisted
Place brake handles in the hands and check brake lines are free
Position pilot in centre of wing
Check wind direction
Check take off area is clear
Check airspace is free from congestion
c. Take-off
The key to successful launching is to practice ground-handling on flat ground as often as
possible.
The VOLT inflates easily and steadily using forward or reverse launch techniques. There is no
tendency for the canopy to hang back during inflation. To forward (alpine) launch in light or nil
wind there is no need to pull the risers hard. Allow the glider to stabilise overhead and run
positively forward checking the canopy is fully inflated and clear of any knots or tangles.
Reverse launching is recommended in strong wind.
The glider has split A-risers. For launching you can take either just the inner A-line riser or both.
For launching in tail-wind it might help to use just the inner A-line riser to avoid the tips
accelerating ahead of the centre of the wing while inflating.
d. Turning flight
Your will notice the very precise handling from the first flight. The VOLT is easy to turn at any
bank angle, from flat through to steeply banked turns.
Brake pressure is progressive which enables the pilot to feel the wing and helps prevent
unintentional stalling.
In turbulent air the VOLT is easy to centre in a thermal and absorbs turbulence very effectively
which improves pilot comfort in flight.
The webbing attachment for the brake-line pulley is intentionally long making it possible to
move the brake handle either to the inside or outside of the riser.
For example: if the glider turns flat: make a steeper or faster turn by moving the inside hand
towards the centre of wing. The glider then speeds up in the turn and the angle of bank
becomes steeper. When doing the opposite –moving the arms away from the body - the glider
turns flatter and the climb becomes more efficient. We call it “brake-shifting”. Please find more
information at our website or facebook (www.ad-gliders.com,
www.facebook.com/AirDesignGliders).

26
ATTENTION: PULLING THE BRAKES TOO FAST AND
DEEP INCREASES THE RISK OF STALLING THE WING!
When entering an asymmetric stall (negative): the glider starts to slide into the turn.
The inner wing stops flying, loses pressure and becomes soft. At this point the brakes have to
be released immediately.
In the unlikely event that a brake line releases from the brake handle or breaks, the glider is
manoeuvrable using the C-risers. By pulling gently on the C-risers it is possible to steer the
glider and land safely.
e. Brake line length
The brake-line length of your new VOLT has been finely tuned by AIRDESIGN test pilots and it
should not be necessary to adjust it.
If you feel it is necessary to adjust the brake-line length to suit physical build, height of harness
hang points, or style of flying we recommend you ground handle the glider before you test-fly
it and carry out this process after every 20mm of adjustment.
There should always be free brake travel when the glider is flown hands-up. This means when
you look at your brake lines in flight with your hands up, there should be a slight bow, or arc, to
the line –the brake lines should not be tight. This is to prevent the brakes being applied when
the speed-system is used.
Brake lines that are too short:
May lead to fatigue from flying with your hands in an unnatural position
May impede recovery from certain manoeuvres
Will certainly reduce your glider's speed range.
Brake lines that are too long will:
Reduce pilot control during launch
Reduce control in extreme flying situations
Make it difficult to execute a good flare when landing.
Each brake line should be tied securely to its control handle with a suitable knot.
Other adjustments or changes to your VOLT lead to a loss of warranty, airworthiness and
validity of certification and may endanger both yourself and others.
If you have any suggestions for improvements let us know and our test pilots will try out your
ideas in a controlled situation.
f. Active flying
Flying with a little brake applied equally will slightly increase the angle of attack and help to
prevent deflations and allow the pilot to experience more direct feedback. This allows the pilot
to feel the air and the glider which can help prevent collapses.
The aim of active flying is to keep the glider above the pilot’s head in all situations by
responding correctly to the glider's movements using the brakes and weight shift.
When entering a strong or rough thermal it is important that the glider is not too far back or
able to enter a dynamic stall. To avoid this, it is often helpful to release the brakes slightly
when entering, which gives the glider a little more speed. Equally, when exiting a strong climb

27
it may be necessary to brake more to prevent the glider from diving forward.
The VOLT is designed to be flown actively. To aid this, the C-risers are fitted with a control ball
which helps the pilot to hold the C-riser comfortably. When flying in turbulence, instead of
pulling the brakes it is possible to pull down the C-risers. This stabilises the glider and avoids
deformation of the wing. This also works to keep the glider on course and to make small
corrections in direction.
The VOLT may be flown using the C-riser technique when accelerated as well as at trim speed.
Controlling the glider using the C-risers is more efficient than using the brakes. Speed is not
significantly affected and the performance loss is reduced.
NOTE: Pulling the C-risers down while flying in turbulence does not completely erase the
possibility of deformations. Be aware that strong turbulence can still cause the wing to
collapse.
g. Accelerating
The speed system on the VOLT comes supplied with ‘quick hooks’ ready to attach to a speed
bar of choice. The complete speed system should be checked to ensure it runs smoothly by
hanging in the harness before flying.
In particular, check that the speed system won’t be engaged when in normal flight.
Unnecessary knots and loops in a speed system are not recommended.
When pushing the speed bar the angle of attack of the glider is reduced. The glider speeds up
but at the same time is more sensitive to deformation.
In spite of the exceptional stability of the VOLT, any accelerated collapse will be more dynamic
than the same event experienced at trim speed and will require quicker reactions to maintain
normal flight.
Always keep both hands on the controls when flying fast or in turbulence and be ready to
release the speed system immediately at the first sign of a collapse.
When flying through strong sink or into a headwind it is useful to fly faster using the speedbar.
Use the speed system carefully when flying close to the terrain and maintain enough height
from the ground or other obstacles to recover in the event of a collapse.
DO NOT BRAKE WHILE FLYING FULLY ACCELERATED –THIS MAY RESULT IN A COLLAPSE OF THE
WING.
h. Landing
The VOLT is easy to land, however, on your first flights you may be surprised at how well it
glides. Take account of this when making your landing approach and give yourself the
opportunity for S-turns or a longer approach than you might be used to.
For a normal, into-wind landing evenly pull the brakes all the way down when you are close to
the ground and straighten up to land on your feet. The glider will stop almost completely as the
brakes are fully applied. Avoid landing directly out of a turn or wing-over since the momentum
of the pilot will be much greater due to the pendulum effect.
Attention:
After touching down do not allow the glider to dive overhead and fall in front of you. If the
leading edge hits the ground hard the structure of the cell walls may become damaged.

28
i. Towing and winching
When towing or winching, the glider must be above the pilots head before starting.
In the initial phase the tension should not be too high –a pilot climbing at a flatter angle has
more control.
Tension of more than 90kp is not allowed. In any situation, the maximum permitted tension on
the line must not exceed the pilot’s weight.
The pilot must be informed and aware of the national requirements for towing. This includes
matter such as; tow/winch licence requirements, qualified tow operators, suitability of glider
for towing, if winch and towing-links are certified etc.
In general, the regulated and enforced regulations must to be followed.
j. Asymmetric and frontal collapses
As with any paraglider collapses can occur. “Active flying” as described in point “f” can help
avoid deformations.
You should always maintain course and direction by weight-shifting away from the collapsed
side. This can be reinforced by applying a small amount of brake on the opposite side to the
deflation. If the collapse stays in, the glider can be re-inflated by pumping the brake on the
collapsed side in a firm and smooth manner. Be aware that the brake travel is shorter when the
glider is collapsed and the glider can stall with less brake input.
If you experience a big collapse while accelerated, the canopy will fall behind the pilot due to
the difference in inertia between the pilot and the canopy. You must wait until you pendulum
back under the canopy before dealing with the deflation. Reacting too early can risk stalling the
glider completely. Release the speed-bar immediately if you have a big collapse during
accelerated flight and, while keeping weight-shift neutral, apply slight brake to the open side.
Let the glider enter a turn if space allows in order to avoid a spin or stall.
To assist in the reopening of a frontal collapse the pilot should pull both brakes equally at the
same time. This also reduces the dive after the glider reopens.
NOTE: Pulling too much brake during a frontal collapse recovery can stall the glider or cause
the glider to revert from the frontal collapse directly into a deep-stall.
k. Reopening a cravat
In extreme conditions it is possible that the wing tip(s) can become trapped between the lines.
In general, this would happen only after a big uncontrolled collapse or during extreme
manoeuvres.
If this cravat occurs, in the first instance use the techniques described for releasing asymmetric
collapses.
If it fails to release, take hold of the stabilo line and pull hard towards yourself until the
trapped section of the wing is released.
A full-stall should be the last option to reopen a cravat and is a manoeuvre for experienced
pilots only and should be attempted only if there is sufficient altitude. At low altitude it is
important to stabilise the rotation, if any, and if necessary use the reserve (rescue) if this is not
possible.

29
l. Negative spin
We recommend that this manoeuvre is only carried out during a safety training course over
water and under supervision. The intention in this situation is for a pilot to discover the point-
of-spin and to control it. This demands a high level of experience and skill.
The longer the time between the glider entering a spin and the pilot attempting to recover, the
more chance there is of it becoming out of control.
As the glider surges forward slow it down with the brakes to avoid the possibility of an
asymmetric collapse. Always wait for the glider to be in front of you or above you when
releasing a fully deployed spin - never release the spin while the wing is behind you because
the glider would dive very far in front of you or even underneath.
m. Full-stall
This is an extreme manoeuvre that should rarely, if ever, be required.
To induce a full stall, pull both brake-lines down smoothly. Hold them down, locking your arms
under your seat until the canopy falls behind you and deforms into a characteristic crescent
shape. In spite of how uncomfortable it may feel as the glider falls backwards, be careful not to
release the brakes prematurely or asymmetrically. If the brakes are released while the glider is
falling backwards the surge and dive forwards is very fast and the glider may shoot in front and
even underneath you.
In a full stall the canopy will oscillate back and forth. To stabilise this, the pilot can release the
brakes slowly and for approximately 1/3 of the brake travel and then hold at this level. Holding
at this position allows the wing to refill slightly across the span. When releasing the brakes
without pre-filling the ears mostly will most probably hook in the lines and this can result in a
cravat.
After pre-filling the glider stabilizes its movements and the brakes can be leased until the glider
recovers speed and flies again.
ATTENTION: The full stall requires a lot of height and demands certain skills to recover. It is
important this manoeuvre is not practiced without qualified supervision.
It should preferably be practiced during a safety training course.
n. Rapid decent manoeuvres
i. Spiral
The spiral dive is an effective way of making a fast descent. During the spiral dive the pilot and
glider will experience strong centrifugal forces which strain the glider. As such it should be
considered an extreme manoeuvre. Due to the rapid height loss during a spiral, pilots must
always take care that they have sufficient altitude before initiating the manoeuvre and that the
airspace is free around the pilot.
Initiation: Weight shift and smoothly pull on one brake (the same side you are weight shifting
into) so the glider goes from a normal 360-degree turn into a steep turn and from there into a
spiral dive. Once established in the spiral the descent rate and bank angle can be controlled
with weight shift and the releasing or pulling of inner brake. As the glider banks in front of the
pilot maintain the spiral by keeping the brake pressure constant, at this point weight-shift can
be neutralised. Descent is controlled by pulling more on the inner brake. A slight pull on the
outside brake helps to keep the glider stable.

30
Recovery: The VOLT recovers from a spiral spontaneously as soon as the brakes are released
and weight shift returns to neutral. To exit, allow the spiral to slow down for a turn or two by
slowly releasing the inner brake. Once the glider starts to exit the spiral, control your descent
rate and bank angle with weight shift and the outer and/or inner brake to prevent any strong
climbs out of spiral. Always finish a spiral dive at a safe altitude.
The VOLT does not show any tendency for a stable spiral. That means the glider does not
remain in spiral after releasing the brakes. If the glider should, in rare cases, remain in a stable
spiral the pilot should first weight-shift to the outside and then brake slightly more on the
outside.
ATTENTION: In a stable spiral the G-forces are very high. Be aware that it may therefore
require considerable more input and effort to recover from this state.
ATTENTION: The VOLT is an agile high performance glider. When exiting a spiral too fast the
conversion of energy may result in the glider climbing quickly and entering its own turbulence.
This may cause the glider to collapse. We advise that you allow the VOLT to exit from the spiral
dive in a controlled manner.
You should take care to use only moderate spirals so as not to put unnecessary load on you
and your lines.
IMPORTANT SATEFY NOTICE! A pilot who is dehydrated and/or not accustomed to spiralling
can lose consciousness during a steep spiral dive!
ii. B-line stall
This is an effective way of making a moderate to rapid descent but doesn’t allow any forward
speed.
Initiation: Take hold of the B-risers (both sides at same time) just above the maillons and
slowly but smoothly pull them down, twisting your hands until the canopy shows a span-wise
crease at the B-line attachment points and stops flying forward. It is difficult to pull at first but
becomes easier as the airfoil creases. Your sink rate will increase while your forward speed will
reduce to practically zero.
Recovery: Let go of the risers smoothly but determinedly and symmetrically, the glider will
speed up and gain forward movement. The brakes are kept in your hands at all time during this
manoeuvre. When exiting take care not to pull the brakes.
ATTENTION: IF THE B-RISERS ARE PULLED DOWN TOO MUCH THE WING MAY LOOSE ITS
SPANWISE FORM OR THE TIPS COME IN FRONT OF THE CENTRE OF THE WING. IN THIS
INSTANCE THE B-RISERS MUST BE RELEASED IMMEDIATELY.
iii. “Big-ears”
This is the easiest and safest technique for descent while maintaining forward speed.
Depending on how much of the wing-tip you deflate, 3m/s to 5m/s sink rate can be achieved.
While in big-ears your forward speed can be increased by using the speed system.
The tendency for the wing to collapse is reduced while flying with big-ears.
The VOLT can be steered with big ears in by weight-shift alone.
Initiation: Reach up high and take hold of the metal maillon (quick-link) of the “outer” A-riser
on each side of the glider. Pull both sides down simultaneous. Hold them in firmly. The tips will
fold in. Make sure the lines are pulled down equally on each side and your big ears are even.
Recovery: the ears might stay slightly tucked under but a gentle pump on the brakes will
accelerate the opening.

31
NOTE: It may happen that the big ears shake or appear unstable. Taking a wrap on the brake
line before pulling in the ears can prevent this.
iv. “Big-ears” with B-line
As an alternative to the “big-ears” done by the outer A-line it’s possible to do “big-ears” with
the outer B-line instead. Like this the tips make a partial B-stall which gives a very similar result
compared to doing it with the A-line. To release just put the B-lines up again. The advantage by
doing so is that the ears are more stable and have no tendency to shake. A disadvantage would
be that the ears cannot be alternated in size. This manoeuvre works in trim speed as well when
accelerated.
ALL RAPID DESCENT MANOUVRES SHOULD BE FIRST PRACTICED IN CALM AIR, WITH
SUFFICIENT ALTITUDE AND WITH QUALIFIED SUPERVISION.
REMEMBER:
A wrong manoeuvre at the wrong time may change a straightforward situation into a
dangerous problem. Extreme manoeuvres also expose your glider to forces which may damage
it.
Practice these techniques under qualified supervision preferably during a safety
training course
Before initiating a manoeuvre make sure that the airspace below is clear of
obstructions or other pilots.
During manoeuvres watch both the glider and altitude above the ground.
8. Maintenance and Repairs
The materials used to construct your VOLT have been carefully chosen for maximum durability.
If you treat your glider carefully and follow these guidelines it will last you a long time.
Excessive wear can occur by bad ground-handling, careless packing, unnecessary exposure to
UV light, exposure to chemicals, heat and moisture.
Ground-handling
Choose a suitable area to launch your glider. Lines caught on roots or rocks lead to
unnecessary strain on the attachment tabs during inflation. Snagging lines may rip
the canopy fabric or damage lines.
When landing, never let the canopy fall on its leading edge. The sudden pressure
increase can severely damage the air-resistant coating of the canopy as well as
weaken the ribs and seams.
Dragging the glider over grass, soil, sand or rocks, will significantly reduce its lifetime
and increase its porosity.
When preparing for launch or when ground-handling, be sure not to step on any of
the lines or the canopy fabric.
Don't tie any knots in the lines.

32
This glider will remain airworthy and in good condition for many years, if well cared for and
packed correctly.
Packing the glider:
It is strongly recommended to concertina pack your glider by folding it rib onto rib, in order to
preserve the shape of the leading edge and therefore help maintain inflation characteristics
and performance.
The VOLT has nylon wire support in the leading edge which cannot break, but if packed badly
(bending during packing) and stored for a long time may deform.
The AIRPack inner-bag can help you to pack easily and properly.
For details see the accessories section of the www.ad-gliders.com website.
Packing your AirDesign glider.
1. Lay the lines / risers / harness at the trailing edge of the wing. Collect the lines together and
lay them as much as possible on top of the wing fabric. This protects the lines during packing
and storage.
2. Starting either at one tip or at the centre of the wing, gather all the leading edge cell walls
together so that the polyamide rods are side by side.
IMPORTANT NOTE: if you are packing the glider on rough ground, first gather the wing into a
‘cauliflower’ by pulling in the lines and then pack the leading edge. Dragging the canopy over
rough ground will damage the fabric.
3. Lay the leading edge flat on the packing bag / Airpack and secure with the internal strap just
below the end of the polyamide rods.
4. Adjust the packed leading edge to ensure all polyamide rods are flat against each other.
5. Fold the rest of the wing in from the tips on each side using the same concertina procedure
and then fold one side half lengthwise on top of the other.

33
6. Fold the wing up from the trailing edge into 2 or 3 folds, removing excess air and making
sure that the packed leading edge is kept flat and outermost. DO NOT fold the leading edge
back inside the wing. This may damage / distort the polyamide rods.
7. For Packing bag - Undo the clip holding the leading edge in place and secure around the
folded glider. Close the bag with the side clip and top drawstring.
Storage
Avoid packing your glider when it is wet. If there is no other way, then dry it as soon
as possible away from direct sunlight and heat. Be careful to avoid storing your
canopy when damp or wet: this is the most common reason for canopy degradation.
Do not let your glider come into contact with seawater. If it does, rinse the lines,
canopy and risers with fresh water and dry it away from direct sunlight before
storing.
After flight or when storing, always use the inner protection sack (or AIRPack).
When storing or during transport make sure your glider is not exposed to
temperatures higher than 50°C.
Never let the glider come into contact with chemicals. Clean the glider with clean
lukewarm water only. Never clean using abrasives.

34
For long-term storage do not pack the glider too tightly. Leave the rucksack zip open
when possible to allow any moisture to evaporate.
Transport:
Some materials used in the construction of the glider are sensitive to temperature. Therefore,
the pilot should ensure that the glider is not exposed to excessive heat. For instance, do not
leave the glider in a car during hot summer days.
When packing to send by post use appropriate packing material.
Cleaning:
For cleaning just use only a soft sponge and clean water.
Do not use solvents, cleaners or abrasives.
Repairs:
Repairs must be done exclusively by the manufacturer, importer or authorised persons.
Use only original parts.
In case of questions please contact AIRDESIGN directly.
Material wear:
The VOLT consists mainly of Nylon cloth.
This material does not lose much strength or become porosity through exposure to UV
radiation. However, despite this, the pilot should take care to not expose the glider
unnecessarily to sunlight. Unpack shortly before take-off and pack the glider right after landing.
The VOLT is lined with unsheathed Aramid lines in the top- and middle cascades and with
sheathed Aramid-lines at the main-lines. Take care not to stress any line mechanically.
Overloading should be avoided as a stretching is non-reversible. Continuous bending of Aramid
lines at the same spot weakens the strength.
When putting the glider to the ground avoid dirt and dust as much as possible. Dirt can get
between the fibres of the lines which may shorten the lines and damage the covering.
When lines get caught during take-off, they can stretch or even break. Do not step on lines.
Sharp edges on the ground can damage the sheathing.
A brake line tangled around other lines can tear or cause damage.
Take care that no snow, stones or sand get into the canopy. The weight can pull down the
trailing edge and slows the glider. In the worst case scenario, the glider can be caused to stall.
When launching in strong winds the canopy can, if not controlled, overshoot and hit the
ground hard. This can lead to tears in the ribs or damage the sail or stitching.
When landing, avoid the leading edge hitting the ground in front of the pilot. This can damage
the materials in the leading edge.
After landings in trees or water the line length must be checked. After contact with salt water
wash the glider immediately with clean water.
Avoid contact between the fabric and sweat.
Do not pull the glider over rough ground; his can damage the cloth at the contact points.
Do not too pack the glider too tightly.
The total line length documents for each size of the VOLT are found in the annex.

35
9. Checking the glider
Even with the best possible care each glider is subjected to a certain ageing which can affect
the flying characteristics, performance and safety.
A thorough inspection of all components, including checking suspension line strength, line
geometry, riser geometry and permeability of the canopy material is mandatory.
2-Years Inspection:
After 24 months or 150 flight hours (whichever occurs first) the glider must be inspected. This
check will be made by the manufacturer, importer, distributor or other authorised persons.
The checking must be proven by a stamp on the certification sticker on the glider as well in the
service book.
In the event that a glider is NOT checked according to this schedule, the airworthiness
warranty of the glider is invalidated.
More information about servicing and inspections can be found in the document “Inspection
Information” available on the AIRDESIGN website www.ad-gliders.com
Ground-handling times must be multiplied by factor of 2 due to the greater contact with
abrasive surfaces.
Respecting nature and environment:
Finally, we would ask each pilot to take care of nature and our environment. Respect nature
and the environment at all times but most particularly at take-off and landing places.
Respect others and paraglide in harmony with nature.
Do not leave marked tracks and do not leave rubbish behind.
Do not make unnecessary noise and respect sensitive biological areas.
The materials used on a paraglider should be recycled.
Please send old AIRDESIGN gliders back to us AIRDESIGN offices. We will undertake to recycle
the glider.
10. The Final Word
The VOLT will give you hours of fun and satisfaction in the air. We wish you lots of good flights.
Treat your glider well and have respect for the demands and dangers of flying. Even the safest
glider cannot help avoid a situation where a pilot misjudges the circumstances or makes errors.
We ask all pilots to fly with care and to respect the national and international laws with regard
to our sport.
SEE YOU IN THE SKY!

36
A. ANHANG - ANNEX
a. Übersichtszeichnung –Overview
Table of contents
Other Air Design Aircraft manuals

Air Design
Air Design RISE User manual

Air Design
Air Design RIDE 3 User manual

Air Design
Air Design Rama Flex Series User manual

Air Design
Air Design EAZY 2 User manual

Air Design
Air Design VOLT 2 User manual

Air Design
Air Design VOLT 4 User manual

Air Design
Air Design PURE User manual

Air Design
Air Design RISE Series User manual

Air Design
Air Design SUSI 3 User manual

Air Design
Air Design VOLT 3 User manual