- 9 -
Press the speed up button, the LED lights of speed
indicator will be on one by one.
Press the speed down button, the LED lights of
speed indicator will be off one by one.
It shows the percentage of the remaining battery
capacity. Each LED light represents 20% of the battery
capacity. The LED lights will be off one by one after
consumed every 20% of the battery. For example, it
means 40% battery consumed already when two LED
lights are off. Better charge the battery when 2 or 3 LED
lights are off to prolong the battery life. It is prohibited to
drive the wheelchair when there is only one LED light
on, otherwise, it will cause damage to the battery due to
over-discharge. The accuracy of the power indicator will
decrease after daily use.
Speed indicator
5-level LED power indicator
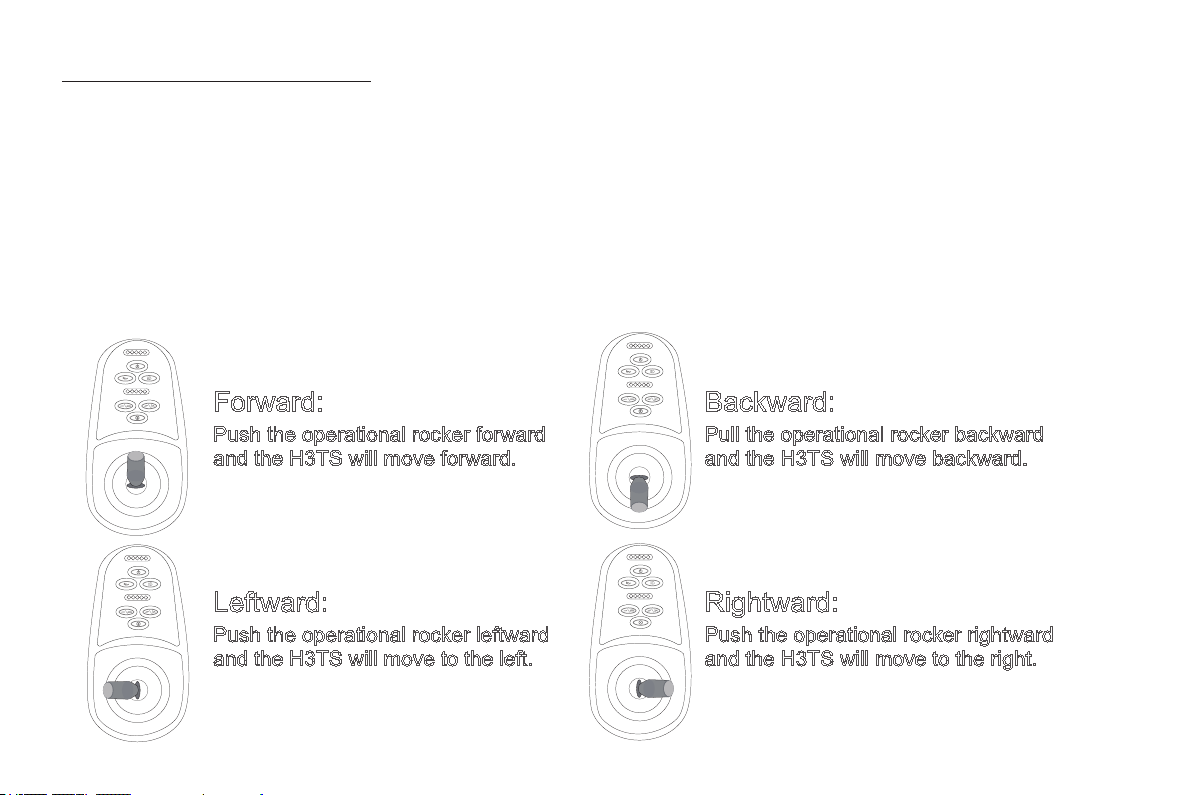
In the power-off state, press the button over
2 seconds, the H3TS enters the extending/
contracting mode. Release it to extend.
In the extending/contracting mode, click the
button to stop extending if it is extending. When
contracting stops, click it to extend.
In the ready mode, remote control mode and riding
mode, click the gear button to increase one gear.
In the extending/contracting mode, click the button to
stop extending or contracting. It enters the shutdown
state.
Speed up / Unfold Stop folding / unfolding
Shutdown state: the circuit connection is complete, the power switch in the battery pack is turned on. But
the on-off button in the control box isn't pressed and the indicator light isn't on.
Standby state: press the on-off button in the control box, the indicator light will be on, but without any man-
made operation.
Riding state: press the on-off button in the control box, the indicator light will be on, and use the operating
lever to make it move.