1010
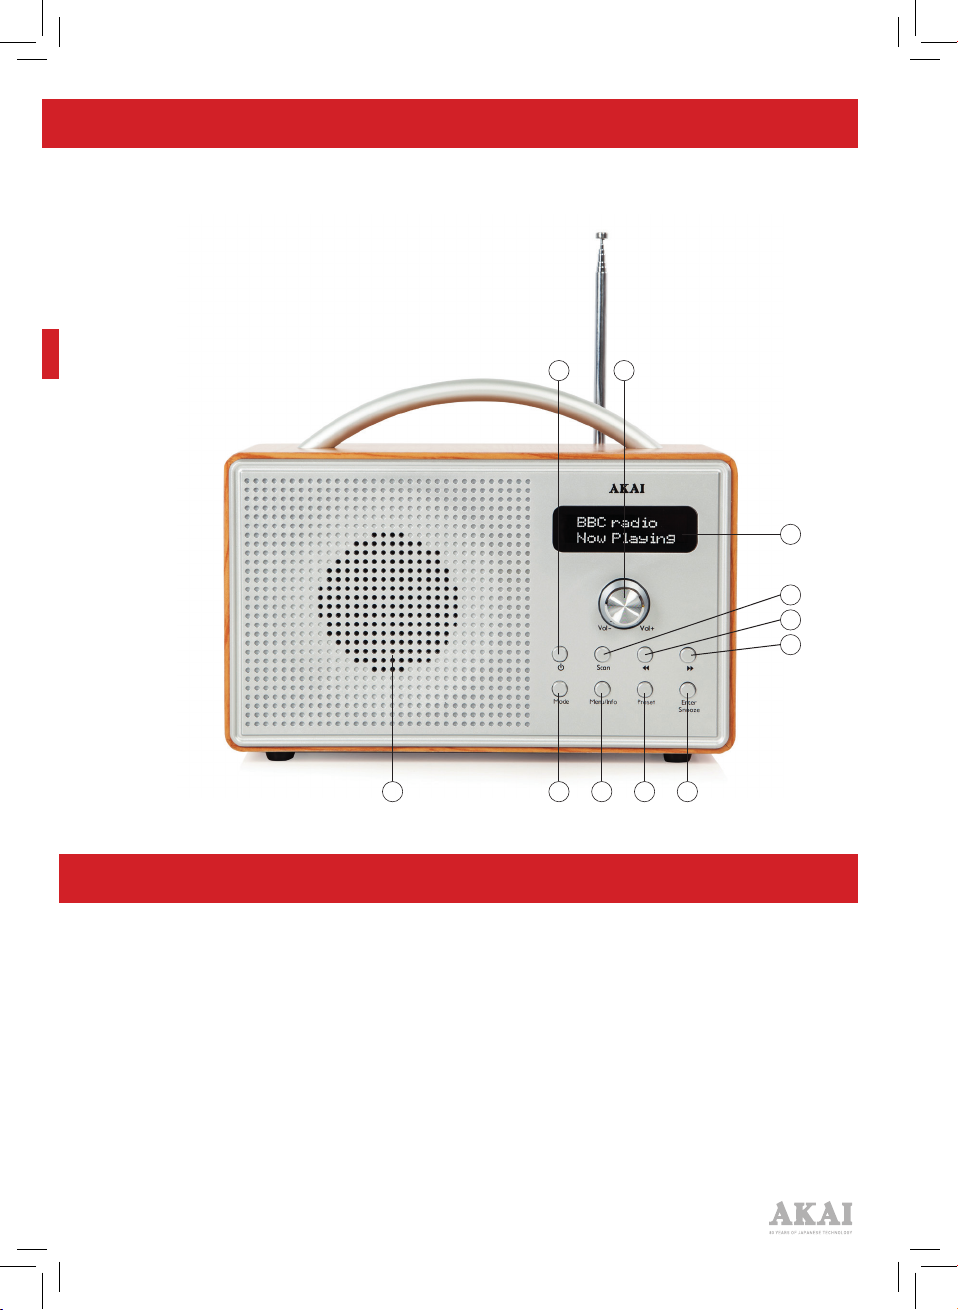
USING YOUR APPLIANCE
ALARM:
Setting the alarm:
1. Press and hold Menu button to go
to menu setting, press NEXT to go
to Alarm Set 1 and press enter to
confirm.
2. The display will flash ‘ON’. Press
ENTER to confirm.
3. Use the PREV and NEXT buttons to
select the required hour. Press ENTER
to confirm.
4. Repeat the above step to set the
minutes.
5. Press PREV and NEXT to set the
volume and press ENTER to confirm.
6. Select between Alarm-DAB-FM and
press ENTER.
7. To set ‘Alarm 2’, follow step 1-6 and
and choose Alarm 2 set on menu
setting.
TURN OFF THE ALARM:
1. To turn off the alarm, press and hold
MENU to enter ‘Alarm 1 Set’ and press
ENTER to confirm.
2. Press NEXT to select ‘OFF’ and press
ENTER. The alarm is now off.
3. To turn off the alarm when it is
sounding, press the POWER button.
SNOOZE:
To snooze the alarm, press the SNOOZE
button. The alarm will rest before
sounding again in 9 minutes. Press the
POWER button to stop the snooze function
altogether.
SLEEP TIMER:
The sleep timer allows you to play music
for a certain amount of time, before the
radio turns itself off automatically.
SETTING THE SLEEP TIMER:
1. Press and hold the Menu button to
go to Menu setting then press NEXT
button to choose sleep set. Press
ENTER to confirm.
2. Press the PREV and NEXT buttons to
select between OFF-120-90-60-45-30-
15-5 minutes.
3. Press ENTER to confirm your
selection.
4. The radio will play for the selected
time and then switch to standby.
SYSTEM SETTINGS:
Press and hold the INFO/MENU button to
open the System Menu settings.
Press the PREV/NEXT buttons to select
one of the menu options.
Time/Date:
• Press the ENTER button and the hour
digits will flash. Use the PREV/NEXT
buttons to set the hour.
• Press enter to confirm.
• Repeat the above steps to set the
minutes, and then the date.
SYSTEM VERSION:
Select to check the software version
number.
RESETTING THE RADIO:
Resetting the radio will delete all stored
DAB and FM stations, and all the tuned
stations.
1. Enter the system menu, and then
press the NEXT button until ‘Factory
reset’ is displayed on screen.
2. Press the ENTER button and the
display will show ‘Factory Reset?’.
Press NEXT to select YES.
3. Press ENTER to confirm.
FM SCAN SETTING:
You can choose station strong ‘only’ or ‘all’
to stop the automatic scanning.