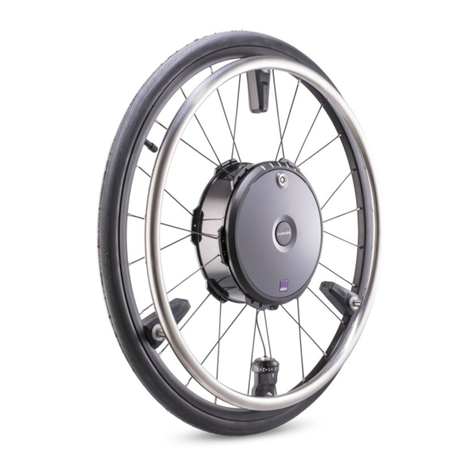
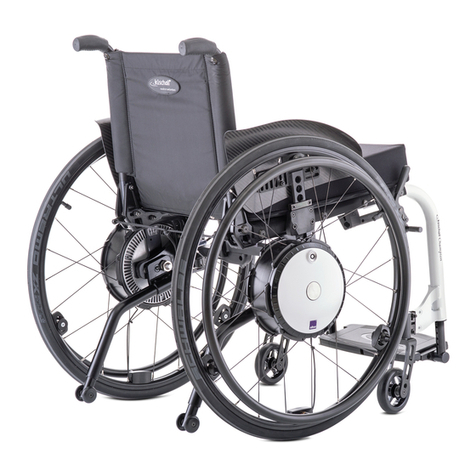
Alber twion User manual

1
Lizenzcode-Karte innen
License code card inside
Carte du code de licence
à l’intérieur
Bijgesloten: kaart met
licentiecode
LIZENZCODE / LICENSE CODE
Bitte freirubbeln und Code unter www.twion.deeingeben
Please scratch off and enter the code on www.twion.de
BKY8L-PAS1E-6BFWE-BNA4V-9RYZF
BEDIENUNGSANLEITUNG
USER MANUAL
MODE D’EMPLOI
GEBRUIKSAANWIJZING

23
Willkommen zum Mobility Plus Paket
Mit dem Mobility Plus Paket noch mehr Features in der Mobility
App freischalten und über das Smartphone mit den twion Rädern
kommunizieren!
Welcome to the Mobility Plus package
With the Mobility Plus package, you can activate even more features in
the Mobility App and communicate directly with the twion wheels via your
smartphone!
Bienvenue au pack Mobility Plus
Avec le pack Mobility Plus, multipliez les fonctions de votre application
Mobility et communiquez par smartphone avec les roues twion!
Welkom bij het Mobility Plus-pakket
Met het Mobility Plus-pakket kunt u nu nog meer functies activeren in de
Mobility App en via de smartphone communiceren met de twion-wielen!
WILLKOMMEN / WELCOME / BIENVENUE / WELKOM
Hinweis: Bewahren Sie Ihre twion Lizenzcode-Karte sorgfältig
auf und geben Sie diese nicht an Dritte weiter. Teilen Sie uns
den Verlust der Karte bitte unverzüglich mit.
Note: Keep your twion license code card in a safe place and
never entrust it to a third party. Report the loss of your card to us
immediately.
Remarque: conservez précieusement la carte de votre code de
licence twion et ne la transmettez pas à des tiers. Veuillez nous
avertir immédiatement en cas de perte de votre carte.
Opmerking: Bewaar de kaart met uw twion-licentiecode zorgvul-
dig en geef deze niet door aan derden. Meld ons het verlies van de
kaart zo snel mogelijk.

45
1. Allgemeines 5
1.1 Voraussetzungen 5
1.2 Wichtige Sicherheitshinweise 5
2. Verbinden mit den twion Rädern 6
2.1 Erstinstallation und Registrierung 6
2.2 Aktive Verbindung mit Ihren twion Rädern 8
2.3 Im Servicefall 8
3. Anwendungen 9
4. Standby-Betrieb 12
5. Außenring tauschen 13
1.1 Voraussetzungen
Derzeit nur für Smartphones mit Anroid Betriebssystem ab
Version 2.3.5 und Internetfähigkeit möglich.
1.2 Wichtige Sicherheitshinweise
Mit dem Mobility Plus Paket können Sie:
Die Unterstützungsgeschwindigkeit Ihrer twion Räder von 6 km/h
auf 10 km/h erhöhen. Hierzu sind die länderspezifischen Straßen-
verkehrsgesetze zu beachten. Das Rad speichert die Einstellung.
Mit der BlueDrive-Steuerung einen Rollstuhl mittels Smartphone
steuern. Diese Steuerung ist nur ohne Rollstuhl-Insasse erlaubt.
Erfolgt eine unerlaubte Verwendung, so wird dies als Missbrauch des
Gerätes angesehen. Für daraus resultierende Schadensfälle lehnt
Alber jegliche Haftung ab.
1. ALLGEMEINESINHALT
D

67
2.1 Erstinstallation und Registrierung
1. Lizenzcode freirubbeln.
2. In der App im Menü Verbindungsmanager (Symbole unter
Kapitel 3) unter Radpaar anlegen nach Geräten suchen
und zwei Bluetooth-Module auswählen.
3. Online-Aktivierung zustimmen.
4. Lizenzcode eingeben.
5. Übermittelte Radcodes überprüfen und OK drücken.
6. Passendes Rad nach akustischem Signal auswählen.
7. Name und individuelles Passwort eingeben. Das Passwort
darf maximal 4-stellig sein.
Sollten Sie keine Online-Verbindung mit dem Alber Server herstellen
können, folgen Sie den Anweisungen unter www.twion.de.
War die Registrierung erfolgreich, erscheint in der oberen Menüleiste
folgendes Symbol: und unter Fahrinformationen werden
2. VERBINDEN MIT DEN TWION RÄDERN
die aktuellen Akku-Kapazitäten angezeigt. Sollte dies nicht der Fall
sein, wiederholen Sie den Vorgang ab Schritt 2.
Ihr Passwort muss in verschiedenen Situationen eingegeben werden.
Verwenden Sie daher ein Passwort, das Sie sich gut merken können,
und bewahren Sie es gut auf.
connected

89
2.2 Aktive Verbindung mit Ihren twion Rädern
twion Räder über Ein-/Aus-Knopf am Rad einschalten. Im Menü
Verbindungsmanager Aktive Verbindung Verbindung herstellen
Passwort eingeben. Unter Aktive Verbindung Verbindung beenden
kann die Verbindung zu den twion Rädern beendet werden.
Sollte Ihr Rollstuhl in der BlueDrive-Steuerung (siehe Kapitel 3,
BlueDrive-Steuerung) in die entgegengesetzte Richtung als
gewünscht fahren, kann unter Verbindungsmanager Radpaar
verwalten Räder tauschen die Fahrtrichtung getauscht werden.
2.3 Im Servicefall
Sollte es bei einem Rad zu einem Servicefall kommen, müssen
folgende Schritte vorgenommen werden:
1. Löschen des Radpaars unter Radpaar verwalten Radpaar löschen.
2. Erstinstallation aus Kapitel 2.1 wiederholen. Lizenzcode kann
weiterhin verwendet werden.
Fahrinformationen
Ablesen von Fahrparametern wie Batteriezustand,
Geschwindigkeit.
Einfacher Wechsel zwischen Fahrmodi ECO und SPORT.
TOUR-Modus
Aufzeichnung und Anzeige der Fahrstrecken mittels
Smartphone GPS-Signal.
Detailanzeige und Speicherung der TOUR-Daten.
Ruhe-Modus
Stumm-Modus schaltet per Knopfdruck die Lade-
anzeige und die akustischen Töne des Rades aus.
Individuelles Profil einstellbar.
2. VERBINDEN MIT DEN TWION RÄDERN 3. ANWENDUNGEN

10 11
3. ANWENDUNGEN
Fahrkonfiguration
Erhöhung der Unterstützungsgeschwindigkeit
von 6 km/h auf 10 km/h.
Einstellung der Akku-Kapazitätsanzeige im
AUTO-Fahrmodus.
Allgemeine Einstellungen
Einstellungen der Sprache, Maßeinheit und
Hinterlegung eigener Daten.
Informationen zur App.
Verbindungsmanager
Stellt die Verbindung zwischen Smartphone und
twion Rädern her.
Erstinstallation und Radpaare verwalten.
Schneller Verbindungsaufbau mit eigenem Passwort
sicher und jederzeit.
BlueDrive-Steuerung
Steuerung des leeren Rollstuhls wahlweise über inte-
grierten Neigungssensor (durch leichtes Kippen
des Smartphones) oder über einen virtuellen Joystick.
Service
Servicebereich mit Kurzbedienungsanleitung und
Kontaktmöglichkeiten im Servicefall.
Standby-Betrieb
Ein- und Ausschalten der twion Räder über das
Smartphone.

12 13
4. STANDBY-BETRIEB 5. AUSSENRING TAUSCHEN
Wird das System über den Ein-/Aus-Schalter am Rad ausgeschaltet:
Ist die Verbindung zum Smartphone unterbrochen und das Rad
kann über das Smartphone nicht eingeschaltet werden.
Verbraucht das System keinen Strom.
Wird das System über das Smartphone ausgeschaltet:
Befindet sich das System im Standby-Betrieb.
Ist die Verbindung zum Smartphone unterbrochen, kann jedoch
jederzeit wieder hergestellt werden.
Verbraucht das System minimal Strom. In Abhängigkeit von der
vorhandenen Akku-Kapazität wird die maximale Standby-Zeit
angezeigt. Wird diese Zeit überschritten, schaltet sich das System
ab und kann nur über den Ein-/Aus-Schalter am Rad wieder ein-
geschaltet werden.
Einen der 3 Aussparungsschlitze
am äußeren Rand der Abde-
ckung finden (zwischen Ring
und Abdeckung).
Ringrand umfassen und mit
dem Daumennagel in die Kerbe
drücken. Gleichzeitig nach
außen ziehen.

14 15
Weitere Tipps, interaktive Demos
oder Hilfe nötig?
Mehr Informationen finden Sie
unter www.twion.de.
5. AUSSENRING TAUSCHEN
Am Ring entlangfahren, um die
beiden restlichen Befestigungen
zu lösen.
Den neu anzubringenden Ring
ausrichten, sodass die 5 LED-
Aussparungen auf die 5 LEDs
des Antriebs passen.
Stifte auf der Unterseite des
Rings in die vorgesehenen
Öffnungen einstecken und
die 3 Verschlussstellen durch
Drücken einrasten lassen.

16 17
1. General information 17
1.1 Requirements 17
1.2 Important safety instructions 17
2. Connecting to the twion wheels 18
2.1 Initial installation and registration 18
2.2 Actively connecting with your twion wheels 20
2.3 If servicing is required 20
3. Applications 21
4. Standby mode 24
5. Replacing the outer ring 25
CONTENTS
GB
1.1 Requirements
Currently only available for smartphones running Android operating
system versions from 2.3.5 and with Internet capability.
1.2 Important safety instructions
The Mobility Plus package allows you to:
Increase the assistance speed of your twion wheels from 6 km/h to
10 km/h. Country-specific road traffic legislation must be observed.
The wheel saves the setting.
You can use the BlueDrive control system to control a wheelchair
via smartphone. This type of control is only permitted when the
wheelchair is empty.
Any improper use shall be deemed a misuse of the device. Alber accepts
no liability for any resulting damage.
1. GENERAL INFORMATION

18 19
2.1 Initial installation and registration
1. Scratch to reveal the license code.
2. In the Connection Manager menu (Symbols under chapter 3),
search for devices under Create new wheelpair and select two
Bluetooth modules.
3. Agree online licensing.
4. Enter license code.
5. Check submitted wheel codes.
6. Select the corresponding twion wheel based on acoustic signal.
7. Enter your name and personal password. The password may
have a maximum of 4 figure.
If you cannot connect with the Alber server, follow the registration
at www.twion.de.
If registration was successful, the following symbol appears in the
upper menu bar: and the current battery capacities are
2. CONNECTING TO THE TWION WHEELS
displayed under Driving Information. If this is not the case, go back
to step 2 and repeat the process.
Your password must be entered in different situations. For this reason,
you should use a password you can remember easily and keep it in a
safe place.
connected

20 21
2.2 Actively connecting with your twion wheels
Activating twion wheels via the On/Off button on the wheel. Enter the
password under Connection Manager Active Connection Connect.
Connection to the twion wheels can be terminated under Active
Connection Disconnect.
If your wheelchair moves in the opposite direction to that desired under
the BlueDrive control system (see chapter3, BlueDrive control system),
the direction can be changed under Connection Manager Manage
Wheel Pair Swap Wheels.
2.3 If servicing is required
If a wheel requires servicing, proceed as follows:
1. Delete the wheel pair under Manage Wheel Pair Delete Wheel Pair
2. Repeat initial installation as described in section 2.1. The license
code can still be used.
Driving Information
Find out driving parameters such as battery status,
average speed.
Easy changing between ECO and SPORT driving modes
TOUR mode
Recording and display of distances via smartphone GPS
signal
Detailed display and storing of TOUR data
SILENT mode
Mute mode switches off the LED display and the
acoustic signals from the wheel at the touch of a button.
An individual profile can be configured.
2. CONNECTING TO THE TWION WHEELS 3. APPLICATIONS

22 23
3. APPLICATIONS
Driving configuration
Increase of assistance speed from 6 km/h to 10 km/h
Setting of battery capacity display in AUTO mode
Common settings
Language and unit of measurement settings and
personal data storage
App information
Connection Manager
Establishes the connection between the smartphone
and the twion wheels
Manages initial installation and wheel pairs
Reliable connection established quickly at any time
using your own password
BlueDrive control system
The empty wheelchair can be controlled either via the
integrated inclination sensor (by lightly tilting your
smartphone) or using the virtual joystick.
Service
Service area with short operating instructions and contact
options for when service is required.
Standby mode
Activate and deactivate the twion wheels via smartphone.

24 25
4. STANDBY MODE 5. REPLACING THE OUTER RING
If the system is switched off using the On/Off switch on the wheel:
The connection to the smartphone is disconnected and the
wheel cannot be switched on via the smartphone.
The system does not consume any power.
If the system is switched off via the smartphone:
The system goes into standby mode.
The connection to the smartphone is disconnected, but can be re-
established at any time.
The system consumes a small amount of power. The maximum
standby time is displayed, depending on the available battery
capacity. If this time is exceeded, the system switches off and
can only be switched on again via the On/Off switch on the wheel.
Find one of the three recesses
at the outer edge of the cover
(between ring and cover).
Grip the edge of the ring and
press your thumbnail into the
notch. Pull outwards at the same
time.

26 27
Do you require further tips, inter-
active demonstrations or help?
Further information can be found
at www.twion.de.
5. REPLACING THE OUTER RING
Move your fingers around the
ring to release the other two
fastenings.
Align the new ring so that the
5LED recesses correspond to the
5LEDs on the drive unit.
Insert the pins on the underside
of the ring into the openings
provided and push in the 3 locking
points until they engage.

28 29
1. Généralités 29
1.1 Équipement requis 29
1.2 Consignes de sécurité importantes 29
2. Connexion aux roues twion 30
2.1 Première installation et enregistrement 30
2.2 Connexion active à vos roues twion 32
2.3 Consignes en cas d’intervention du service
après-vente 32
3. Applications 33
4. Mode veille 36
5. Remplacement de la bague extérieure 37
SOMMAIRE
F
1.1 Équipement requis
Actuellement uniquement disponible pour les smartphones équipés du
système d'exploitation Android versions 2.3.5 ou ultérieures, et disposant
de fonctionnalités Internet.
1.2 Consignes de sécurité importantes
Le pack Mobility Plus vous permet:
de faire passer la vitesse d'assistance de vos roues twion de 6km/h
à 10km/h. Attention: respectez le code de la route en vigueur dans
le pays en question. La roue mémorise le réglage.
de commander un fauteuil roulant depuis un smartphone grâce à la
commande BlueDrive. Cette commande est uniquement autorisée
avec un fauteuil roulant vide.
Toute utilisation non autorisée sera considérée comme une utilisation
abusive de l'appareil. Par conséquent, Alber ne pourra en aucun cas
assumer la responsabilité de quelconques dommages découlant d'une
telle utilisation abusive.
1. GÉNÉRALITÉS

30 31
2.1 Première installation et enregistrement
1. Grattez le code de licence.
2. Dans le menu ”Gestionnaire de connexion“ (voir symboles au
chapitre 3), sélectionnez ”Enregistrer paire de roues“ pour chercher
les roues et choisissez une paire.
3. Acceptez l'activation en ligne.
4. Entrez la clé de licence.
5. Vérifiez les codes transférés et choisissez „OK“.
6. Choisissez la roue appropriée d'après le signal acoustique.
7. Saisissez nom et mot de passe. Le mot de passe doit comporter
quatre caractères
Ci c'est pas possible d'etablir une connexion en ligne avec le serveur
Alber, suivez les instructions sur www.twion.de.
Si l'enregistrement a réussi, le symbole suivant s'affiche dans la barre
supérieure du menu ; la capacité restante de la batterie
2. CONNEXION AUX ROUES TWION
s'affiche alors dans ”Informations de conduite”. Si ce n'est pas le cas,
répétez la procédure à compter de la deuxième étape.
Différentes situations exigent que vous indiquiez votre mot de passe.
C'est pourquoi nous vous recommandons d'utiliser un mot de passe
que vous pourrez facilement retenir et mémoriser.
connected

32 33
2.2 Connexion active à vos roues twion
Activez les roues twion via l'interrupteur de marche/arrêt situé sur la
roue. Dans le menu ”Gestionnaire de connexion” ”Sélectionnez Connexion
active””Établir connexion”, puis saisissez votre mot de passe. L'option
”Connexion active” ”Arrêter connexion”, vous permet de mettre fin à la
connexion aux roues twion.
Si vous souhaitez déplacer votre fauteuil roulant dans la direction
inverse en utilisant la commande BlueDrive (voir chapitre3, Commande
BlueDrive), vous pouvez inverser le sens du déplacement en sélection-
nant ”Gestionnaire de connexion” ”Gérer paire de roues” ”Remplacer
roues”.
2.3 Consignes en cas d'intervention du service après-vente
Si une roue exige l'intervention du service après-vente, respectez les
étapes suivantes:
1. supprimez la paire de roues en sélectionnant ”Gérer paire de roues”
”Supprimer paire de roues”.
2. répétez les étapes de la première installation mentionnées au cha-
pitre 2.1. Vous pouvez continuer à utiliser votre code de licence.
Informations de conduite
Lecture des paramètres de conduite, tels que niveau de
batterie, vitesse
Commutation simple entre les modes de conduite ECO
et SPORT
Mode TOUR
Enregistrement et affichage des trajets via le signal GPS
du smartphone
Indication détaillée et mémorisation des données de
TOUR
Mode SILENCE
Le mode muet permet de désactiver en une pression
l'indication de charge et les signaux sonores de la roue
Profil individuel personnalisable
2. CONNEXION AUX ROUES TWION 3. APPLICATIONS

34 35
3. APPLICATIONS
Configuration de conduite
Passage de la vitesse d'assistance de 6km/h à 10km/h
Réglage de l'affichage de capacité de la batterie en
mode de conduite AUTO
Réglages généraux
Réglage de la langue, de l'unité de mesure et
consignation de données personnelles
Informations sur l'application
Gestionnaire de connexion
Permet d'établir la connexion entre le smartphone et
les roues twion
Première installation et gestion des paires de roues
Établissement rapide et à tout moment d'une
connexion sécurisée par mot de passe individuel
Commande BlueDrive
Commande du fauteuil roulant vide par capteur d'inclinaison
intégré (via un léger basculement du smartphone) ou par
joystick virtuel, au choix.
Service après-vente
Zone de service avec courtes instructions de commande
et possibilités de contact en cas d'intervention du service
après-vente.
Mode veille
Activation et désactivation des roues twion via le
smartphone.

36 37
4. MODE VEILLE 5. REMPLACEMENT DE LA BAGUE EXTÉRIEURE
Si le système est désactivé via l'interrupteur marche/arrêt situé sur
la roue,
la connexion avec le smartphone est interrompue et la roue ne
peut pas être activée via le smartphone;
le système n'utilise pas de courant.
Si le système est désactivé via le smartphone,
le système se trouve alors en mode veille;
la connexion avec le smartphone est interrompue, mais peut
cependant être rétablie à tout moment;
le système utilise très peu de courant. La durée maximum de veille,
qui est fonction de la capacité restante de la batterie, s'affiche. Une
fois la durée écoulée, le système s'arrête. Il peut alors uniquement
être réactivé via l'interrupteur de marche/arrêt situé sur la roue.
Localisez une des trois encoches
situées sur le bord extérieur
du cache (entre la bague et le
cache).
Saisissez le bord de la bague et
enfancez l'ongle du pouce dans
l'encoche. Tirez simultanément
vers l'extérieur.

38 39
Vous souhaitez connaître d'autres
astuces, accéder à des démons-
trations interactives ou accéder
à l'aide?
Vous trouverez davantage d'infor-
mations à l'adresse www.twion.de
5. REMPLACEMENT DE LA BAGUE EXTÉRIEURE
Glissez vos doigts le long de
la bague pour libérer les deux
fixations restantes.
Alignez la nouvelle bague à
appliquer de façon à ce que
les cinq évidements pour LED
s'adaptent sur les cinqLED de
l'entraînement.
Insérez les picots situés sur la
face inférieure de la bague dans
les ouvertures prévues à cet effet
et la verrouillez les troispoints
de fermeture en appuyant bien.
Other manuals for twion
3
Table of contents
Languages:
Other Alber Wheelchair manuals

Alber
Alber E-Motion M25 Operating instructions

Alber
Alber viamobil V25 User guide

Alber
Alber e-fix User manual

Alber
Alber Twion Mobility Plus Paket User manual

Alber
Alber twion User manual

Alber
Alber e-fix E35 User manual

Alber
Alber viamobil Series User manual

Alber
Alber e-fix User manual

Alber
Alber viamobil V15 User manual

Alber
Alber Viaplus User manual

Alber
Alber via GO V24 User manual
Alber
Alber twion User manual

Alber
Alber E-Motion M25 User manual

Alber
Alber Adventure A10 Guide

Alber
Alber E34z User manual

Alber
Alber via GO V24 User manual

Alber
Alber e-fix User manual

Alber
Alber viamobil V15 User manual

Alber
Alber e-motion User manual
Alber
Alber viamobil eco V14 User manual