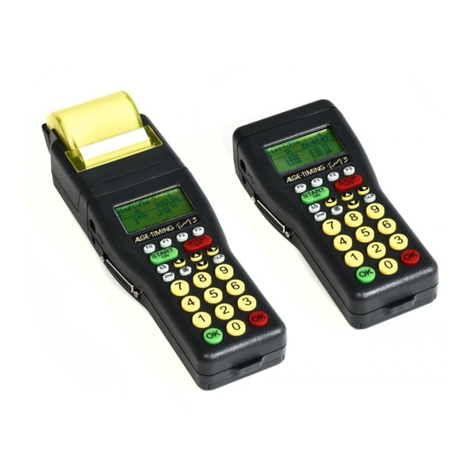
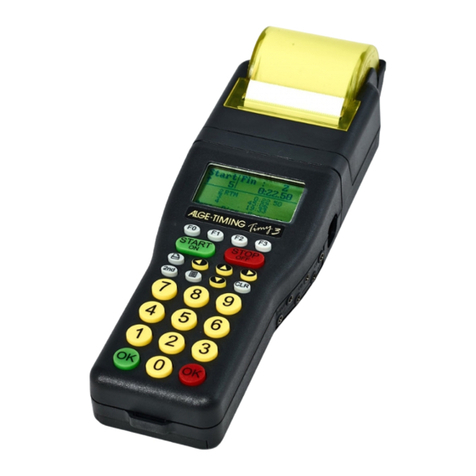
ALGE-Timing Timy3 User manual

TrackTimer
Version-E230717

Timy TrackTimer
Page 2
Important Information
General
Before using your ALGE-TIMING device read the complete manual carefully. It is part of the device and
contains important information about installation, safety and its intended use. This manual cannot cover
all conceivable applications. For further information or in case of problems that are mentioned not at all
or not sufficiently detailed, please contact your ALGE-TIMING representative. You can find contact details
on our homepage www.alge-timing.com
Safety
Apart from the information of this manual all general safety and accident prevention regulations of the
legislator must be taken into account.
The device must only be used by trained persons. The setting-up and installation must only be executed
according to the manufacturer’s data.
Intended Use
The device must only be used for its intended applications. Technical modifications and any misuse are
prohibited because of the risks involved! ALGE-TIMING is not liable for damages that are caused by im-
proper use or incorrect operation.
Power supply
The stated voltage on the type plate must correspond to voltage of the power source. Check all connec-
tions and plugs before usage. Damaged connection wires must be replaced immediately by an author-
ized electrician. The device must only be connected to an electric supply that has been installed by an
electrician according to IEC 60364-1. Never touch the mains plug with wet hands! Never touch live parts!
Cleaning
Please clean the outside of the device only with a smooth cloth. Detergents can cause damage. Never
submerge in water, never open or clean with wet cloth. The cleaning must not be carried out by hose or
high-pressure (risk of short circuits or other damage).
Liability Limitations
All technical information, data and information for installation and operation correspond to the latest
status at time of printing and are made in all conscience considering our past experience and knowledge.
Information, pictures and description do not entitle to base any claims. The manufacturer is not liable
for damage due to failure to observe the manual, improper use, incorrect repairs, technical modifications,
use of unauthorized spare parts. Translations are made in all conscience. We assume no liability for
translation mistakes, even if the translation is carried out by us or on our behalf.
Disposal
If a label is placed on the device showing a crossed out dustbin on wheels (see drawing), the
European directive 2002/96/EG applies for this device.
Please get informed about the applicable regulations for separate collection of electrical and
electronical waste in your country and do not dispose of the old devices as household
waste. Correct disposal of old equipment protects the environment and humans against
negative consequences!
Copyright by ALGE-TIMING GmbH
All rights reserved. Any duplication, either in full or in part, requires the prior written consent of the
copyright holder.
Subject to changes! Copyright by:
ALGE-TIMING GmbH
Rotkreuzstrasse 39
A-6890 Lustenau
Austria
office@alge-timing.com
www.alge-timing.com

Timy TrackTimer
Page 3
Table of contents
1Keyboard and getting started................................................................................................... 4
2Program TrackTimer ................................................................................................................. 4
3Anwendungsschema................................................................................................................. 5
3.1 Swimming or Athletics wired........................................................................................................ 5
3.2 Swimming or Athletics with WTN-PB .......................................................................................... 6
4Configuration for WTN-PB........................................................................................................ 7
5Operation of Program Track Timer:......................................................................................... 8
6Display Mode.............................................................................................................................. 8
6.1 LANE-MODE ............................................................................................................................... 8
6.2 RANK-MODE............................................................................................................................... 8
6.3 ALTERNATING-MODE ............................................................................................................... 8
6.4 STANDARD-MODE..................................................................................................................... 8
7RS 232 Interface......................................................................................................................... 9
7.1 TRACK-MODUS.......................................................................................................................... 9
7.1.1 NORM...................................................................................................................................... 9
7.1.2 IDENT...................................................................................................................................... 9
7.1.3 Interface Data.......................................................................................................................... 9
7.1.4 RS 232 Commands ............................................................................................................... 10

Timy TrackTimer
Page 4
1 Keyboard and getting started
See Timy manual „GENERAL“
2 Program TrackTimer
The program TrackTimer is made for all sports with one mass start andfinish arrival on different
tracks (e.g. athletic, swimming). It is possible to start a race and use for each lane a different
finish trigger. To operatethe Timy in this mode you needadditionally the Docking Station TIDO
or Multichannel MC9.
Further this program works also very well for timing a single racer with intermediate times. The
clock stops after each impulse and continues with the running time when pressing key <OK>
(red).

Timy TrackTimer
Page 5
3 Anwendungsschema
3.1 Swimming or Athletics wired

Timy TrackTimer
Page 6
3.2 Swimming or Athletics with WTN-PB

Timy TrackTimer
Page 7
4 Configuration for WTN-PB
When using WTN-PBs, socket mode must be used from 4 lanes in the WTN menu. This is
configured as follows.
Up to 9 timing channels can be configured for the WTN in this mode. Pulses stopped in so-
cket mode are marked with a "t" (e.g. t0124 ST 10:12:34.0384)Starten Sie die WTN-Geräte,
die externe Zeitmessimpulse erzeugen; stellen Sie das gleiche Team wie im Timy3 ein.
•Check that the WTN of your Timy3 is switched on
•Press the Menu-Button .
•Choose <WTN> and press .
•Choose <SOCKET> and press .
•Under„Neighbour“ you should see the total amount of WTN-
PBs in the same Team.
•Choose with the F-Button the devices you like to configure (z.
B. F3 = all WTN-devices)
•Because of technical limitations you can not configure the E-
START W as a socket device! The E-START W works all-
ways in standard mode so the BANGx will be triggered cor-
rect.
•Now press the WTN-PB used for the first lane.
•1 SOCKET is now shown in the display.
•Press then ext WTN-PB. (Lane 2)
•It shows now 2 SOCKET in the display
•continue.
•After configuring all WTN-PBs press to exit.
•Now all WTN-PB are connected, but using channel 0 to n-1)
•Now you have to change the channel usage.
•Press Menu-Channels-Channel-Usage and adjust the cha-
nelusage as shown to the right!

Timy TrackTimer
Page 8
5 Operation of Program Track Timer:
•Switch the Timy on as described in Timy manual GENERAL
•Select <TrackTimer>
•Clear the memory with key or and press key or (red or green).
•Input the time of day and date for synchronization and confirm it with or (or .
Make a synchronization start (e.g. with key START ).
•Now it shows ID-number 1 and the time zero
•If you want to input another ID-number, do it with the keyboard and confirm it with or
•Start the race with a start impulse (channel 0) or keyboard .
•Stop each competitor with finish impulse device (e.g. manual push buttons)
•If you get a wrong impulse, or if you want to see other times press .
•After the race is finished, input the next ID-number and confirm it with or , etc.
•Check one last setting to be sure that all timing channels are used for the right lanes.
6 Display Mode
You can select between four different mode.
LANE-MODE
RANK-MODE
ALTERNATING-MODE
STANDARD-MODE
6.1 LANE-MODE
The Channel and Lane are the same. You can connect up to 8 GAZ or D-LINE with 7 digit.
The running time will be shown on the display board with address 1.
Lane 1 = Channel 1 = Display address 1
Lane 2 = Channel 2 = Display address 2
etc.
6.2 RANK-MODE
You can connect up to 8 GAZ or D-LINE with 7 digit.. The running time will be shown on the
display board with address 1
Rank 1 = Display address 1
Rank 2 = Display address 2
etc.
6.3 ALTERNATING-MODE
Works on one display board with 8 digit who will show time, rank and lane. The switch for
address adjustment must be on 0.
If the delay time setting is 0, the display board shows only the first stopped time.
To show the next time you have to press the red „OK” button.
6.4 STANDARD-MODE
Display board shows only the stopped time without rank and lane for the duration of the ad-
justed delay time.

Timy TrackTimer
Page 9
7 RS 232 Interface
7.1 TRACK-MODUS
You can select in the Menu "MAIN-MENU"->"INTERFACE"->"RS-232"->"TRACK-MODE" be-
tween two modes.
NORM
IDENT
7.1.1 NORM
On this setting the memory printing is different to the ONLINE printing. It shows on the memory
print how many times the same channel was released.
0001 c2 00:01:03.04 03
0001 c1 00:01:03.68 05
0001 c2 00:01:04.34 04
0001 c1 00:01:04.94 06
0001 c2 00:01:05.57 05
0001 c2 00:01:06.09 06
0001 c2 00:01:06.59 07
7.1.2 IDENT
On this setting the memory printing is the same as the ONLINE printing. It will not show the
how often the channel was released.
7.1.3 Interface Data
RS 232 Interface
Standard 38.400 Baud (adjustable: 2400, 4800, 9600, 19200, 38400)
8 Data Bit, no Parity Bit, 1 Stop Bit
ASCII Characters
n0002.............................Input of ID-number 2
0002 C0 10:27:28.4172 00........Start Time (time of day)
0001 c5 00:01:07.56 00........Finish Impulse from Lane 5 (impulse 1)
0001 c4 00:01:08.79 00 .......Finish Impulse from Lane 4 (impulse 1)
0002 c4 00:01:09.04 00 .......Finish Impulse from Lane 4 (impulse 2)
0001 c6 00:01:09.73 00 .......Finish Impulse form Lane 6 (impulse 1)
0001 c3 00:01:10.02 00 .......Finish Impulse from Lane 3 (impulse 1)
0001 c7 00:01:10.65 00 .......Finish Impulse from Lane 7 (impulse 1)
0002 c7 00:01:10.75 00 .......Finish Impulse form Lane 7 (impulse 2)
0001 c2 00:01:10.97 00 .......Finish Impulse from Lane 2 (impulse 1)
0001 c8 00:01:11.50 00 .......Finish Impulse from Lane 8 (impulse 1)
0001 c1 00:01:12.16 00 .......Finish Impulse from Lane 1 (impulse 1)
Each string ends with a carriage return
Small c = Nettime
Big C = Daytime
Channels:
Channel 0 C0 max. Precision 1/10.000
Channel 0M C0M max. Precision 1/100 – manual = keyboard

Timy TrackTimer
Page 10
Channel 1 C1 max. Precision 1/10.000
Channel 1M C1M max. Precision 1/100 – manual = keyboard
Channel 2 C2 max. Precision 1/10.000
Channel 3 C3 max. Precision 1/10.000
Channel 4 C4 max. Precision 1/10.000
Channel 5 C5 max. Precision 1/100
Channel 6 C6 max. Precision 1/100
Channel 7 C7 max. Precision 1/100
Channel 8 C8 max. Precision 1/100
7.1.4 RS 232 Commands
Syntax
Parameter
Example
Explanation
Description
BE
0 or 1
BE0 BE1BE?
Beep tone
Request, on/off
BWF
BWF
Update of program - RS 232
Afterwards update-file
USB-TIMY:BWF!!!!
USB-TIMY:BWF!!!!
Update of program - USB
Afterwards update-file
DIT1
00 - 99
DIT103 DIT1?
Display time 1 in display
Request, Set
DIT2
00 - 99
DIT299 DIT2?
Display time 2 in display
Request, Set
DTF
00.01 - 59.99
DTF00.03 DTF?
Delay time for finish and intermediate
Request, Set
DTS
00.01 - 59.99
DTS09.99 DTS?
Delay time for start
Request, Set
KL
0 or 1
KL0 KL1 KL?
Keyboard lock
Request, on/off
NSF?
NSF?
Timy version of program
Sends NSFV03B2
PRI_AF
0 - 9
PRI_AF3
Line Feed adjustment for printer
Printer AutoLineFeed 0 - 9
PRI
0 or 1
PRI0 PRI1
On, or. off from printer
Request, on/off
PRILF
PRILF
Line Feed for printer
Set
PRILO
PRILO
Print ofALGE-logo
Set
PRIM
PRIM
Printing of memory
Printing memory
RSM
RSM
Send memory through RS 232
Memory on RS 232
SL
0 or 1
SL0 SL1 SL?
Print of ALGE logo (switch on)
Request, on/off
TIMYINIT
TIMYINIT
Output of Timy hardware number
Not specified
Other manuals for Timy3
2
Table of contents
Other ALGE-Timing Timer manuals

ALGE-Timing
ALGE-Timing Mobile Timing MT1 User manual

ALGE-Timing
ALGE-Timing Mobile Timing MT1 User manual

ALGE-Timing
ALGE-Timing Timy User manual

ALGE-Timing
ALGE-Timing TDC8001 User manual

ALGE-Timing
ALGE-Timing Timy User manual

ALGE-Timing
ALGE-Timing Timy 3 User manual

ALGE-Timing
ALGE-Timing TdC 8000 User manual

ALGE-Timing
ALGE-Timing Timy User manual

ALGE-Timing
ALGE-Timing Timy LapTimer User manual

ALGE-Timing
ALGE-Timing TIMY2 User manual