manuals.online logo
Brands
  1. Home
  2. •
  3. Brands
  4. •
  5. Aluprof
  6. •
  7. Transmitter
  8. •
  9. Aluprof AC151-06 Owner's manual

Aluprof AC151-06 Owner's manual

1
We reserve the right to any technical change.
Valid on 2022.03.16
PROGRAMMING MANUAL OF THE AC151-06 TRANSMITTER
1. TECHNICAL SPECIFICATIONS
Power supply:
Operating temperature:
AC151-06 - 6-channels:
3 V (1xCR2430)
~ -20°C - ~ +55°C
Average range: 80 meters (in open space), 20 meters (inside buildings)
Frequency: 433.92 MHz
Company reserves the tolerance of catalog data due the different conditions usage.
In accordance with the provisions of the Directive of the European Parliament and of the Council 2012/19 / EU of 4 July 2012
on waste electrical and electronic equipment (WEEE), it is prohibited to place of used equipment together with other wastes,
marked with crossed out wheeled bin symbol. The users are obliged to transfer their used equipment to a designated collection
point for proper processing. The marking means, at the same time, that the equipment was put on the market after 13 August
2005. These legal obligations have been introduced to reduce the amount of waste generated from waste electrical and
electronic equipment and to ensure an appropriate level of collection, recovery and recycling. The equipment does not contain
any dangerous components, which would have any particularly negative impact on the environment and human health.
Possible of control of 6 motors or 6 groups of motors.
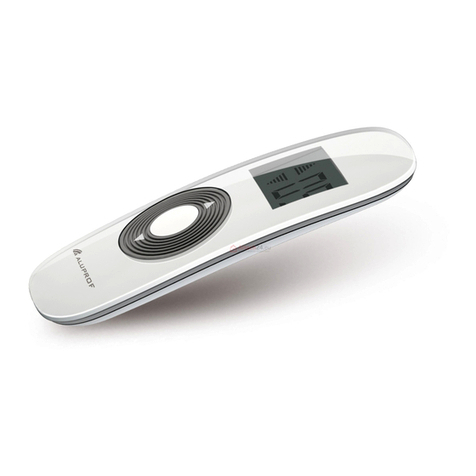
2. DIAGRAM OF THE FRONT PANEL
Works with all AM series radio control motors as well as AC control units and switches offered by ALUPROF S.A.
LEFT SET RIGHT
STOP DOWNUP P2 ON/OFF
OPERATING BATTERYACTIVE
CHANNEL
CLOCK
ROLLER
WEEK DAYS
Radiated power: 10 miliwat (mW)
PROGRAMMING MANUAL OF THE AC151-06 TRANSMITTER
MODE
SHUTTER MOVE
STATUS
2
We reserve the right to any technical change.
Valid on 2022.03.16
PROGRAMMING MANUAL OF THE AC151-06 TRANSMITTER
- The setting mode will close after 60 seconds of inactivity and the changes will not be saved.
- Press and hold the “STOP”button for 3 seconds to cancel the entire procedure.
- To automatically control receivers from all the channels seting up a group channel on the transmitter is required. Group channel is
active when all channels numbers are highlighted.
- The symbol “00 : 00” in the automatic control time settings means that the control is not active.
- It is possible to set the days of the week in automatic control in three modes: 1. Selected day of the week, 2. The whole week, 3.
Working days + Weekend.
Manual mode - without time control function,
Automatic mode - with time control function,
Random mode - with time control function with a random selected time within ± 15 minutes to the set automatic time.
Press and hold the “LEFT” and “RIGHT” buttons for 3 seconds to quickly activate / deactivate the manual mode.
3. OPERATING MODE CHANGE
Press and hold“SET” button
for 3 seconds. The time icon
Press the“RIGHT” button.
The operating mode icon
will flash.will flash.
Press the ”UP”or
“DOWN” button to change
Press and hold“SET” button for 3
seconds till flashing of the icons on
LCD will stop, which means that
the changes to the settings
have been saved.
the operating mode
4. SETTING THE CURRENT TIME AND DAY OF THE WEEK
Press and hold“SET” button
for 3 seconds. The time icon
Press the “STOP”
button. Hour digits will
flash.will flash.
By pressing the„UP” or
„DOWN” buttons, you can
Press the“STOP” button again.
Minutes digits will flash.
change the hour settings.
By pressing the „UP” or„DOWN”
buttons, settings of the
By pressing the “LEFT” or
“RIGHT” buttons, settings of the week
days can by change.minutes can by change.
Press and hold“SET” button for 3
seconds till flashing of the icons on LCD
will stop, which means that the changes
to the settings have been saved.
3
We reserve the right to any technical change.
Valid on 2022.03.16
PROGRAMMING MANUAL OF THE AC151-06 TRANSMITTER
5. SETTING OF THE AUTOMATIC CONTROL TIME
Press and hold“SET” Press the“RIGHT” button. Press the ”UP”or “DOWN”buttons
to change the operating modeThe operating mode icon will flash.
By pressing the “LEFT” or Press the“STOP” button.
The lifting hour will be displayed.
By pressing the „UP” or„DOWN”
buttons, settings of the minutes can
“RIGHT” buttons, settings of the
Hour digits will flash.
by change.
button for 3 seconds. The time
Repeat steps 7, 8, 9.
Press the “LEFT” or “RIGHT”
button to select the
required channel.
Press and hold“SET” button for 3
seconds till flashing of the icons on LCD
will stop, which means that the changes
Press the“STOP” button.
The channel digits
begin to flash.
Pressing the“STOP” button will switch
to settings of the lowering
hour.
to (T) automatic.
Press “STOP” button. Week
day will flash.
By pressing the„UP” or„DOWN” Press “STOP” buttons.
Minutes digits willbuttons, you can change the hour
flash.
7, 8, 9
Press the ”UP”button to
activate the channel. Press the
“DOWN” button to deactivate the
icon will flash.
week days can by change. settings.
to the settings have been saved.
channel.
4
We reserve the right to any technical change.
Valid on 2022.03.16
PROGRAMMING MANUAL OF THE AC151-06 TRANSMITTER

Other Aluprof Transmitter manuals

Aluprof DC 448 Owner's manual

Aluprof

Aluprof DC 448 Owner's manual

Aluprof DC 661 Owner's manual

Aluprof

Aluprof DC 661 Owner's manual

Aluprof DC920 Owner's manual

Aluprof

Aluprof DC920 Owner's manual

Aluprof DC 920 Owner's manual

Aluprof

Aluprof DC 920 Owner's manual

Aluprof DC1675 Installation manual

Aluprof

Aluprof DC1675 Installation manual

Aluprof DC 448 Owner's manual

Aluprof

Aluprof DC 448 Owner's manual

Aluprof AC226-01 Owner's manual

Aluprof

Aluprof AC226-01 Owner's manual

Popular Transmitter manuals by other brands

GAPOSA EMITTO SMART16 quick start guide

GAPOSA

GAPOSA EMITTO SMART16 quick start guide

Insignia NS-M35FMT-C Quick setup guide

Insignia

Insignia NS-M35FMT-C Quick setup guide

Ramsey Electronics QRP20 user manual

Ramsey Electronics

Ramsey Electronics QRP20 user manual

TESTO 6651 instruction manual

TESTO

TESTO 6651 instruction manual

Nuova Fima ST Series user guide

Nuova Fima

Nuova Fima ST Series user guide

Nitek EL4500C Installation and operation manual

Nitek

Nitek EL4500C Installation and operation manual

Long Range Systems T9560 Multitouch user manual

Long Range Systems

Long Range Systems T9560 Multitouch user manual

Intelix DIGI-HD-IR3-WP installation manual

Intelix

Intelix DIGI-HD-IR3-WP installation manual

Vaisala HUMICAP HMT330 SERIES Quick reference guide

Vaisala

Vaisala HUMICAP HMT330 SERIES Quick reference guide

FTS G6-DB Operator's manual

FTS

FTS G6-DB Operator's manual

Fomei TR-X 32 user guide

Fomei

Fomei TR-X 32 user guide

FlowLine LU20 owner's manual

FlowLine

FlowLine LU20 owner's manual

M-system M1EXS-2 instruction manual

M-system

M-system M1EXS-2 instruction manual

Nolan NSTX5C2XXX user guide

Nolan

Nolan NSTX5C2XXX user guide

ALFAtron ALF-TPUHD70-T user manual

ALFAtron

ALFAtron ALF-TPUHD70-T user manual

RKI 65-2443SS Series Operator's manual

RKI

RKI 65-2443SS Series Operator's manual

Matsushima MWLM-FM79 instruction manual

Matsushima

Matsushima MWLM-FM79 instruction manual

WisyCom MTP40S manual

WisyCom

WisyCom MTP40S manual

manuals.online logo
manuals.online logoBrands
  • About & Mission
  • Contact us
  • Privacy Policy
  • Terms and Conditions

Copyright 2025 Manuals.Online. All Rights Reserved.