Orientation Aid for the Start of the Season - ZA-TS
Version 08/2018 Page 5
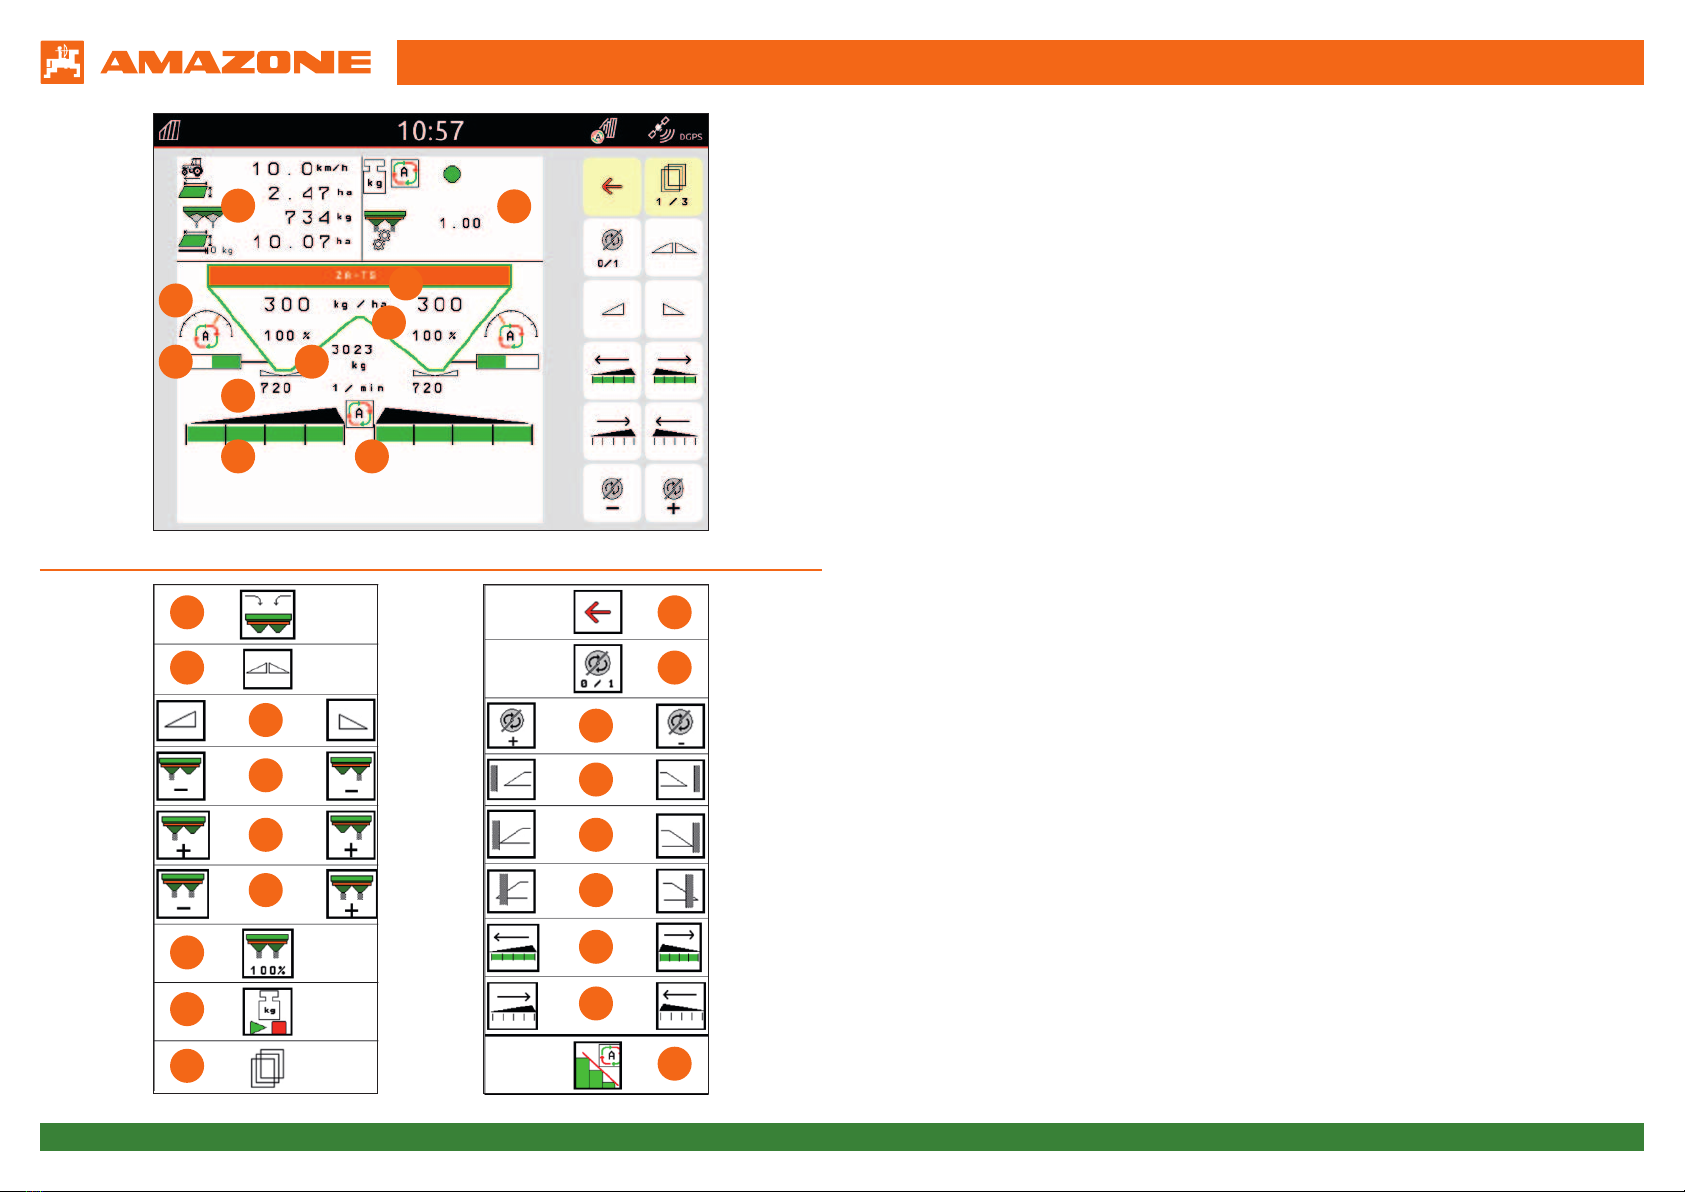
4. Work menu of the implement software
(1) Multi-function display, freely configurable, see operating manual for more information
(2) Scale display
(3)
Current absolute spread rate (top, here in kg/ha) and relative spread rate (bottom, in %).
100% corresponds to the quantity on the Start screen (see previous page). As soon as
the deviation is more than 10%, the corresponding field is highlighted in yellow.
(4) Weighed hopper content, is highlighted in yellow when the alarm limit has been
undercut; can be configured in the Implement menu, see operating manual
(5) Position of the delivery system when using ArgusTwin
(6) Opening of the metering shutter
(7) Spreading disc speed, is highlighted in yellow if the deviation is > 50 rpm from the
nominal speed (fertiliser database)
(8) Main section switch: Black is OPEN, white is CLOSED
(9) Section status: Green is open, white is closed
(10) Status of Section Control
(11) Refill fertiliser
(12) Both shutters open/closed
(13) Left/right shutter open/closed
(14) Reduce the spread rate on the left/right
(15) Increase the spread rate on the left/right
(16) Increase/reduce the spread rate on both sides
(17) Set the spread rate to the target quantity (100 %) on both sides
(18) Calibration run in offline mode of the scale
(19) Scroll to the next screen
(20) Back the the Start screen
(21) Switch on the spreading disc: Only if you have a hydraulic drive press and hold the
button until the acoustic signal is muted
(22) Increase/reduce the boundary spreading speed
(23) Switch ditch spreading on/off on the left/right
(24) Switch boundary spreading on/off on the left/right
(25) Switch border spreading on/off on the left/right
(26) Switch on part-width sections left/right
(27) Switch off part-width sections left/right
(28) Switch Section Control on/off
28
27
18
19
26
17
2516
2415
23
14
22
13
2112
2011
10
9
8
76
54
3
2
1