Your SiteSync IQ system is now set up for proper operation.
For information on other features, see the Installation and
Operation Manual that was included with your system. If you
have any questions, please contact Technical Support at
American Time: 800-328-8996.
6
Activate and hang your clocks
Don't activate the battery or apply power to the clocks until the system controller is installed and
transmitting and the clock is in the intended location.
American Series Digital Clocks
1. Take the clock to the area where it will be used.
2. To activate the clock, connect to 120vac power.
3. Display will ash “U40” or 1:00 o’clock until it
receives a signal.
4. Verify synchronization takes place within 2-5
minutes
SiteSync IQ®Wireless Clock System
Standard GPS with Campus TX Antenna & External Transmitter
INST-SSIQ-X-G Rev 14
Please read this rst!
After determining the proper wattage for your facility, we guarantee the coverage of your SiteSync IQ
when you follow a few simple steps. If this is your rst installation or you have questions at any time
during this process, please call American Time toll free at 800-328-8996.
We're here to help!
This Quick Start Guide will help you avoid three common installation mistakes:
1. Improper location of transmitting (TX) antenna. A temporary install of the system controller
is recommended.
Don't drill holes for permanent installation and mounting until the system is working correctly.
2. Improper system controller start-up. A successful transmission is indicated by a TX in the
lower right-hand corner of the system controller screen.
Don't locate the campus TX antenna within 4' of the system controller.
3. Improper clock start-up. Activate clocks in their intended location.
Don't activate the clocks in one room and move them to another location as signal reception
will not be veried. Make sure the system controller is transmitting and is not in Quiet Mode.
Important Note: Clocks should be installed within 24 hours of installing the system controller. After
24 hours, the system controller will enter Quiet Mode. Pressing 3-5-7 on the keypad will disable Quiet
Mode for 6 hours. Reference Appendix J in the SiteSync IQ Installation and Operation Manual for
more details on Quiet Mode.
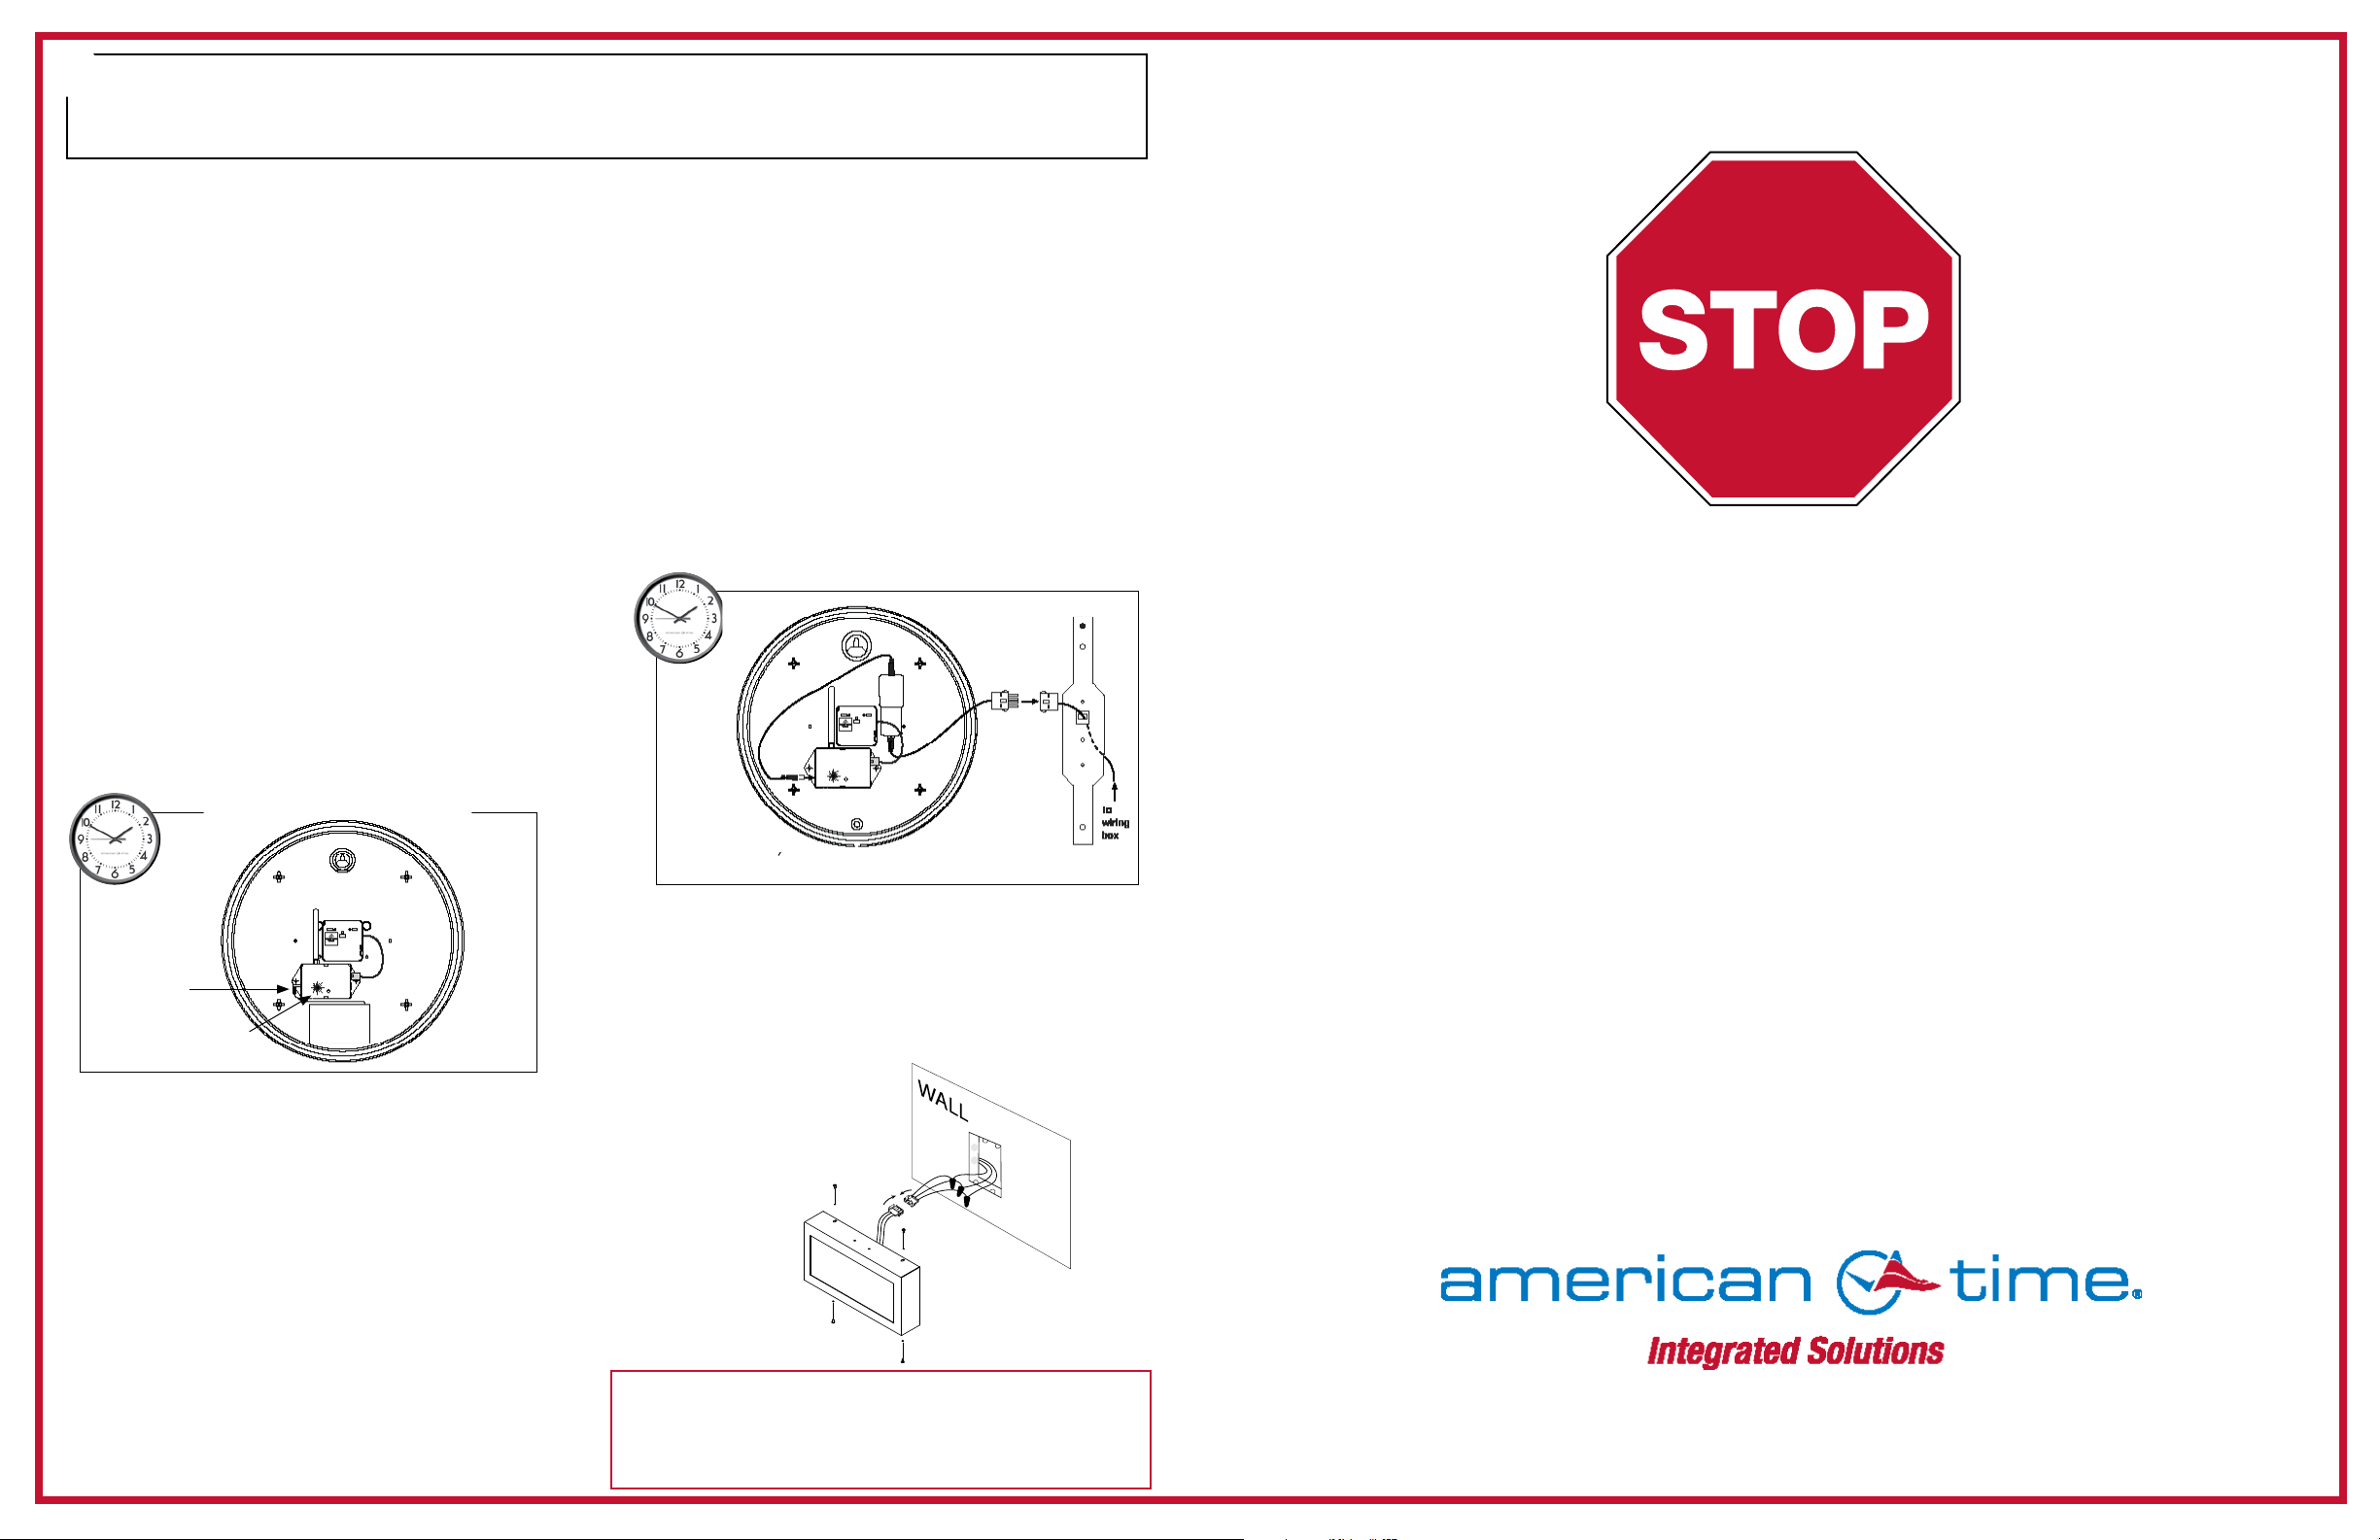
Reset
Button
LED
Electric
Electric (AC) Analog Clocks
1. Take the clock to the area where it will be used.
2. To activate the clock, connect to AC power.
The LED on the back of the clock (see below)
will ash red within 30 seconds of power-up to
indicate receiver is looking for the wireless
signal.
When the signal is received, the LED will ash
green. Be patient. The clock hands will rapid
advance to the correct time. This may take
up to 7 minutes.
3. Hang the clock once signal reception is
veried and clock is operating correctly.
Note: If the LED does not ash within 30 seconds,
disconnect the barrel plug on the clock receiver, wait
10 seconds and reconnect. The LED will begin ashing
within 30 seconds.
Activation Note: Clocks should be installed within 24 hours
of installing the system controller. After 24 hours, the system
controller will enter Quiet Mode. Pressing 3-5-7 on the keypad
will disable Quiet Mode for 6 hours. Reference Appendix J in the
SiteSync IQ Installation and Operation Manual for more details
on Quiet Mode.
phone: 800-328-8996 fax: 800-789-1882 online:american-time.com
mail: 140 3rd St. So.; PO Box 707, Dassel, MN 55325-0707
LED
Battery
Barrel
Jack
Input
Battery Analog Clocks
1. Take the clock to the area where it will be
used.
2. To activate the clock, connect barrel jack plug
of battery pack to wireless receiver. The
LED on the back of the clock will ash red
within 30 seconds of power-up to indicate
receiver is looking for the wireless signal.
When the signal is received, the LED will ash
green. Be patient. The clock hands will rapid
advance to the correct time. This may take up
to 7 minutes.
3. Hang the clock after hands are rapid
advancing.
Note: If the LED does not ash within 30 seconds,
remove the barrel jack plug of the battery pack from
the wireless receiver for 5 seconds and reconnect it.
This resets the receiver. The LED will begin ashing
within 30 seconds.


