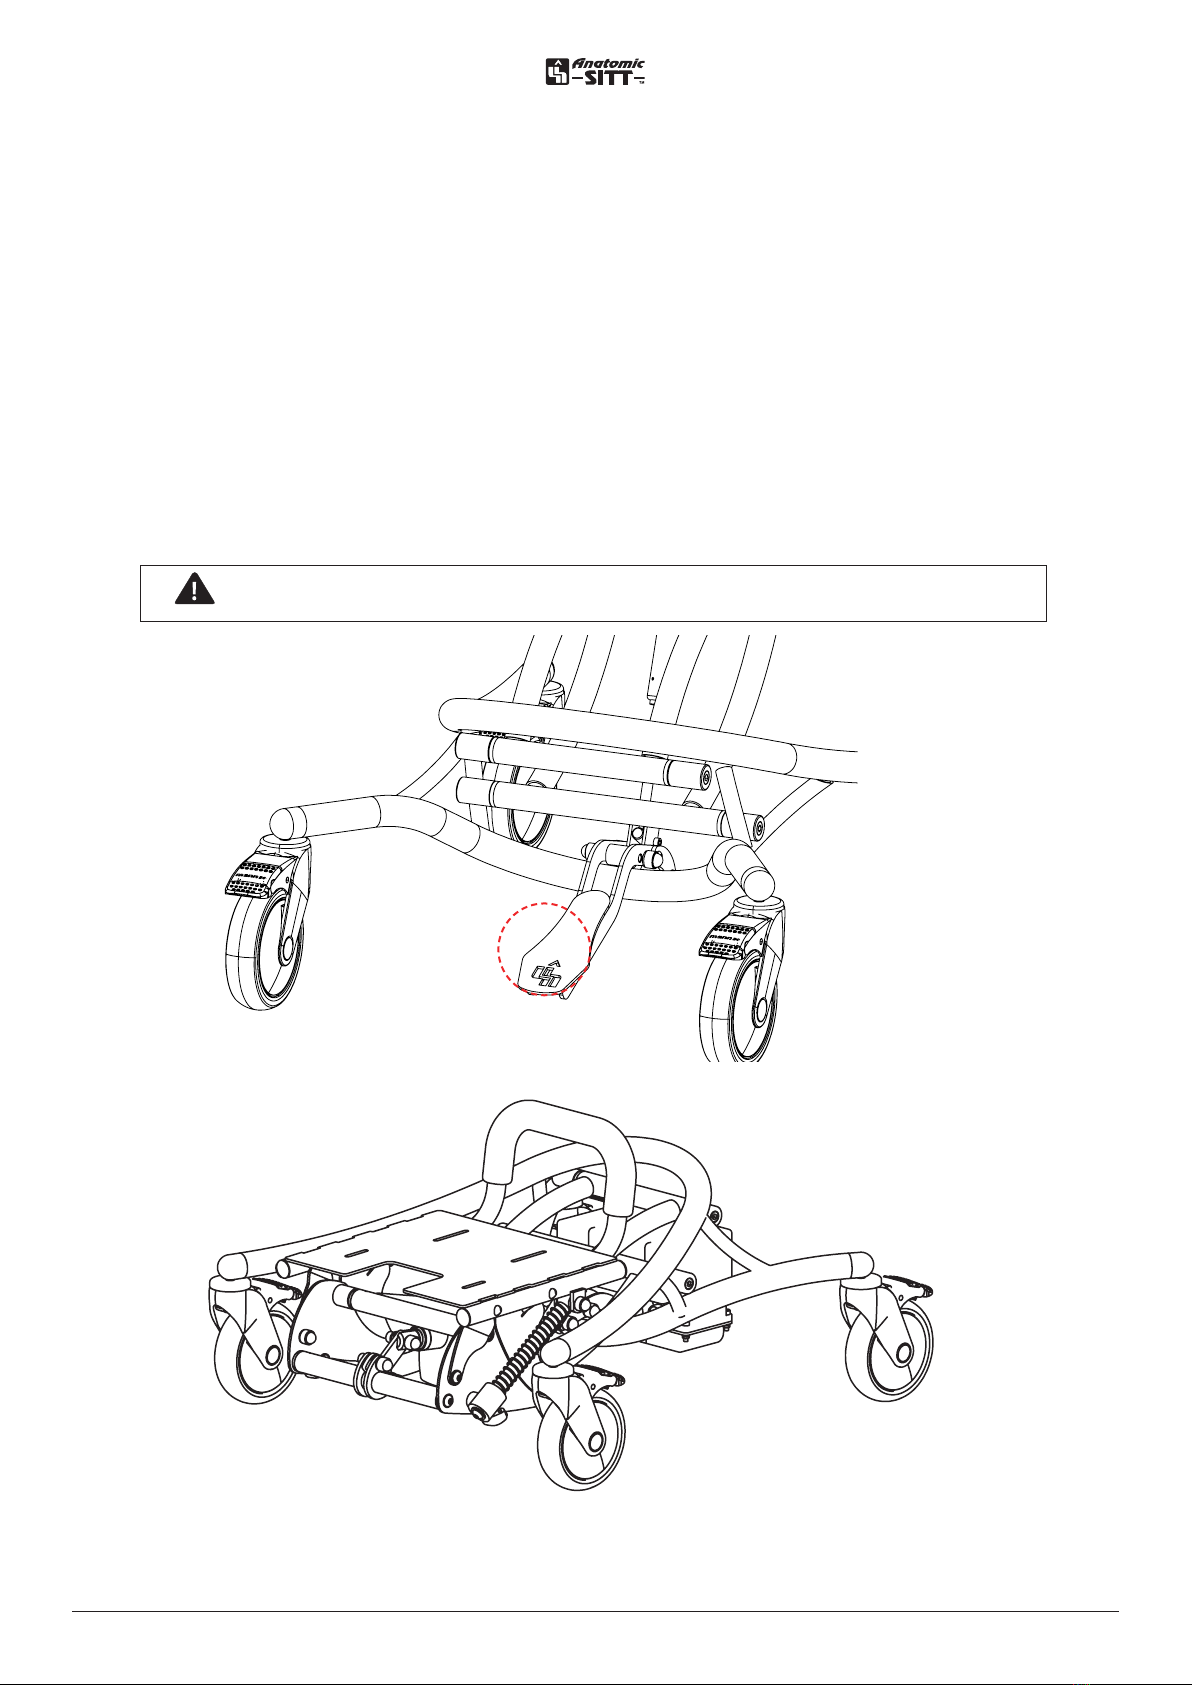
7www.anatomicsitt.com | +46 11 16 18 00User manual Zitzi Flipper Pro
Tilt function
Flipper Pro has two dierent tilt positions, which is
set using holes on the side of the seat plate. If the
piston is attached to the lower hole (see figure), tilt is
obtained at 0° -30°. If the piston is inserted into the
upper hole, a tilt of -5° to 25° is obtained.
Knob (A),
right side
Tilting with gas piston
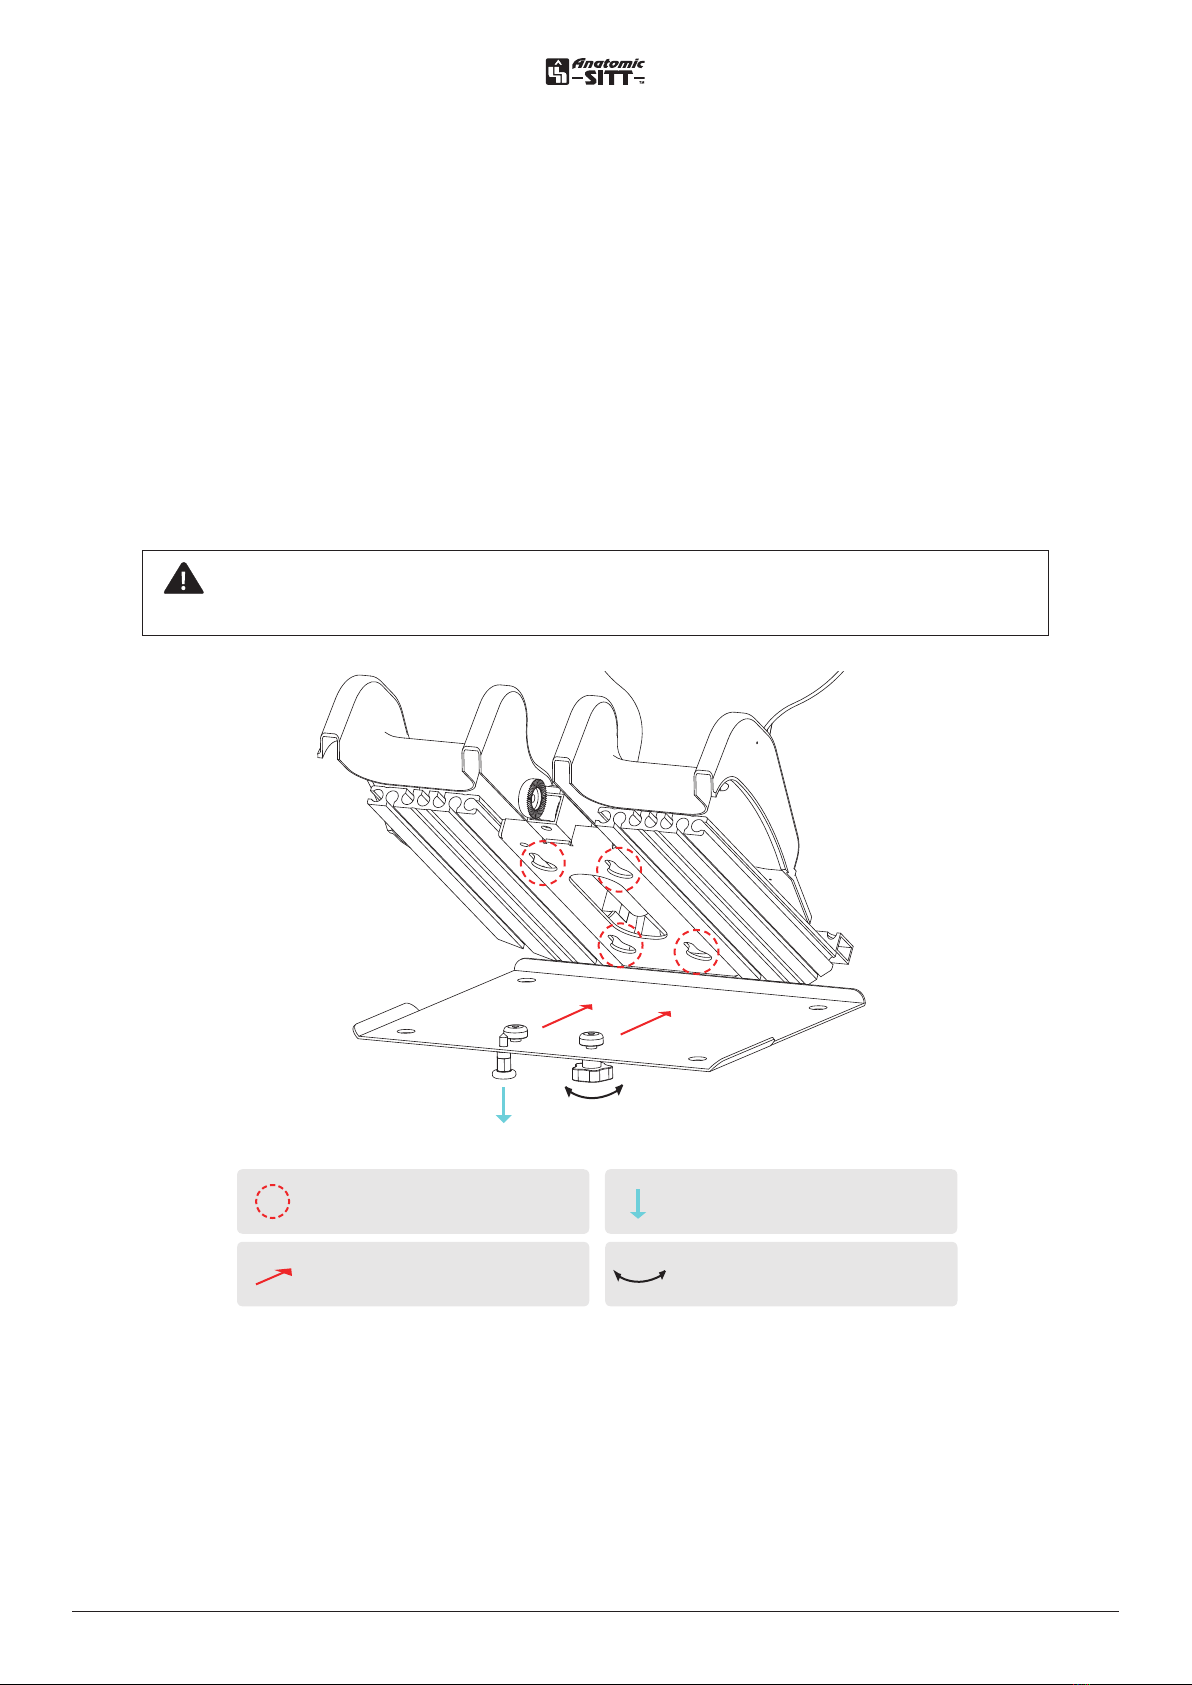
The angle of the seat plate are adjustable 0-30° and
can be adjusted by loosen the knob (A) and pressing
the lever (B), then push the seat plate down- and
forward. Release the lever (B) to lock the desired
angle, and then tighten the knob (A) to ensure that
the angle is locked.
The spring on the side of the seat plate helps to
reset the seat plate to its original position.
Always check that the tilt is locked when you reach
the desired angle.
The knob (A) must always be locked after any
adjustment.
Spring return
Control
Locking
Note! To reset the seat angle to its starting
position, loose the knob (A), press the lever
(B) and pull the seat plate up and backwards
by griping the handle.
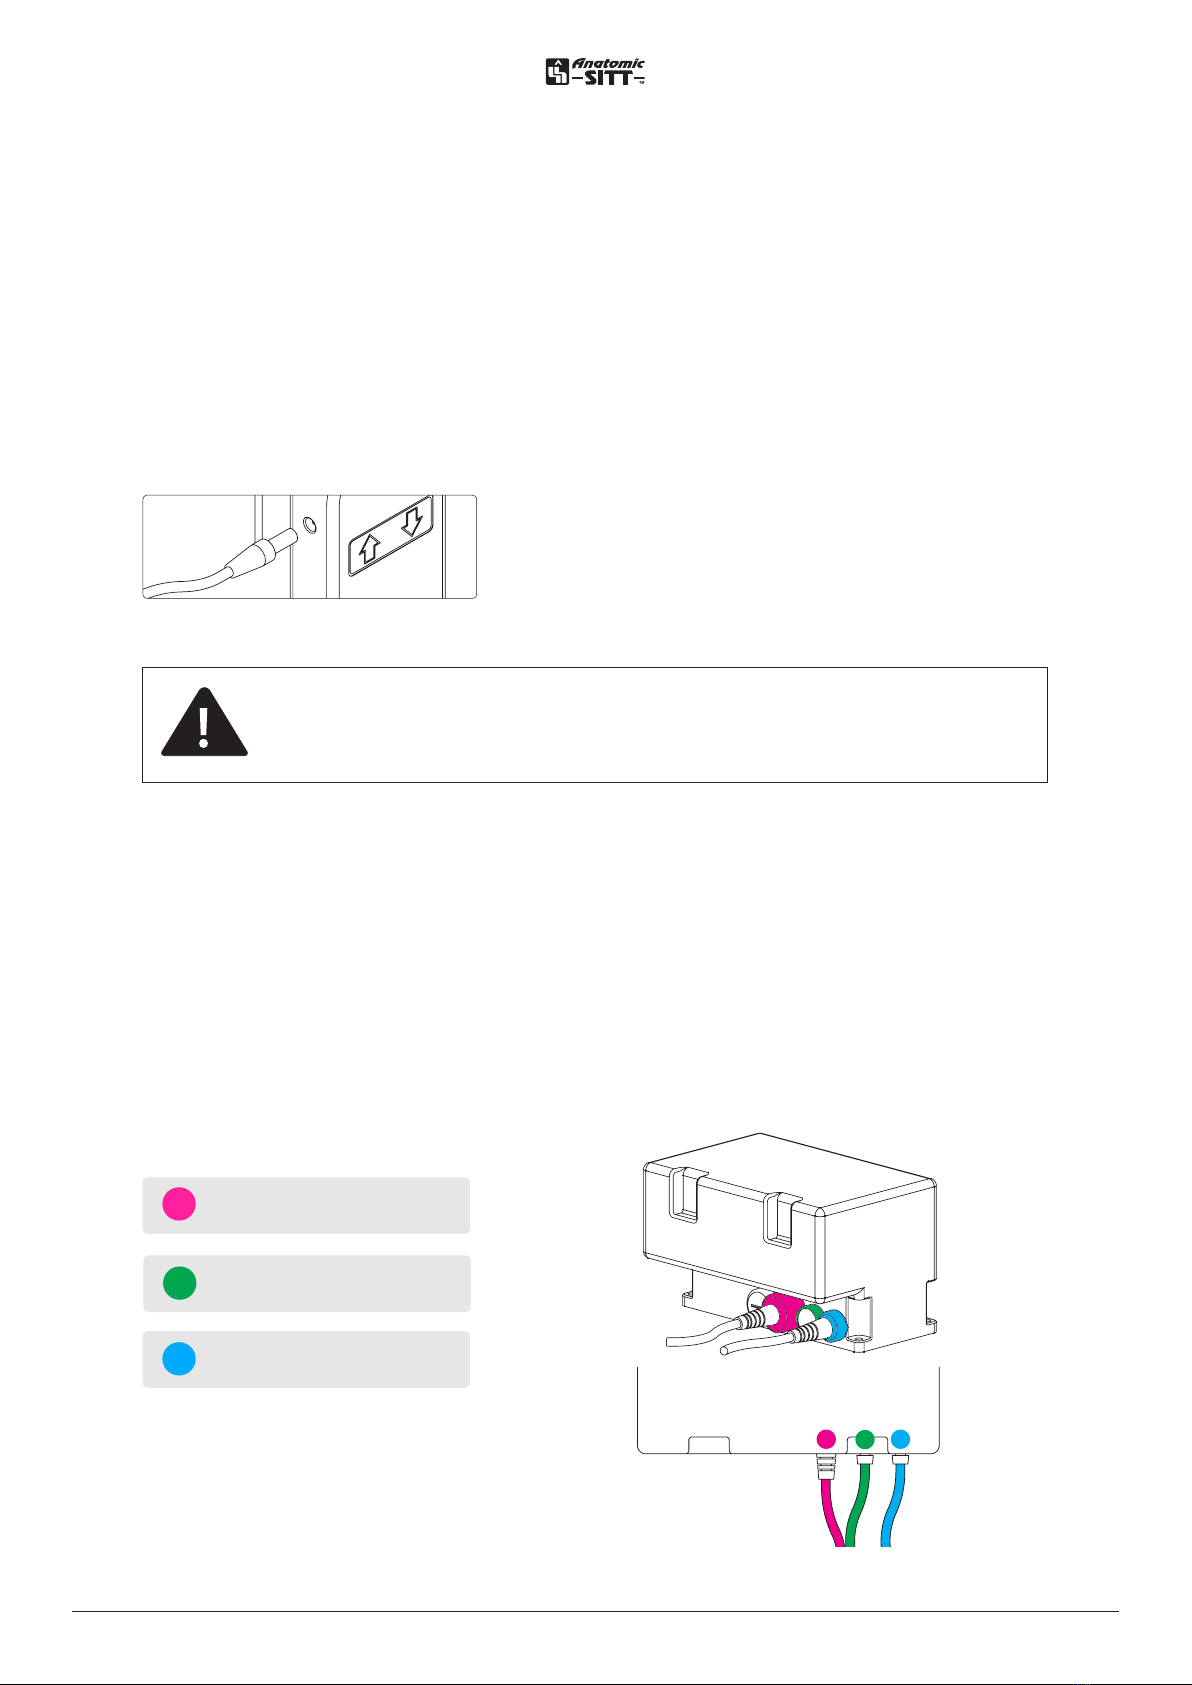
Electric tilting
The angle of the seat plate are adjustable 0-30° and
can be adjusted by loosen the knob (A) and pressing
button (C) for tilting forward and button (D) for
tilting backward. Release the button on the hand
control when the desired tilt position is reached.
Lock the knob (A) to ensure that tilt position is
locked.
Lever (B),
left side
Hand
control
Montering av negativ tilt Flipper pro
Flipper pro har två olika lägen för tilt vilket ställs in med hjälp av hål vid sidan om sittplattan. Om
kolven fästs in i hålet längst ned (som på bild nedan) erhålls tilt på 0-30O. Om kolven fästs in i hålet
framför erhålls en tilt på -5-25O.
Standard tilt
Negative tilt
Tilt function
Note! It is very important that the knob (A) is
released before using the electric tilt function.
Note! Be careful to avoid risk of pinching