Andor Technology Shamrock 500i User manual

Shamrock Series
User Guide
andor.com © Andor Technology Ltd. 2017
Version 2.1 revised 13 Feb 2017
Covering Shamrock models: 500i and 750

Shamrock 500i & 750
2
Version 2.1 rev 13 Feb 2017
TABLE OF CONTENTS
SECTION 1: INTRODUCTION............................................................................................................. 10
1.1 TECHNICAL SUPPORT.......................................................................................................... 11
1.2 DISCLAIMER .......................................................................................................................... 12
1.3 COPYRIGHT AND PROTECTIVE NOTICES........................................................................... 12
1.4 TRADEMARKS AND PATENT INFORMATION....................................................................... 12
1.5 PACKING LIST........................................................................................................................ 13
1.5.1 Optional Accessories................................................................................................ 14
1.6 ACCESSORIES FOR THE SHAMROCK SERIES................................................................... 14
SECTION 2: PRODUCT OVERVIEW................................................................................................... 15
2.1 EXTERNAL FEATURES AND MODEL OPTIONS................................................................... 15
2.1.1 Shamrock 500i .......................................................................................................... 15
2.1.2 Shamrock 750 ........................................................................................................... 16
2.2 SIGNAL AND POWER CONNECTIONS (500I AND 750 MODELS) ...................................... 17
2.2.1 Front Panel ............................................................................................................... 17
2.2.2 Rear Panel................................................................................................................. 18
2.3 POWER SUPPLY .................................................................................................................... 19
SECTION 3: INSTALLATION ............................................................................................................... 20
3.1 AN OVERVIEW FOR SETTING UP YOUR SHAMROCK SPECTROGRAPH ......................... 20
3.1.1 Removing the Flipper Mirror Locking Screws ......................................................... 21
3.1.2 Installing the Software (Solis Spectroscopy/SDK) .................................................. 23
3.1.3 Software and Driver Installation............................................................................... 24
3.1.4 Connecting the Power and USB Cables.................................................................. 25
3.2 ATTACHING A CAMERA TO THE SHAMROCK..................................................................... 26
3.2.1 USB Camera Signal and Power Connections ......................................................... 27
3.2.2 Standalone Spectrograph ........................................................................................ 28
3.2.3 Pre-aligned Camera and Spectrograph ................................................................... 29
3.2.3.1 Attaching the camera .............................................................................. 29

Shamrock 500i & 750
3
Version 2.1 rev 13 Feb 2017
3.3 INSTALLATION OF FILTERS (IF APPLICABLE) ..................................................................... 30
3.3.1 Filter Access.............................................................................................................. 30
3.3.2 Initializing the Filter Wheel........................................................................................ 31
3.3.3 Filter Wheel Control and Updating the Filter Details Stored in the
Spectrograph Memory.............................................................................................. 31
3.4 GRATING TURRET REPLACEMENT...................................................................................... 32
3.5 INSTALLATION OF ACCESSORY PARTS .............................................................................. 33
3.5.1 Grating Adjustment................................................................................................... 34
3.5.1.1 Correcting for Yaw ................................................................................... 34
3.5.1.2 Correcting for Roll and Tilt ...................................................................... 35
SECTION 4: OPERATION ................................................................................................................... 36
4.1 EMERGENCY MAINS DISCONNECTION .............................................................................. 37
4.2 DETECTOR CONTROLS ........................................................................................................ 37
4.2.1 Exposure Time Control ............................................................................................. 37
4.2.2 Read Mode Control................................................................................................... 38
4.3 SPECTROGRAPH CONTROLS.............................................................................................. 39
4.3.1 Reset Menu Options ................................................................................................. 39
4.3.2 Wavelength Drive Control......................................................................................... 40
4.3.2.1 Changing the Wavelength Range............................................................ 40
4.3.3 Step and Glue ........................................................................................................... 41
4.3.3.1 Relative Efciency Correction ................................................................. 44
4.4 GRATING TURRET CONTROL............................................................................................... 45
4.5 OFFSET ADJUSTMENT CONTROL....................................................................................... 46
4.5.1 Manual Grating Offset Adjustment Procedure ........................................................ 47
4.6 SLIT DRIVE CONTROL........................................................................................................... 48
4.7 FILTER WHEEL CONTROL .................................................................................................... 49
4.8 SHUTTER CONTROL ............................................................................................................. 50
4.8.1 Control of Shutter via External TTL Signal .............................................................. 51
4.8.1.1 External Control of the Shutter ............................................................... 51

Shamrock 500i & 750
4
Version 2.1 rev 13 Feb 2017
4.9 FLIPPER MIRROR CONTROL................................................................................................ 52
4.10 DISPERSION OPTIMISER...................................................................................................... 53
4.10.1 How to use the Dispersion Optimiser:........................................................................ 54
SECTION 5: MAINTENANCE.............................................................................................................. 57
5.1 REGULAR CHECKS ............................................................................................................... 57
5.2 ANNUAL ELECTRICAL SAFETY CHECKS ............................................................................ 57
5.3 FUSE REPLACEMENT ........................................................................................................... 57
5.4 CLEANING (EXTERNAL) ........................................................................................................ 57
SECTION 6: TROUBLESHOOTING .................................................................................................... 58
SECTION 7: SPECIFICATIONS........................................................................................................... 59
7.1 SPECIFICATIONS (ELECTRICAL AND ENVIRONMENTAL) .................................................. 59
7.2 SPECIFICATIONS (OPTICAL)................................................................................................. 60
APPENDIX A: MECHANICAL DRAWINGS ......................................................................................... 61
APPENDIX B: OTHER INFORMATION ............................................................................................... 65

Shamrock 500i & 750
5
Version 2.1 rev 13 Feb 2017
Revision History
Version Released Description
2.0 11 Oct 2016
Content prepared from, and replacing previous Shamrock 500i User Guide Version 3.0
- August 2008 and Shamrock 750 User Guide Version 1.1 - August 2008
Updated content in line with the machinery directive 2006/42/EC (all Sections)
Presentation and manual structure updated to latest format (All sections)
Revision History added
Added link to Customer Support page on Website (Sections 1.1 & 5)
Added extra images of product and software to improve descriptions (all Sections)
New Packing List added (Section 1.5)
Removed reference to changing EEPROM Settings using CD (Section 3.2.4)
Updated Grating Replacement procedure (Section 3.4)
Further detail added to the Grating Adjustment procedure (Section 3.5.1)
Added cross references (all Sections)
Added warning symbols to highlight warning text (all Sections)
Updated dimensions and mechanical drawings (Section 7 & Appendix A)
2.1 13 Feb 2017 Added additional information to mechanical drawings. Included further detail
regarding feet mounting location (Appendix A).

Shamrock 500i & 750
6
Version 2.1 rev 13 Feb 2017
Safety and Warning Information
PLEASE READ THIS INFORMATION FIRST
1. If the equipment is used in a manner not specied by Andor, the protection provided by the equipment may be
impaired.
CAUTION – USE OF CONTROLS OR ADJUSTMENTS OR PERFORMANCE OF PROCEDURES OTHER THAN THOSE
SPECIFIED HEREIN MAY RESULT IN HAZARDOUS RADIATION EXPOSURE.
2. Do not position this product so that it is difcult to operate the Mains disconnecting device. See, “Emergency
Mains Disconnection” on page 37”.
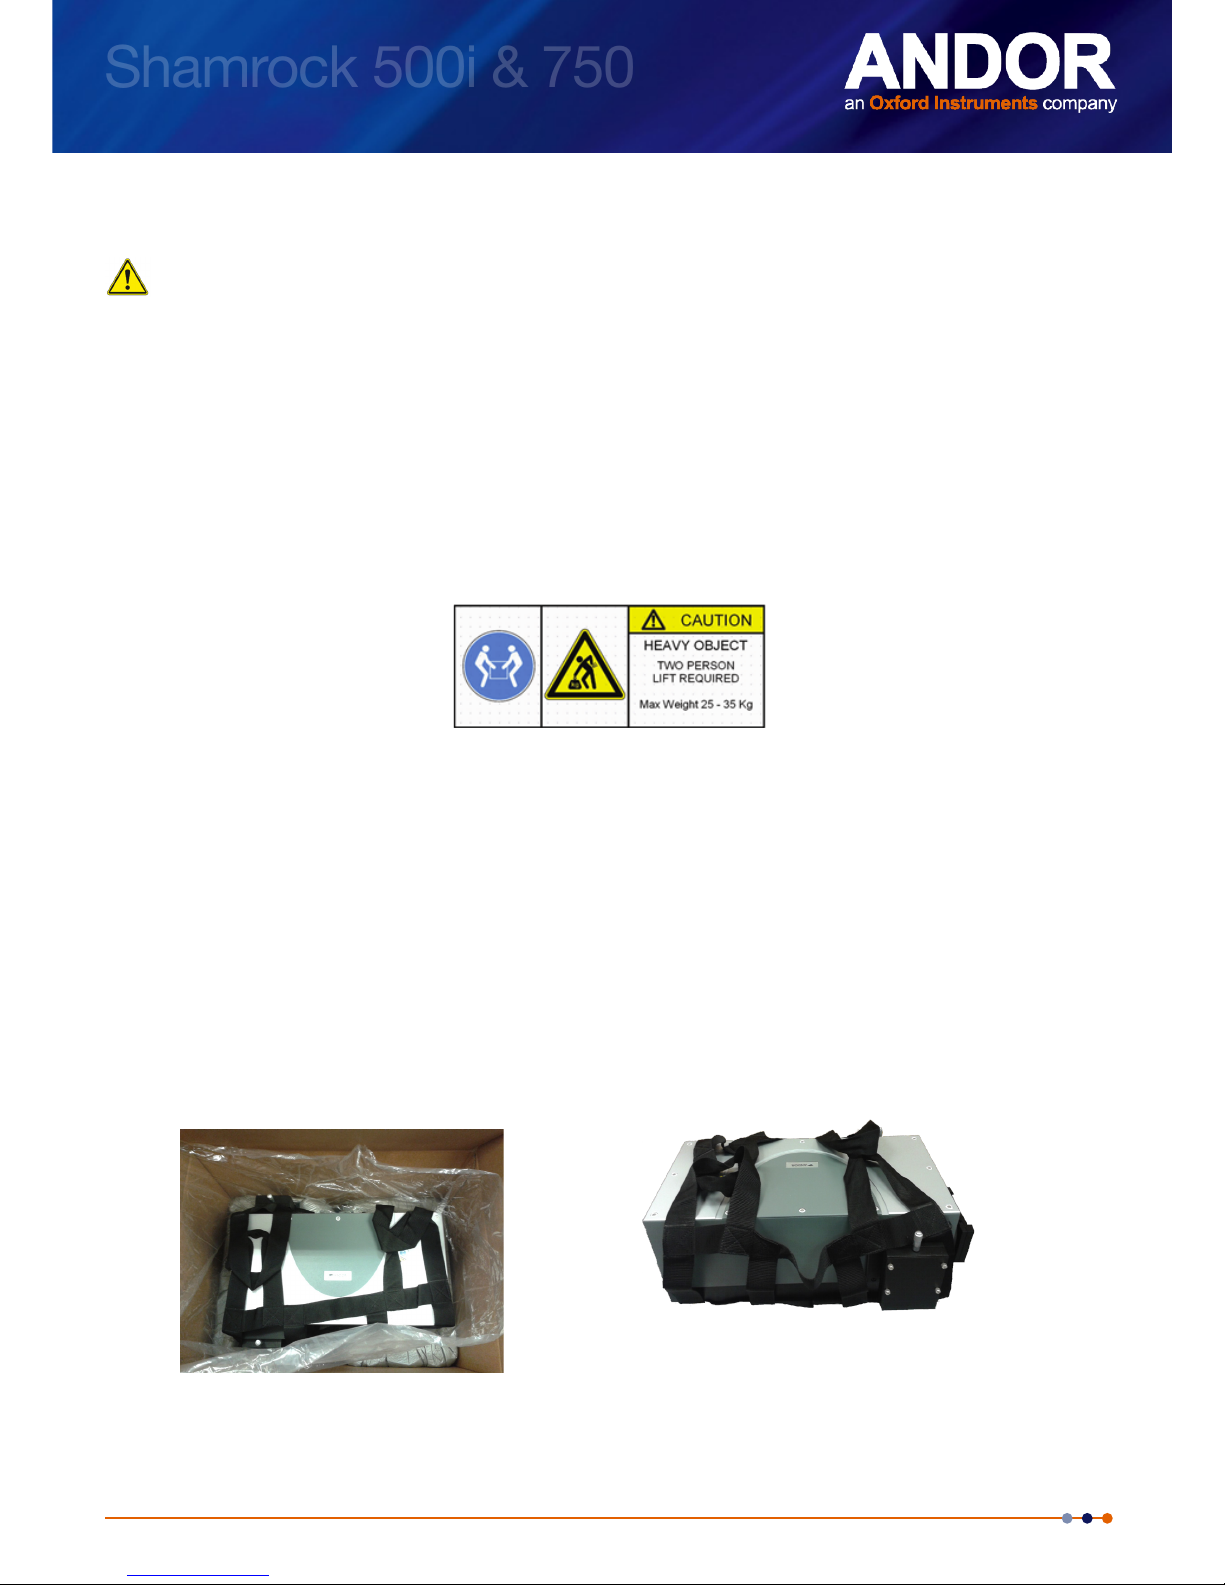
3. Before using the system, please follow and adhere to all warnings, safety, manual handling and operating
instructions located either on the product or in this User Guide.
4. Keep this manual in a safe place for future reference.
5. Users must be authorised and trained personnel only; otherwise this may result in personal injury, and/ or
equipment damage and impaired system performance.
6. There are no user-serviceable parts inside the product beyond those specied in the dened user accessible
areas. Only authorised service personnel may service this equipment.
7. This equipment has not been designed and manufactured for the medical diagnosis of patients.
8. Protective earth is an integral part of the protection against electric shock in this product, and is provided via
the earth pin of the external power supply. Ensure that this is plugged into the building earth system via the
mains socket. Do not tamper with any of the earthing measures.
9. Always disconnect the power supply from the product in the event that the top panel must be removed- for
example, accessing the grating turret.
10. Only the correctly specied mains supply should be used.
11. Only the AC/DC external power supply provided with the product should be used.
12. Only the power supply cord provided with the product should be used. Should this not be correct for your
geographical area, contact your local Andor representative.
13. Make sure the power supply cord is located so that it will not be subject to damage. If replacement of the
detachable power supply cord is required, ensure replacement is of same type and rating.
14. While running an experiment, keep the room temperature as stable as possible.
15. Performance of the system may be adversely affected by rapidly changing environmental conditions or
operation outside of the operating conditions specied in “SPECIFICATIONS” on page 59.
16. Electromagnetic Compatibility: Class B.
17. This product has been designed and tested to perform successfully in a normal (basic) electromagnetic
environment, e.g. a typical life science test laboratory, as per the EU EMC Directive. It is not designed to
operate in a harsh electromagnetic environment, e.g. close to the following equipment: EMI/RFI generators,
electrostatic eld generators, electromagnetic or radioactive devices, plasma sources, arc welders, x-ray
instruments, intense pulsed sources, or other similar sources of high energy elds whose emissions are not
within the normal range expected under the EU EMC Directive.

Shamrock 500i & 750
7
Version 2.1 rev 13 Feb 2017
18. Please note that this product is not designed to provide protection from ionising radiation. Any customer using
this product in such an application should provide their own protection.
19. Your product is a precision scientic instrument containing fragile components. Always handle it with care.
20. Do not use with intense light sources, e.g. lasers that could damage the optical coatings.
21. If purging, use a dry inert gas e.g. N2
22. Take appropriate measures to avoid spills, do not store or place liquids on the product.
23. If spillage occurs on the product, switch off power immediately, and wipe off with a dry, lint-free cloth.
24. If any ingress of liquids has occurred or is suspected, unplug the mains cables, do not use, and contact Andor
Customer Support for further instruction.
25. The Shamrock does not have specic ventilation requirements, if operating in the stated operational
temperature range. However, accessories such as cameras and other accessories used with the spectrograph
may require a dened space to enable adequate ventilation.
26. Do not expose the product to extreme hot or cold temperatures.
27. Do not expose the product to open ames.
28. Do not allow objects to fall on the product.
29. See “MAINTENANCE” on page 57 for cleaning and decontamination information.

Shamrock 500i & 750
8
Version 2.1 rev 13 Feb 2017
Safety SymbolS
The following are explanations of the safety symbols found on this product:
Caution, potential hazard Caution Sharp
Caution, risk of electric shock Caution Heavy Object
Regulatory Information
• The Shamrock spectrograph series complies with the requirements of the EU Electromagnetic Compatibility
and Low Voltage Directives, specically by satisfying the requirements of EN61326-1 and EN61010-1.
• This product complies with the Machinery Directive 2006/42/EC.
• This product requires a DC power supply.
Shipping and Storage precautionS
• Product must be kept dry and free from condensation, <70% humidity, non-condensing.
• Storage temperature range: -25°C to +50°C.
• Do not stack heavy objects on top of the product- observe any warning symbols displayed on the packaging.
• Retain packaging in case it is necessary to return equipment for servicing.
• If the equipment appears damaged in any way on receipt, please contact customer support for further
instruction.
operational precautionS
• Product must be kept dry and free from condensation, <70% humidity, non-condensing.
• Operating Temperature: 0°C to 30°C ambient

Shamrock 500i & 750
9
Version 2.1 rev 13 Feb 2017
Unpacking the Shamrock and Manual Handling Information
IMPORTANT PRECAUTIONARY NOTICE:
Correct manual handling techniques are important when installing Shamrock spectrographs so the integrity of the
products is safeguarded and individuals involved are not exposed to unnecessary risks or possible injury. Whilst taking
any of the following actions:
• Lifting a load which is too heavy
• Poor posture or technique during lifting
• Dropping the device during transfer
• Lifting objects with sharp edges
Special attention should be drawn to the weight of the 500i and 750 spectrograph models, which exceed guidelines for
safe lifting. The Shamrock 500i weighs ~25 kg and the Shamrock 750 weighs ~35 kg. Both spectrographs have been
suitably marked/labelled with the following information labels to indicate this specic hazard:
Due to the delicate nature of some of the components within, and the overall weight of the object, care must be
exercised when unpacking/relocating the spectrograph.
NOTE: As outlined below, two/multi person lifts must be used at all times.
The Shamrock 500i and 750 are precision instruments that will perform best when set up and operated properly:
• Open the shipping box and allow it to fully acclimatise to room temperature.
• Ensure there is an appropriate space available to manoeuvre and put the spectrograph in place.
• Remove any accessories which may be in the top section of the box and store them in a safe location for later
use.
• Remove the protective packaging from around the spectrograph.
• Two persons should lift the spectrograph out of the shipping box and place on a suitable surface using the
provided straps (see images below).
• Note: ipper mirror locking screw(s) must be removed before operation (refer to “INSTALLATION” on
page 20).
• Check the contents are as per the Packing List (see “PACKING LIST” on page 13) and they match those
specied at the time of ordering.
• Your spectrograph is now ready to be set up and prepared for use. Refer to “INSTALLATION” on page 20.
Use the straps to lift the spectrograph from the shipping box (requires 2 persons)
and place on a suitable surface that can support the weight of the spectrograph.

Shamrock 500i & 750
10
Version 2.1 rev 13 Feb 2017
SECTION 1: INTRODUCTION
Thank you for choosing an Andor Shamrock spectrograph. Please read this manual and information supplied with any
other system components and software before using your Shamrock spectrograph.
This User Guide covers the following models:
1. Shamrock 500i (below left)
2. Shamrock 750 (below right)
The Shamrock 500i and 750 are available in two congurations:
1. As a pre-aligned detector/spectrometer system allowing fast and efcient set-up, or,
2. As a stand-alone spectrograph, to retrot to existing cameras/systems
Your Shamrock comes with a range of features including:
• A USB 2.0 interface for “plug-and-play” convenience and compatibility.
• An intuitive graphical user interface (dashboard) giving the user complete control over the spectrograph
functionality including wavelength control and calibration, grating selection, shutter control, motorised slit
control and lter selection.
• Software functionality is described in the integrated help function of Solis for Spectroscopy Software.
• Compatibility with many accessories including optical bres and inputs, motorised lter wheel, and camera
adaptors. For further information please refer to MyAndor.

Shamrock 500i & 750
11
Version 2.1 rev 13 Feb 2017
1.1
technical Support
If you have any questions regarding the use of this equipment, please contact the representative* from whom your
system was purchased, or:
Europe USA
Andor Technology Ltd.
7 Millennium Way
Springvale Business Park
Belfast
BT12 7AL
Northern Ireland
Tel. +44 (0) 28 9023 7126
Fax. +44 (0) 28 9031 0792
www.andor.com/contact_us/support_request
Andor Technology
425 Sullivan Avenue
Suite # 3
South Windsor
CT 06074
USA
Tel. +1 (860) 290-9211
Fax. +1 (860) 290-9566
www.andor.com/contact_us/support_request
Asia-Pacic China
Andor Technology (Japan)
IS Building
3-32-42 Higashi-Shinagawa
Shinagawa-ku,
Tokyo 140-0002
Japan
Tel: +81-3-6732-8968
Fax: +81-3-6732-8939
www.andor.com/contact_us/support_request
Andor Technology
Unit 1, Building A,
66 Zhufang Rd, Haidian Dist.
Beijing 100085
China
Tel: +86 (0)10 8271 9066
Fax. +86(0)10 8271 9055
www.andor.com/contact_us/support_requestt
* The latest contact details for your local representative can be found on our website.
Technical Notes and further product support information including video tutorials are available from the Andor Product
Support page.

Shamrock 500i & 750
12
Version 2.1 rev 13 Feb 2017
1.2
diSclaimer
THE INFORMATION CONTAINED HEREIN IS PROVIDED “AS IS” WITHOUT WARRANTY, CONDITION OR
REPRESENTATION OF ANY KIND, EITHER EXPRESS, IMPLIED, STATUTORY OR OTHERWISE, INCLUDING BUT NOT
LIMITED TO, ANY WARRANTY OF MERCHANTABILITY, NON-INFRINGEMENT OR FITNESS FOR A PARTICULAR
PURPOSE.
IN NO EVENT SHALL ANDOR BE LIABLE FOR ANY LOSS OR DAMAGE, WHETHER DIRECT, INDIRECT, SPECIAL,
INCIDENTAL, CONSEQUENTIAL OR OTHERWISE HOWSOEVER CAUSED WHETHER ARISING IN CONTRACT, TORT
OR OTHERWISE, ARISING OUT OF OR IN CONNECTION WITH THE USE OF THE INFORMATION PROVIDED HEREIN.
1.3
copyright and protective noticeS
The copyright in this document and the associated drawings are the property of Andor Technology Ltd. and all rights
are reserved. This document and the associated drawings are issued on condition that they are not copied, reprinted or
reproduced, nor their contents disclosed.
The publication of information in this documentation does not imply freedom from any patent or proprietary right of
Andor Technology Ltd. or any third party.
1.4
trademarkS and patent information
Andor and the Andor logo are trademarks of Andor Technology Ltd. Andor is an Oxford Instruments company. All other
marks are property of their owners.
Changes are periodically made to the product and these will be incorporated into new editions of the manual. New
releases of the manual are available through MyAndor. If you nd a mistake in this manual, or have a suggestion for
improvements, please inform your customer support representative.

Shamrock 500i & 750
13
Version 2.1 rev 13 Feb 2017
1.5 packing liSt
After having removed the spectrograph from its packaging, conrm that the following standard items are included:
Item Quantity
Shamrock
Spectrograph
Model 500i or 750
1
Description Quantity
Power Supply
Unit (PSU) 1
Power Cable
(3 m) 1
USB 2.0 cable
Type A to Type B
(3 m)
1
User Guide-
included on
Product Manuals
CD
1
* Software must be specied and ordered separately at time of ordering
Description Quantity
System
performance
booklet
1
Allen key set 1
Certicate of
Conformity
(included on
Product Manuals
CD)
-
Spectrograph
Interface software 1*
Filter insertion/
removal tool (if
a lter wheel is
installed)
1

Shamrock 500i & 750
14
Version 2.1 rev 13 Feb 2017
1.5.1
optional acceSSorieS
Depending on the Shamrock model and options purchased, the following optional accessories may also be included:
• Detector ange(s) for output port(s).
• Grating turret(s): The main grating turret may already be installed in the spectrograph.
• 1x CD containing either Solis software or SDK (if requested at time of order).
• Light-coupling interfaces: Accessories such as shutter, lter wheel, and motorised slits may already been
installed on the spectrograph prior to shipping if they have been specied.
• Detector(s).
• Purpose-built accessories as ordered through Andor’s Customer Special Request (CSR) programme.
If any of the items you ordered are missing or for further information on any of the accessories available for the
Shamrock series, please contact your local representative.
1.6
acceSSorieS for the Shamrock SerieS
A wide range of accessories are available to upgrade your Shamrock spectrograph to suit various applications. For
further information on any of the accessories, refer to MyAndor or contact your local representative.

Shamrock 500i & 750
15
Version 2.1 rev 13 Feb 2017
SECTION 2: PRODUCT OVERVIEW
The Shamrock imaging spectrographs are a series of research-grade, high performance, exible and rugged platforms
designed for use in demanding low-light applications, but are equally suited to routine measurements. Shamrock
spectrographs are compatible with a wide range of Andor detectors, as well as those from other manufacturers. This
section provides an overview of the signal and power connections of the spectrographs.
2.1
external featureS and model optionS
2.1.1
Shamrock 500i
The main external features of the Shamrock 500i are shown below. Features will vary depending on model type (see table).
Figure 1: Shamrock 500i
Model Side input
port
Direct input
port
Direct output
port
Side output
port
Motorised
ipper mirror
SR-500i-A Manual slit - Camera - -
SR-500i-B1 Manual slit - Camera Manual slit √
SR-500i-B2 Manual slit - Camera Camera √
SR-500i-C Manual slit Manual slit Camera - √
SR-500i-D1 Manual slit Manual slit Camera Manual slit √
SR-500i-D2 Manual slit Manual slit Camera Camera √
SR-500i-XX-SIL Protected silver coated optics options for models shown above (replace X with relevant model number)
Signal and power
Connections
Removable top panel for
access to interior e.g.
Grating turret
Direct Output Port
Shown with Detector
attached Side Input Port
Side Output Port
Direct Input Port

Shamrock 500i & 750
16
Version 2.1 rev 13 Feb 2017
2.1.2
Shamrock 750
The main external features of the Shamrock 750 are shown below. Features will vary depending on model type (see
table).
Figure 2: Shamrock 750
Model Side input port Direct input
port
Direct output
port
Side output
port
Motorised
ipper mirror
SR-750-A Manual slit -Camera --
SR-750-B1 Manual slit -Camera Manual slit √
SR-750-B2 Manual slit -Camera Camera √
SR-750-C Manual slit Manual slit Camera -√
SR-750-D1 Manual slit Manual slit Camera Manual slit √
SR-750-D2 Manual slit Manual slit Camera Camera √
SR-750-X-SIL Protected silver coated optics options for models shown above (replace Xwith relevant model number)
Signal and power
Connections
Removable top panel for
access to interior e.g.
Grating turret
Exit Port 1
Shown with Detector
attached
Exit Port 2
Side exit port
Direct Input Port
Side Input Port

Shamrock 500i & 750
17
Version 2.1 rev 13 Feb 2017
2.2
Signal and power connectionS (500iand 750 modelS)
2.2.1
front panel
The connections on the front panel of the Shamrock series are shown below:
Figure 3: Front Panel Connections
Shutter
The shutter in the 500i/750 may also be operated by an external TTL signal. This allows the shutter to be operated by,
and synchronised to, other laboratory equipment.
I/O
9 pin I/O connection.
Filter
15 pin connection to enable connection to optional lter accessories.
Filter (15 pin)I/O Connection
(9 pin)
External Shutter
Connection (BNC)

Shamrock 500i & 750
18
Version 2.1 rev 13 Feb 2017
2.2.2
rear panel
The connections on the rear panel of the Shamrock 500i and 750 are shown below:
Figure 4: Rear Panel Connections
Power Switch
Turn power off or on to the spectrograph.
Power Input (DC 24V)
Power input connection from the external power supply unit. The adjacent Power LED lights to indicate if the unit is
receiving power.
Fuse
The fuse (5A) is located in a fuse holder to the right of the power input socket.
USB Control
USB connection for connection of the Shamrock to the PC, allowing control of the spectrograph through the PC.
Remote
Not applicable.
Power
Switch
Power
Input
Fuse
Holder
USB

Shamrock 500i & 750
19
Version 2.1 rev 13 Feb 2017
2.3
power Supply
The Shamrock series are powered by external PSUs- details for each model are shown in the table below.
Parameter 500i 750
Mains Power Supply
Requirements 100 - 240 V AC, 47 - 63 Hz
PSU Output 24 VDC, 2.5 A
Power Connector
Type
KPPX 4-pin
Pins 1 & 2: + 24V
Pins 3 & 4: 0V
NOTES:
1. The electrical mains lead should be certied for use in your country and in applicable countries the plug must be
tted with a 240V 5A fuse.
2. If users use any other power supply, they do so at their own risk.
3. The Shamrock series of spectrographs is for use with Telecommunications, Computer, Industrial Controller, and
OA Systems and must only be used indoors.
4. Shamrock spectrographs require a Direct Current (DC) supply.

Shamrock 500i & 750
20
Version 2.1 rev 13 Feb 2017
SECTION 3: INSTALLATION
3.1
anoverview for Setting up your Shamrock Spectrograph
After you have removed the spectrograph from the box and checked all components against the packing list and they
are as ordered, please follow the instruction below to prepare your spectrograph for use. An overview of the main steps
is shown below:
1. Installing the software (Solis for Spectroscopy or SDK).
2. Connecting the power and USB cables to spectrograph and computer.
3. Attaching camera(s) to spectrograph output port(s) - if applicable.
4. Connecting the camera data and power interface, e.g. USB and power supply (some cameras may require a
PCI card. If this is applicable, refer to the relevant manual for instruction on how to install the PCI card into your
computer).
5. Turning the system on.
6. Installing the spectrograph and detector drivers.
Once these steps are completed, your spectrograph is ready for use.
This manual suits for next models
1
Table of contents
Other Andor Technology Laboratory Equipment manuals
Popular Laboratory Equipment manuals by other brands

Agilent Technologies
Agilent Technologies 7000 Triple Quadrupole GC/MS Maintenance manual

AFi
AFi SS101 Assembly instructions

Experiment X
Experiment X Igloo Instructions for use

Maestrogen
Maestrogen Ultra Slim LED Illuminator instruction manual

Showa Denko
Showa Denko Shodex IC SI-50 4E Operation manual

Neuation
Neuation iFUGE MlSK Product user manual