10
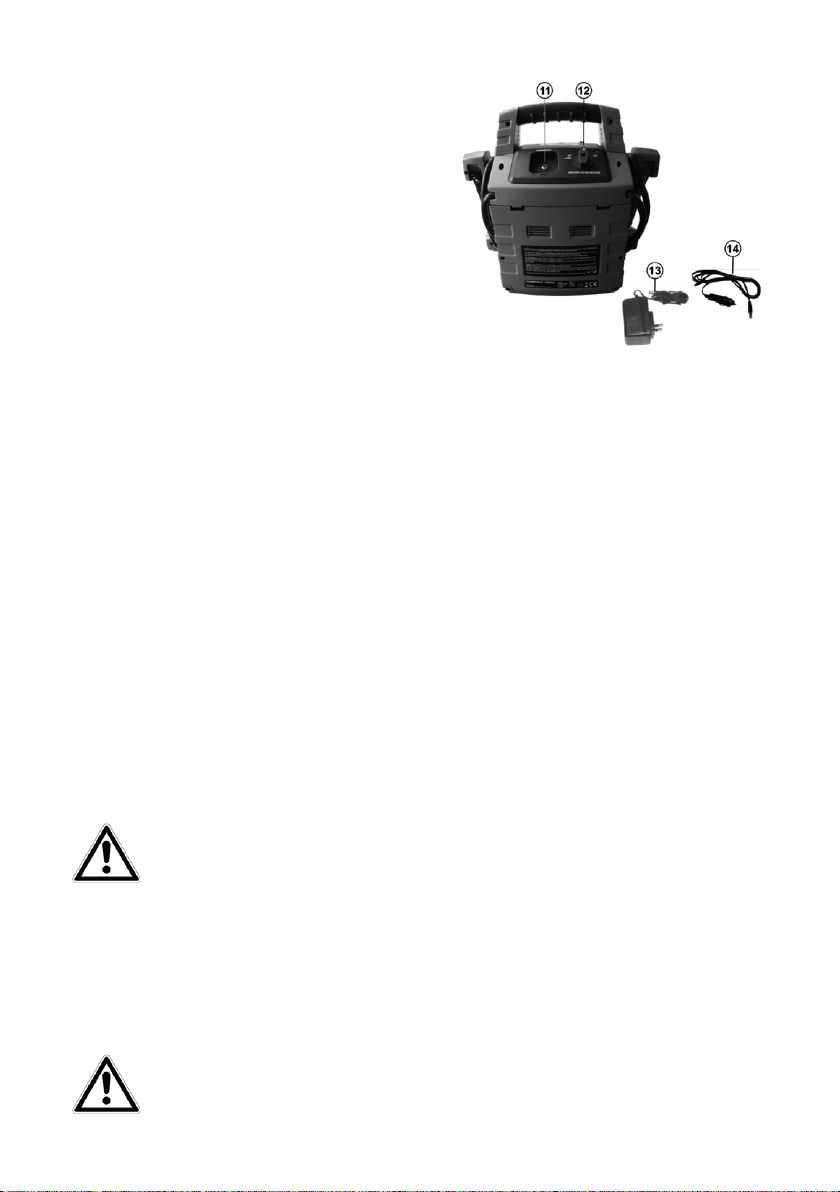
6.3 Charging with the 12 V cigarette lighter charging cable
Rotate the selection switch for the starter aid voltage, located on the rear of the device (Position 12 in the over-
view), to the„12V AND CHARGING“ setting. Plug the coaxial connector of the 12V charging cable (Position 14 in the
overview) into the charging socket of the power pack (Position 11 in the overview). Now connect the 12 V plug to
the 12V socket of your vehicle. The charge control lamp (Position 3 in the overview) now lights in red.
This method is only capable of charging the battery up to approximately 50% of its capacity. We recommend only
using this system in emergencies otherwise the lifetime of the battery and the starting power will be reduced.
CAUTION: Only charge the power pack when driving or when the motor is running, otherwise
there is a risk that the starter battery of your vehicle may be discharged.
6.4 Starting procedure
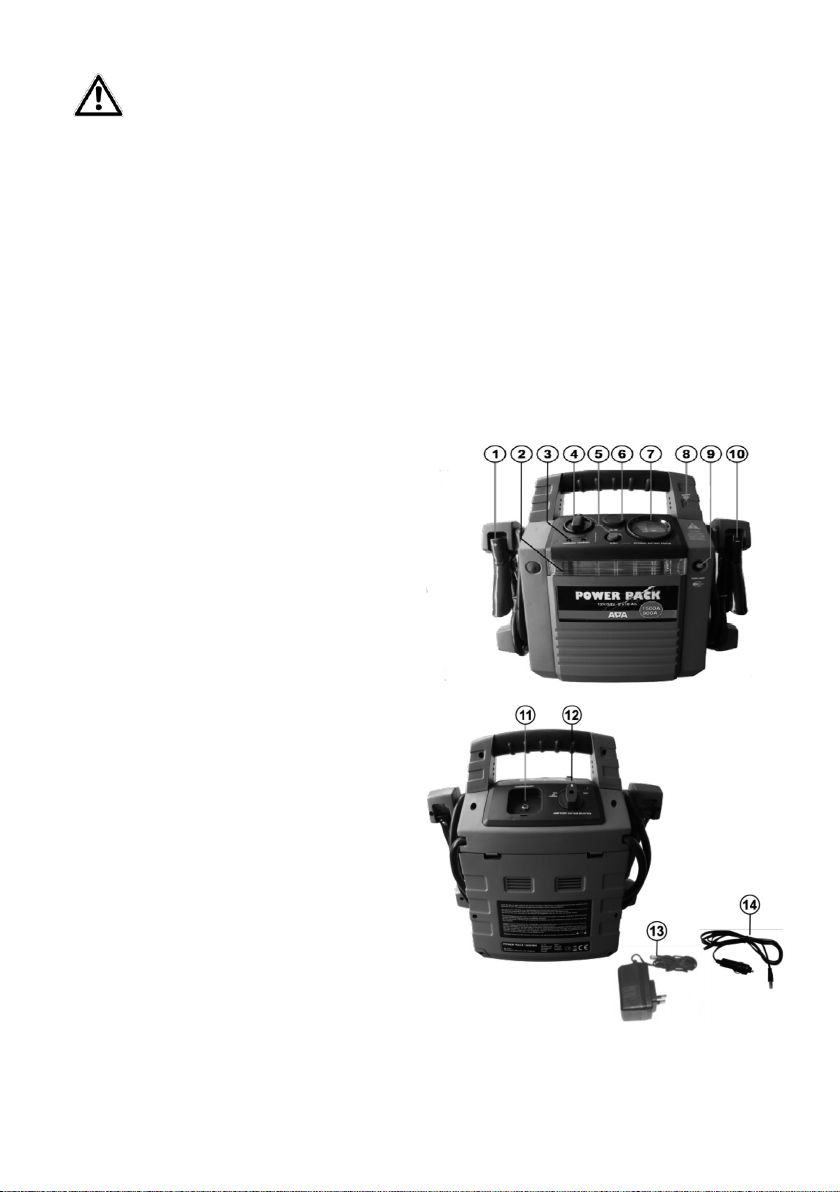
Make sure that the power pack is fully charged.To do this, press the control button for the charge status (Position 5
in the overview). If theVoltmeter shows a voltage of around 13V, the power pack is ready for use.
The starting aid function of the power pack is designed only for vehicles with a 12 V and
24 V on-board voltage. Before using, consult the operating instructions of your vehicle to
determine which voltage your vehicle uses, and whether an external starting aid may be
used. Modern vehicles have sensitive electronics and control devices that may be dama-
ged if the wrong procedure is used.
Selecting the starter aid voltage. Set the selection switch for the starter aid voltage, located on the rear of the
device (Position 12 in the overview), to the appropriate voltage for your vehicle, 12V or 24 V.
6.5 Connecting the power pack (vehicles with negative earth)
Switch o the ignition and all electrical consumers of the vehicle (radio, lights, rear window heating, seat heating
etc.). Apply the parking brake. Rotate the On/O switch for the starter aid (Position 4 in the overview) to the OFF
setting. First connect the red (+) pole callipers (Position 1 in the overview) to the plus pole of your vehicle battery.
The black (-) pole callipers (Position 10 in the overview) is connected, as far as possible from the battery, to the
motor block or chassis (not to a painted part). If the power pack has been connected correctly, the incorrect poling
protection display (Position 8 in the overview) lights in green. If this is not the case, the incorrect poling protection
display lights in red and an acoustic warning is issued. In this case, check the connections of the pole callipers and
correct. Now rotate the On/O switch for the starter aid to the ON position.
6.6 Attempting to start
Start the motor. Do not operate the starter for longer than 6 seconds.The battery of the power pack is not designed
for longer starting attempts. Pause for at least 5 minutes between two starting attempts. If the motor does not
start after a number of attempts, abort the process and investigate the cause of the defect.
6.7 Removing the power pack
Rotate the On/O switch for the starter aid and the selection switch for starter aid voltage to the OFF setting. First
disconnect the black (-) pole calliper, coil the cable and attach the pole calliper to the designated holder. Then
disconnect the red (+) pole calliper, coil the cable and attach the pole calliper to the designated holder. Always
maintain this sequence. Recharge the power pack.