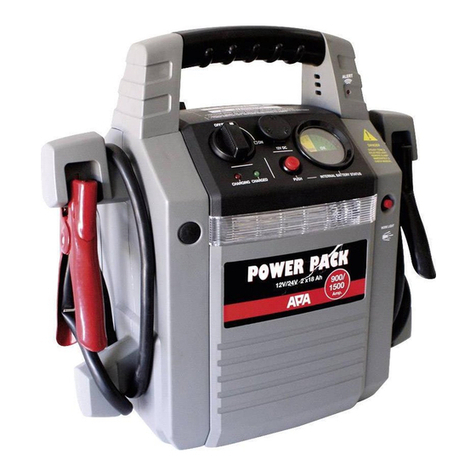
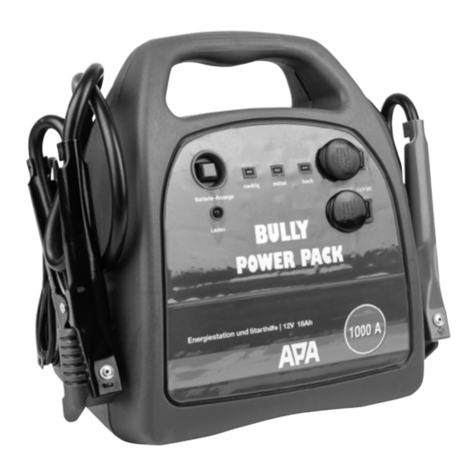
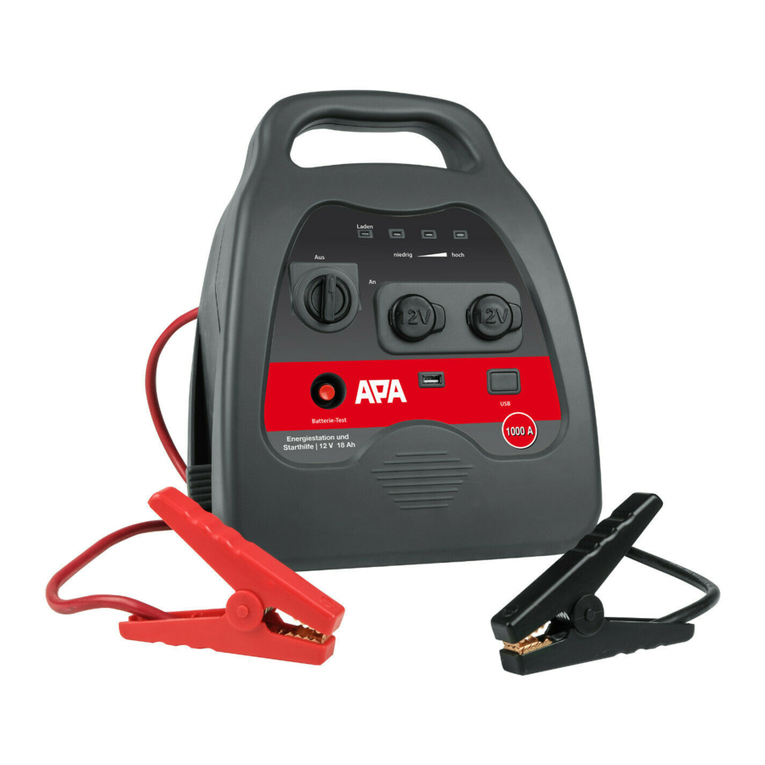
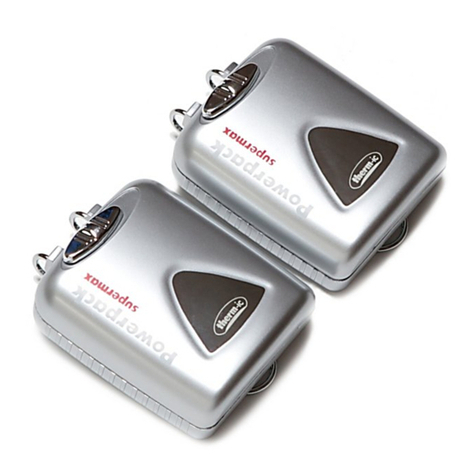
APA BULLY SMART User manual

1
Art.-Nr.: 16644
Powerpack „BULLY SMART“
Bedienungsanleitung . . . . . . . . . . . . . . . . . . . . . . . . 2
Art. No. 16644
Powerpack „BULLY SMART“
Operating instructions . . . . . . . . . . . . . . . . . . . . . . . . 5
Réf. art. 16644
Powerpack „BULLY SMART“
Manuel de l‘opérateur . . . . . . . . . . . . . . . . . . . . . . . . 8
Cod. art. 16644
Powerpack „BULLY SMART“
Istruzioni per l‘uso . . . . . . . . . . . . . . . . . . . . . . . . . 14
Art.nr. 16644
Powerpack „BULLY SMART“
Gebruiksaanwijzing . . . . . . . . . . . . . . . . . . . . . . . . 11

2
WARNUNG
LesenSiedieBedienungsanleitungvorInbetriebnahmesorgfältigdurchundbeachtenSiealleSicherheitshinweise!
Nichtbeachtung kann zu Personenschäden, Schäden am Gerät oder Ihrem Eigentum führen! Bewahren Sie die
Originalverpackung, den Kaufbeleg sowie diese Anleitung zum späteren Nachschlagen auf! Bei der Weitergabe
des Produkts geben Sie auch diese Anleitung weiter. Prüfen Sie vor Inbetriebnahme den Inhalt der Verpackung
auf Unversehrtheit und Vollständigkeit!
Powerpack„BULLY SMART“
1. BESTIMMUNGSGEMÄSSER GEBRAUCH
Das Powerpack„BULLY SMART“ dient als Starthilfe für Kraftfahrzeuge mit 12V Bordspannungsnetz. Zusätzlich kann es als 12V – Gleich-
spannungsquelle für Geräte mit Zigarettenanzünderstecker und als 5V USB Ladegerät genutzt werden.
Dieses Gerät ist nicht dafür bestimmt, durch Kinder und Personen mit eingeschränkten geistigen Fähigkeiten oder ohne erforderliches
Fachwissen benutzt zu werden. Kinder sind von dem Gerät fernzuhalten.
Das Gerät ist nicht für den gewerblichen Einsatz bestimmt.
Zum bestimmungsgemäßem Gebrauch gehört auch die Beachtung aller Informationen in dieser Anleitung, insbesondere die Beach-
tung der Sicherheitshinweise. Jede andere Verwendung gilt als nicht bestimmungsgemäß und kann zu Sach- oder Personenschäden
führen. Die EAL GmbH übernimmt keine Haftung für Schäden, die durch nicht bestimmungsgemäßen Gebrauch entstehen.
2. LIEFERUMFANG
1 x Powerpack 1 x Gebrauchsanleitung
3. SPEZIFIKATIONEN
Länge: 290 mm Spannung: 12V
Breite: 203 mm max. Startstromstärke: 1000 A
Höhe: 320 mm Batteriekapazität: 18 Ah, 216Wh
Polzangenkabel: ca. 0,55 m Batterietyp: AGM
Netzkabel: ca.1,30 m Gewicht: ca.8 kg
INHALT
1. BESTIMMUNGSGEMÄSSER GEBRAUCH ________________________________________________ 2
2. LIEFERUMFANG ______________________________________________________________ 2
3. SPEZIFIKATIONEN _____________________________________________________________ 2
4. SYMBOLERKLÄRUNG ___________________________________________________________ 2
5. SICHERHEITSHINWEISE__________________________________________________________ 3
6. BEDIENUNGSANLEITUNG_________________________________________________________ 3
6.1. ÜBERSICHT _________________________________________________________________ 3
6.2. LADEN DES POWERPACKS ________________________________________________________ 3
6.3. KONTROLLE DES LADEZUSTANDS____________________________________________________ 3
6.4. STARTHILFE_________________________________________________________________ 3
6.5. ANSCHLIESSEN DES POWERPACKS FAHRZEUGE MIT NEGATIVER MASSE ___________________________ 4
6.6. STARTVERSUCH ______________________________________________________________ 4
6.7. ENTFERNEN DES POWERPACKS _____________________________________________________ 4
6.8. EINSATZ ALS 12V SPANNUNGSQUELLE _______________________________________________ 4
7. WARTUNG UND PFLEGE _________________________________________________________ 4
8. HINWEISE ZUM UMWELTSCHUTZ____________________________________________________ 4
9. KONTAKTINFORMATIONEN________________________________________________________ 4
4. SYMBOLERKLÄRUNG
entspricht den
EG-Richtlinen
Gebrauchsanleitung lesen
gekennzeichnetes Elektropro-
dukt darf nicht in den Haus-
müll geworfen werden
Kennzeichnung nach § 17 BattG:
Der Endverbraucher ist gesetzlich
verpichtet, diese zwecks fachge-
rechter Entsorgung an den Händ-
ler oder einer entsprechenden
Rücknahmestelle zurückzugeben.
Pb

3
• Das Warndreieck kennzeichnet alle für die Sicherheit wichtigen Anweisungen. Befolgen Sie diese immer, anderenfalls
könnten Sie sich verletzen oder das Gerät könnte beschädigt werden.
• Kinder dürfen nicht mit dem Gerät spielen.
• Reinigung und Benutzerwartung dürfen nicht von Kindern ohne Beaufsichtigung durchgeführt werden.
• Lassen Sie dasVerpackungsmaterial nicht achtlos liegen. Dieses kann für Kinder zu einem gefährlichen Spielzeug werden!
• Benutzen Sie dieses Produkt nur für die dafür vorgeseheneVerwendung!
• Manipulieren oder zerlegen Sie das Gerät nicht!
• Verwenden Sie zu Ihrer eigenen Sicherheit ausschließlich Zubehör oder Ersatzteile, die in der Anleitung angegeben sind,
oder derenVerwendung durch den Hersteller empfohlen wird!
• Tragen Sie beim Umgang mit Bleiakkus stets eine Schutzbrille und Schutzkleidung.
• Bleiakkus enthalten aggressive ätzende Säuren.Vermeiden Sie Haut- und Augenkontakt mit Flüssigkeiten aus dem Blei-
akku! Zerlegen Sie Bleiakkus niemals! Waschen Sie betroene Hautpartien gründlich mit Wasser und Seife ab. Ist Säure
ins Auge gelangt, spülen Sie dieses sofort für mindestens 10 Minuten unter ießendem, klarem, lauwarmemWasser aus!
Suchen Sie danach sofort einen Arzt auf!
• Ist Säure auf Ihre Kleidung gelangt, so waschen Sie diese sofort mit viel Wasser und Seife aus!
• Tragen Sie niemals Ringe, Halsketten, Uhren o.ä. beim Umgang mit Akkus oder Ladegeräten. Durch das kurzschließen der
Akkukontakte bestehtVerbrennungs- und Explosionsgefahr!
• Das Powerpack ist nur vorgesehen für Starthilfe eines Kraftfahrzeugs mit eigenem Akku. Das Powerpack kann den Fahr-
zeugakku nicht ersetzten.
• Bewahren Sie die Polzangen immer in den dafür vorgesehenen Halterungen auf, damit es nicht zu Kurzschlüssen kommen
kann, wenn das Powerpack nicht gebraucht wird.
• Versuchen Sie niemals eine Starthilfe bei eingefrorener Batterie durchzuführen, es besteht Explosionsgefahr.
• Beachten Sie immer folgende Reihenfolge beim Entfernen des Powerpack von der Batterie, es besteht Explosionsgefahr:
Schalten Sie die Starthilfefunktion am Powerpack aus. Entfernen Sie zuerst die schwarze (-) Polzange, wickeln Sie das Ka-
belauf undbefestigenSie diePolzangean derdafür vorgesehenenHalterung.Danach entfernenSie die rote(+) Polzange,
wickeln Sie das Kabel auf und befestigen Sie die Polzange an der dafür vorgesehenen Halterung.
5. SICHERHEITSHINWEISE
6. BEDIENUNGSANLEITUNG
6.1 ÜBERSICHT
1 Polzange (+) rot
2 Drehschalter Starthilfe
3 Ladekontrolleuchten
4 Kontrolleuchten für Ladezustand
5 12V Steckdosen
6Tastschalter Ladezustand
7 USB-Ausgang mit Kontrolleuchte
8 EIN-AUS-Schalter USB-Ausgang
9 Staufach 230V Ladekabel
10 Polzange (-) schwarz
6.2 LADEN DES POWERPACKS
Laden Sie das Powerpack vor dem ersten Gebrauch 24 Stunden auf. Stellen Sie das Powerpack dazu an einem gut belüfteten Ort auf. Önen Sie
das Staufach für das 230 V Ladekabel (Position 9 in der Übersicht) und nehmen Sie das Ladekabel heraus. Stecken Sie den Stecker des Kabels
in eine 230 V Steckdose. Die Ladekontrolleuchte (Position 3 in der Übersicht) leuchtet jetzt rot. Ziehen Sie nach 24 Stunden den Netzstecker,
verstauen Sie das Kabel knickfrei im Staufach und schließen Sie den Deckel. Drücken Sie den Tastschalter (Position 6 in der Übersicht) für die
Ladezustandsanzeige (Position 4 in der Übersicht). Leuchtet die grüne Kontrolleuchte, ist das Powerpack einsatzbereit.
Um sicherzustellen daß das Powerpack immer seine volle Leistung bringen kann, laden Sie es nach jedem Gebrauch (Starthilfe) für mindestens
5 Stunden wieder auf.
6.3 KONTROLLE DES LADEZUSTANDS
Der Ladezustand des Akkus kann nicht während des Ladevorgangs kontrolliert werden. Ziehen Sie zuerst das 230V Ladekabel aus der Steckdose,
bevor Sie den Ladezustand überprüfen.
Um den Ladezustand des Powerpacks zu kontrollieren, drücken Sie bei gezogenem Netzstecker den Tastschalter für den Ladezustand (Position 6
in der Übersicht). Die Kontrolleuchten für den Ladezustand (Position 4 in der Übersicht) zeigen Ihnen den Zustand der Batterie an:
niedrig (rot): Die Batterie muss umgehend aufgeladen werden
mittel (grün): Das Nachladen der Batterie ist empfehlenswert
hoch (grün): Ein Auaden der Batterie ist nicht nötig
Die Starthilfefunktion des Powerpacks ist nur für Fahrzeuge mit 12 V Bordspannung geeignet. Lesen Sie vorher
in der Bedienungsanleitung Ihres Fahrzeugs, ob und wie eine externe Starthilfe benutzt werden darf. Moderne
Fahrzeuge verfügen über eine empndliche Elektronik und Steuergeräte, die bei falscher Vorgehensweise
beschädigt werden können.
6.4 STARTHILFE
Stellen Sie sicher, daß das Powerpack voll aufgeladen ist. Drücken Sie dazu die Kontrolltaste für den Ladezustand (Position 6 in der Übersicht).
Wenn die Ladekontrolleuchte (Position 4 in der Übersicht)„hoch“ grün leuchtet, ist das Powerpack einsatzbereit.

4
BERECHNUNGSBEISPIEL FÜR DIE BETRIEBSDAUER ALS GLEICHSPANNUNGSQUELLE
Batteriekapazität des Powerpacks: 18 Ah
Stromaufnahme des angeschlossenenVerbrauchers (Beispiel): 2,5 A
18 Ah
____ = 7,2 h
2,5 A
Betriebsdauer / Ergebnis: 7,2 h (Stunden)
(Diese Werte sind natürlich nur Richtwerte und beziehen sich auf eine vollständig geladene Batterie.)
6.8. EINSATZ ALS 12V SPANNUNGSQUELLE
Das Powerpack kann als 12 V-Gleichspannungsquelle für viele Geräte, die mit 12 V-Gleichstrom und einem Zigarettenanzünder-Stecker be-
trieben werden, genutzt werden. Stecken Sie den Zigarettenanzünder-Stecker des zu betreibenden Gerätes in eine der beiden 12 V-Steckdosen
(Position 5 in der Übersicht). Dabei sollte das zu betreibende Gerät nicht mehr als 10 A Strom benötigen. Die Ausgangsbuchsen des Power Pack
verfügen über eine automatische Sicherung, die das Gerät bei einem Strom, der höher als 10 A ist, abschaltet. Bei einer Abschaltung trennen
Sie sofort die Verbindung zwischen dem Powerpack und dem zu betreibendem Gerät. Nach ca. drei Minuten gibt die Sicherung die Ausgänge
wieder frei.
6.6. STARTVERSUCH
Schalten Sie mit dem Drehschalter (Position 2 in der Übersicht) die Starthilfefunktion ein. Starten Sie den Motor. Lassen Sie den Anlasser nicht
länger als 6 Sekunden arbeiten. Der Akku des Powerpacks ist für längere Startversuche nicht geeignet. Machen Sie zwischen zwei Startver-
suchen immer eine Pause von mindestens 5 min. Wenn der Motor nach mehreren Versuchen nicht anspringt, brechen Sie die Starthilfe ab und
suchen die Ursache für den Defekt.
9. KONTAKTINFORMATIONEN
EAL GmbH
Otto-Hausmann-Ring 107
42115Wuppertal, Deutschland
+49 (0)202 42 92 83 0
+49 (0) 202 42 92 83 – 160
www.eal-vertrieb.com
7.WARTUNG UND PFLEGE
Wartung: Lagern Sie das Powerpack bei Raumtemperatur. Die Batterie entlädt sich auch bei Nichtnutzung des Geräts. Wird das Power Pack
längere Zeit nicht benutzt, laden Sie es imWinter alle 6Wochen und im Sommer alle 4 Wochen für 5 Stunden auf.
Pege: Reinigen Sie das Gehäuse des Powerpacks mit einem weichen trockenen Tuch. Verwenden Sie keine scharfen oder lösemittelhaltigen
Reiniger. Lassen Sie niemals Flüssigkeiten in das Innere des Gehäuses gelangen.
8.HINWEISE ZUM UMWELTSCHUTZ
Entsorgen Sie Elektrogeräte nicht mit dem Hausmüll! Elektro- und Elektronik-Altgeräte müssen getrennt gesammelt und einer
umweltgerechten Wiederverwertung zugeführt werden. Über Entsorgungsmöglichkeiten für Elektro- und Elektronik-Altgeräte
informieren Sie sich bei Ihrer Gemeinde- oder Stadtverwaltung
Sie sind gesetzlich verpichtet, Batterien und Akkus zurückzugeben. Sie können diese nach Gebrauch uns, einer kommunalen
Sammelstelle oder auch einem Händler vor Ort zurückgeben. Schadstohaltige Batterien sind mit einem Zeichen, bestehend
aus einer durchgestrichenen Mülltonne und dem chemischen Symbol (Cd, Hg oder Pb) des für die Einstufung als schadsto-
haltig ausschlaggebenden Schwermetalls versehen.
Pb
6.5 ANSCHLIESSEN DES POWERPACKS FAHRZEUGE MIT NEGATIVER MASSE
Schalten Sie die Zündung und alle elektrischen Verbraucher (Radio, Beleuchtung, Heckscheibenheizung, Sitzheizung etc.) an Ihrem Fahrzeug
aus. Ziehen Sie die Parkbremse an.
Stellen Sie sicher, daß der Drehschalter für die Starthilfe (Position 2 in der Übersicht) des Powerpacks auf
Position„AUS“ steht.
Schließen Siezuerst die rote(+) Polzange(Position1 in der Übersicht) an den Pluspol IhrerFahrzeugbatteriean. Die schwarze(-) Polzange(Posi-
tion 10 in der Übersicht) schließen Sie, so weit wie möglich von der Batterie entfernt, am Motorblock oder am Chassis (keine lackiertenTeile) an.
6.7. ENTFERNEN DES POWERPACKS
Schalten Sie die Starthilfefunktion mit dem Drehschalter (Position 2 in der Übersicht) aus. Entfernen Sie zuerst die schwarze (-) Polzange,
wickeln Sie das Kabel auf und befestigen Sie die Polzange an der dafür vorgesehenen Halterung. Danach entfernen Sie die rote (+) Polzange,
wickeln Sie das Kabel auf und befestigen Sie die Polzange an der dafür vorgesehenen Halterung.
Halten Sie diese Reihenfolge immer ein.
Laden Sie das Powerpack wieder auf.
6.9. EINSATZ ALS USBLADEGERÄT
Sie können das Powerpack auch als USB-Ladegerät einsetzen. Dazu schließen Sie Ihr Smartphone, MP3-Player, etc. an den
USB-Ausgang (Position 7 in der Übersicht) an. Schalten sie den USB-Ausgang mit dem Schalter (Position 8 in der Übersicht) ein,
die Kontrolleuchte unterhalb des USB-Ausgangs leuchtet. Nach dem Ladevorgang schalten Sie den USB-Ausgang wieder aus und
entfernen Ihr Gerät vom USB-Ausgang.

5
Powerpack„BULLY SMART“
WARNING
Please read the operating instructions carefully prior to use and observe all safety instructions! Not
observing such may lead to personal injury, damage to the device or to your property! Store the original
packaging, the receipt and these instructions so that they may be consulted at a later date! When passing
on the product, also include these operating instructions. Check the contents of package for integrity and
completeness prior to use!
CONTENT
1. PROPER USE OFTHE PRODUCT _____________________________________________________ 5
2. SCOPE OF DELIVERY____________________________________________________________ 5
3. SPECIFICATIONS ______________________________________________________________ 5
4. EXPLANATION OF SYMBOLS _______________________________________________________ 5
5. SAFETY PRECAUTIONS __________________________________________________________ 6
6. MANUAL___________________________________________________________________ 6
6.1. OVERVIEW _________________________________________________________________ 6
6.2. CHARGINGTHE POWER PACK ______________________________________________________ 6
6.3. CHECKINGTHE CHARGING STATUS ___________________________________________________ 6
6.4. JUMPSTART ________________________________________________________________ 6
6.5. CONNECTINGTHE POWER PACK VEHICLESWITH NEGATIVE EARTH ______________________________ 7
6.6. ATTEMPTING TO START __________________________________________________________ 7
6.7. REMOVINGTHE POWER PACK ______________________________________________________ 7
6.8. USING AS A 12VVOLTAGE SUPPLY ___________________________________________________ 7
6.9. USING AS A USB CHARGER________________________________________________________ 7
7. MAINTENANCE AND CARE ________________________________________________________ 7
8. NOTES REGARDING ENVIRONMENTAL PROTECTION_________________________________________ 7
9. CONTACT INFORMATION _________________________________________________________ 7
1.PROPER USE OF THE PRODUCT
The„BULLY SMART“ power pack acts as a jump-start for vehicles with a 12 V on-board electrical system. It can also be used as a 12 V DC
voltage source for devices with cigarette lighter plugs and as a 5V USB charger.
This device is not designed to be used by children or persons with limited mental abilities or without experience and/or lack of required
specialist knowledge. Keep children away from the device.
The device is not designated for commercial use.
Utilisation according to the intended purpose also includes the observation of all information in these operating instructions, particu-
larly the observation of safety instructions. Any other utilisation is considered to be counter to the intended purpose and may result in
material damage or personal injuries. EAL GmbH assumes no liability for damage resulting from improper use.
2. SCOPE OF DELIVERY
1 x power pack 1 x set of operating instructions
3. SPECIFICATIONS
Length: 290 mm Voltage: 12V
Width: 203 mm maximum starting current 1000 A
Height: 320 mm Battery capacity: 18 Ah, 216Wh
Pole clamp cables: approx. 0.55 m Battery type: AGM
Power cable: approx. 1.30 m Weight: approx. 8 kg
4.EXPLANATION OF SYMBOLS
complies with
EC directives
Read instructions for use
the labelled electrical product
must not be thrown into the
household refuse
Marking according to § 17 BattG:
The end user is legally obliged to
returnthese tothe dealer oran ap-
propriate collection point for the
purpose of professional disposal.
Pb

6
• The warning triangle sign indicates all instructions which are important for safety. Always follow these, otherwise you
could injure yourself or damage the device.
• Children may not play with the device.
• Cleaning and user maintenance may not be carried out by children without supervision.
• Do not treat packaging material carelessly. It may become a dangerous plaything for a child!
• Only use this product for its designated purpose!
• Do not manipulate or disassemble the device!
• For your own safety, only use accessories and spare parts that are stated in these instructions or that are recommended
by the manufacturer!
• When using lead batteries, always wear protective goggles and clothing.
• Lead batteries contain aggressive, corrosive acids. Prevent skin and eyes from coming into contact with the lead battery
uids! Never dismantle the lead battery! Wash aected skin thoroughly using soap and water. If acid has entered an eye,
rinse immediately for at least 10 minutes under clean, running, lukewarm water!Then immediately consult a doctor!
• If your clothing has acid on, rinse immediately with plenty of soap and water!
• Never wear rings, necklaces, watches or similar when handling batteries or chargers. The short-circuiting of the battery
contacts brings a risk of burns and explosion!
• The power pack is only designed as a jump-start for a vehicle that has a battery of its own.The power pack cannot replace
the vehicle battery.
• Always store the pole callipers in the designated holders to ensure that the power pack is not at risk of short-circuiting
when not in use.
• Never attempt to jump-start a vehicle when the battery is frozen, this brings a risk of explosion.
• Always observe the following sequence when disconnecting the power pack from the battery.There is a risk of explosion:
Switch o the jump-start function on the Powerpack. First disconnect the black (-) pole calliper, coil the cable and attach
the pole calliper to the designated holder. Then disconnect the red (+) pole calliper, coil the cable and attach the pole
calliper to the designated holder.
5. SAFETY PRECAUTIONS
6. MANUAL
6.1 OVERVIEW
1 pole clamp (+) red
2 Rotary switch jump-start
3 Charging indicator light
4 Control lamps for charging status
5 12V sockets
6 push-button switch charging status
7 USB output with control lamp
8 ON/OFF switch USB connection
9 Storage compartment
230V charging cable
10 Pole clamp (-) black
6.3 CHECKING THE CHARGING STATUS
The charging status of the battery cannot be checked during charging. First disconnect the 230 V charging cable from the socket before checking
the charging status.
To check the charging status of the power pack, press the button for the charging status (Position 6 in the overview) while the mains is un-
plugged.The indicator lights for the charging status (Position 4 in the overview) indicate the status of the battery:
Low (red): The battery must be charged as soon as possible
Middle (yellow): Charging the battery is recommended
High (green): It is not necessary to charge the battery
6.2 CHARGING THE POWER PACK
Charge the power pack for 24 hours before you use it for the rst time. To do this, place the power pack in a well-ventilated location. Open the
storage compartment for the 230V charging cable (Position 9 in the overview) and remove the charging cable. Insert the plug of the cable into a
230V socket.The charge control lamp (Position 3 in the overview) now lights in red. After 24 hours, disconnect the mains plug, stow the cable in
the storage compartment without kinking and close the lid. Press the push button (Position 6 in the overview) for the charging status indicator
(position 4 in the overview). If the green control lamp lights up, the power pack is ready for use.
In order to ensure that the power pack is always able to provide its full power performance, charge for at least 5 hours after each use (to jump-
start a vehicle).
The jump-start function of the power pack is designed only for vehicles with a 12V on-board voltage. Before using,
consult the operating instructions of your vehicle to determine whether, and if so, how an external jump-start
is to be used. Modern vehicles have sensitive electronics and control devices that may be damaged if the wrong
procedure is used.
6.4 JUMPSTART
Make sure that the power pack is fully charged. To do this, press the control button for the charging status (Position 6 in the overview). If the
charging control lamp (Position 4 in the overview) lights up„high“ green, the power pack is ready for use.

7
CALCULATION EXAMPLE FOR OPERATING TIME AS A DIRECT CURRENT SOURCE:
Battery capacity of the power pack: 18 Ah
Power consumption of the connected consumer (example): 2.5 A
18 Ah
____ = 7,2 h
2,5 A
Operating time/result: 7.2 h (hours)
(These values are, of course, only guidelines and refer to a sound, completely charged battery.)
6.8. USING AS A 12 V VOLTAGE SUPPLY
The power pack can be used as a 12 V DC source for many devices that can be operated with 12 V DC and a cigarette lighter plug. Plug the
cigarette lighter plug of the device you wish to operated into one of the 12V sockets (Position 5 in the overview).The device you wish to operate
should not require a current greater than 10 A. The outlets of the power pack have an automatic fuse that will deactivate the device at a current
greater than 10 A. If the unit is switched o, immediately disconnect the power pack from the device to be operated. After approximately three
minutes, the fuse will free the outlets for use.
6.6. ATTEMPTING TO START
Use the rotary switch (Position 2 in the overview) to switch on the jump-start function. Start the motor. Do not operate the starter for longer
than 6 seconds.The battery of the power pack is not designed for longer starting attempts. Pause for at least 5 minutes between two starting
attempts. If the motor does not start after a number of attempts, abort the jump-start process and investigate the cause of the defect.
6.5 CONNECTING THE POWER PACK VEHICLES WITH NEGATIVE EARTH
Switch o the ignition and all electrical consumers of the vehicle (radio, lights, rear window heating, seat heating etc.). Apply the parking brake.
Make sure that the power pack‘s jump-start rotary switch (Position 2 in the overview) is set to„OFF“.
First connect the red (+) pole callipers (Position 1 in the overview) to the plus pole of your vehicle battery.The black (-) pole callipers (Position
10 in the overview) is connected, as far as possible from the battery, to the motor block or chassis (not to a painted part).
6.7. REMOVING THE POWER PACK
Switch o the jump-start function with the rotary switch (Position 2 in the overview). First disconnect the black (-) pole calliper, coil the cable
and attach the pole calliper to the designated holder.Then disconnect the red (+) pole calliper, coil the cable and attach the pole calliper to the
designated holder.
Always maintain this sequence.
Recharge the power pack.
7.MAINTENANCE AND CARE
Maintenance: Store the power pack at room temperature. The battery will discharge even when not in use. If the power pack is not used for a
longer period of time, it must be recharged for ve hours. In winter, recharge every six weeks, in summer recharge every four weeks.
Care: Clean the housing of the power pack with a soft, dry cloth. Do not use any aggressive cleaning agents or solvent-based cleaners. Never
allow liquids to ingress into the housing.
6.9. USING AS A USB CHARGER
You can also use the power pack as a USB charger.Todo this, connect your smartphone, MP3 player, etc. to the USB output (Position
7 in the overview). Switch on the USB output with the switch (Position 8 in the overview), the control light below the USB output
lights up. After charging, turn o the USB output and remove your device from the USB output.
9. CONTACT INFORMATION
EAL GmbH
Otto-Hausmann-Ring 107
42115Wuppertal, Germany
+49 (0)202 42 92 83 0
+49 (0) 202 42 92 83 – 160
www.eal-vertrieb.com
8.NOTES REGARDING ENVIRONMENTAL PROTECTION
Do not dispose of electrical devices with the household waste! Electrical and electronic scrap must be collected separately and
disposed of in an environmentally responsible manner for recycling. Please contact your community or city administration re-
garding disposal options for electrical and electronic scrap.
You are legally obliged to return batteries and battery packs. After use, they may be returned to us, handed in to a communal
collection point, or to a local dealer. Batteries containing hazardous materials are labelled with a symbol consisting of a crossed
out trash can and the chemical symbol (Cd, Hg or Pb) which designates the heavy metal responsible for the hazard.
Pb

8
AVERTISSEMENT
Lisez attentivement la notice d‘utilisation avant la mise en service et respectez toutes les consignes de sécurité !
Tout non-respect de ces consignes peut entraîner des dommages corporels, endommager l‘appareil ou vos biens
! Conservez l‘emballage d‘origine, le justicatif d‘achat et la présente notice pour vous y référer ultérieurement
! Si vous revendez ou remettez l‘appareil à des tiers, veuillez également leur remettre cette notice d‘utilisation.
Avant la mise en service, veuillez contrôler le contenu de l‘emballage quant à l‘absence de dommages et vérier
si toutes les pièces sont présentes !
Powerpack„BULLY SMART“
1. UTILISATION CONFORME
Le bloc d‘alimentation « BULLY SMART » sert d‘aide au démarrage pour les véhicules automobiles avec une tension de bord de 12 V. En outre, il
peut être utilisé en tant que source de tension continue de 12V pour appareils avec prise allume-cigare et comme chargeur USB 5V.
Cet appareil n‘est pas destiné à être utilisé par des enfants ou des personnes aux capacités mentales limitées ou ne disposant pas de l‘expérience
ou des connaissances nécessaires. Les enfants doivent rester à distance de cet appareil.
L‘appareil n‘est pas destiné à une utilisation commerciale.
L‘utilisation conforme aux prescriptions implique également le respect de toutes les informations contenues dans cette notice d‘utilisation, en
particulier le respect des consignes de sécurité. Toute autre utilisation est considérée comme non conforme et peut entraîner des dommages
matériels ou corporels. La société EAL GmbH décline toute responsabilité en cas de dommages découlant d’une utilisation non conforme à
l’emploi prévu.
2. MATÉRIEL FOURNI
1 x Bloc d’alimentation 1 x Mode d’emploi
3. SPÉCIFICATIONS
Longueur : 290 mm Tension : 12 V
Largeur : 203 mm Courant de démarrage max. 1000 A
Hauteur : 320 mm Capacité de la batterie : 18 Ah, 216Wh
Câble à pinces crocodiles : env. 0,55 m Type de batterie : AGM
Câble d’alimentation : env.1,30 m Poids : env.8 kg
SOMMAIRE
1. UTILISATION CONFORME_______________________________________________________ 8
2. MATÉRIEL FOURNI___________________________________________________________8
3. SPÉCIFICATIONS ____________________________________________________________8
4. EXPLICATION DES SYMBOLES ____________________________________________________ 8
5. CONSIGNES DE SÉCURITÉ ______________________________________________________ 9
6. NOTICE D‘UTILISATION ________________________________________________________9
6.1. VUE D‘ENSEMBLE ___________________________________________________________9
6.2. CHARGEMENT DU BLOC D’ALIMENTATION_____________________________________________9
6.3. VÉRIFICATION DE L‘ÉTAT DE CHARGE________________________________________________9
6.4. AIDE AU DÉMARRAGE_________________________________________________________ 9
6.5. RACCORDEMENT DU BLOC D‘ALIMENTATION VÉHICULES AVEC MASSE NÉGATIVE ____________________10
6.6. TENTATIVE DE DÉMARRAGE _____________________________________________________10
6.7. RETRAIT DU BLOC D‘ALIMENTATION ________________________________________________10
6.8. UTILISATION ENTANT QUE SOURCE DETENSION DE 12V____________________________________10
6.9. UTILISATION ENTANT QUE CHARGEUR USB____________________________________________10
7. MAINTENANCE ET NETTOYAGE ___________________________________________________10
8. REMARQUES RELATIVES À LA PROTECTION DE L‘ENVIRONNEMENT _____________________________10
9. CONTACT ________________________________________________________________10
4.EXPLICATION DES SYMBOLES
correspond aux di-
rectives de la CE
Lire la notice d‘utilisation
Un produit électrique marqué
ne doit pas être jeté avec les
ordures ménagères.
Marquage selon § 17 de la loi sur
les piles et les accumulateurs
(loi allemande BattG) : Le client
nal est tenu, par la loi, de remet-
tre le produit au revendeur ou à
un service de recyclage approprié
pour qu‘il soit éliminé de manière
conforme.
Pb

9
• Le triangle d’avertissement indique toutes les instructions relatives à la sécurité. Respectez-les à tout moment car vous
risqueriez sinon de vous blesser ou l‘appareil risquerait d‘être endommagé.
• Les enfants ne doivent pas jouer avec l‘appareil.
• Les tâches de nettoyage et d‘entretien à eectuer chez soi ne doivent pas être exécutées par des enfants qui ne sont pas
sous surveillance.
• Ne laissez pas traîner le matériel d‘emballage. Il pourrait devenir un jouet dangereux pour les enfants !
• N‘utilisez cet appareil qu‘aux ns pour lesquelles il a été prévu !
• Ne pas manipuler ni démonter l‘appareil !
• Pour votre propre sécurité, utilisez exclusivement les accessoires ou pièces de rechange qui sont indiqué(e)s dans la notice
d‘utilisation ou dont l‘utilisation est conseillée par le fabricant !
• Portez toujours des lunettes de protection et des vêtements de protection lorsque vous manipulez des batteries au plomb.
• Les batteries au plomb contiennent des acides corrosifs. Évitez tout contact de la peau et des yeux avec les liquides de la
batterie au plomb ! Ne démontez jamais les batteries au plomb ! Lavez soigneusement les zones de la peau concernées à
l‘eau et au savon. Si de l‘acide est entré au contact d‘un œil, rincez-le immédiatement pendant au moins 10 minutes sous
de l‘eau claire courante tiède ! Consultez ensuite immédiatement un médecin !
• Si vos vêtements sont entrés en contact avec de l‘acide, lavez-les immédiatement avec beaucoup d‘eau et du savon !
• Ne portez jamais de bagues, de colliers, de montres, etc. lorsque vous manipulez des batteries ou des chargeurs. Un
court-circuit au niveau des contacts de la batterie entraîne un risque de brûlure et d‘explosion !
• Le bloc d‘alimentation est uniquement prévu comme aide au démarrage pour les véhicules automobiles équipés de leur
propre batterie. Le bloc d‘alimentation ne remplace pas la batterie du véhicule.
• Conservez toujours les pinces crocodiles dans les supports prévus à cet eet an d‘éviter les courts-circuits lorsque le bloc
d‘alimentation n‘est pas utilisé.
• N‘essayez jamais d‘eectuer une aide au démarrage lorsque la batterie est gelée, car cela présente un risque d‘explosion.
• Observez l‘ordre opérationnel indiqué lorsque vous débranchez le bloc d’alimentation de la batterie, car il y a sinon un
risque d‘explosion : Éteignez la fonction d‘aide au démarrage du bloc d’alimentation. Retirez d‘abord la pince crocodile
noire (-), enroulez le câble et xez la pince crocodile au support prévu à cet eet. Retirez ensuite la pince crocodile rouge
(+), enroulez le câble et xez la pince crocodile au support prévu à cet eet.
5. CONSIGNES DE SÉCURITÉ
6. NOTICE D‘UTILISATION
6.1 VUE D‘ENSEMBLE
1 Pince crocodile (+) rouge
2 Commutateur rotatif d’aide au démarrage
3 Lampes de contrôle de charge
4 Lampes de contrôle pour l’état de charge
5 Prises 12V
6 Bouton-poussoir de l’état de charge
7 Sortie USB avec lampe de contrôle
8 Interrupteur MARCHE/ARRÊT
pour sortie USB
9 Compartiment pour câble de chargement de 230V
10 Pince crocodile (-) noire
6.2 CHARGEMENT DU BLOC D’ALIMENTATION
Chargez le bloc d’alimentation pendant 24 heures avant la première utilisation. Pour cela, placez le bloc d’alimentation dans un endroit bien
aéré. Ouvrez le compartiment réservé au câble de chargement 230 V (position 9 dans la vue d’ensemble) et retirez le câble de chargement.
Branchez la che du câble dans une prise de courant de 230 V. Le voyant lumineux de contrôle de charge (position 3 dans la vue d‘ensemble)
s‘allume maintenant en rouge. Débranchez la che après 24 heures, rangez le câble dans le compartiment sans le plier et fermez le couvercle.
Appuyez sur le bouton-poussoir (position 6 dans la vue d‘ensemble) pour l’indicateur d‘état de charge (position 4 dans la vue d‘ensemble). La
lampe de contrôle verte s‘allume pour indiquer que le bloc d’alimentation est opérationnel.
An d’être sûr que le bloc d’alimentation fonctionne toujours à plein régime, chargez-le après chaque utilisation (aide au démarrage) pendant
au moins 5 heures.
6.3 VÉRIFICATION DE L‘ÉTAT DE CHARGE
L’état de charge de la batterie ne peut pas être contrôlé pendant le processus de charge. Débranchez d’abord le câble de chargement 230V de la
prise de courant avant de vérier l’état de charge.
Pour contrôler l’état de charge du bloc d’alimentation, appuyez sur le bouton-poussoir de l’état de charge (position 6 dans la vue d’ensemble)
lorsque la che est débranchée Les lampes de contrôle de l’état de charge (position 4 dans la vue d’ensemble) vous indiquent le niveau de la
batterie :
Faible (rouge) : La batterie doit être rechargée immédiatement
Moyen (jaune) : Il est recommandé de recharger la batterie
Élevé (vert) : Il n’est pas nécessaire de recharger la batterie
6.4 AIDE AU DÉMARRAGE
Assurez-vous que le bloc d‘alimentation est totalement rechargé. Pour ce faire, pressez la touche de contrôle de l‘état de charge (position 6 dans
la vue d‘ensemble). Lorsque la lampe de contrôle de charge (position 4 dans la vue d‘ensemble) de niveau « Élevé » s’allume en vert, cela signie
que le bloc d‘alimentation est prêt à être utilisé.
La fonction d‘aide au démarrage du bloc d‘alimentation est uniquement compatible avec les véhicules qui ont une
tension de bord de 12 V. Lisez préalablement le mode d‘emploi de votre véhicule pour savoir si et comment vous
pouvez utiliser une aide au démarrage externe. Les véhicules modernes sont équipés de systèmes électroniques et
d‘unités de commande sensibles qui peuvent être endommagés en cas de mauvaise manipulation.
10
6.6. TENTATIVE DE DÉMARRAGE
Allumez la fonction d’aide au démarrage à l’aide de l’interrupteur rotatif (position 2 dans la vue d’ensemble). Démarrez le moteur. Ne laissez
pas fonctionner le démarreur pendant plus de 6 secondes. La batterie du bloc d‘alimentation ne convient pas aux tentatives de démarrage de
longue durée. Faites toujours une pause d‘au moins 5 minutes entre deux tentatives de démarrage. Si le moteur ne démarre pas après plusieurs
tentatives, arrêtez l‘aide au démarrage et recherchez les causes du défaut.
6.5 RACCORDEMENT DU BLOC D‘ALIMENTATION VÉHICULES AVEC MASSE NÉGATIVE :
Éteignez le contact et tous les consommateurs électriques (radio, lumière, chauage de la lunette arrière, sièges chauants, etc.) de votre
véhicule. Serrez le frein à main.
Assurez-vous que l’interrupteur rotatif pour l’aide au démarrage (position 2 dans la vue d’ensemble) du bloc
d’alimentation se trouve en position « ARRÊT ».
Raccordez d‘abord la pince crocodile rouge (+) (position 1 dans la vue d‘ensemble) au pôle positif de la batterie de votre véhicule. Raccordez la
pince crocodile noire (-) (position 10 dans la vue d‘ensemble) au bloc moteur ou au châssis (pas sur des pièces peintes) le plus loin possible de
la batterie.
6.7. RETRAIT DU BLOC D‘ALIMENTATION
Éteignez la fonction d’aide au démarrage à l’aide de l’interrupteur rotatif (position 2 dans la vue d’ensemble). Retirez d‘abord la pince crocodile
noire (-), enroulez le câble et xez la pince crocodile au support prévu à cet eet. Retirez ensuite la pince crocodile rouge (+), enroulez le câble
et xez la pince crocodile au support prévu à cet eet.
Respectez impérativement cet ordre opérationnel.
Rechargez le bloc d‘alimentation.
EXEMPLE DE CALCUL POUR LA DURÉE DE FONCTIONNEMENT EN TANT QUE SOURCE DETENSION CONTINUE :
Capacité de la batterie du bloc d’alimentation : 18 Ah
Consommation électrique du consommateur connecté (exemple) : 2.5 A
18 Ah
____ = 7,2 h
2,5 A
Durée de fonctionnement / résultat : 7.2 h (heures)
(Bien entendu, ces valeurs n’ont qu‘une valeur indicative et se réfèrent à une batterie intacte et complètement chargée.)
6.8. UTILISATION EN TANT QUE SOURCE DE TENSION DE 12 V
Le bloc d’alimentation peut être utilisé en tant que source de tension continue de 12 V pour un grand nombre d‘appareils fonctionnant avec
un courant continu de 12V et disposant d‘une prise allume-cigare. Branchez la che d‘allume-cigare de l‘appareil souhaité dans l‘une des deux
prises de 12V (position 5 dans la vue d‘ensemble). L‘appareil à utiliser ne doit pas consommer un courant supérieur à 10 A. Les prises de sortie du
bloc d’alimentation sont équipées d’un fusible automatique qui arrête l‘appareil lorsque le courant dépasse 10 A. En cas de coupure, débranchez
immédiatement le câble entre le bloc d’alimentation et l‘appareil raccordé. Au bout d’environ trois minutes environ, le fusible déverrouillera les
sorties.
7.MAINTENANCE ET NETTOYAGE
Maintenance : Entreposez le bloc d‘alimentation à température ambiante. La batterie se décharge également lorsque l’appareil n’est pas utili-
sé. Si le bloc d’alimentation n‘est pas utilisé durant une période prolongée, rechargez-le toutes les 6 semaines en hiver et toutes les 4 semaines
en été et ce, pendant 5 heures.
Nettoyage : Nettoyez le boîtier du bloc d‘alimentation à l‘aide d‘un chion doux et sec. N‘utilisez pas de nettoyants agressifs ou contenant des
solvants. Ne laissez jamais de liquides entrer à l‘intérieur du boîtier.
6.9. UTILISATION EN TANT QUE CHARGEUR USB
Vous pouvez également utiliser le bloc d’alimentation comme chargeur USB. Pour cela, branchez votre smartphone, lecteur MP3, etc. à la sortie
USB (position 7 dans la vue d’ensemble). Allumez la sortie USB à l’aide de l’interrupteur (position 8 dans la vue d’ensemble) ; la lampe de
contrôle située sous la sortie USB s’allume. Après le processus de chargement, éteignez à nouveau la sortie USB et débranchez votre appareil
de la sortie USB.
9. CONTACT
EAL GmbH
Otto-Hausmann-Ring 107
42115Wuppertal, Allemagne
+49 (0)202 42 92 83 0
+49 (0) 202 42 92 83 – 160
www.eal-vertrieb.com
8.REMARQUES RELATIVES À LA PROTECTION DE L‘ENVIRONNEMENT
Ne jetez pas les appareils électriques dans les ordures ménagères ! Les appareils électriques et électroniques usagés doivent être
collectés séparément et être remis aux services de recyclage. Renseignez-vous quant aux possibilités d‘élimination d‘appareils
électriques et électroniques usagés auprès de votre administration communale ou municipale.
Vous êtes légalement tenu de restituer les piles et les batteries.Vous pouvez nous remettre les piles et les batteries usagées ou
les déposer dans un point de collecte communal ou chez un revendeur dans votre région. Les batteries contenant des substances
dangereuses sont pourvues d‘un symbole représentant une poubelle barrée et le symbole chimique (Cd, Hg ou Pb) du métal
lourd déterminant la classication comme produit contenant des substances dangereuses.
Pb

11
Powerpack„BULLY SMART“
WAARSCHUWING
Lees de gebruiksaanwijzing voor de ingebruikname aandachtig door en neem alle veiligheidsvoorschriften
in acht! Het niet-naleven hiervan kan letsel, schade aan het product of aan uw eigendom veroorzaken!
Bewaar de oorspronkelijke verpakking, het aankoopbewijs en de gebruiksaanwijzing om deze later te
kunnen raadplegen! Geef bij het doorgeven van het product ook deze gebruiksaanwijzing door. Controleer
de inhoud van de verpakking voor de ingebruikname eerst op beschadigingen en volledigheid!
1. REGLEMENTAIR GEBRUIK
Het powerpack‚BULLY SMART‘ dient als starthulp bij motorvoertuigen met een 12V-boordspanningsnet. Daarnaast kan het worden
gebruikt als 12V-gelijkspanningsbron voor apparaten met een aanstekerstekker en als 5V-USB-oplader.
Dit product mag niet worden gebruikt door kinderen, mensen met een verstandelijke beperking of mensen die niet over de vereiste
ervaring/kennis beschikken. Houd kinderen uit de buurt van het apparaat.
Het apparaat is niet bedoeld voor bedrijfsmatig gebruik.
Tot het reglementair gebruik behoort ook het in acht nemen van alle informatie in deze gebruiksaanwijzing, in het bijzonder van de
veiligheidsvoorschriften. Elk ander gebruik geldt als niet-reglementair en kan materiële schade of persoonlijk letsel veroorzaken. EAL
GmbH is niet aansprakelijk voor schade als gevolg van niet-reglementair gebruik.
2. LEVERINGSOMVANG
1 x powerpack 1 x gebruiksaanwijzing
3. SPECIFICATIES
Lengte: 290 mm Spanning: 12V
Breedte: 203 mm Max. startstroom: 1000 A
Hoogte: 320 mm Accucapaciteit: 18 Ah, 216Wh
Pooltangkabels: ca. 0,55 m Accutype: AGM
Netsnoer: ca.1,30 m Gewicht: ca.8 kg
INHOUD
1. REGLEMENTAIR GEBRUIK _______________________________________________________ 11
2. LEVERINGSOMVANG __________________________________________________________ 11
3. SPECIFICATIES ______________________________________________________________ 11
4. UITLEGVAN DE SYMBOLEN ______________________________________________________ 11
5. VEILIGHEIDSINSTRUCTIES _______________________________________________________ 12
6. GEBRUIKSAANWIJZING_________________________________________________________ 12
6.1. OVERZICHT ________________________________________________________________ 12
6.2. HET POWERPACK OPLADEN ______________________________________________________ 12
6.3. DE LAADSTATUS CONTROLEREN____________________________________________________ 12
6.4. STARTHULP ________________________________________________________________ 12
6.5. AANSLUITEN VAN HET POWERPACK VOERTUIGEN MET NEGATIEVE MASSA ________________________ 13
6.6. STARTEN__________________________________________________________________ 13
6.7. VERWIJDERENVAN HET POWERPACK ________________________________________________ 13
6.8. GEBRUIK ALS 12VSPANNINGSBRON ________________________________________________ 13
6.9. GEBRUIK ALS USBOPLADER _____________________________________________________ 13
7. ONDERHOUD ENVERZORGING ____________________________________________________ 13
8. INFORMATIE M.B.T. HET MILIEU____________________________________________________ 13
9. CONTACTINFORMATIE__________________________________________________________ 13
4.UITLEG VAN DE SYMBOLEN
Conform de
EG-richtlijnen
Gebruiksaanwijzing lezen
Een dienovereenkom-stig ge-
markeerd elektrisch product
mag niet als afval via het hu-
isvuil worden afgevoerd
Aanduiding volgens § 17 BattG:
de eindgebruiker is wettelijk
verplicht om dit product terug te
brengen naar de leverancier of een
verzamelpunt waar een correcte
verwijdering kan plaatsvinden.
Pb

12
• De waarschuwingsdriehoek geldt als aanduiding van alle voor de veiligheid belangrijke aanwijzingen. Neem deze te allen
tijde in acht, anders kan lichamelijk letsel of schade aan het apparaat het gevolg zijn.
• Kinderen mogen niet met het apparaat spelen.
• Kinderen mogen het apparaat niet zonder toezicht reinigen of het gebruikersonderhoud uitvoeren.
• Laat het verpakkingsmateriaal niet achteloos rondslingeren. Dit kan voor kinderen gevaarlijk speelgoed worden!
• Gebruik dit product uitsluitend voor het beoogde doel!
• Verander of demonteer het product niet!
• Gebruik voor uw eigen veiligheid uitsluitend toebehoren of reserveonderdelen die in de gebruiksaanwijzing staan ver-
meld of waarvan het gebruik door de fabrikant wordt aanbevolen!
• Draag bij het hanteren van loodaccu‘s altijd een veiligheidsbril en beschermende kleding.
• Loodaccu‘s bevatten agressieve bijtende zuren.Vermijd huid- en oogcontact met vloeistoen uit de loodaccu! Demonteer
nooit een loodaccu!Was de getroen huid grondig met water en zeep. Als u zuur in de ogen krijgt, spoel het dan onmid-
dellijk uit gedurende minimaal 10 minuten onder stromend, helder, lauw water! Consulteer daarna onmiddellijk een arts!
• Als er zuur op uw kleding komt, spoelt u het uit met veel water en zeep!
• Draag nooit ringen, kettingen, horloges etc. als u met accu‘s en opladers werkt. Kortsluiting van de accupolen kan brand-
wonden of een explosie veroorzaken!
• Het powerpack is uitsluitend bedoeld als starthulp voor motorvoertuigen met een eigen accu. Het powerpack kan niet als
vervanging dienen voor de accu van het voertuig.
• Bewaar de accuklemmen altijd in de daarvoor bestemde houders, zodat deze geen kortsluiting kunnen veroorzaken als
het powerpack niet wordt gebruikt.
• Probeer nooit een jumpstart uit te voeren bij een bevroren accu, deze kan daarbij ontploen.
• Houd altijd de volgende volgorde aan bij het verwijderen van het powerpack van de accu, anders kan een explosie plaats-
vinden: Schakel de starthulpfunctie op het powerpack uit. Verwijder eerst de zwarte (-) pooltang, rol de kabel op en
plaats de pooltang in de daarvoor bestemde houder. Verwijder daarna de rode (+) pooltang, rol de kabel op en plaats de
pooltang in de daarvoor bestemde houder.
5. VEILIGHEIDSINSTRUCTIES
6. GEBRUIKSAANWIJZING
6.1 OVERZICHT
1 Pooltang (+) rood
2 Draaischakelaar starthulp
3 Laadindicator
4 Controlelampjes voor laadstatus
5 12V-stopcontact
6 Drukknopschakelaar laadstatus
7 USB-uitgang met controlelampje
8 Aan-/uitschakelaar USB-uitgang
9 Opbergvak 230V-laadkabel
10 Pooltang (-) zwart
6.2 HET POWERPACK OPLADEN
Laad het powerpack 24 uur op voor het eerste gebruik. Plaats het powerpack daarbij op een goed geventileerde plaats. Open het opbergvak voor
de 230V-laadkabel (positie 9 in het overzicht) en haal de laadkabel eruit. Steek de stekker van de kabel in een 230 V-stopcontact. De laadindica-
tor (positie 3 in het overzicht) brandt nu rood.Verwijder de stekker na 24 uur, berg de kabel op in het opbergvak zonder deze te knikken en sluit
het deksel. Druk op de drukknopschakelaar (positie 6 in het overzicht) voor de laadstatusindicator (positie 4 in het overzicht).
Als het groene controlelampje brandt, is het powerpack klaar voor gebruik.
Om ervoor te zorgen dat het powerpack altijd zijn volledige vermogen kan leveren, moet u het na elk gebruik (jump-start) minstens 5 uur
opladen.
6.3 DE LAADSTATUS CONTROLEREN
De laadstatus van de accu kan niet worden gecontroleerd tijdens het opladen. Trek eerst de 230V-laadkabel uit het stopcontact voordat u de
laadstatus controleert.
Om de laadstatus van het powerpack te controleren, drukt u, met de stekker uit het stopcontact getrokken, op de drukknop voor de laadstatus
(positie 6 in het overzicht). De laadstatuslampjes (positie 4 in het overzicht) geven de status van de accu aan:
leeg (rood): de accu moet onmiddellijk worden opgeladen
gemiddeld (geel): het wordt aanbevolen om de accu op te laden
vol (groen): u hoeft de accu niet op te laden
De starthulpfunctie van het powerpack is uitsluitend geschikt voor voertuigen met 12 V-boordspanning. Lees eerst
in de gebruiksaanwijzing van uw voertuig of en hoe u een externe starthulp kunt gebruiken. Moderne voertuigen
beschikken over gevoelige elektronica en regelapparatuur die bij verkeerd gebruik beschadigd kunnen raken.
6.4 STARTHULP
Zorg dat het powerpack volledig is opgeladen. Druk daartoe op de controletoets voor de laadstatus (positie 6 in het overzicht). Als de laadstatu-
sindicator (positie 4 in het overzicht) groen brandt, is het powerpack klaar voor gebruik.

13
6.6. STARTEN
Schakel de starthulpfunctie in met de draaischakelaar (positie 2 in het overzicht). Start de motor. Laat de starter niet langer dan 6 seconden
werken. De accu van het powerpack is niet geschikt voor langdurige startpogingen. Houd tussen twee startpogingen altijd een pauze van
minimaal 5 minuten aan. Als de motor na meerdere pogingen niet aanslaat, stop dan de starthulpprocedure en probeer de oorzaak van het
probleem te achterhalen.
6.5 AANSLUITEN VAN HET POWERPACK VOERTUIGEN MET NEGATIEVE MASSA:
Schakel de ontsteking en alle elektrische verbruikers (radio, verlichting, achterruitverwarming, stoelverwarming etc.) van uw voertuig uit. Trek
de handrem aan.
Zorg ervoor dat de draaischakelaar voor starthulp (positie 2 in het overzicht) van het powerpack in de stand„UIT“
staat.
Sluit eerst de rode (+) pooltang (positie 1 in het overzicht) aan op de pluspool van de voertuigaccu. De zwarte (-) pooltang (positie 10 in het
overzicht) sluit u, zo ver mogelijk verwijderd van de accu, aan op het motorblok of het chassis (niet op gelakte delen).
6.7. VERWIJDEREN VAN HET POWERPACK:
Schakel de starthulpfunctie uit met de draaischakelaar (positie 2 in het overzicht). Verwijder eerst de zwarte (-) pooltang, rol de kabel op
en plaats de pooltang in de daarvoor bestemde houder. Verwijder daarna de rode (+) pooltang, rol de kabel op en plaats de pooltang in de
daarvoor bestemde houder.
Houd altijd deze volgorde aan.
Laad het powerpack weer op.
REKENVOORBEELD VOOR DE BEDRIJFSTIJD ALS GELIJKSPANNINGSBRON:
Accucapaciteit van het powerpack: 18 Ah
Stroomverbruik van de aangesloten verbruikers (bijvoorbeeld): 2.5 A
18 Ah
____ = 7,2 h
2,5 A
Bedrijfstijd/resultaat: 7.2 h (hours)
(Deze waarden zijn natuurlijk slechts richtwaarden en hebben betrekking op een intacte, volledig opgeladen accu.)
6.8. GEBRUIK ALS 12VSPANNINGSBRON
Het powerpack kan worden gebruikt als 12 V-voeding voor diverse apparaten die op 12 V-gelijkspanning werken en voorzien zijn van een 12
V-autostekker. Steek de aanstekerstekker van het te voeden apparaat in een van beide 12 V-stopcontacten (positie 5 in het overzicht). Het
aangesloten apparaat mag niet meer stroom verbruiken dan 10 A. De uitgangsbussen van het powerpack beschikken over een automatische
zekering die het apparaat uitschakelt als het stroomverbruik hoger is dan 10 A. Koppel na een uitschakeling onmiddellijk het aangesloten
apparaat los van het powerpack. Na ongeveer drie minuten geeft de zekering de uitgang weer vrij.
7. ONDERHOUD EN VERZORGING
Onderhoud: Bewaar het powerpack bij kamertemperatuur. De accu ontlaadt ook wanneer het apparaat niet in gebruik is. Als het power-
pack gedurende lange tijd niet wordt gebruikt, moet het in de winter om de zes weken en in de zomer om de vier weken 5 uur lang worden
opgeladen.
Verzorging: Reinig de behuizing van het powerpack met een zachte, droge doek. Gebruik geen agressieve reinigings- of oplosmiddelen. Laat
nooit vloeistoen in de behuizing terechtkomen.
6.9. GEBRUIK ALS USBOPLADER
U kunt het powerpack ook als USB-oplader gebruiken. Sluit hiertoe uw smartphone, MP3-speler enz. aan op de USB-uitgang
(positie 7 in het overzicht). Schakel de USB-uitgang in met de schakelaar (positie 8 in het overzicht). Het controlelampje onder de
USB-uitgang gaat branden. Schakel na het opladen de USB-uitgang uit en verwijder uw apparaat van de USB-uitgang.
9. CONTACTINFORMATIE
EAL GmbH
Otto-Hausmann-Ring 107
42115Wuppertal, Duitsland
+49 (0)202 42 92 83 0
+49 (0) 202 42 92 83 – 160
www.eal-vertrieb.com
8. INFORMATIE M.B.T. HET MILIEU
Gooi elektrische apparaten niet weg bij het huisvuil! Elektrische en elektronische apparaten moeten gescheiden worden inge-
zameld en op milieuvriendelijke wijze worden gerecycled. Meer informatie over het afvoeren van elektrische en elektronische
apparaten kunt u opvragen bij de gemeente of het stadsbestuur.
U bent wettelijk verplicht om afgedankte batterijen en accu‘s te retourneren. U kunt deze inleveren bij ons, bij een openbare/
gemeentelijkeinzamelplaats of bij een plaatselijkeleverancier.Verontreinigdeaccu‘szijn voorzienvan een markeringbestaande
uit een doorgestreepte vuilnisbak en het chemische symbool (Cd, Hg en Pb) van de classicatie als verontreinigende stof van
overwegend zwaar metaal.
Pb

14
Powerpack„BULLY SMART“
INDICE
1. USO CONFORME _____________________________________________________________ 14
2. VOLUME DI CONSEGNA _________________________________________________________ 14
3. SPECIFICHE ________________________________________________________________ 14
4. SPIEGAZIONE DEI SIMBOLI_______________________________________________________ 14
5. AVVERTENZE DI SICUREZZA ______________________________________________________ 15
6. ISTRUZIONI PER L‘USO _________________________________________________________ 15
6.1. SCHEMA __________________________________________________________________ 15
6.2. RICARICA DEL POWERPACK ______________________________________________________ 15
6.3. CONTROLLO DEL LIVELLO DI CARICA _________________________________________________ 15
6.4. AVVIAMENTO DI EMERGENZA _____________________________________________________ 15
6.5. COLLEGAMENTO DEL POWERPACK VEICOLI CON MASSA NEGATIVA _____________________________ 16
6.6. PROVA DI AVVIAMENTO ________________________________________________________ 16
6.7. RIMOZIONE DEL POWERPACK _____________________________________________________ 16
6.8. UTILIZZO COME FONTE DI ALIMENTAZIONE DA 12 V________________________________________ 16
6.9. UTILIZZO COME CARICABATTERIE USB________________________________________________ 16
7. MANUTENZIONE E PULIZIA ______________________________________________________ 16
8. AVVERTENZE SULLA TUTELA AMBIENTALE _____________________________________________ 16
9. CONTACTINFORMATIE__________________________________________________________ 16
AVVERTENZA
Leggere attentamente le istruzioni per l‘uso prima della messa in funzione e osservare tutte le avvertenze
sulla sicurezza! La mancata osservanza di queste istruzioni può provocare lesioni personali, danni al
prodottooallavostraproprietà!Conservarel‘imballo originale,la ricevutadi acquistoeil presentemanuale
per poterlo eventualmente consultare in seguito! Quando si consegna il prodotto a terzi, consegnare anche
il presente manuale. Prima della messa in funzione vericare l‘integrità e la completezza del contenuto
della confezione!
1. USO CONFORME
Il Powerpack„BULLY SMART“ serve per l‘avviamento d‘emergenza di autoveicoli con una tensione di bordo pari a 12V. Si può utilizzare
anche come fonte di corrente continua di 12V per dispositivi dotati di connettore per accendisigari e come caricabatteria USB da 5V.
Questo dispositivo non è destinato all‘uso da parte di bambini e persone con capacità mentali limitate o che non siano in possesso delle
necessarie conoscenze.Tenere il dispositivo lontano dalla portata dei bambini.
Questo dispositivo non è destinato all‘impiego industriale.
Dell’uso appropriato fa parte anche il rispetto di tutte le informazioni fornite in queste istruzioni, soprattutto delle avvertenze sulla
sicurezza. Qualsiasi impiego diverso da quello previsto è da considerarsi inappropriato e può provocare danni a persone o cose. EAL
GmbH non si assume nessuna responsabilità per eventuali danni provocati dall‘uso improprio.
2.VOLUME DI CONSEGNA
1 x Powerpack 1 x manuale d’uso
3. SPECIFICHE
Lunghezza: 290 mm Tensione: 12V
Larghezza: 203 mm Corrente d‘avviamento max.: 1000 A
Altezza: 320 mm Capacità della batteria: 18 Ah, 216Wh
Cavo morsetti: ca. 0,55 m Tipo di batteria: AGM
Cavo di alimentazione: ca.1,30 m Peso: ca. 8 kg
4. SPIEGAZIONE DEI SIMBOLI
Conforme alle
direttive CE
Leggere le istruzioni d‘uso
I dispositivi elettrici contras-
segnati con questo simbolo
non vanno gettati nei riuti
domestici.
Contrassegno sec. § 17 BattG: il
consumatore nale è obbligato
per legge a smaltirla correttamen-
te restituendola al rivenditore o a
un apposito centro di raccolta.
Pb

15
• Il triangolo di segnalazione identica tutte le istruzioni importanti per la sicurezza. Rispettare sempre queste istruzioni,
per evitare il pericolo di lesioni personali o danni al dispositivo.
• I bambini non devono giocare con l‘apparecchio.
• Non adare pulizia e manutenzione ai bambini se non sorvegliati.
• Non lasciare il materiale d‘imballaggio in giro incustodito. Potrebbe infatti diventare un pericoloso giocattolo per i bam-
bini!
• Utilizzare questo prodotto solo per lo scopo previsto!
• Non manomettere né smontare il prodotto!
• Per la propria sicurezza, utilizzare solo gli accessori e i pezzi di ricambio indicati nelle istruzioni o consigliati dal produttore!
• Mentre si utilizzano le batterie al piombo, indossare sempre occhiali di protezione e indumenti protettivi.
• Le batterie al piombo contengono acidi corrosivi aggressivi. Evitare il contatto della pelle e degli occhi con i liquidi che
fuoriescono dalla batteria al piombo! Non smontare mai le batterie al piombo! Lavare a fondo con acqua e sapone le parti
della pelle interessate. Se l‘acido penetra in un occhio, sciacquare l‘occhio immediatamente per almeno 10 minuti sotto
acqua corrente pulita e tiepida! Dopodiché contattare subito un medico!
• Se l‘acido viene a contatto con i propri indumenti, lavarli immediatamente e abbondantemente con acqua e sapone!
• Mentre si utilizzano batterie o caricabatterie, non indossare mai anelli, collane, orologi o sim. Il cortocircuito dei contatti
della batteria comporta il rischio di ustioni ed esplosione!
• Il Powerpack è concepito esclusivamente per l‘avviamento d‘emergenza di un autoveicolo dotato di batteria propria. Il
Powerpack non può sostituire la batteria del veicolo.
• Conservare i morsetti sempre negli appositi supporti per evitare cortocircuiti quando il Powerpack non viene utilizzato.
• Non eettuare mai l‘avviamento d‘emergenza con una batteria congelata, altrimenti si rischia di provocare esplosioni.
• Per evitare il rischio di esplosioni, accertarsi di rimuovere il Powerpack dalla batteria procedendo sempre nel seguente
ordine: Disattivare la funzione dell’avviamento d’emergenza sul Powerpack. Rimuovere prima il morsetto nero (-), avvol-
gere il cavo e ssare il morsetto all‘apposito supporto. Quindi rimuovere il morsetto rosso (+), avvolgere il cavo e ssare
il morsetto al relativo supporto.
5.AVVERTENZE DI SICUREZZA
6.ISTRUZIONI PER L‘USO
6.1 SCHEMA
1 Morsetto rosso (+)
2 Selettore rotante avviamento emergenza
3 Spie di controllo ricarica
4 Spie di controllo livello di carica
5 Prese 12V
6 Pulsante livello di carica
7 Uscita USB con spia di controllo
8 Interruttore ON/OFF uscita USB
9 Scomparto per cavo di ricarica 230V
10 Morsetto nero (-)
6.3 CONTROLLO DEL LIVELLO DI CARICA
È impossibile controllare il livello di carica della batteria durante il processo di ricarica. Prima di controllare il livello di carica, scollegare il cavo
di ricarica di 230 V dalla presa.
Per controllare il livello di carica del Powerpack, premere il pulsante per il livello di carica (pos. 6 dello schema) con la spina scollegata. Le spie di
controllo per l‘indicazione del livello di carica (pos. 4 dello schema) mostrano lo stato di carica della batteria:
basso (rosso): la batteria deve essere ricaricata immediatamente
medio (giallo): si consiglia di ricaricare la batteria
elevato (verde): non è necessario ricaricare la batteria
6.2 RICARICA DEL POWERPACK
Caricare il Powerpack prima del primo utilizzo per 24 ore. A tale scopo, collocare il Powerpack in un ambiente ben ventilato. Aprire lo scomparto
per il cavo di ricarica da 230V (pos. 9 dello schema) ed estrarre il cavo. Inserire la spina del cavo in una presa da 230 V. La spia di controllo ricarica
(pos. 3 dello schema) si accende ora in rosso. Dopo 24 ore, estrarre il connettore di rete, sistemare il cavo nel relativo scomparto senza piegarlo e
chiudere il coperchio. Premere il pulsante (pos. 6 dello schema) per l’indicatore del livello di carica (pos. 4 dello schema). Il Powerpack è pronto
all’uso quando si accende la spia di controllo verde.
Per garantire sempre le massime prestazioni del Powerpack, ricaricarlo per almeno 5 ore dopo ogni utilizzo (avviamento d‘emergenza).
La funzione di avviamento di emergenza del Powerpack è adatta soltanto per veicoli con tensione di bordo
di 12 V. Leggere prima nel manuale d‘uso del proprio veicolo se e come si può utilizzare un dispositivo esterno
per l‘avviamento d‘emergenza. I veicoli moderni sono equipaggiati con un‘elettronica e centraline sensibili che
possono subire danni per via di un utilizzo errato.
6.4 AVVIAMENTO DI EMERGENZA
Assicurarsi che il Powerpack sia completamente ricaricato. A tale scopo, premere il pulsante di controllo del livello di carica (pos. 6 dello schema).
Se la spia di controllo ricarica (pos. 4 dello schema)„elevato“ si accende in verde, il Powerpack è pronto all‘uso.

16
6.6. PROVA DI AVVIAMENTO
Attivare la funzione dell’avviamento di emergenza con il selettore rotante (pos. 2 dello schema). Avviare il motore. Lasciare funzionare l‘avviato-
re per non più di 6 secondi. La batteria del Powerpack non è adatta per prove di avviamento prolungate.Tra due tentativi, fare sempre una pausa
di almeno 5 min. Se il motore non si mette in moto dopo diversi tentativi, interrompere l‘avviamento d‘emergenza e ricercare la causa del difetto.
6.5 COLLEGAMENTO DEL POWERPACK VEICOLI CON MASSA NEGATIVA
Sul proprio veicolo, disinserire l‘accensione e tutte le utenze elettriche (radio, luci, riscaldamento lunotto, riscaldamento sedili ecc.). Tirare il
freno di stazionamento.
Assicurarsi che il selettore rotante dell’avviamento d’emergenza (pos. 2 dello schema) del Powerpack si trovi in
posizione“OFF”.
Collegare prima il morsetto rosso (+) (pos. 1 dello schema) al polo positivo della batteria del veicolo. Collegare il morsetto nero (-) (pos. 10 dello
schema) al blocco motore o allo chassis (parti senza vernice) quanto più lontano possibile dalla batteria.
6.7. RIMOZIONE DEL POWERPACK
Disattivare la funzione dell’avviamento di emergenza con il selettore rotante (pos. 2 dello schema). Rimuovere prima il morsetto nero (-), avvol-
gere il cavo e ssare il morsetto all‘apposito supporto. Quindi rimuovere il morsetto rosso (+), avvolgere il cavo e ssare il morsetto al relativo
supporto.
Rispettare sempre questa sequenza.
Ricaricare nuovamente il Powerpack.
ESEMPIODI CALCOLODELLA DURATADI FUNZIONAMENTO COMEFONTE DI ALIMENTAZIONEA CORRENTE CONTINUA:
Capacità batteria del Powerpack: 18 Ah
Corrente assorbita dall‘utenza collegata (esempio): 2.5 A
18 Ah
____ = 7,2 h
2,5 A
Durata di funzionamento / risultato: 7.2 h (hours)
(Naturalmente, questi valori sono puramente orientativi e si riferiscono a una batteria intatta e completamente carica.)
6.8. UTILIZZO COME FONTE DI ALIMENTAZIONE DA 12 V
Il Powerpack si può utilizzare anche come fonte di alimentazione a corrente continua di 12 V per svariati dispositivi che vengono impiegati con
una corrente continua di 12V e un connettore per accendisigari. Inserire il connettore per accendisigari del dispositivo da alimentare in una delle
due prese di 12V (pos. 5 dello schema). Il dispositivo da alimentare non deve ricevere una corrente superiore a 10 A. Le prese di uscita del Power-
pack dispongono di una protezione automatica che fa spegnere il dispositivo nel caso in cui la corrente superi i 10 A. In caso di spegnimento,
scollegare immediatamente il Powerpack dal dispositivo alimentato. Dopo ca. tre minuti, la protezione riattiva le uscite.
7.MANUTENZIONE E PULIZIA
Manutenzione: Conservare il Powerpack a temperatura ambiente. La batteria si scarica anche quando l‘apparecchio non viene utilizzato. Qua-
lora il Powerpack non venga utilizzato per un prolungato periodo di tempo, ricaricarlo per 5 ore ogni 6 settimane in inverno e ogni 4 settimane
in estate.
Pulizia: Pulire l‘alloggiamento del Powerpack con un panno morbido e asciutto. Non utilizzare detergenti aggressivi o solventi. Evitare sempre
che eventuali liquidi penetrino all‘interno dell‘alloggiamento.
6.9. UTILIZZO COME CARICABATTERIE USB
Il Powerpack può essere utilizzato anche come caricabatteria USB. A tale scopo, collegare lo smartphone, il lettore MP3 ecc. all’uscita USB (pos.
7 dello schema). Attivare l’uscita USB con l’apposito interruttore (pos. 8 dello schema); così facendo, si accende la spia di controllo che si trova
sotto l’uscita USB. Successivamente al processo di ricarica, disattivare l’uscita USB e rimuovere il dispositivo da essa.
9. CONTACTINFORMATIE
EAL GmbH
Otto-Hausmann-Ring 107
42115Wuppertal, Germania
+49 (0)202 42 92 83 0
+49 (0) 202 42 92 83 – 160
www.eal-vertrieb.com
8.AVVERTENZE SULLA TUTELA AMBIENTALE
Non smaltire gli apparecchi elettrici insieme ai riuti domestici! I dispositivi elettrici ed elettronici devono essere separati e
destinati al riciclaggio. Per le possibilità di smaltimento delle apparecchiature elettriche ed elettroniche, informarsi presso il
proprio comune.
Siete obbligati per legge a restituire tutte le batterie sia ricaricabili che non. Dopo l‘uso, potete restituirle a noi, presso un centro
di raccolta comunale o anche a un rivenditore del posto. Le batterie contenenti sostanze nocive sono contrassegnate con il
simbolo del bidone della spazzatura barrato da una croce e con il simbolo chimico (Cd, Hg o Pb) del metallo pesante in base al
quale la batteria viene classicata come contenente sostanze nocive.
Pb
This manual suits for next models
1
Table of contents
Languages:
Other APA Power Pack manuals