Aquatic AQ-DM-5BT DIGITAL MEDIA LOCKER User manual

OWNERS MANUAL
PLEASE READ THIS INSTRUCTION MANUAL BEFORE
INSTALLATION AND OPERATION
AQ-DM-5BT - DIGITAL MEDIA LOCKER™
for Bluetooth & MP3 devices

1 Getting Started.........................................................................................................................
1.1 Contents.............................................................................................................................
1.2 Connections........................................................................................................................
1.3 12-pin Harness Connection................................................................................................
1.4 Mounting the Digital Media Locker.....................................................................................
1.5 Power On............................................................................................................................
1.6 Remote Control Battery Install...........................................................................................
1.7 Remote Control Synchronizing.............................................................................................
2 Location of Controls..................................................................................................................
2.1 Digital Media Locker Controls............................................................................................
2.2 Door Keypad Controls.........................................................................................................
2.3 Remote Control..................................................................................................................
3 Listening to Devices..................................................................................................................
3.1 Listening via Bluetooth......................................................................................................
3.1.1 Pair with Bluetooth Device..........................................................................................
3.1.2 Listening via Bluetooth Device....................................................................................
3.2 Listening via Auxiliary Input..............................................................................................
4 Specifications & Dimensions....................................................................................................
4.1 Specifications.....................................................................................................................
4.2 Dimensions........................................................................................................................
5 Warranty Information...............................................................................................................
3
3
3
4
4
5
5
5
6
6
6
7
8
8
8
8
8
9
9
9
10
Table of Contents Digital Media Locker AQ-DM-5BT
2www.aquaticav.com

• AQ-DM-5BT Digital Media Locker™
• 2-Way RF Waterproof Remote Control, AQ-RFDM-5BT (optional)
• RF Remote Control Receiver (optional)
• Jack Cable (3.5mm Male to 3.5mm Male)
• Wiring Harness (AQ-UNH-2)
• Six (6) Stainless Steel Mounting Screws
• One (1) CR-2450 Remote Control Battery (optional)
• Mounting Template
• Owner’s Manual
1.1 Contents
1. 12-pin Watertight Harness
The 12-pin harness supplies power and ground connections to the Digital Media Locker and
four (4) speaker channel output connections from the Digital Media Locker.
Do not cut or modify the 12-pin harness on the Locker side or warranty will be void.
2. Auxiliary Outputs
Allows external amplifiers to be connected to power additional speakers.
3. 8-pin DIN Remote Receiver Cable
Connects to the RF Remote Control Receiver (optional).
4. RF Remote Control Receiver (optional)
Allows RF Remote Control signal to be received.
1.2 Connections
112-pin Watertight Harness
2RCA Auxiliary Output
38-pin DIN Remote Receiver Cable
4RF Remote Receiver
(optional)
Getting Started Digital Media Locker AQ-DM-5BT
3www.aquaticav.com

194mm
118mm
95mm66.8mm
The AQ-DM-5BT includes the universal harness AQ-UNH-2 in order to connect the dock to power
and speakers.
All open wire connections should be soldered and protected against water and dust for best long
term performance.
1.3 12-pin Harness Connection
1. A mounting template is included. Aquatic
AV recommends using the ‘measure twice, cut
once’ method!
2. Once the mounting hole is complete, make
sure the outside surface is clean and clear of
debris. The Digital Media Locker has an exter-
nal water/dust proof gasket, but this requires
a clean and flat surface for best performance.
3. The Digital Media Locker has six (6) front
screws. Drive the screws using a screw driver.
During final mounting apply equal pressure to
all points for the best water/dust outer seal per-
formance. Make sure screws are snug and do
not over tighten.
4. Review all outside surfaces of the Digital
Media Locker to ensure proper water/dust seal.
This is important for long term environmental
protection performance for your digital media
device.
1.4 Mounting the Digital Media Locker
No lower than a 2 Ohm load should be used
or damage may occur to the Digital Media
Locker.
Make sure the polarity of speakers are
connected correctly.
Power Antenna (7)
Fuse Box
No lower than a 2 Ohm load should be used
or damage may occur to the Digital Media
Locker.
Make sure the polarity of speakers are
connected correctly.
(White/strip)
Getting Started Digital Media Locker AQ-DM-5BT
4www.aquaticav.com

Remove the RF wireless remote control from the Digital Media Locker box. Unscrew the water-
proof cap on the back of the remote control. Place the CR-2450 battery in the RF remote control
and replace the water/dust proof cap.
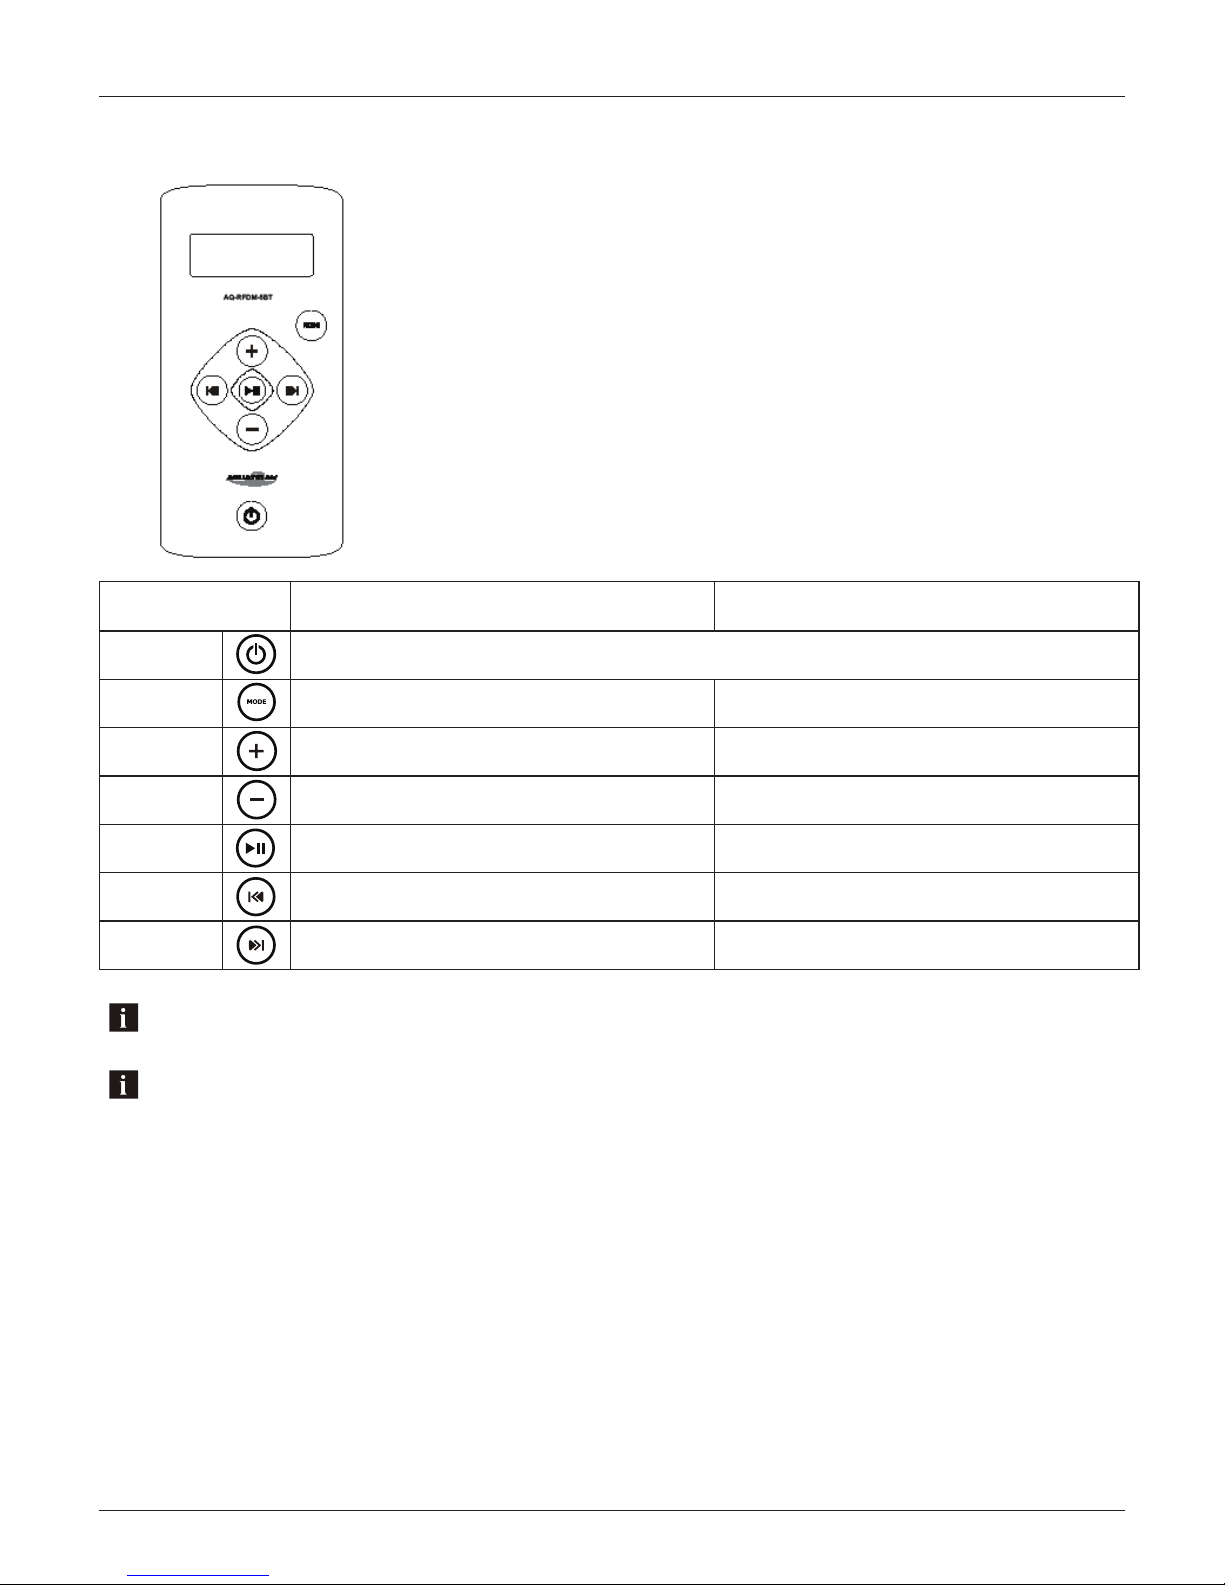
1.6 Remote Control Battery Install for AQ-RFDM-5BT (optional)
1.7 Remote Control Synchronizing for AQ-RFDM-5BT (optional)
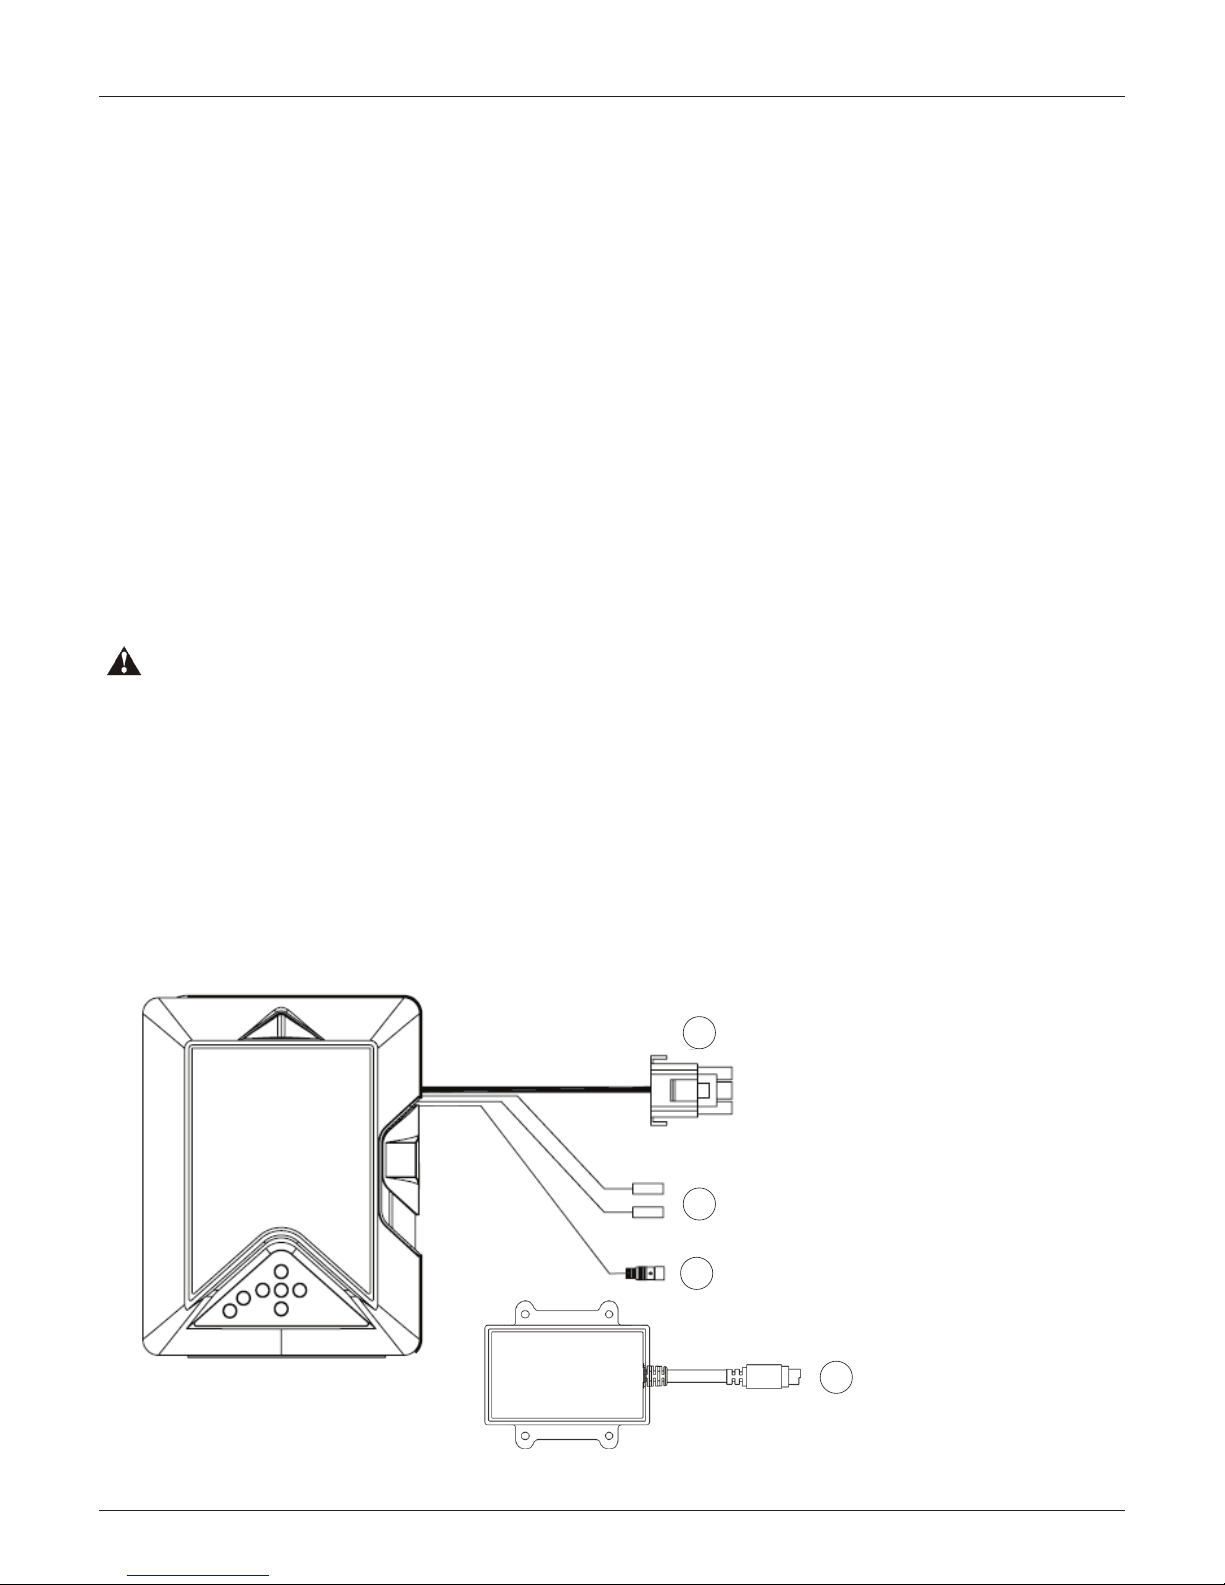
1. Connect the RF Remote Receiever and 8-pin DIN Remote Receiver Cable together.
2. Turn the Digital Media Locker to OFF mode with the power button inside the door. The
LED should not be illuminated.
3. Press the red (POWER) button on the remote.
4. Press and hold the (MODE) button until the LCD reads PAIR.
5. Continue to press and hold the (MODE) button during step 5 below.
6. Turn the docking station to standby mode (within 10 seconds) with the on/off button
inside door (the red LED will illuminate and then turn blue).
7. The remote’s LCD should read WELCOME and then display mode position BT AUDIO or
AUX IN.
For any additional remote controls, you will also need to activate/synchronize those remote con-
trols by following the steps above.
If the pairing process is not effective, switch the locker off using the on/off button located inside the door of the dock.
Unplug the 12-pin Harness on the back of the Locker for 3 minutes. Reattach the Harness and repeat steps 1-6 above.
If the pairing process is not effective, check the battery voltage. If above 3V DC refer to section 1.5 above top make
sure the battery is installed correctly. If battery voltage is below 3V DC replace the battery.
If you lose your remote control and purchase another new remote control, please follow the above to start pairing before
normal usage.
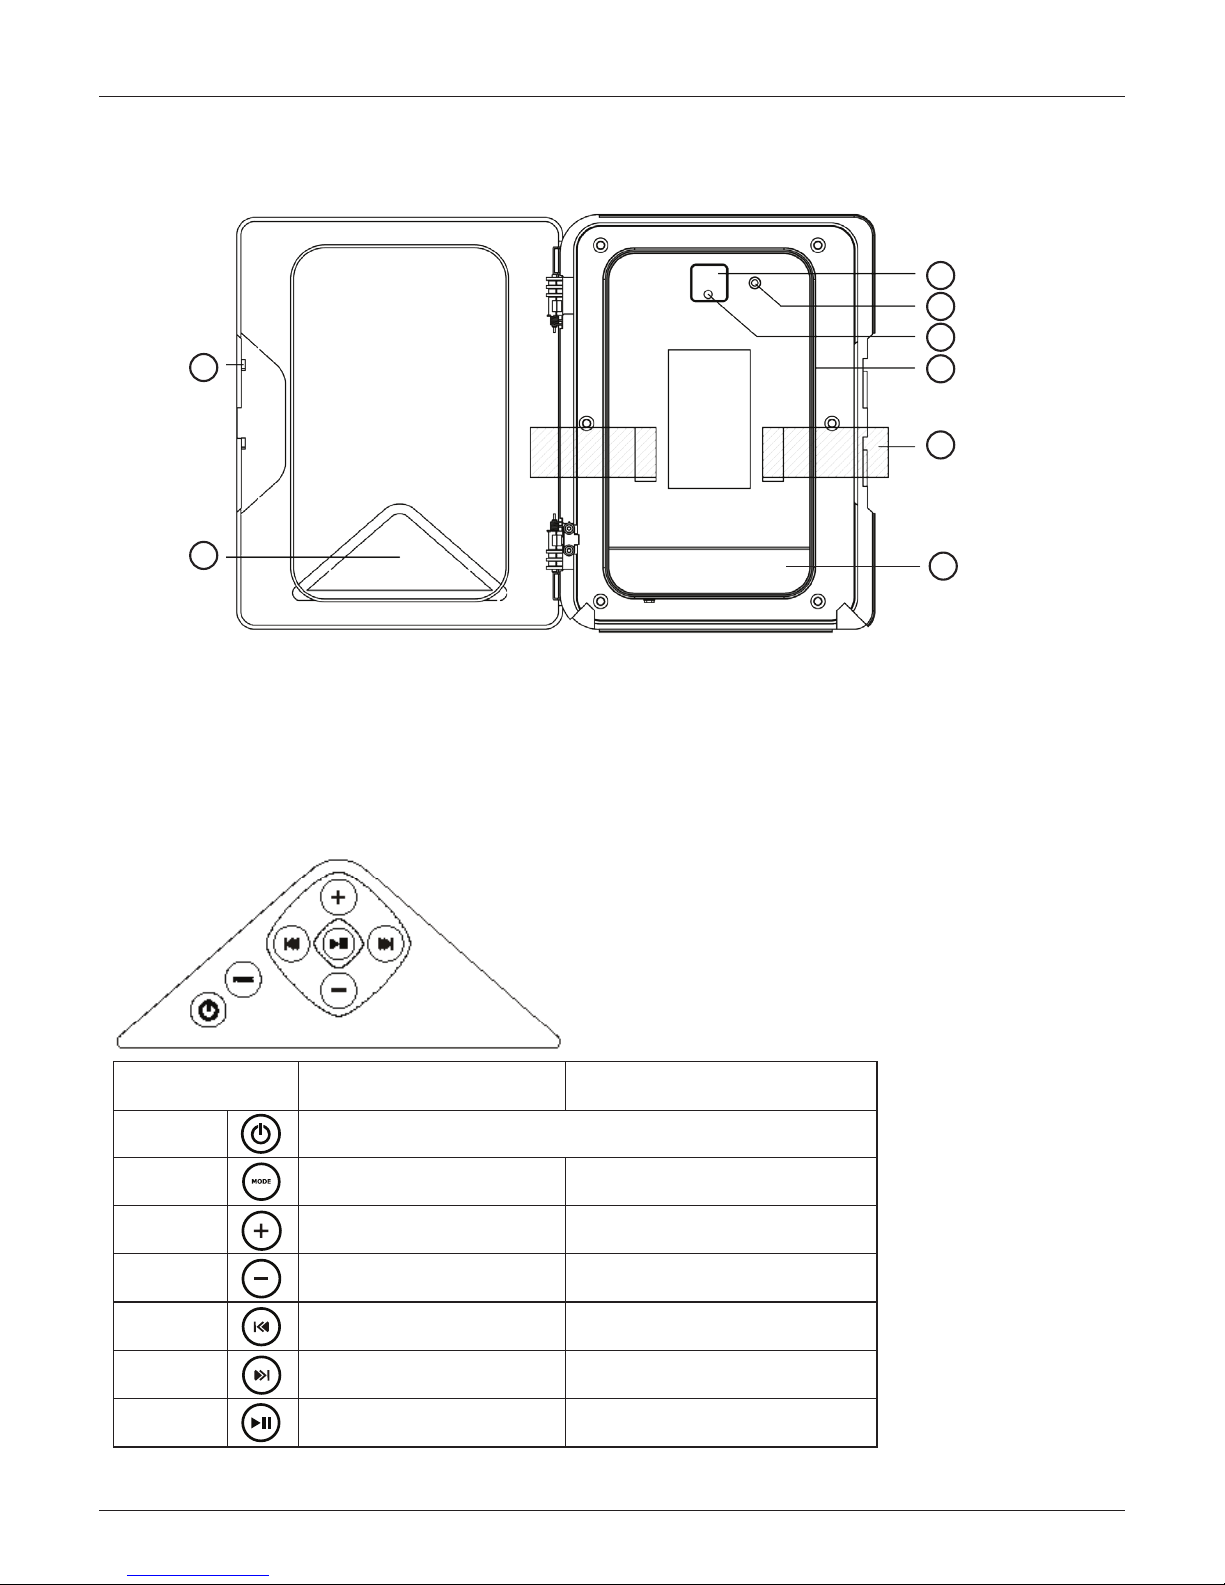
Press the on/off button inside the dock.
Red Light: Power to the docking station is ON, but the unit is in standby mode.
Blue Light: The unit is powered ON and looking for an audio source.
For applications that require low current draw and where battery drain may occur, the power but-
ton must be turned OFF inside the unit. When the power button is in the OFF position the red
LED will not be lit.
For applications where a 12V battery is not used, such as in a Spa, the power button can be left
ON and the remote control or door controls can then be used to power on/off accordingly.
1.5 Power On
Getting Started Digital Media Locker AQ-DM-5BT
5www.aquaticav.com
Table of contents
Other Aquatic Marine Equipment manuals